Glaze Kitchen Cabinets to Look Like a Pro
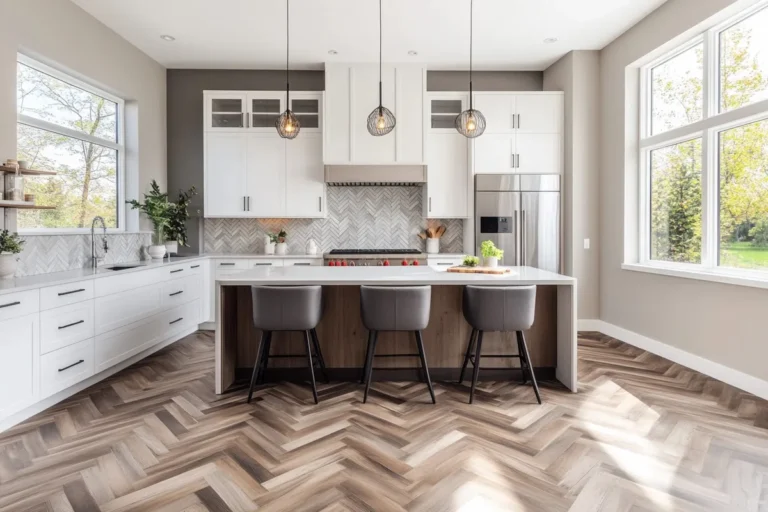
Your kitchen cabinets have good bones, but they look flat. If you've ever wanted to know how to glaze kitchen cabinets, the short answer is that glaze adds depth without a full repaint. It's not paint, and it's not stain.
It's a translucent layer that sits on top of your base color and settles into recessed details, so you end up with shadows that look built in, not brushed on.
In our research, a quart of cabinet glaze covers roughly 100 to 150 square feet when wiped back properly, enough for a typical 10-door kitchen. Working time runs 15 to 30 minutes before the glaze starts to set, depending on humidity. As of 2026, most DIY glazes are water-based, which means easy cleanup and low VOCs.
That's a weekend-friendly project, but only if you prepare the surface correctly.

Image source: Web (Bing) / pinterest.com (Web image (fair-use with source credit))
Why Glazing Kitchen Cabinets Isn't Just Another Paint Job
Stand in front of a freshly painted cabinet door and you'll see a flat field of color. Nice, but flat. Glaze changes that.
It catches in the corners, pools around raised panels, and leaves a slightly darker edge on the frame. That small shift is what separates a builder-grade kitchen from a custom one.
The technique is simple. A translucent layer sits on top of your base coat. Because glaze doesn't penetrate the way stain does, you can wipe it back as little or as much as you want.
That gives you full control over whether the finish looks subtle or aged.
For homeowners refreshing tired cupboards, glazing is a smart middle step. It's a significant visual upgrade without a full remodel.
What glazing does that painting can't
Paint gives you color. Glaze gives you light and shadow. The darker pigment settles into the recessed details, while the smoother surface stays lighter.
It's the same trick faux finishers have used for years, just dialed down for cabinetry.
The Quick Answer: What Cabinet Glazing Actually Looks Like
To glaze kitchen cabinets, you paint a base coat, let it dry, then brush on a thin layer of glaze. Wipe the excess off with a lint-free cloth. The glaze stays in the recessed areas, making details look darker.
Flat areas stay lighter. That contrast gives your cabinets depth and a custom finish.
The visual difference between glazed, stained, and plain painted cabinets
A plain painted cabinet is one solid color across every surface. A stained cabinet absorbs into the wood grain and shows the natural fiber pattern. A glazed cabinet keeps the paint color underneath while adding darker pigment to the details.
If you look at the same door finished all three ways, the glazed version will always feel more dimensional.
That's why glaze works so well in smaller kitchens, where the added light and shadow can make cabinets feel richer without adding physical bulk.
How to Read Glaze: Consistency, Transparency, and Sheen
The biggest mistake beginners make is treating glaze like paint. Paint is meant to cover. Glaze is meant to reveal.
The right consistency should look like warm honey, not watered-down paint. When you dip a brush in, it should coat the bristles but not drip like water.
You also need to check the transparency. Some glazes are highly translucent, meaning they tint the surface and let the base color show through. Others are more opaque and will actually hide the paint underneath if you apply them too thick.
For kitchen cabinets, you almost always want the translucent end of the spectrum.
| Property | What glaze should look like | Why it matters |
|---|---|---|
| Consistency | Like warm honey, not watery paint | Thick enough to stay where you place it |
| Transparency | Translucent, not fully opaque | Lets the base color show through |
| Sheen | Usually matte or satin | Reflects light so the depth is visible |
| Working time | 15 to 30 minutes | Gives you time to wipe and blend |
Translucent vs opaque glazes
Translucent glazes are your default choice for cabinet doors. They add shadow without changing the base color too much. Opaque glazes act almost like a second paint coat and are better for special effects or when you want a dramatic color shift.
Before you start, read the label for working time. Polyurethane-based glazes and water-based acrylic glazes dry at different speeds, and humidity matters. On a humid day, you get a few extra minutes.
In a dry, heated house, the glaze can start to set in under ten minutes.
Tools and Materials That Show Up in the Final Finish
You don't need a sprayer or a spray booth to get a professional look. Most of the work is done with basic tools you probably already own. The trick is choosing the right kind of brush and cloth.
| Tool | What it's for | Pro tip |
|---|---|---|
| Synthetic brush | Applying base coat and glaze | Use a new brush to avoid old paint flecks |
| Foam brush | Smooth application on flat panels | Leaves no brush marks |
| Lint-free cloth | Wiping off excess glaze | Cut-up old t-shirts work great |
| Painter's tape | Protecting edges and hardware | Use low-tack tape on finished surfaces |
You'll also need a primer if your cabinets are bare wood, a base coat paint, the glaze itself, and a clear topcoat like water-based polyurethane to protect everything once the glaze is dry.
If you're keeping costs down, skip expensive specialty products. A budget-friendly kitchen renovation can use a standard latex base coat and a water-based glazing medium mixed with a small amount of artist's acrylic paint. That combination is far cheaper than buying pre-mixed cans, and it gives you the same wipe-off performance.
If your kitchen dates to before 1978, factor in lead-safe prep. The EPA's lead-safe renovation guidance explains what you need to do before sanding.
Pros and Cons: What Glazing Does to Your Kitchen's Look
Glazing is a love-it-or-hate-it finish. Done right, it adds a level of richness that plain paint can't match. Done heavy-handed, it can make a kitchen feel like a themed restaurant.
Here's an honest look.
| Pros | Cons |
|---|---|
| Adds depth and dimension | Can look dated if overdone |
| Hides fingerprints and small wear | Adds an extra day to the project |
| Works over painted or stained cabinets | Harder to correct once dried |
| Budget-friendly upgrade | Not great on flat, modern doors |
The biggest pro is durability in terms of appearance. A glazed surface hides smudges and minor scuffs much better than a flat painted cabinet, especially around drawers and handles. The biggest con is the extra step.
You're adding a full coat and a wipe-back, which means more time before you can reinstall the hardware.
Glaze also isn't universal. For a modern kitchen design, the added texture can feel out of place. It shines in farmhouse, French country, and transitional kitchens where warmth is part of the style.
If your cabinets are flat slab doors with no routed details, glaze has nowhere to settle, so the finish will look smudged rather than dimensional.
If you're planning a full remodel, the glaze step fits naturally between painting and hardware installation. A complete kitchen remodel timeline helps you plan around those extra drying hours without rushing the finish.
Step-by-Step: How to Glaze Kitchen Cabinets Like a Pro
The actual glazing process is forgiving, but order matters. Skip the prep and you'll fight the finish the whole way. Follow these steps and the glaze does exactly what you want.

Image source: Web (Bing) / kilz.com (Web image (fair-use with source credit))
Visual checklist before you start
Pull out a door and set it on a work table. Look at the surface under bright light. You want a smooth base, no drips, no brush marks.
Run your finger over the panel. It should feel slick, not gritty.
If the existing finish is glossy, scuff it lightly with 220-grit sandpaper. Wipe away the dust with a tack cloth. Degrease everything first.
A TSP substitute mixed with warm water cuts through kitchen grease that sandpaper alone can't budge.
Mixing and tinting the glaze
Pre-mixed cabinet glaze works fine. You'll get more control if you tint it yourself. Start with a water-based glazing medium and add small amounts of artist's acrylic paint.
Black or raw umber mixed in small drops gives a soft antique look.
Test the consistency on a scrap board. The glaze should stay where you brush it. If it runs, you've thinned it too much.
If it pulls and feels sticky, add a little water. The photo above shows the correct wipe-back look: dark in the recesses, light on the flat surfaces.
Applying glaze to a door or drawer front
Work one door at a time. A raised-panel door takes about five minutes to glaze before it needs wiping. Brush the glaze on in a thin, even coat.
Push it into the recessed panels with the brush. Don't let it pool in the corners.
Wait two to five minutes. The glaze needs time to firm up just a little. Then wipe the flat surfaces with a lint-free cloth.
Use even pressure. Leave the recessed areas alone. That darker outline is what creates the depth.
Wiping, ragging, and dry brushing
The wipe-back step controls how heavy the final look is. A single pass with a dry cloth gives you a subtle shadow. Multiple passes lighten it further.
For a more pronounced antique effect, press glaze deeper into the corners.
Dry brushing adds highlights to the raised edges. Dip a dry brush into a tiny amount of glaze, wipe most of it off, then drag it over the edges of the panels. This mimics years of natural wear.
Sealing the finish with polyurethane or wax
Let the glaze dry completely, usually 24 hours, before sealing. Water-based polyurethane is the safest topcoat. It stays clear and won't yellow over white paint.
Apply two thin coats with a foam brush, sanding lightly with 320-grit between coats.
Glaze vs Gel Stain vs Antiquing Wax: Which Finish Do You Really Want?
These three products get grouped together, but they behave differently on cabinet doors. The right choice depends on the look you want and how much wear the cabinets see.

Image source: Web (Bing) / storage.googleapis.com (Web image (fair-use with source credit))
| Product | How it works | Best for | Durability |
|---|---|---|---|
| Glaze | Translucent layer that settles in recesses | Painted cabinets, farmhouse and transitional kitchens | Good with topcoat |
| Gel stain | Thick semi-opaque color that can hide grain | Wood cabinets wanting a richer tone | Good with topcoat |
| Antiquing wax | Waxy tint with light pigment | Quick vintage look, low-traffic areas | Needs reapplication |
Glaze is for cabinets already painted or sealed. It adds shadow without changing the base color. Gel stain reads more like a color wash.
It can hide wood grain and works best over bare wood or a light base coat.
Antiquing wax is the quickest option. Rub it on, buff it off, done. But it's not durable near a stove or sink.
If you want a permanent finish, glaze with a polyurethane topcoat beats wax every time.
When Glazing Makes Sense — and When It Doesn't
A glazed finish only works if the cabinet itself has details for the glaze to catch. That's the first test. If your doors are flat slabs with no routed edges, glaze has nowhere to pool.
The result looks streaky instead of dimensional.
Glaze makes sense for raised-panel doors, recessed-panel doors, and anything with beaded details. It also works well on shaker-style doors, though you'll see less contrast since the recess is shallow. On those, the glaze settles mostly in the corners and along the frame.
Skip glazing for ultra-modern kitchens with flat lacquered doors. Skip it for laminate surfaces unless you sand and prime them first. And skip it if you're on a tight deadline.
The extra coat adds a full day to the project.
If you're still planning cabinets from scratch, think about which style you want before you commit. A custom kitchen cabinet design that includes raised panels will glaze beautifully later. Flat slab doors will look better with a solid color or a matte finish instead.
7 Visual Mistakes That Make Glazed Cabinets Look Amateur

Image source: Web (Bing) / coohom.com (Web image (fair-use with source credit))
Glaze can go wrong quickly, and the errors are all visual. Here are the seven most common and how to avoid them.
Applying too much glaze. Thick glaze dries with a sticky, muddy look. Thin coats wipe back clean.
Wiping too soon. If you wipe immediately, you remove everything from the recesses. Wait until the glaze firms up.
Leaving streaks. A dirty cloth or too much pressure causes smearing. Use a fresh lint-free cloth and long, even strokes.
Pooling in corners. Glaze settles fast in tight angles. Offload the excess with a small dry brush before it dries.
Uneven edges. If you glaze while the door is vertical, gravity pulls the glaze downward. Always work flat.
Over-glazing. Two heavy coats read as a painted mess, not a fine finish. One pass is usually enough.
Skipping the test board. Every batch of glaze behaves differently on its first day. Test on scrap wood before touching your doors.
What Cabinet Glazing Costs and How Long It Really Takes
The cost to glaze kitchen cabinets is small compared to replacement. For a standard 10-door kitchen with drawers and a pantry, expect to spend $25 to $75 in supplies.
| Material | Estimated cost | Notes |
|---|---|---|
| Degreaser and tack cloths | $10–$15 | Needed for prep |
| Sandpaper (220 and 320 grit) | $5–$10 | A few sheets is enough |
| Base coat paint | $25–$45 | One quart covers most kitchens |
| Glazing medium and acrylic tint | $15–$30 | Or buy pre-mixed glaze |
| Water-based polyurethane | $20–$35 | Two light coats |
If you already own basic brushes and cloths, the total sits near the low end. Add a few dollars for painter's tape and drop cloths.
The timeline runs three to four days if you respect the drying times. Day one is prep, cleaning, sanding, and priming. Day two is the base coat, which needs four to six hours to dry before you can handle the doors.
Day three is glazing and the wipe-back. Day four is the clear topcoat and reinstalling the hardware.
A full kitchen with 15 or more doors stretches to a weekend plus one evening. The payoff is a custom look for less than the cost of one new cabinet box. That's the practical math behind glazing.
Expert Tips for a Professional-Grade Glazed Finish
Work in controlled sections. Glaze one door at a time, from brush to final wipe, before moving on. That rhythm keeps the finish even.
Watch the humidity. On a dry day, glaze sets faster, so use smaller sections. On a humid day, you gain working time but the glaze stays tacky longer.
Use a quality brush. A cheap synthetic brush sheds bristles into wet glaze. A 2-inch high-end synthetic brush costs a few dollars more and saves you from picking fibers out of the finish.
Trust the test board. Glaze behaves differently on every surface. Test on a scrap piece first.
If it streaks, add a tiny bit of water. If it dries too fast, work in smaller patches.
Cabinet Glazing FAQs
Can you glaze already-painted cabinets?
Yes. Glaze works well over an existing painted finish, as long as the paint is clean, dry, and lightly scuffed. Rough up glossy surfaces with 220-grit sandpaper first.
Then wipe away all dust before applying the glaze.
Do you need to seal over glaze?
Yes. Glaze is not a durable topcoat by itself. Sealing locks in the pigment and protects against moisture and daily wear.
Use water-based polyurethane in two thin coats for the best balance of durability and clarity.
How long does glaze take to dry before the topcoat?
Most water-based glazes dry to the touch in one to two hours. But you should wait a full 24 hours before applying a topcoat. That wait ensures the glaze has fully cured and won't streak or lift when the polyurethane goes on.
Will glazed cabinets yellow over time?
Only with oil-based products. Oil-based glazes and topcoats can amber over white paint, especially in low-light kitchens. Stick with water-based glaze and water-based polyurethane.
They stay crystal clear for years.
Final Verdict: Should You Glaze Your Kitchen Cabinets?
Glazing is worth it if you have detailed doors, a solid base coat, and a weekend to spare. It adds visual depth that plain paint can't match, hides fingerprints, and costs less than $75 in supplies.
Skip it if your doors are flat slab, laminate, or already heavily textured. Skip it if you can't wait a full day for the glaze to set. And skip it if your kitchen style leans ultra-modern and minimalist.
If your kitchen fits the look, glazing is one of the best budget upgrades you can make. It's a proven, low-risk finish that gives standard cabinets a custom edge. Just respect the drying times, test your technique, and seal it properly.