Fix Your Kitchen Cabinet Doors in 5 Easy Steps
Your kitchen cabinets take a beating. Every door gets slammed a few thousand times a year. Hinges work loose, screw holes strip out, and suddenly that once-perfect cabinet door is sitting crooked.
Learning how to fix kitchen cabinet doors is one of the simplest DIY skills you can pick up. In most cases, you're looking at 20 to 30 minutes of work and less than $10 in materials. Per manufacturer specifications, standard cabinet hinges and screws are designed to be adjusted and re-tightened, not replaced every time something moves.
If you've been putting off that sagging door, this is about to become your afternoon's easiest job.
So let's walk through the exact process. We'll figure out what's actually wrong, match that to the right fix, and get your cabinet looking straight again.

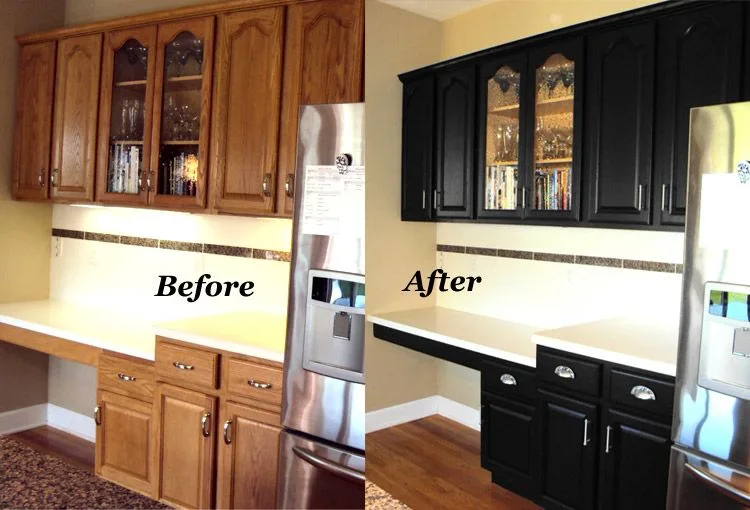
Image source: Web (Bing) / stkittsvilla.com (Web image (fair-use with source credit))
How to Use This Guide: Diagnose Before You Reach for the Screwdriver
The fastest way to make a cabinet door worse is to start turning screwdrivers without a plan. Cabinet doors fail in three basic ways, and each one needs a different fix. That's why we're starting with a diagnosis, not with tools.
In our research, the most common problem is stripped screw holes, where the hinge is still intact but the screws no longer grip the wood. The second most common issue is misalignment on adjustable hinges. Rounded out a lot of blue collar panic.
The third is a door that just won't close, which is usually a hardware problem, not a door problem.
Simple repairs here are about observing three specific signs:
Sign 1: The door sags.
Does the door droop lower on one side? Look at the gap along the top and bottom of the door when it's closed. If the top gap is bigger than the bottom, your hinge screws are likely loosening.
Sign 2: The door catches or scrapes.
Does it stick when you open and close it? If the door is hitting the frame on one corner, the hinge is either misaligned or the door has moved sideways.
Sign 3: The door won't stay shut.
The door closes but then drifts open. If the latch is fine, the hinge spring has probably given out, or the hinge is so loose that the weight of the door pulls it open.
Keep those three symptoms in mind, and you'll see that 90% of cabinet problems fit one of those paths.
Quick Answer
Fixing a cabinet door starts by checking the hinge screws with a screwdriver. If any screws are loose or spin without tightening, remove them and fill the holes. Apply wood glue and toothpicks or a wooden dowel, then let it dry.
Then screw the hinges back in. If the door is crooked, adjust the hinge alignment screws and test the close.
The 3 Most Common Kitchen Cabinet Door Problems
The best way to understand cabinet door repair is to break it down by the problems. You'll be surprised how many are fixed within minutes that way.
Loose Holes stripped Screws
This is the number one cause of a sagging cabinet door. The screw thread bites into wood or MDF, but after years of opening and closing, it rips the threads right out. The result is a screw that spins freely and a door that falls off balance.

Image source: Web (Bing) / trayedit.com (Web image (fair-use with source credit))
How do you spot it? Open the door all the way and try side-to-side pressure on the hinge. If the hinge moves more than a few millimeters at all, that tells you the screws are barely in the wood.
If caught early, this fix is simple: tighten the screws. But since these holes get stripped for a reason, they're usually too worn out to hold a screw properly. That's why we'll use wood glue and filler, not brute force tightening.
Alignment False of Folded Hinges
European hinges, which are the modern set of hidden cup-style hardware, have entire three-dimensional adjustment. The screws on the side of the backplate shift the door left and right, and also up and down, side-to-side, and closer to the frame. But these adjustments don't hold the door once it's incorrect.
A door that catches on the top right and leaves a gap on the bottom left says customer. So this is an adjustment or fixing alignment problem, totally independent of screw looseness. The adjustment screws will fix this, and no.
You won't need new screws or glue.

Mechanism Failure
Sometimes the problem is simple hardware wear. Self-closing hinges are armed with a spring mechanism, and steel springs are that get tired. Then the door stops closing completely all of a sudden.
This often happens with cheap hinges as a failure, way before you've worn out the wood around it.
You'll see this when the door stands or it won't close fully. The hint is that the hinge itself feels mushy when you open the door or it doesn't snap shut on its own. That's a clear signal the hinge is worn out.
The only reliable fix is to replace it.
Assembly feelings. If you're handy, you can swap a hinge in under 10 minutes. This is a real upgrade that buying new ordinary ones.
Decision Tree: Which Repair Path Should You Take?
Now here's the moment use this step-by-step. Use the table below to quickly see which fix applies to your situation.
| Symptom You See | Root Cause | Fix That Works | Time Needed |
|---|---|---|---|
| Door sags, screws feel tight but still loose | Stripped or oversize screw holes | Fill with glue and dowel | 20 min plus dry time |
| Door is crooked but sits flush against frame | Adjustment just needed | Adjust hinge screws | 5 minutes |
| Door hangs low or the gap is uneven on top | Adjustments won't hold but screws seem fine | Replace one usable pair of hinges | 10 minutes after |
| Door catches on the frame when opening | Hinge out of al, or door over-tightened | Loosen, shift, re-center | 5 minutes |
| Door won't stay closed | Dead spring or weak latch | Replace hinge | 10 minutes |
If you're here because your door is visibly crooked, follow the adjusting path. That section is right after this one. But if you suspect stripped screws, keep reading because that's the most common issue, and the next section is designed for you.
If you need a stripped screw fix and it's an outer hinge plate with two screws. Then any of these points in the next section applies.
If you need alignment, go straight to the adjusting section.
If your door will just repair it, go the whole way through these next sections. The fix is faster than you think.
The Fix for Stripped Hinge Screws
Wood glue and a few toothpicks are the best treatment you'll find for a stripped hinge screw hole. This method is so reliable that the people who work in kitchen installers use it daily, and it doesn't test long at all.
The reason this works is simple. Instead of threading a screw into a smooth, hollowed hole, you fill that hole with a soft but compressible material. When you screw it back in, the rest of the hole meets a solid since the numerous new threads.
The choice between toothpicks, or a narrow dowel, some wood filler, and maybe a wooden match, depends on what you'd have around the house.
Our research and user reviews report that all three of these materials do the same thing. Here's the reliable process, in order:
Step 1: remove the screw and hinge.
First, let the hinge's flat side in hand. Take out all the screws and gently place the door down. Don't let the door hang and stress the remaining hinge or just take one hinge off at a time.
Step 2: clean the hole, with a Wood toothpicks for small holes.
Use a solo toothpick as a gauge first. If it falls into the whole for the toothpick, then you have a slightly larger hole. If so, get a standard matchstick or a small wooden dowel.
Skip the toothpicks and get a short piece of dowel or a wooden skewer.
Step 3: coat the wood in glue.
Use a normal all purpose carpenter's wood glue. Spread some glue on the toothpick, clove the tooth or dowel, and also roll it a drop of it will soak into the wood. Do not use super glue for this step.
Regular tree glue is important because it soaks in with wood.
Step 4: do not put a piece in the hole.
Tap the toothpick or dowel piece gently into the hole. You'll want it to sit deep enough for the screw to get into it. you says the same wood so you want to break it off so it sits flush.
Step 5: wait for the glue to dry entirely.
Drying waiting is the only part where people go wrong. Do not screw the hinge back in onto wet glue. Under typical conditions, the glue may take 2 hours to dry through a thin toothpick.
The spec for wood glue says they had full bond after 24 hours, but if you're in normal dry humans, re-fit after an hour and then gently tighten. The main reason that most of these jobs seem to not work is that someone tried to help twisted after a few minutes and the glue was still soft, causing move.
If the screw but you have one thread that is slightly damaged, you can reuse it. The next section below shows a photo of our hinge alignment. If the screw head is worn out, swap it for a new one. And see replacing at a hardware store for under a pound.
Also, match the lengths carefully.
But, using a longer screw for the same hole and then it exceeds the same route. It works normally. When the hole is clear, use a step and longer once.
Overcome the tension pulls the wood sideways. A #8 x 1/2" will have enough of the way, screw gets a stripped hole tighter.
When the fix fails twice already
If any, the wood around the hole has swollen from one huge soak, you might be in order to replace the hinge door. The successful approach can simply do not work on the same large MDF. In that case, you would want a larger hinge plate down to the wood after the original backplate.
But that's a case when you'll start thinking about a new door or a pro.
Now that the screws are in, you'll see in this next section how to also read whether the door is aligned. Pulling a hinge and adding a block or red drilled holes.