Delta Kitchen Faucet Cartridge Replacement: Easy Steps
If your Delta kitchen faucet won't stop dripping even with the handle closed, the fix is almost always the cartridge. Learning how to change a delta kitchen faucet cartridge is a straightforward DIY repair that takes about 30 minutes and costs under $40 in parts. You don't need to replace the faucet.
You just need the right replacement part, a few basic tools, and a little patience.
Manufacturer specs indicate that most Delta kitchen faucets use one of a few RP-series cartridges, with the RP19804 being the most common in single-handle models. Per ASME A112.18.1, cartridge valves are rated for hundreds of thousands of cycles, but hard water and mineral buildup eventually wear out the rubber seals. That wear causes the drip.
Here's how to fix it properly.
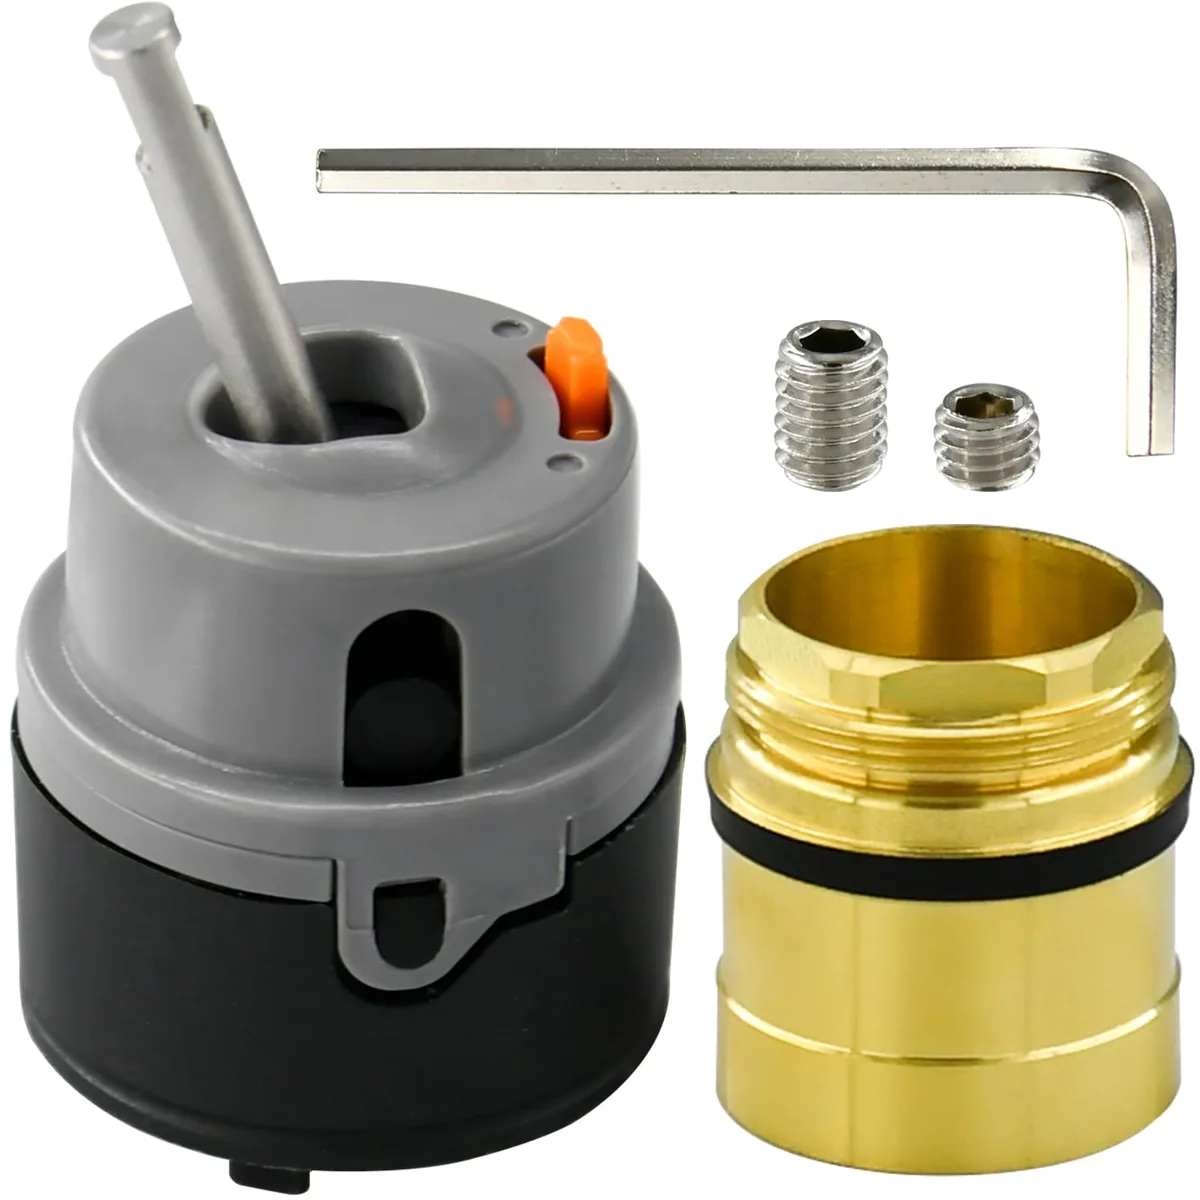
Image source: Web (Bing) / storage.googleapis.com (Web image (fair-use with source credit))
Why Is My Delta Kitchen Faucet Still Dripping After a Tight Shutoff?
That drip is annoying. It's also a clue.
Inside every Delta kitchen faucet sits a cartridge, a valve core that mixes hot and cold water and shuts off the flow when you lower the handle. The cartridge has rubber O-rings and, in newer models, ceramic discs. When those seals wear down, water slips past even with the handle fully closed.
Common symptoms that point to a failing cartridge:
- A steady drip from the spout when the faucet is off
- A handle that feels stiff, gritty, or loose in its travel
- Water temperature that drifts while the handle stays still
- Moisture building up around the base of the handle
- Reduced flow that doesn't improve after cleaning the aerator
If you spot one or more of these, the cartridge is the first thing to suspect. Aggregate reviews in plumbing forums and repair guides consistently point to cartridge wear as the leading cause of Delta kitchen faucet drips. It's also the cheapest fix to try before considering a full faucet replacement, which is a much bigger project.
If your kitchen is already dated and you're thinking about a bigger refresh, a full kitchen remodel project might change how you prioritize this repair.
Water waste from a leaking faucet adds up, too. The EPA's WaterSense program highlights household leaks as a surprisingly large source of wasted water.
Quick Answer: You Don't Replace the Faucet. You Swap the Cartridge
Turn off the water supply valves under the sink. Remove the handle to expose the cartridge. Pull the old cartridge using a puller tool.
Install the new Delta cartridge, oriented the same way. Reassemble and restore water flow. Test both hot and cold.
That's the whole job in one breath. The rest of this guide walks through each step with the visual clues that keep you from making a costly mistake.
Why Visuals Matter: How to Nail This Repair the First Time
The hardest part of this repair is identifying the correct cartridge. Delta makes dozens of cartridge styles, and several look nearly identical. A pull-down kitchen faucet uses a different cartridge than a two-handle widespread faucet.
If you buy the wrong one, it won't seat properly, and it can leak worse than the old one.
Start with the handle. A single-lever kitchen faucet typically uses one of three common cartridges: the RP19804, the RP25513, or the RP50581. A double-handle kitchen faucet uses a smaller cartridge on each side, often the RP19804 in a different configuration.
Next, look at the spout. Pull-down and pull-out models with a single handle almost always use the RP19804 or RP25513. Fixed spouts are more varied.
When you remove the handle, the cartridge stem itself often has a part number stamped on it. That number is your definitive answer.
Take a photo of the cartridge before removing it. The orientation matters. Delta cartridges have a specific "up" and "down" based on the hot and cold inlets.
If you don't note which way the stem faces, you'll likely install the new one upside down. That flips hot and cold water.
A quick reference for the most common Delta kitchen cartridge families:
| Faucet style | Common cartridge | Notes |
|---|---|---|
| Single-handle pull-down | RP19804 | Most widespread in kitchen models |
| Single-handle pull-out | RP25513 | Similar body, different stem splines |
| Two-handle widespread | RP50581 | One cartridge per side |
| Older two-handle models | RP19804 | Check the stem shape before ordering |
This is also where a lot of DIY guides get vague. They say "look at the part number" without explaining where to find it. In most Delta cartridges, the part number is molded into the plastic body near the base of the stem.
Sometimes it's covered by mineral crust. A quick scrub with a brush usually reveals it.
Preparation: Tools and Parts You'll Need
Before you start, gather the right tools. This repair doesn't need a full toolbox, but the wrong tool can strip a screw or crack the valve body.
Here's what you need:
- Allen wrench set, typically 1/8" or 5/32" for the handle set screw
- Adjustable wrench or socket for the retaining nut
- Slip-joint pliers (use on the plastic nut carefully)
- Delta cartridge puller tool, about $10 to $20
- Flathead screwdriver for prying off caps and trim
- Plumber's silicone grease for the new O-rings
- Clean rag and a small flashlight
The cartridge puller is worth buying even for a one-time repair. It attaches to the top of the cartridge and lets you twist gently before pulling straight up. Without it, a stuck cartridge can leave you fighting with the valve body and risking damage.

Image source: Web (Bing) / snapklik.com (Web image (fair-use with source credit))
Order the correct part before you begin disassembly. OEM Delta cartridges cost between $15 and $40 depending on the model. You can also call Delta's customer service with the part number stamped on the old cartridge, and they'll help confirm compatibility.
Using a genuine Delta part keeps the faucet's lifetime limited warranty intact. You can reach them through Delta Faucet's official website.
Also, shut off the water. There are two angle stop valves under the sink, one for hot and one for cold. Turn both clockwise until they stop.
Then open the faucet handle to release any pressure and drain the remaining water from the supply lines.
If you're working in a compact galley, having a clear space under the sink is half the battle. That's where a guide on designing a smaller kitchen can help with layout planning down the road.
Step-by-Step Visual Guide: Replacing the Delta Kitchen Cartridge
This is the core of the repair. Work slowly and pay attention to what you're seeing at each step.
Part 1: Exposing the Cartridge
Pop off the handle cap or trim button first. On most Delta kitchen faucets, this is a small round cover on the top or front of the handle. Use a flathead screwdriver to gently pry it loose.
If the handle has a cap, you'll find a set screw underneath. It's usually an Allen head. Pick the right size wrench and loosen it, don't remove it completely.
You want the stem free to slide out.
Then lift the handle straight up off the cartridge stem. If it sticks, rock it gently side to side while pulling. Don't yank.
If the handle won't budge, soak around the base with white vinegar to dissolve mineral deposits.
Once the handle is off, you'll see a metal retaining nut or a plastic clip. The nut threads onto the valve body. The clip snaps into place.
You'll know which style you have by what you see. A nut needs an adjustable wrench. A clip needs a pair of pliers to squeeze the tabs and lift it off.
Part 2: Removing the Old Cartridge
Now you're looking at the cartridge itself. Check for debris, scale, and discoloration. Note the orientation of the stem.
A Delta cartridge has a flat side and a notched side. The flat side faces the front of the faucet on most models, but that's not guaranteed. Take that photo now.

Image source: Web (Bing) / tocolombia.org (Web image (fair-use with source credit))
Attach the cartridge puller. Twist it gently counterclockwise first, then pull straight up. A stuck cartridge is often fused to the valve body by calcium and lime.
If it won't release, apply a little warm vinegar around the base and wait ten minutes. The acid softens the scale.
Once the cartridge is out, clean the cavity. Use a rag and a soft brush to remove any debris. Check the O-rings inside the valve body for damage.
If the body is scored or cracked, you're looking at a faucet replacement, not a cartridge fix.
Part 3: Installing the New Cartridge
Lubricate the new cartridge's O-rings with plumber's silicone grease. Don't use petroleum jelly or regular grease. Silicone grease is safe for rubber and won't contaminate your water.
Insert the cartridge, aligning the flat side with the front of the faucet. Push it down firmly until it seats. It should slide in smoothly.
If it resists, don't force it. You're likely misaligned. Pull up, rotate slightly, and try again.
Reinstall the retaining nut or clip. Tighten the nut hand-tight, then add a quarter turn. Over-tightening can crack the valve body.
For a clip, just press it down until it locks.
Slide the handle back on. Tighten the set screw gently. Turn the water supply valves back on slowly.
Cycle the handle from hot to cold a few times to purge air and check for leaks. Look at the base of the handle and the spout while the faucet is both closed and open.
That's the entire job. Most people finish in under 45 minutes on the first attempt. The second time is closer to 15 minutes.