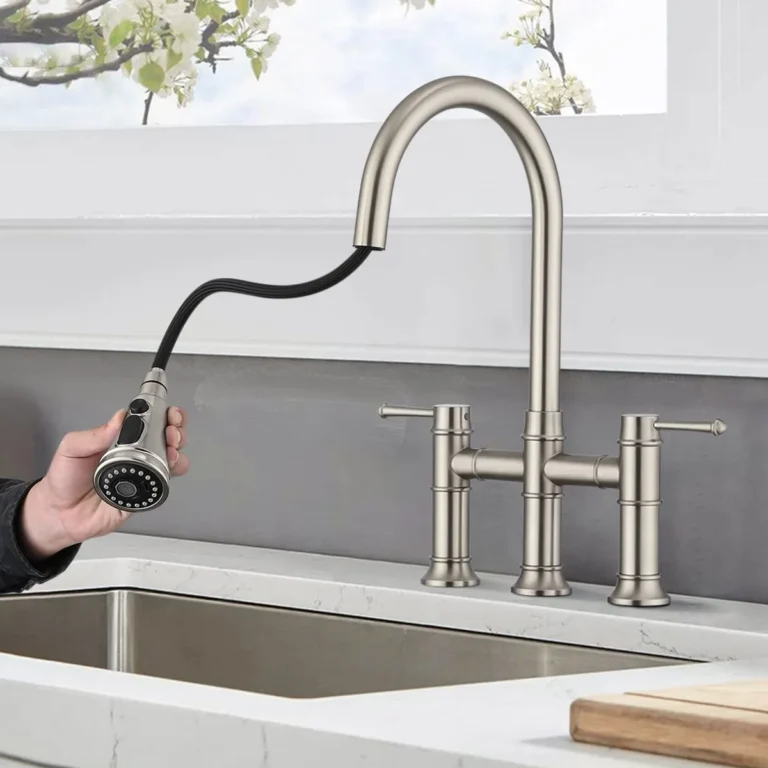
How to Attach a Kitchen Sink Without a Plumber
If you're asking how to attach a kitchen sink, the answer depends less on the sink itself and more on what's underneath it. Drop-in, undermount, and farmhouse sinks each use different hardware and a different order of operations. Get that part right, and the job feels almost easy.
Get it wrong, and you'll be chasing leaks for years.
Our research keeps pointing to one simple rule: the sealant holds the water out, but the clips hold the sink in. As of 2026, most residential sink kits include between 10 and 12 clips. The real skill is knowing which ones to tighten first and how hard to pull.
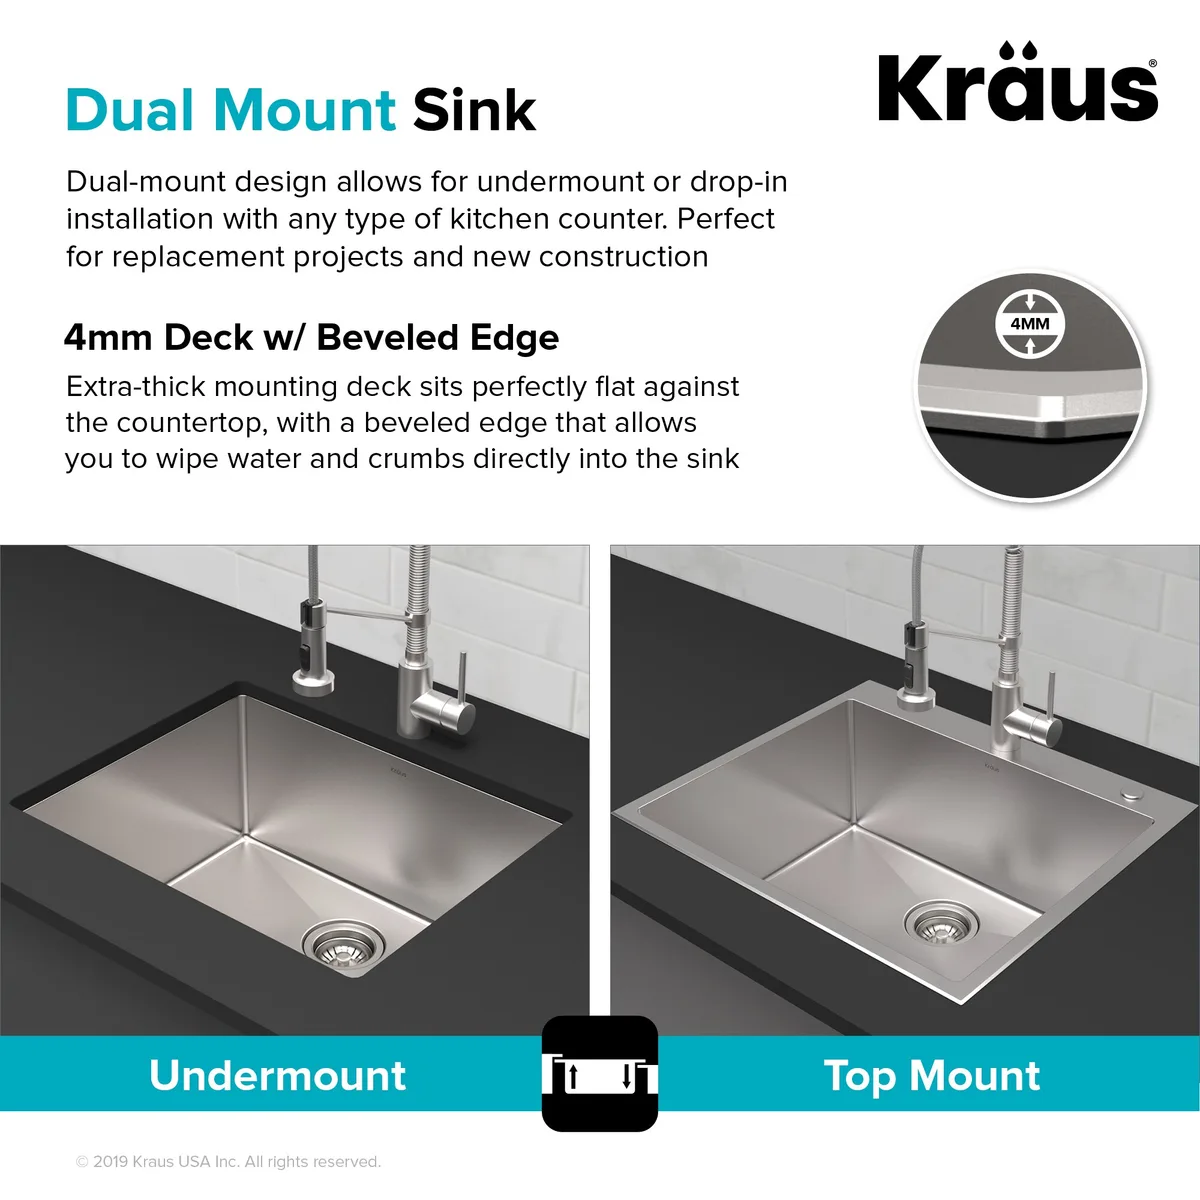
Image source: Web (Bing) / storage.googleapis.com (Web image (fair-use with source credit))
Quick Answer
Use the mounting clips and a continuous bead of 100% silicone sealant. Drop-in sinks sit on the countertop and clamp from above. Undermount sinks hang below.
Farmhouse sinks need a support base. Let the sealant cure for 24 hours.
First, Find Out What Kind of Sink You're Dealing With
Before you buy a single clip, you need to know which category your sink falls into. The mounting method is decided by the sink body itself, not by the brand. Once you identify the type, the rest of the installation becomes a clear sequence.
Drop-In (Top-Mount) vs Undermount vs Farmhouse: Quick Decision Branch
Here's the short version. A drop-in sink has a visible rim that rests on top of the counter. An undermount sink has no rim, so the countertop becomes the visible edge.
A farmhouse sink is basically an oversized apron-front style that requires support from below.
| Sink Type | How It Mounts | Best For |
|---|---|---|
| Drop-in | Rim rests on the countertop; clips pull down from inside the basin | DIY replacements, laminate counters, budget remodels |
| Undermount | Sits beneath the cutout; clips attach to the countertop underside | Granite, quartz, and solid-surface counters |
| Farmhouse | Apron front shows on the outside; needs a support base plus clips | Open shelving, rustic kitchens, high-end designs |
If you have a drop-in sink, your path is the simplest one in this guide. If you have an undermount, expect to work underneath the counter. If you have a farmhouse sink, plan to brace the front before you even think about sealant.
One quick note on planning: the style you choose affects the whole work triangle, especially when you're working with a tight floor plan. A little thought about the counter layout before installation saves you from awkward plumbing angles later.
The Countertop Check: What Are You Actually Mounting To?
The sink is only half the equation. The material underneath it decides which clips work and how hard you can torque them. Don't skip this step, because a granite countertop and a laminate countertop behave completely differently under tension.
Granite and Quartz: Heavy, Needs the Right Clips
Stone countertops are brittle. That's not an insult, it's a fact. A granite slab handles enormous downward weight, but it cracks easily with a sharp point load.
That's why undermount sinks on stone use flat metal clips with a wide bearing surface, never little plastic hooks.
Manufacturer installation guides also call for masonry-rated screws or epoxy-set bolts when the counter is stone. The clips need to bite into dense material, not just grab a thin edge. If your counter is 3 centimeters thick, check the clip length before assembly.
Short clips won't reach the flange on a thick slab.
Laminate and Solid-Surface: Lighter, Different Rules
Laminate is far more forgiving, but it has its own weakness: the top layer can crush. Overtightening a clip on a laminate counter is one of the quickest ways to dent the surface near the sink rim. Solid-surface materials like Corian are more stable, but still softer than stone.
For laminate, stick with drop-in sinks whenever possible. The broad rim spreads the load across the countertop, which is exactly what the material wants. Undermounting into laminate is possible, but the edges need extra sealing tape and the clips must be placed carefully.
It's not a beginner-friendly setup.
How Countertop Thickness Changes Clip Choice
Countertop thickness matters more than most DIYers expect. Standard counters run around 1.5 inches, but stone slabs often measure 2 or 3 centimeters, which is roughly 0.8 to 1.2 inches. Solid-surface and laminate builds vary even more.
Sink clips are sized to specific thickness ranges. If a clip says it fits 1.5-inch counters, don't force it onto a 3-centimeter slab. The angled hook won't land flush, and the sink will rock side to side.
Measure the counter edge before you shop. This is also a good moment to check that the cabinet construction underneath is square, because a twisted base will pull the sink out of alignment no matter how careful you are.
The Mounting Hardware: What's Supposed to Hold This Sink?
Most people think the sealant does the heavy lifting. It doesn't. Silicone seals against water, but the attachment comes from mechanical hardware.
Without proper clips, the sink shifts, the seal breaks, and water finds the gap.
Sink Clips, Keyhole Slots, and Tension Bolts Explained
The clip system is simple once you see the parts. A metal bracket hooks onto the sink's flange or rim. A screw or bolt passes through that bracket and into the countertop.
As you tighten the screw, the bracket pulls the sink downward and locks it into place.
Some sinks use keyhole slots on their underside. In that setup, the bolt head slides into the wide part of the slot, then locks into the narrow end. The bolt is held in a floating bracket, so the clip can rotate slightly.
That rotation lets you angle the clip to match the countertop edge.
Here's what's going on inside a standard kit:
- Mounting clip or bracket: the curved metal piece that grips the sink flange
- Bolt and nut: the tension mechanism that pulls the clip tight
- Washer or lock washer: keeps the bolt from backing out
- Silicone sealant: a separate waterproofing layer applied before the sink is set
As of 2026, most kits include enough clips for one sink. Count them before you start. If you're missing one or two, order replacements from the manufacturer rather than mixing in generic hardware.
Why Cheap Clip Kits Are the Most Common Failure Point
In our research, the number one cause of a loose sink isn't bad sealant. It's a clip that's too thin, too short, or made of plated steel that rusts within a year. Generic kits often include 8 clips and call it a day.
Fine for a small bar sink, not enough for a heavy 30-inch basin filled with dishes.
Look for stainless steel clips whenever possible. If the box doesn't say stainless, verify the finish before installing. Plated hardware can corrode and snap, especially in a damp kitchen environment.
The clip is a permanent part of the counter, so skipping on quality is a false economy.
The International Code Council has published fixture mounting requirements for decades, and the same principle appears across those documents: fixtures must be rigidly secured and watertight. That's why the clip quality isn't just a preference. It's a safety issue.
A heavy sink that lets go can damage plumbing and, worse, the person reaching under the cabinet.
Path 1: How to Attach a Drop-In Sink Step by Step
This is the classic DIY replacement. It's also the easiest sink type to install yourself, as long as you respect the silicone cure time. Plan for about 30 minutes of active work, plus a full 24 hours of drying before heavy use.
Dry Fit, Bead the Silicone, Drop, and Clamp
Start with a dry fit. Set the sink into the counter cutout and check the gap around the rim. It should sit evenly with no pinched corners.
If it rocks, find out why before you apply any sealant.
Once the fit is good, wipe the underside of the sink rim with mineral spirits and let it dry. Then run a continuous bead of 100% silicone around the underside of the rim. The bead should be about 1/4 inch thick.
A gap in that bead is a future leak, so overlap the starting point slightly.
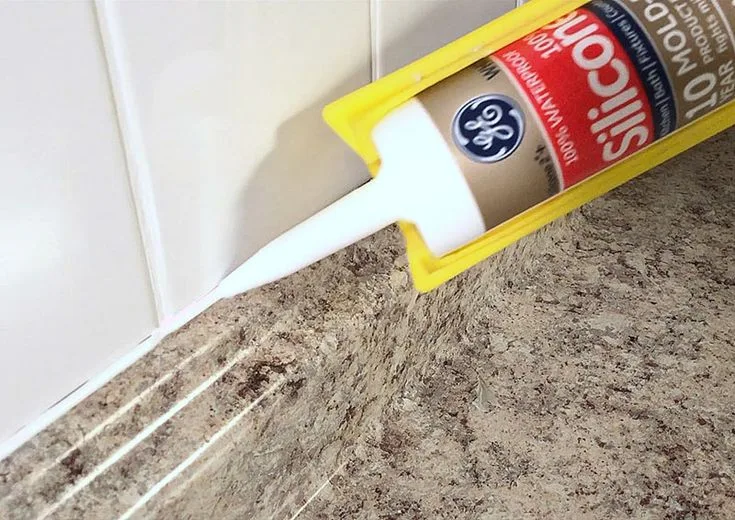
Image source: Web (Bing) / storage.googleapis.com (Web image (fair-use with source credit))
Lower the sink straight into the cutout. Don't slide it sideways once the silicone touches the counter, because that creates a thin spot in the seal. Press down firmly around the rim to set the gasket, then wipe away the excess silicone that squeezes out.
How to Space the Clips So the Rim Stays Flat
The clip placement is what keeps the rim flat and prevents rocking. Start by installing the clips at the four corners, then fill in the middle points. Most standard kitchen sinks need 8 to 12 clips total, depending on the size and weight.
Tighten them in a crossing pattern, just like you would on a car wheel. Snug the front clips, then the back clips, then the sides. Go around again and add a quarter turn to each one.
The goal is even pressure, not maximum pressure.
If you overtighten, the rim will cup and the sealant will squeeze out in one spot. If you undertighten, the sink will rock when you put weight on it. Listen for the silicone squishing and check the rim by running your finger along the seam.
The sink should sit flush with no vertical movement. And yes, the same dry-fit principle applies even if you're doing a full upgrade. For a larger project, this is the point where you'd integrate the work into a remodeling plan so the plumbing and countertop stay coordinated.
Path 2: How to Attach an Undermount Sink Step by Step
Undermount installation is more involved, but the payoff is a clean countertop and no rim to scrub around. The biggest challenge is working in the tight space under the counter while keeping the sink pressed upward. A helper or a temporary support brace makes the job dramatically easier.
Cutting the Underside Bead: Where Sealant Actually Goes
Unlike a drop-in, the sealant goes on top of the sink's outer lip, not the underside of the rim. The sink must be lifted into position so the top edge presses against the underside of the countertop.
First, clean both surfaces thoroughly. The stone needs to be dry and free of dust. Then run a consistent bead of 100% silicone around the top lip of the sink.
Don't use plumber's putty here. It isn't formulated for stone and can stain some materials over time.
Lift the sink into place and use shims or a support brace to hold it flush against the counter. Before the clips go in, check the seam visually. It should be tight all the way around.
If one corner sits lower, adjust the support before you touch the hardware.
Tightening Clips Underneath Without Cracking Stone
The clips for an undermount sink attach to the underside of the countertop and hook onto the sink's flange. On stone, the bolts usually go into drilled holes, epoxy anchors, or heavy-duty adhesive brackets. Never hammer a screw into granite.
The slab will crack before the screw bites.
If your sink has keyhole slots, insert the bolt heads into the slots and slide them to the narrow end. Then rotate the clips so they grip the underside of the counter. Snug the bolts one at a time, moving from the front to the back and then side to side.

Image source: Bing (Web (fair-use with source credit))
Take it slow. A quarter turn on each bolt is enough between passes. The tension should pull the sink up evenly, not twist it.
When the silicone just starts to squeeze out along the seam, stop tightening. That's your visual cue that the seal is compressed.
Let the install sit for at least 24 hours before running water into the basin. If the sink is especially heavy, keep the support brace in place for the full cure. This is also the right time to address any issues with the worn cabinet interiors below, since the space is already empty and you'll need easy access for a while anyway.
Path 3: How to Attach a Farmhouse / Apron-Front Sink Step by Step
Farmhouse sinks need more than clips. They need a support base. The apron front hangs open, so no cabinet panel carries the load.
You have to build something to take the weight.
Start with a 3/4-inch plywood base cut to fit the cabinet floor. Attach tension mounting legs to the base and adjust them up against the sink's underside. The sink slides in from the front.
Secure the top rim with standard sink clips, then tighten the legs until the sink is firm.
Seal the visible seam with silicone. If the cabinet frame is old, reinforce the side walls first. That same framing logic applies when you build a base structure from scratch.
The 24-Hour Rule: Silicone Cure Time and Why Rushing Ruins It
100% silicone dries to the touch in about 45 minutes. Full cure takes 24 hours. That second number is the one that matters.
If you run water before the seal sets, the sink shifts microscopically and breaks the bond.
Temperature and humidity change the timeline. Below 50°F, cure time can double. High humidity adds hours too.
Check the tube for the manufacturer's specific window.
| Condition | Touch dry | Full cure |
|---|---|---|
| 70°F, normal humidity | 45 minutes | 24 hours |
| Below 50°F | 2-3 hours | 48+ hours |
Use the waiting day to install the garbage disposal base and connect the supply lines. Just don't let anything heavy rest on the basin while the silicone cures.
Sink Clip Torque: The Goldilocks Problem
The bolt tension is the Goldilocks problem. Too loose, the sink rocks. Too tight, the stone cracks.
Most install kits specify just 3 to 5 inch-pounds of torque. That's barely more than hand-tight.
So skip the power drill. Tighten by hand in a crossing pattern. Front clips first, back clips next, then the sides.
Go around again with a quarter turn each pass. Stop when a thin line of silicone just appears at the seam.
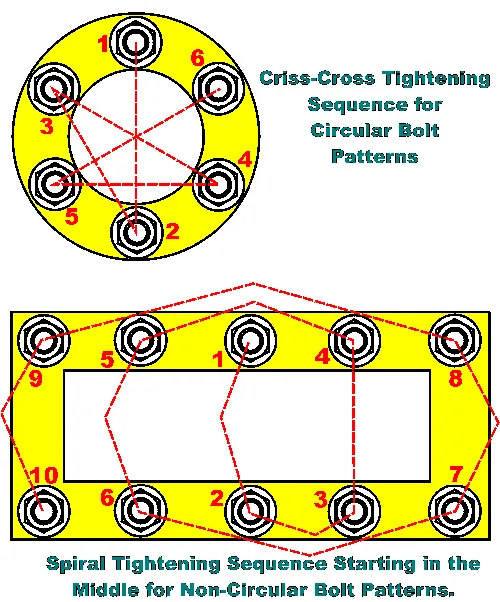
Image source: Web (Bing) / infoupdate.org (Web image (fair-use with source credit))
The sequence protects the seal. If you fully tighten one side before the other, the sink twists and squeezes out the sealant. Work in small increments and check the rim level after each pass.
Common Mistakes That Send Water Under Your Sink
Overtightening is the biggest killer. It flattens the silicone bead and leaves a bare spot where water gets through. You want a visible squeeze-out line, not a crushed one.
Skipping the surface prep is next. Grease and dust stop silicone from bonding. Wipe both surfaces with mineral spirits and let them dry completely.
Plumber's putty fails here too. It works on drain flanges but not as a mounting sealant. It dries brittle and washes out over time.
Clip spacing matters. Space the clips no more than 8 inches apart around the rim. Large sinks need 10 to 12 clips, not the 4 that some budget kits include.
Uneven sinks cause standing water. Set a level across the rim before the silicone cures. You still have a few minutes to adjust.
If the sink sits tilted, water pools against the seam and eventually finds a path out. This kind of repair often gets folded into a budget-friendly remodel because the leak damages the cabinet base over time.
When to Call the Pros (and When You Really Don't Need To)
Call a pro when the countertop needs cutting. Stone fabrication requires a wet saw and diamond blades. That's not a weekend rental tool.
Also call if the sink is cast iron, because the weight alone can injure your back.
Do it yourself when the counter is already cut and the sink is standard stainless steel. That's a 30-minute job with simple hand tools.
Costs make the decision clearer. Professional install runs $200 to $400 in most markets. A clip kit costs around $20.
Silicone costs $8. If the cutout is ready, there's no reason to pay for labor.
Plumbing changes are the exception. If the drain line needs to move, hire a plumber. A pro also makes sense if you're planning a full redesign.
Sink style shapes the entire room, and undermounts are the most common choice in modern kitchens.
Quick Decision Guide: Your Sink, Your Countertop, Your Move
| Sink type | Core move | Time |
|---|---|---|
| Drop-in | Silicone bead plus a full clip set, cross-tightened | 30 minutes |
| Undermount | Clips with masonry anchors, shimmed until cure | 1 hour |
| Farmhouse | Plywood base, tension legs, rim clips | 2 hours |
If the cutout needs cutting or the drain has to move, call a pro. Cabinet depth matters too, so check the cabinet sizing before you commit. These methods follow the fixture mounting standards published by the International Code Council.
Frequently Asked Questions
Do I need plumber's putty to attach a kitchen sink?
No. Putty is for drain fittings, not basin mounting. Use 100% silicone on the rim or flange instead.
Putty dries brittle and leaves gaps.
How long should I wait before using the sink?
A full 24 hours. Touch-dry takes about 45 minutes, but full cure needs a day. Heavy use before that shifts the basin and breaks the seal.
Can I attach a kitchen sink without clips?
Not safely. Sealant alone won't hold the weight of dishes and water. Clips pull the basin tight against the counter and keep the seal intact.