how to build a kitchen island
Building a kitchen island starts with honest assessment of your floor plan and your comfort level with power tools. The project demands precise layout work, structural anchoring, and code-compliant rough-ins before any finish material arrives. Most DIYers underestimate the sequencing, electrical and plumbing must run while the base is still open.
A successful build follows a strict order: plan, prep, frame, rough-in, top, finish.
The 2021 International Residential Code requires at least 42 inches of clearance between an island and opposing countertops for a single cook, 48 inches for multiple cooks. Seating overhangs need 12 inches minimum knee space per NKBA guidelines. Those numbers drive every dimension decision you will make next.
Quick Answer
A kitchen island build starts with layout and clearance verification. You anchor base cabinets to floor blocking, run electrical and plumbing rough-ins, then install the countertop with proper overhang support. Stock cabinets cost $1,500 to $4,000 in materials.
Custom carcasses run $8,000 to $15,000 plus stone. Most DIY builds take two to three weekends.
Is a DIY Kitchen Island Right for Your Space (and Skill Level)?

Assess the floor structure before buying anything. A slab-on-grade floor handles weight differently than a raised joist system. Stone tops can exceed 900 pounds.
Joist spacing and blocking capacity determine whether you need supplementary posts. Check for squeaks or deflection, fix those first.
Your tool inventory matters. A track saw or circular saw with guide rail replaces a table saw for cabinet breakdown. A 48-inch box level and laser level catch floor slope.
Pocket hole jigs speed face frame assembly. If you lack these, rental cost adds up fast. Skill-wise, you need confidence shimming to level, squaring cabinets with clamps, and reading a wiring diagram for GFCI circuits.
Budget reality check: stock cabinets plus laminate run $2,000 to $3,500. Quartz tops add $3,000 to $6,000 installed. Pro labor doubles that.
If your kitchen renovation includes moving gas lines or adding a vent hood, budget for licensed trades. Those steps are not DIY-friendly in most jurisdictions.
| Factor | DIY Green Light | Call a Pro |
|---|---|---|
| Floor | Flat, accessible joists | Slab with post-tension cables |
| Plumbing | No sink or dishwasher | New supply, drain, vent |
| Electrical | One GFCI circuit | Subpanel upgrade needed |
| Countertop | Laminate, butcher block | 3cm quartz, waterfall edges |
| Timeline | Flexible, 2–3 weekends | Hard deadline, permits pulled |
Planning the Footprint: Clearance Zones, Workflow & Seating Geometry

Start with painter's tape on the floor. Mark the island perimeter at your target dimensions. Standard depth is 24 inches without seating, 36 inches with stools.
Width starts at 48 inches for minimal prep space. Walk the tape lines. Open appliance doors.
Simulate two people passing. You will feel the pinch points immediately.
The work triangle still applies. Keep the island prep zone between sink and cooktop. If the island holds the second sink, maintain 36 inches from the primary sink centerline.
For seating, allow 24 inches width per stool. A 72-inch island seats three comfortably. Extend to 96 inches for four with elbow room.
Traffic paths need 36 inches minimum. The main kitchen thoroughfare should stay 42 to 48 inches clear. If the island blocks the fridge-to-sink run, reconsider placement.
Many DIYers center the island visually but create a bottleneck functionally. Test with cardboard mockups at countertop height before cutting wood.
NKBA recommends 15 inches minimum landing space beside a cooktop. If your island includes a range, factor that in. Downdraft vents need 12 inches rear clearance for ducting.
Pop-up electrical outlets require 18 inches from the sink edge per NEC. Every appliance dictates its own buffer zone.
Choosing Your Build Method: Stock Cabinets, Custom Carcasses, or Pre-Fab Units
Stock cabinets from big-box retailers offer the fastest start. Standard 30-inch and 36-inch base boxes lock together with 3-inch screws. Face frames attach with pocket holes.
You gain adjustable shelves and factory finish. Drawback: fixed heights, limited depth options, particleboard gables swell if wet.
Custom carcasses built from 3/4-inch plywood give total dimension control. Use pocket screws or domino joinery for cases. Edge-band exposed plywood edges.
This route lets you integrate appliance garages, vertical dividers, and non-standard heights like a 30-inch baking station. Material cost runs $800 to $1,200 in plywood and hardware per 8-foot run.
Pre-fab island units ship as complete assemblies. Some include butcher block tops. They sit on adjustable feet.
Installation takes hours. Flexibility is near zero, you get what the manufacturer designed. Weight limits restrict stone tops.
These suit rentals or temporary layouts best.
Hybrid approach: stock perimeter cabinets with a custom center section. The custom zone houses the sink, cooktop, or specialized storage. Stock boxes flank it for drawers and doors.
This balances cost and customization. Many kitchen remodel projects use this split strategy.
| Method | Material Cost | Build Time | Weight Capacity | Customization |
|---|---|---|---|---|
| Stock cabinets | $1,500–$4,000 | 1–2 days | 200 lb/lin ft | Low |
| Custom plywood | $800–$1,500 | 3–5 days | 300 lb/lin ft | High |
| Pre-fab unit | $800–$2,500 | 4–8 hours | 150 lb/lin ft | None |
| Hybrid | $2,000–$5,000 | 2–3 days | 250 lb/lin ft | Medium |
Subfloor Prep & Blocking: The Foundation Nobody Sees But Everything Rests On

Remove flooring down to subfloor in the island footprint. Check flatness with a 6-foot level. The subfloor must not vary more than 1/8 inch over 6 feet.
High spots sand down. Low spots get floor patch compound. Skip this step and your cabinets will rock forever.
Locate joists with a stud finder or by drilling test holes. Mark centers on the subfloor. Solid blocking between joists transfers cabinet weight to the framing.
Use 2×6 or 2×8 pressure-treated lumber. Cut blocks to fit tight. Fasten with 3-inch structural screws every 8 inches through the joist faces.
Two rows of blocking per cabinet run minimum.
Cleats anchor the cabinet bases to the blocking. Rip 2x4s to 3.5 inches wide. Lay them out matching the cabinet back rail positions.
Screw cleats through subfloor into blocking with 3-inch screws at 12 inches on center. Stagger screws to avoid splitting. The cleat top becomes your level reference plane.
If the floor slopes, shim the cleats before final fastening. Plastic composite shims won't rot. Check level in both directions after each cleat.
A laser level projects a reference line across the whole layout. Adjust until the plane is true. This is the only moment you can fix floor issues easily.
For concrete slabs, use Tapcon anchors or powder-actuated pins. Pressure-treated sleepers isolate cabinets from moisture. A 6-mil polyethylene barrier under sleepers adds protection.
Follow local building code for fastener spacing in seismic zones.
Cabinet Assembly & Positioning: Shimming, Clamping & Squaring the Base
Assemble cabinet boxes on sawhorses before placement. Install drawer slides, hinge plates, and shelf pins now. Face frames attach with 1-1/4 inch pocket screws.
Clamp joints tight while driving screws. Wipe excess glue immediately. Pre-drill hinge holes with a 35mm Forstner bit for Euro hinges.
Dry-fit all boxes on the cleats. Leave 1/8 inch gaps between adjacent cabinets for alignment play. Shim each box to level front-to-back and side-to-side.
Check diagonals, equal measurements mean square. Adjust shims until perfect. This step determines door gaps and drawer function for the life of the island.
Clamp face frames together across the front. Use parallel jaw clamps every 12 inches. Drive 3-inch cabinet screws through the stile of one box into the stile of the next.
Two screws per joint, top and bottom. Remove clamps. Verify level again.
The base should move as one rigid unit.
Anchor the assembly to cleats through the cabinet backs. Use 3-inch construction screws at 12 inches on center. Hit the cleats, not just subfloor.
For tall cabinets or heavy stone tops, add 2×4 vertical posts at corners and mid-spans. Posts bear directly on blocking. Screw through cabinet gables into posts.
Scribe the toe kick board to the floor contour. A contour gauge transfers the profile. Cut with a jigsaw.
Nail the scribed board to the cabinet bottom rails. Install the factory toe kick plate over it. This hides gaps and finishes the base visually.
Now the island is ready for rough-ins.
Electrical & Plumbing Rough-In: Run Before You Lock It Down
Run all wires and pipes while the cabinet backs are open. Drill 1-inch holes through cabinet gables for cable passes. Use NM-B cable with staple supports every 4.5 feet.
Keep cables 1.25 inches from edge of framing to avoid drywall screws. Install a dedicated 20-amp GFCI circuit for countertop receptacles. Place the first outlet within 12 inches of the sink edge per NEC 210.52.
For a cooktop, run a 40-amp or 50-amp circuit with 8/3 or 6/3 cable. Verify manufacturer specs for exact breaker size. A microwave drawer needs its own 15-amp circuit.
Pop-up receptacles mount in the countertop cutout; feed them from below before stone sets. Label every wire at the panel.
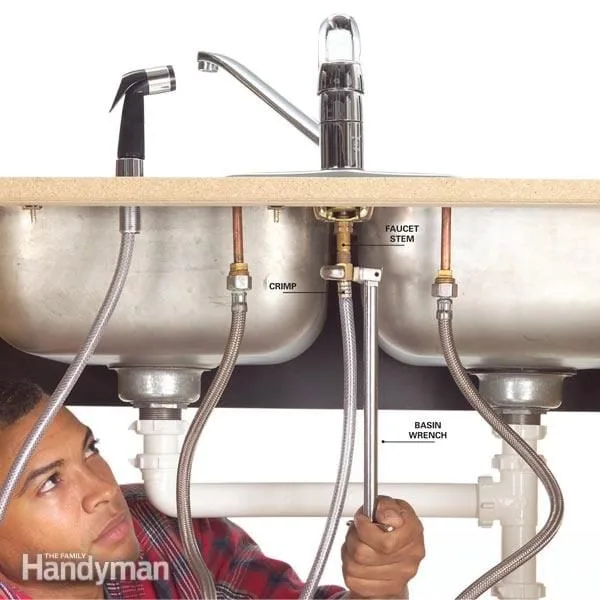
Plumbing rough-in starts with supply lines. Run 1/2-inch PEX for hot and cold to the sink location. Use push-fit or crimp fittings.
Pressure-test at 60 psi for 15 minutes before closing walls. Drain line slopes 1/4 inch per foot. A 2-inch PVC drain serves a single bowl; 3-inch for double.
Vent within 6 feet of trap per IPC. If roof penetration is impossible, use an air admittance valve approved by local code.
Dishwasher supply ties into the hot line with a dual-outlet valve. Drain hose loops high under the countertop and connects to the disposal or tailpiece with an air gap. Garbage disposal needs a switched receptacle.
Wire the switch at the countertop front for accessibility.
Protect all penetrations with steel nail plates where cables or pipes run within 1.25 inches of framing faces. This prevents drywall screws from hitting utilities. Inspect everything before insulation or cabinet backs go on.
Most jurisdictions require a rough-in inspection at this stage.
Countertop Template, Fabrication & Install: Seams, Overhangs & Support

Template after cabinets are fully anchored and level. Digital laser templating captures every corner, cutout, and overhang radius. Physical strip templates work for simple rectangles.
Mark sink center, faucet holes, and cooktop cutout on the template. Indicate overhang depth on each side. Standard overhang is 1.5 inches; seating overhangs are 12 to 18 inches.
Seam placement matters. Avoid seams over dishwasher or trash pull-out. Center seams on cabinet runs where possible.
For L-shaped islands, place the seam at the inside corner. Quartz slabs max out at 120 inches; longer runs need a seam. Book-match adjacent pieces for vein continuity.
Support seating overhangs with hidden steel brackets every 18 to 24 inches. Brackets bolt to cabinet carcass through 3/8-inch lag screws. Corbels work but reduce knee space.
Knee walls (short framed walls) carry load to the floor. For 3cm quartz, 12-inch overhangs need brackets; 15-inch overhangs require knee walls or corbels.
Install undermount sink brackets before setting the top. Apply silicone beads on cabinet top rails. Lower slab with suction cups.
Two people minimum for 3cm stone. Shim seams level with plastic horseshoe shims. Fill seams with color-matched epoxy.
Clamp with vacuum seam setters until cured.
Caulk perimeter with 100% silicone. Install faucet and drain assemblies. Connect supply lines.
Test for leaks. Wait 24 hours before heavy use. Seal natural stone annually.
Quartz needs no sealing.
Toe Kick Scribing & Finish Details: The Difference Between Pro & Amateur
The toe kick board covers the gap between cabinet bottom and floor. Most floors slope. A straight board leaves visible gaps.
Scribing matches the board to the floor contour. Use a contour gauge or compass set to the widest gap. Transfer the line.
Cut with a jigsaw. Test fit. Adjust until the board kisses the floor along its full length.
Nail the scribed board to cabinet bottom rails with 1-inch brads. Keep nails 1 inch from ends to avoid splitting. Install the factory toe kick clip system over the board.
Clips snap into rails. The toe kick plate slides into clips. This allows removal for service without tools.
Fill nail holes with color-matched putty. Touch up any scratches on cabinet faces. Adjust Euro hinges for even door gaps: 1/16 inch vertical, 1/8 inch horizontal.
Adjust drawer slides for smooth travel and flush fronts. Install drawer pulls and door knobs. Level all hardware with a combination square.
Seal the countertop-to-backsplash joint with silicone. If the island has an end panel, scribe it to the floor too. Apply construction adhesive to panel back.
Pin with 23-gauge pins. Caulk edges. Install any decorative corbels or brackets with structural screws into blocking, not just cabinet gables.
Clean the interior. Vacuum dust from toe kick cavities. Wipe cabinets with a damp cloth.
Apply a protective wax or polish if the finish calls for it. The island now looks built-in, not bolted-on.
Common Visual Mistakes: What Goes Wrong When You Can't See the Details
Cabinets not square to each other creates widening door gaps. The fix: clamp face frames before screwing. Check diagonals after every two boxes.
A 1/8-inch diagonal difference multiplies across a 96-inch run.
Overhang sag appears months later. Cause: brackets spaced too far apart or lag screws missing blocking. The fix: follow manufacturer spacing.
Test by pressing down on the overhang, zero deflection is the goal.
Toe kick gaps scream amateur hour. Cause: skipping scribing. The fix: always scribe.
Even on "flat" floors. A 3/16-inch gap at one end catches every eye.
Electrical boxes buried behind cabinet backs. Cause: rough-in after cabinets anchored. The fix: run wires and mount boxes before final screw-down.
Use remodel boxes with ears if you missed the window.
Plumbing cleanout inaccessible. Cause: drain line buried behind a drawer box. The fix: plan cleanout location in a false drawer front or removable panel.
Code requires access.
Vent termination too close to window or property line. Cause: ignoring IPC 905.1. The fix: measure before cutting roof.
Keep 10 feet from operable windows.
Stone seam visible because slabs weren't book-matched. Cause: fabricator cut from different bundles. The fix: inspect slabs together before fabrication.
Reject mismatched pairs.
Island too close to perimeter counter. Cause: designing by eye not tape. The fix: tape the floor.
Walk it. Measure twice.
Code & Safety Checklist: GFCI, Venting, Cleanouts & Permit Triggers
NEC 210.8(A)(6): all countertop receptacles GFCI protected. NEC 210.52(C)(2): at least one receptacle for island countertop 24 inches wide by 12 inches deep. Receptacle no more than 12 inches below countertop.
Pop-up units count if listed for countertop use.
IPC 311.1: cleanout at base of each waste stack. IPC 708.1: cleanout access not covered by permanent construction. Use a decorative access panel in toe kick or end panel.
IRC M1503.4: range hood exhaust ducts terminate outdoors. Recirculating hoods allowed only where outdoor venting impractical. Duct size per manufacturer.
Smooth metal duct. No screws penetrating duct interior.
IRC G2420: gas connector for cooktop must be accessible. Flexible connector length max 6 feet. Shutoff valve in same room.
Permit triggers: new circuit, new plumbing fixture, structural blocking in joists, gas line extension. Most municipalities require electrical and plumbing permits separately. Schedule rough-in inspection before closing cavities.
Final inspection after countertop install.
Seismic zones: cabinets anchored to floor with 1/2-inch anchor bolts at 4 feet on center. Gas appliance flexible connector. Water heater strap if island includes hot water dispenser.
Fire blocking: IRC R302.11 requires blocking at ceiling and floor levels in stud cavities. Not typically needed for island unless it reaches ceiling.
Keep a copy of approved plans on site. Inspector may request them. Document all rough-in with photos before cover.
Photos save hours if questions arise later.
Cost Breakdown & Realistic Timeline: Materials, Tools & Hidden Expenses
Stock cabinets plus laminate top run $2,000 to $3,500 in materials. Add quartz and the range jumps to $5,000 to $9,000. Custom plywood carcasses cost $800 to $1,500 in sheet goods and hardware.
Stone fabrication adds $3,000 to $6,000 for a typical island. Tools you may need to buy or rent: track saw ($400), laser level ($150), pocket hole jig ($140), suction cup lifters ($80).
Permit fees vary by municipality. Electrical permit $50 to $150. Plumbing permit $75 to $200.
Building permit for structural blocking $100 to $300. Schedule inspections early, delays of two weeks are common.
Labor if you hire pros: cabinet install $2,000 to $4,000. Countertop template and install $1,500 to $3,000. Electrician $500 to $1,200 for rough-in and trim.
Plumber $800 to $2,000 for supply, drain, and vent.
Timeline for DIY: weekend one for layout, blocking, and cabinet assembly. Weekend two for rough-ins and countertop template. Week three for countertop install and finish work.
Add a week for each trade you sub out.
Hidden costs: shims, construction adhesive, screws, caulk, sandpaper, touch-up paint, disposal fees for old cabinets, delivery surcharges for stone. Budget 15 percent over material estimate.
When to Call a Pro: Structural, Stone, or Code-Complexity Red Flags
Post-tension slab floors forbid drilling. Hire a structural engineer to design anchoring. Any gas line work requires a licensed plumber in every jurisdiction.
Moving a main drain stack triggers full permit set and engineered drawings.
Stone slabs over 100 pounds per linear foot need professional rigging. A-frame dollies, suction cups, and seam-setting tools are specialty gear. One cracked slab costs more than the install fee.
Electrical service upgrades beyond a single circuit need an electrician. Subpanel work, AFCI requirements, and load calculations are not DIY territory. Failed inspection means open walls twice.
Vent hood duct runs over 25 feet or with more than two elbows need a pro HVAC contractor. Makeup air systems interlock with the hood. Code compliance is strict.
Historic districts and HOAs often require approved plans before permit submission. A designer or architect navigates review boards. Their fee saves months of back-and-forth.
Frequently Asked Questions
How much does it cost to build a kitchen island?
Materials range from $2,000 for stock cabinets with laminate to $15,000 plus for custom cabinets with premium stone. Add permits, tools, and any subcontracted trades.
Do I need a permit to build a kitchen island?
Yes, if you add electrical circuits, plumbing fixtures, structural blocking, or gas lines. Cosmetic cabinet-only islands on existing floors may not need one. Check your local building department.
What is the standard height for a kitchen island?
36 inches finished height matches standard countertops. This equals 34.5-inch base cabinets plus 1.5-inch countertop. Bar-height islands are 42 inches; baking stations drop to 30 inches.
How much overhang do I need for seating?
12 inches minimum knee space per stool. 15 to 18 inches is comfortable. Overhangs beyond 12 inches require hidden steel brackets, corbels, or a knee wall for support.
Can I put a dishwasher in a kitchen island?
Yes. Run a dedicated 15-amp circuit, hot water supply, and drain line with a high loop to an air gap or disposal. Allow 24 inches width plus clearance for door swing.
What clearance do I need around a kitchen island?
42 inches for single-cook work aisles. 48 inches for multiple cooks or cooking zone. 36 inches for traffic paths. Measure from countertop edge, not cabinet face.