How Hard Is It to Repaint Kitchen Cabinets? Simple Breakdown
How hard is it to repaint kitchen cabinets depends entirely on what you're starting with and how you plan to finish. A flat laminate door painted with a roller behaves differently than an oak shaker door sprayed with a waterborne alkyd. Most homeowners underestimate the prep work and overestimate what a weekend can deliver.
The real difficulty sits in the decisions you make before opening a can.
Per PDCA standards, a proper cabinet refinish requires 5 to 7 days of kitchen downtime for a 10-by-12-foot space when you include cure time. That timeline assumes you remove doors, label hardware, and follow manufacturer recoat windows. Let's walk through the variables that determine whether this project stays manageable or becomes a regret.
Quick Answer
Repainting kitchen cabinets rates moderate to difficult for DIYers. Material identification drives the process. Prep work consumes 60 percent of total labor.
Spray application yields the most durable finish. Professional results require 5 to 7 days of kitchen disruption.
The Real Answer: It Depends Entirely on Your Cabinets
There is no single difficulty rating because the substrate dictates everything. Solid wood doors with open grain like oak need grain filler if you want a smooth modern look. Closed-grain maple or cherry paints cleaner with less prep.
MDF and particle board swell if water-based products soak edges. Thermofoil and laminate have near-zero surface energy so adhesion fails without a bonding primer. Factory conversion varnish resists sanding and demands shellac-based primer for bite.
Identify your material before buying a single product.
What Makes This Hard: The Five Difficulty Variables
Five factors move the needle from weekend project to pro territory. First is substrate identification, guess wrong and paint peels within months. Second is existing finish type, conversion varnish, oil paint, or stain each need different prep.
Third is door profile complexity, flat slabs forgive brush marks while detailed raised panels trap them. Fourth is application method, brush and roller is accessible but leaves texture; HVLP spray gives factory smoothness with a steep learning curve. Fifth is kitchen access reality, you lose sink, stove, and countertop space for days.
Each variable branches your workflow.
Decision Branch 1: What Are Your Cabinets Made Of?
Start by removing one door and examining the edge and back. Solid wood shows consistent grain through the edge. MDF reveals a dense uniform core with no voids.
Particle board displays visible wood chips and glue lines. Thermofoil has a vinyl skin wrapped over MDF with a telltale seam at the back edge. Laminate shows a thin plastic layer over particle board.
Melamine looks like laminate but feels harder and colder. RTF (rigid thermofoil) is thicker vinyl with deeper embossing. Match your finding to the right prep path.

| Substrate | Grain Type | Prep Priority | Risk If Wrong |
|---|---|---|---|
| Oak, ash, hickory | Open pore | Grain fill + shellac primer | Telegraphing texture |
| Maple, cherry, poplar | Closed pore | Light scuff + bonding primer | Adhesion failure |
| MDF | None | Seal edges + shellac primer | Edge swell |
| Particle board | None | Seal edges + oil primer | Swell + crumble |
| Thermofoil / RTF | None | Scuff + STIX primer | Delamination |
| Laminate / melamine | None | Scuff + INSL-X primer | Peeling at heat |
Decision Branch 2: What's the Existing Finish?
Test the current coating before sanding. Dab denatured alcohol on a hidden spot, if it softens, the finish is shellac or lacquer. If unchanged, try lacquer thinner, reactivity means conversion varnish or catalyzed lacquer.
No reaction to either suggests oil-based paint or polyurethane. Water-based paint dissolves with ammonia-based cleaner. Factory conversion varnish is the toughest; it sands poorly and resists adhesion.
That surface needs a full coat of Zinsser BIN shellac primer. Stained doors without topcoat need only cleaning and light scuff. Know what you're bonding to.
Decision Branch 3: Door Style and Layout Complexity
Flat slab doors are the easiest to paint, no recesses to trap brush marks. Shaker doors add moderate difficulty because the recessed panel collects material. Raised panel doors with detailed profiles are the hardest; corners build up finish and highlight every flaw.
Glass inserts require careful masking and razor cleanup. Layout matters too. A galley kitchen with 12 linear feet of cabinets takes less time than a U-shape with a pantry wall and crown molding.
Upper cabinets painted in place demand cutting in at the ceiling and soffit. Islands add 360-degree access challenges. Count your doors, drawers, and linear feet before committing.
Decision Branch 4: Your Tools and Application Method
Brush and roller is the lowest barrier to entry. A 2.5-inch angled Purdy Nylox and a 4-inch mohair roller cover most surfaces. Expect visible stipple and brush texture on show faces.
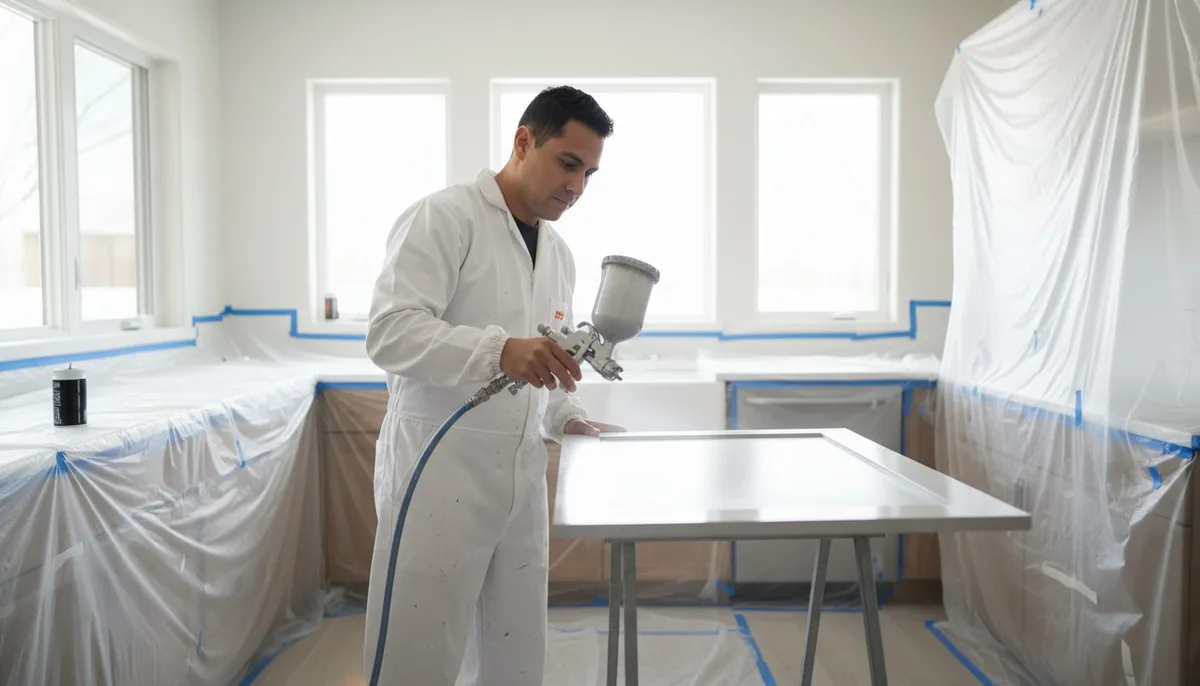
HVLP turbine systems like the Fuji Mini-Mite or Earlex 5500 atomize waterborne alkyds into a fine mist that levels like factory finish. The learning curve is real, plan a practice day on cardboard. Airless sprayers lay down too much material for cabinets and create heavy orange peel.
Rent an HVLP for $150 to $250 per week if you choose spray. The finish quality jump is significant but so is the prep: you need a dust-free tent or garage bay.

| Method | Equipment Cost | Learning Curve | Finish Quality | Best For |
|---|---|---|---|---|
| Brush + roller | $50–$80 | Low | Visible texture | Flat slabs, budget, first-timers |
| HVLP turbine | $150–$250 rental | Medium | Factory smooth | Shaker, raised panel, perfectionists |
| Airless sprayer | $300+ rental | High | Heavy texture | Not recommended for cabinets |
Decision Branch 5: Timeline and Kitchen Access Reality
This is not a weekend project. Day 1: remove doors, label hardware, clean with TSP substitute. Day 2: scuff sand, vacuum, tack cloth, prime boxes in place.
Day 3: prime doors horizontal, first coat paint on boxes. Day 4: second coat doors, second coat boxes. Day 5: third coat if color change dark to light.
Day 6: light sand, tack, reinstall hardware, adjust hinges. Day 7: cure begins, no heavy use for 7 days, full hardness at 30 days. Your sink, stove, and counters are unusable for 5 to 7 days.
Plan meals accordingly. Humidity above 70 percent adds 24 hours per recoat window. Temperatures below 65 degrees Fahrenheit risk poor film formation.
The Three Realistic Paths: DIY Brush/Roll, DIY Spray, or Hire a Pro
Path one: brush and roll with waterborne alkyd like Benjamin Moore Advance or Sherwin-Williams Cabinet Coat. Material cost $350 to $550. Best for flat slabs, tight budgets, and first-timers accepting slight texture.
Path two: DIY HVLP spray with the same coatings. Add $200 rental, one practice day, and a clean spray area. Best for shaker or raised panel doors where finish quality matters.
Path three: professional spray refinishing at $90 to $150 per linear foot. A 30-foot kitchen runs $3,000 to $4,500. They bring a mobile booth, spray conversion varnish or 2K polyurethane, and warranty the work.
Best for high-value homes, complex layouts, or zero tolerance for risk.
Cost Breakdown: What Each Path Actually Costs
DIY brush/roll materials: primer $45, paint $120 (2 gallons), sandpaper $25, brushes/rollers $50, cleaning supplies $30, drop cloths $20, hardware bags $10. Total $300 to $400. DIY HVLP adds turbine rental $200, respirator $40, tent plastic $30, practice board $15.
Total $600 to $850. Professional refinishing: labor $2,700 to $4,500, materials included, 3 to 5 days, warranty 1 to 3 years. Cabinet refacing: $8,000 to $15,000 for new doors and veneer boxes.
Full replacement: $25,000 to $60,000 plus. The paint path saves 85 to 90 percent over replacement.
The Prep Work That Determines Success or Failure
Label every door and drawer with numbered tape and a matching diagram before removal. Skip this and reinstall becomes a puzzle. Clean all surfaces with a TSP substitute like Dirtex or a 50/50 denatured alcohol wipe, grease prevents adhesion.
Scuff sand with 120 to 150 grit; you are not stripping, just creating mechanical tooth. Vacuum with a brush attachment then tack cloth every surface. Prime with shellac-based BIN for stain blocking and universal adhesion.
One coat, 45-minute recoat window. Light sand with 220 grit between coats. Dust nibs caught now save hours of repair later.
This prep sequence is non-negotiable for any path you choose.
Common Failure Points by Cabinet Type
Oak shows grain telegraphing when pores aren't filled, the finish sinks into valleys creating orange peel. Laminate edges delaminate from steam and heat if not sealed with primer before paint. Thermofoil peels at seams when bonding primer is skipped.
MDF edges swell from water-based products unless sealed with oil-based primer first. Factory conversion varnish causes fish-eye and adhesion loss without shellac primer. Raised panel corners collect heavy build that cracks with seasonal movement.
Brush marks in shaker recesses announce amateur application. The photo below shows all three classic failures.

| Failure | Root Cause | Prevention |
|---|---|---|
| Grain telegraphing | Unfilled oak pores | Aqua Coat grain filler before prime |
| Edge delamination | Water intrusion on laminate | Seal edges with oil primer first |
| Peeling at seams | No bonding primer on thermofoil | STIX or Extreme Bond full coat |
| Fish-eye | Silicone contamination | Deep clean with alcohol wipe |
| Corner cracking | Heavy film build | Thin coats, sand profiles lightly |
Lead Paint, VOCs, and Safety Non-Negotiables
Homes built before 1978 likely have lead-based paint layers. Test with 3M LeadCheck swabs or send chips to a lab. If positive, EPA RRP rules apply: contain the work area, use HEPA vacuums, wet sand only, wear N95 or P100 respirator.
Do not dry sand lead paint. Waterborne alkyds like Advance and Cabinet Coat meet CARB SCM limits under 50 g/L VOC. Oil-based primers and shellac run 300 to 400 g/L, ventilate aggressively with box fans exhausting outward.
Rags soaked in oil-based products self-ignite; store in a sealed metal can filled with water. Dispose of liquid coatings at hazardous waste facilities. Dry latex goes in regular trash.
Decision Guide: Which Path Matches Your Situation?
Choose DIY brush/roll if: cabinets are flat slab or simple shaker, budget is under $500, you accept slight texture, and you have 7 days of kitchen downtime. Choose DIY HVLP if: doors are raised panel or detailed shaker, you want factory finish, you can rent a turbine and build a clean spray tent, and you'll practice first. Choose pro refinishing if: kitchen exceeds 30 linear feet, layout includes crown molding and glass inserts, home value justifies $3,000 to $5,000 investment, or lead paint requires certified abatement.
Choose refacing if: boxes are damaged, layout changes, or you want new door styles. Choose replacement if: structure is failing, layout must change, or budget allows $25,000+.
Frequently Asked Questions
How long does cabinet paint take to cure?
Waterborne alkyds dry to touch in 2 to 4 hours and recoat in 4 to 6 hours. Full cure reaches 90 percent hardness at 7 days and 100 percent at 30 days. Avoid heavy loads, cleaners, or moisture during the first week.
Can I paint over laminate without sanding?
No. Laminate has near-zero surface energy. You must scuff with 150 grit and apply a bonding primer like INSL-X Cabinet Coat Primer or STIX.
Skip either step and paint will peel within months.
What sheen is best for kitchen cabinets?
Satin hides brush texture and cleans well. Semi-gloss is more durable but highlights every flaw. High-gloss requires professional spray and perfect prep.
Most pros recommend satin for DIY, semi-gloss for pro spray.
Do I need to remove cabinet doors to paint them?
For brush/roll you can paint in place with careful cutting in. For HVLP spray you must remove doors and paint horizontal. Removing doors always yields better results on edges and recesses.
How much does it cost to hire a pro to paint cabinets?
Professional spray refinishing runs $90 to $150 per linear foot as of 2026. A typical 30-foot kitchen costs $3,000 to $4,500 including materials, masking, and 1 to 3 year warranty.
Can I change hardware hole spacing when repainting?
Yes. Fill old holes with epoxy wood filler, let cure, drill new holes, then prime and paint. Use a combined drill/countersink bit for clean entry.
Misaligned holes are a common DIY giveaway.