how hard is it to install kitchen cabinets
How hard is it to install kitchen cabinets depends entirely on the conditions in your kitchen, not on a universal difficulty score. A straightforward swap on a flat floor with studs in the right spots feels like a long weekend project. The same cabinets on a sloped floor with bowed walls and a solo installer turns into a week of frustration.
The keyword "how hard is it to install kitchen cabinets" gets asked constantly because the answer shifts wildly from one kitchen to the next.
Per KCMA ANSI/KCMA A161.1 standards, cabinet boxes must hold fast to wall studs at 16-inch centers using #8 by 2½-inch structural screws. Aggregate installer data shows DIY timelines range from 40 hours for a simple 10-by-12-foot kitchen to 80-plus hours when assembly, shimming, and scribing pile up. The next sections break down the real variables so you can place your job in the right tier.
Why "How Hard" Is the Wrong Question — The Real Variables That Decide It

The question implies a single answer exists. It does not. Difficulty lives in five specific variables that stack on each other.
Cabinet type drives assembly time versus handling weight. Kitchen geometry, floor slope, wall plumb, corner clearance, dictates shim and scribe work. Layout scope determines whether you simply hang boxes or reroute plumbing and gas.
Tool kit gaps force improvised workarounds that slow you down. Manpower decides whether 90-pound uppers go up safely or become a hazard. Each variable slides the job along a spectrum from manageable to pro territory.
Quick Answer: Your Kitchen Falls Into One of Three Difficulty Tiers
How hard is it to install kitchen cabinets depends on which tier matches your conditions. Tier one is a same-footprint swap with RTA cabinets on a flat floor with studs aligned. Tier two adds pre-assembled weight, minor floor slope, one tricky corner, and a helper.
Tier three means layout changes, frameless boxes, bad walls, solo work, and no cabinet jack. Most DIYers land in tier two and need two full weekends.
Tier 1: Same Footprint, RTA Cabinets, Flat Floor, Studs Where You Need Them
This tier assumes you replace cabinets in the exact same layout. No plumbing moves. No gas line shifts.
No electrical upgrades. RTA (ready-to-assemble) boxes arrive flat-packed. You assemble them on site using cam locks and dowels.
A 10-by-12-foot kitchen typically has 18 to 22 cabinets. Assembly adds 15 to 25 hours. The floor varies less than ¼ inch over 10 feet.
Walls are plumb within ¼ inch over 8 feet. Studs fall within ½ inch of every upper cabinet rail. You own a 6-foot level, a laser level, a cabinet jack or ledger board, and at least one strong helper.
Expect 40 to 50 total hours. First-time DIYers finish in three weekends.
Typical Tier 1 Tool Kit
| Tool | Purpose |
|---|---|
| 6-foot box level | Reference line for bases and uppers |
| Laser level | Transfer level line around room |
| Cabinet jack or T-support | Hold uppers while fastening |
| Drill/driver with clutch | Drive structural screws without stripping |
| 2½-inch #8 structural screws | Fasten cabinets to studs |
| 1¼-inch trim screws | Join face frames |
| Plastic horseshoe shims | Level bases on minor low spots |
| Scribe tool or compass | Fit fillers to uneven walls |
Tier 2: Pre-Assembled Cabinets, Minor Floor Slope, One Tricky Corner, Helper Available
Pre-assembled cabinets skip assembly time but weigh 30 to 50 percent more per box. A 36-inch upper can hit 90 pounds. A 36-inch base with drawers pushes 110 pounds.
You still work the same footprint. The floor slopes ¼ to ½ inch over 10 feet. Shimming every base cabinet becomes mandatory.
One corner, usually a blind base or lazy Susan, fights the wall. A filler strip needs scribing. Studs miss a few upper rails by ¾ inch.
You add blocking or use toggle bolts rated for the load. A helper is present for every upper hang. The laser level earns its keep transferring the reference line around obstacles.
Expect 55 to 70 total hours. Two to three weekends for experienced DIYers. Three to four for first-timers.
When to Add Blocking for Upper Cabinets
- Stud center misses rail by more than ½ inch
- Rail hits only one stud in a 30-inch cabinet
- Frameless box has no face frame to distribute load
- Local code requires seismic clips (California, Washington, Oregon)
Tier 3: Layout Change, Frameless Boxes, Bad Walls, Solo Install, No Cabinet Jack
Layout changes introduce permit territory. Moving a range means gas line work. Moving a sink means supply and drain re-routes.
Moving a fridge means a new 20-amp circuit. Frameless (Euro-style) boxes have no face frame to hide shims. Every gap shows.
The floor slopes more than ½ inch over 10 feet. Walls bow ½ inch or more. Soffits drop below the planned upper height.
You work alone. You lack a cabinet jack and try to improvise with a ledger board that slips. Upper cabinets become a safety hazard.
Hinge adjustments multiply because boxes twist under their own weight. Drawer slides bind. Countertop template gets delayed because bases shift.
This tier routinely hits 80 to 120 hours. Pros finish in 16 to 24 hours with a three-person crew. The cost of mistakes, cracked boxes, stripped cam locks, damaged finishes, often exceeds the labor savings.
The Five Condition Variables That Flip the Job From Weekend to Pro Call
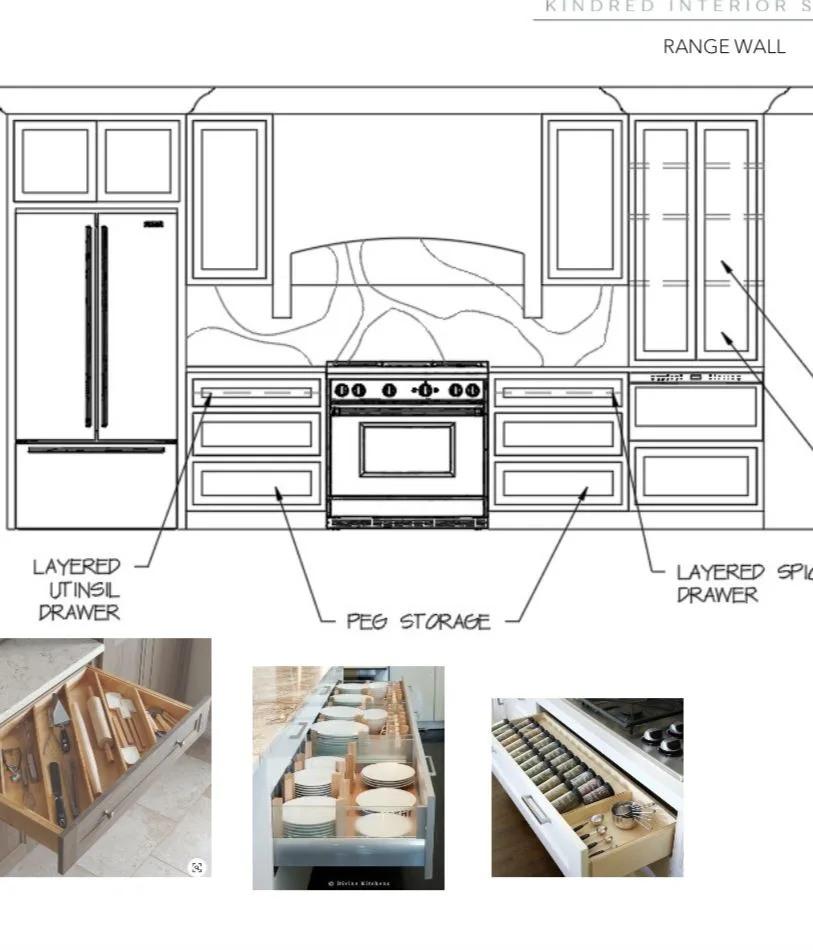
Five variables control the difficulty curve. Cabinet type determines whether you spend hours assembling RTA boxes or wrestling pre-assembled weight. Kitchen geometry, floor slope, wall plumb, corner clearance, dictates shim and scribe volume.
Layout scope separates a straight swap from permit-triggering moves. Tool kit gaps force workarounds that slow every step. Manpower decides whether uppers go up controlled or become a one-person hazard.
Each variable slides independently. A tier-one kitchen with a solo installer jumps to tier three. A tier-three kitchen with a pro crew drops to tier one.
Cabinet Type: RTA Assembly Time vs Pre-Assembled Weight and Handling
RTA cabinets arrive flat-packed. You assemble each box with cam locks, dowels, and glue. A 30-inch base takes 20 to 30 minutes.
A full kitchen adds 15 to 25 hours. Particleboard sides strip if you over-torque. Plywood sides hold better but cost more.
Pre-assembled cabinets skip assembly. A 36-inch upper weighs 85 to 95 pounds. A 36-inch base with dovetail drawers hits 110 to 125 pounds.
Two people move them. One person risks back injury and dented boxes. Frameless pre-assembled boxes twist if lifted by one corner.
Always lift from the bottom panel.
Kitchen Geometry: Floor Slope, Wall Plumb, Corner Clearance, Soffits
Floor slope is the silent killer. A ⅜-inch drop over 10 feet means every base cabinet needs shims. A ¾-inch drop means stacked shims and constant re-checking.
Walls that bow ½ inch in 8 feet demand scribed fillers on every run. Blind corner bases need 3 to 6 inches of pull clearance. Lazy Susan units need 36-inch door swing radius.
Soffits drop 12 to 18 inches below ceiling. Standard 42-inch uppers hit the soffit. You either stack 30-inch uppers with crown or cut the soffit.
Measure every wall at top, middle, and bottom before ordering.
Layout Scope: Straight Swap vs Appliance Move vs Full Reconfigure
Straight swap keeps plumbing, gas, and electric in place. No permits in most jurisdictions. Appliance moves trigger code.
A range relocation needs a gas flex connector within 6 feet of the shutoff. A sink move needs a new vent and trap arm slope. A fridge move needs a dedicated 20-amp GFCI circuit.
Full reconfigure means open walls, rough-in inspection, and final inspection. Each added trade adds days and cost. DIYers often underestimate the ripple effect.
Moving one appliance usually moves two others.
Tool Kit: What You Own, What You Rent, What You Can't Fake
A 6-foot box level is non-negotiable. A laser level saves hours on reference lines. A cabinet jack or T-support costs $40 to $60 to buy or $15 a day to rent.
A ledger board works but slips on slick walls. A scribe tool beats a compass for filler fits. A pocket-hole jig helps face-frame clamping but factory cabinets rarely need it.
A ¼-inch drive impact driver with clutch prevents stripped cam locks. A ½-inch drive impact wrench seats structural screws. Rent the jack.
Buy the level. Borrow the laser. Fake nothing.
Manpower: Solo, One Helper, or Two Strong Backs for Uppers
Solo install works for bases. Uppers are a two-person job minimum. A 30-inch upper weighs 60 pounds.
A 36-inch upper weighs 90 pounds. A 42-inch pantry upper hits 130 pounds. One person holds.
One person drives screws. Three people rotate holds on tall stacks. Solo upper installs lead to dropped cabinets, stripped holes, and emergency room visits.
If you have no helper, rent a cabinet jack and a second jack. Build a temporary T-support from 2x4s. Do not improvise with a broom handle and hope.
Decision Branch: If Your Floor Slopes >¼" in 10 Feet, Do This First

Find the high point of the floor. Set a 6-foot level on the floor at multiple spots. Mark the highest spot.
That spot sets the reference shim height for every base cabinet. Do not shim down from the high point. Shim up to it.
Use plastic horseshoe shims in ⅛, ¼, and ⅜ increments. Stack no more than two shims per stack. Three shims compress and shift.
If a cabinet needs more than ¾ inch of shim, sister a 2×4 sleeper to the subfloor first. Level the sleeper. Fasten the cabinet to the sleeper.
This prevents point loading on shims.
How to Establish the High-Point Reference Line
Snap a chalk line at 34½ inches above the high point. This is the top of the base cabinet line. Extend the line around the room with a laser level.
Every base cabinet top hits this line. Check with a 6-foot level on each cabinet run. Adjust shims until the cabinet top kisses the line.
Do not trust the laser alone. Verify with the box level on every cabinet. The laser transfers.
The level confirms.
When to Sister Sleepers Instead of Stacking Shims
Shim stacks over ¾ inch compress under countertop weight. Quartz and granite add 20 to 25 pounds per square foot. A 10-foot run adds 500 to 600 pounds.
Stacked shims crush. The cabinet drops. The countertop cracks.
Cut pressure-treated 2x4s to length. Rip them to match the shim taper. Fasten to the subfloor with 3-inch construction screws every 16 inches.
Shim the sleeper level. Fasten the cabinet to the sleeper. This distributes load across the full cabinet footprint.
Decision Branch: If Studs Miss Your Upper Cabinet Rails by >½", Do This
Studs on 16-inch centers rarely align with every cabinet rail. A 30-inch cabinet spans two studs. A 36-inch cabinet spans three.
If the rail hits only one stud, add blocking. Cut 2×6 blocking to fit between studs. Fasten with 3-inch structural screws through the stud face into the blocking ends.
Two screws per end. The blocking center aligns with the cabinet rail. Use a level to keep blocking flush with the stud faces.
This gives you a solid nailing surface every 16 inches.
Toggle Bolts Are a Last Resort Not a Plan
Toggle bolts rated for 100 pounds each look tempting. They fail under cyclic load. Cabinet doors open and close thousands of times.
The lever arm pulls the toggle through the drywall. The cabinet sags. The hinge binds.
The door falls. Use toggles only for lightweight items like a single 12-inch upper over a fridge. Never for a run of uppers.
Never for a pantry cabinet. Blocking takes 20 minutes per bay. It lasts the life of the house.
Seismic Zones Require Clips Not Just Screws
California, Washington, Oregon, and parts of Nevada require seismic clips. Clips connect the cabinet top to the wall stud or blocking. Two clips per upper cabinet minimum.
Four for cabinets over 36 inches wide. Clips install after the cabinet is level and plumb. They do not replace structural screws.
They add lateral restraint. Skip them and the inspector fails the final. The clips cost $2 each.
The rework costs hours.
Decision Branch: If You're Hanging 36" Uppers Alone Without a Jack, Stop
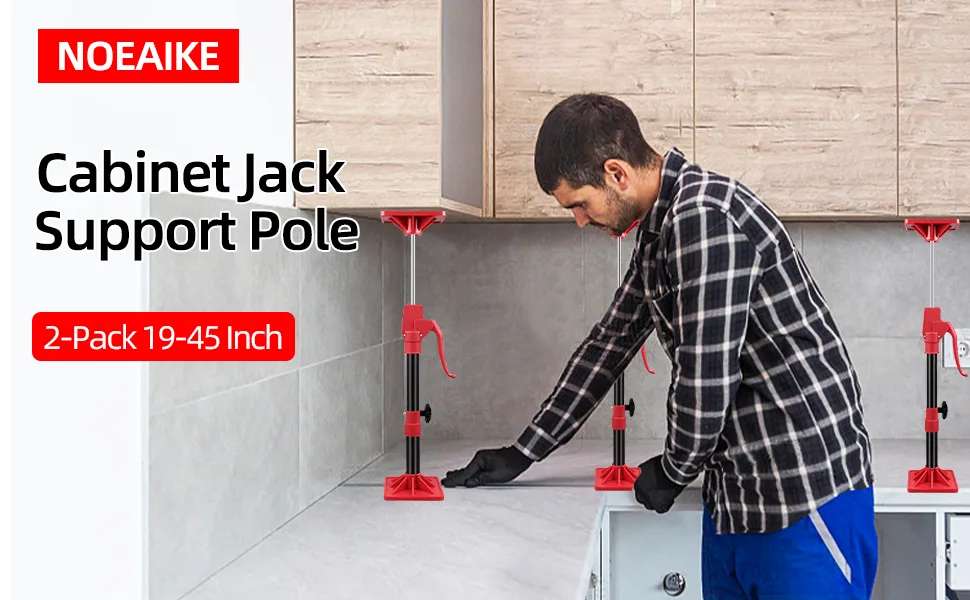
A cabinet jack is a telescoping T-support with a padded cradle. It adjusts from 30 to 60 inches. The cradle holds the cabinet bottom while you level and screw.
One person operates the jack. One person drives screws. The jack takes the weight.
Your arms stay free for the drill. A ledger board works but shifts when you lean on it. A broom handle under the front edge slips on the third cabinet.
The jack costs less than a chiropractor visit. Rent one if you won't buy.
Improvised T-Support From 2x4s If You Absolutely Must
Cut a 2×4 to ceiling height minus ½ inch. Cut a 24-inch crosspiece. Screw the crosspiece to the top of the vertical 2×4 with 3-inch screws.
Pad the crosspiece with a moving blanket. Wedge the vertical tight against the floor. The crosspiece supports the cabinet bottom.
Clamp the cabinet face frame to the crosspiece with a bar clamp. Level the cabinet. Drive your structural screws.
Remove the support. Move to the next cabinet. This works for one person.
It is slower than a jack. It is safer than nothing.
Why Solo Upper Installs Without Support Fail
The cabinet weighs 90 pounds. You hold it with one hand. You drill with the other.
The bit walks. The screw misses the stud. The cabinet tilts.
The back panel cracks. The face frame twists. The hinge boring pattern misaligns.
Doors never close right. Drawers bind. The countertop template reads the twist.
The fabricator charges extra. The install takes twice as long. The result looks amateur.
A $50 jack prevents all of it.
Recommended Action Path for Each Tier (Tools, Sequence, Time Budget)
Tier one follows a clean sequence. Day one: demo, disposal, stud marking, reference line. Day two: base cabinet dry-fit, shim, level, fasten.
Day three: upper cabinet hang, face-frame clamp, door install. Day four: drawer install, hardware, toe kick, fillers. Day five: crown, punch list, countertop template.
Budget 40 to 50 hours. Tools: 6-foot level, laser, jack, drill, impact, shims, screws.
Tier two adds shim time and scribe time. Day one: same as tier one plus floor mapping. Day two: base shim and level takes twice as long.
Day three: upper hang with blocking checks. Day four: scribe fillers, adjust doors, install drawers. Day five: hardware, toe kick, crown.
Budget 55 to 70 hours. Add a scribe tool and blocking lumber.
Tier three demands pro help for rough-in. Week one: permits, demo, rough-in trades, inspection. Week two: cabinet install with extra shimming, blocking, scribing.
Week three: doors, drawers, hardware, trim. Budget 80 to 120 hours DIY. Pro crew does the cabinet week in 16 to 24 hours.
The math favors hiring for tier three.
Common Mistakes That Turn Tier 1 Into Tier 3 Halfway Through
Skipping the floor map is the number one killer. You assume flat. You start bases at the corner.
Three cabinets in the level reads ⅜ inch low. You shim that run. The next run hits a high spot.
Now you have a stepped countertop. The fix is tearing out and restarting. Map the floor first.
Find the high point. Set your reference line there.
Not Verifying Stud Locations Before Upper Hang
You trust the stud finder. You mark centers. You hang the first upper.
The screw misses. You add toggles. The cabinet sags in a month.
Always verify with a finish nail or drill pilot at every mark. Mark both edges of the stud. Center your rail screw in the middle third.
One verified stud beats three guessed ones.
Over-Torquing Cam Locks on RTA Boxes
Cam locks need snug not tight. Particleboard strips at 25 inch-pounds. A cordless drill on high torque delivers 300.
Use a hand driver or a drill with adjustable clutch set to 15. Feel the resistance stop. That is tight enough.
Stripped cams mean wobbly boxes. Wobbly boxes mean misaligned doors. Misaligned doors mean endless hinge adjustment.
Ignoring the Countertop Template Timeline
Cabinets must not move after the fabricator measures. A 1/16-inch shift changes the cut. The template happens when bases are level, plumb, and screwed.
Uppers can wait. Do not install toe kicks, fillers, or crown before template. Do not caulk countertop seams before template.
Schedule the measure the day bases lock. Tell the fabricator the exact install date.
Installing Flooring After Cabinets
Cabinits on finished floor raises the countertop ⅜ to ¾ inch. The range sticks out. The dishwasher won't slide under.
The fridge depth changes. Install cabinets on subfloor. Run flooring to the toe kick.
Scribe the toe kick to the floor. This keeps the 36-inch countertop height standard. It also lets you swap floors later without touching cabinets.
Cost Reality: What DIY Saves, What Mistakes Cost, Where Pros Earn Their Money
A typical 10-by-12 kitchen with mid-grade cabinets runs $12,000 to $18,000 materials. Pro install adds $6,500 to $12,000 labor at $65 to $120 per linear foot. DIY saves the labor line.
Mistakes eat savings fast. A cracked $400 cabinet box. A stripped $300 drawer slide set.
A $2,500 quartz remake from a shifted base. Pros earn on speed, blocking, scribe fits, and liability. They carry insurance.
You carry risk.
| Cost Item | DIY Range | Pro Range |
|---|---|---|
| Cabinet materials | $12,000–$18,000 | $12,000–$18,000 |
| Tools (buy/rent) | $300–$800 | Included |
| Labor | $0 | $6,500–$12,000 |
| Mistake buffer | $500–$3,000 | Covered by pro |
| Total typical | $12,300–$21,800 | $18,500–$30,000 |
When to Call a Pro — The No-Regret Decision Checklist
Call a pro if any of these apply. Floor slope exceeds ¾ inch in 10 feet. Walls bow more than ½ inch in 8 feet.
Layout moves gas, plumbing, or dedicated circuits. Cabinets are frameless and over 42 inches upper height. You have no helper for uppers.
You lack a 6-foot level, laser, or cabinet jack. The kitchen has 25+ cabinets. The timeline is under two weeks.
You are uncomfortable driving 2½-inch screws into studs overhead. One yes means hire. The money you save on labor disappears on the first rework.
Frequently Asked Questions
How long does it take to install kitchen cabinets yourself?
A straightforward 10-by-12 kitchen takes 40 to 50 hours for a first-time DIYer spread over three to four weekends. Complex layouts with shimming and scribing push 70 to 80 hours.
Do I need a permit to install kitchen cabinets?
No permit for a straight swap in the same footprint. Permits trigger when you move gas lines, plumbing supply or drain, or add dedicated electrical circuits.
Can I install upper cabinets alone?
Not safely. A 36-inch upper weighs 90 pounds. Solo installs lead to dropped cabinets, stripped screws, and twisted boxes.
Rent a cabinet jack or build a 2×4 T-support if no helper exists.
Should cabinets go on finished floor or subfloor?
Cabinets on subfloor. Flooring runs to the toe kick. This preserves the standard 36-inch countertop height and allows future floor changes without cabinet work.
What tools are absolutely required?
Six-foot box level, laser level, cabinet jack or T-support, drill/driver with clutch, #8 by 2½-inch structural screws, #8 by 1¼-inch trim screws, plastic horseshoe shims, and a scribe tool.
How much does professional cabinet installation cost?
$65 to $120 per linear foot as of 2026. A typical 25-linear-foot kitchen runs $1,600 to $3,000 labor only. High-cost metros hit $150 to $250 per linear foot.