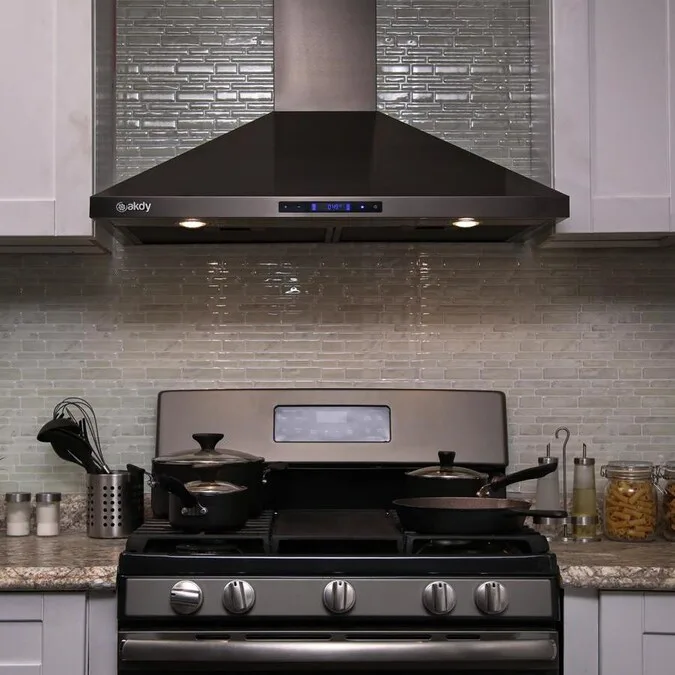
How to Change a Kitchen Backsplash in 5 Easy Steps
If you’re trying to figure out how to change a kitchen backsplash without ending up with lopsided tiles, lumpy grout, or a cheap-looking finish, you’re in the right place. A dated, grease-stained backsplash drags down an otherwise nice kitchen, and most failed DIY attempts come down to skipping small visual checkpoints. This project takes 2 to 3 days for a permanent install, no professional experience required.
Per Tile Council of North America (TCNA) standards, acceptable wall tile lippage maxes out at 1/32 inch, a tolerance most beginners miss without a level. We’ll walk you through every visual checkpoint, material choice, and safety step to get a durable result that lasts for years, whether you own or rent.

Image source: Bing (Web (fair-use with source credit))
Quick Answer
To change a kitchen backsplash, first choose a permanent or temporary install type. Remove the old backsplash and repair any wall damage. Apply thinset and tile, then grout and seal for permanent installs.
Peel-and-stick tile installs in 2 to 4 hours with no permanent wall damage. Always test for lead paint in pre-1978 homes before demo.
Why visual checkpoints make or break your backsplash install
Backsplash tile is installed vertically, so gravity and alignment are immediately visible at eye level. Unlike floor tile, small errors in lippage, thinset coverage, or grout lines stand out instantly in a kitchen. Most beginners skip checking for flat walls, even tile height, and full mortar contact behind tiles, leading to tiles falling off or water damage later.
All steps in this guide include specific visual checks aligned with TCNA installation best practices to avoid those costly mistakes. This project is a top budget-friendly kitchen upgrade for homeowners looking to boost resale value without a full renovation.
Choose your install path: permanent thinset vs renter-friendly peel-and-stick
Your first decision is whether to install a permanent thinset-backed backsplash or a temporary peel-and-stick option. Each has clear use cases, timelines, and durability differences that make one better suited for your situation than the other.
| Feature | Permanent Thinset Install | Renter-Friendly Peel-and-Stick |
|---|---|---|
| Best for | Homeowners, long-term stays | Renters, temporary refreshes |
| Install time | 2-3 days (including cure time) | 2-4 hours |
| Lifespan | 20+ years | 3-5 years |
| Wall prep required | Backer board, patching, priming | Clean, smooth, dry painted drywall |
| Water resistance | Fully waterproof with sealed grout/caulk | Water-resistant, not waterproof near sinks/stoves |
Permanent thinset installs use polymer-modified thinset mortar to adhere tile to cement backer board or primed drywall. This creates a fully waterproof surface that lasts 20+ years. This is the right choice for homeowners planning to stay in their home long-term, or anyone doing a full kitchen remodel where a durable, high-ROI finish matters.
Renter-friendly peel-and-stick tile uses a pressure-sensitive adhesive backing that sticks to smooth, clean painted drywall without permanent damage. It’s ideal for renters who can’t modify walls permanently, or anyone wanting a fast, low-cost refresh. Always get written landlord approval before installing permanent backsplash in a rental property.
Wall prep: 3 visual signs your surface is ready for tile
90% of tile failures trace back to poor wall prep, so these three visual checks are non-negotiable before you buy any tile.
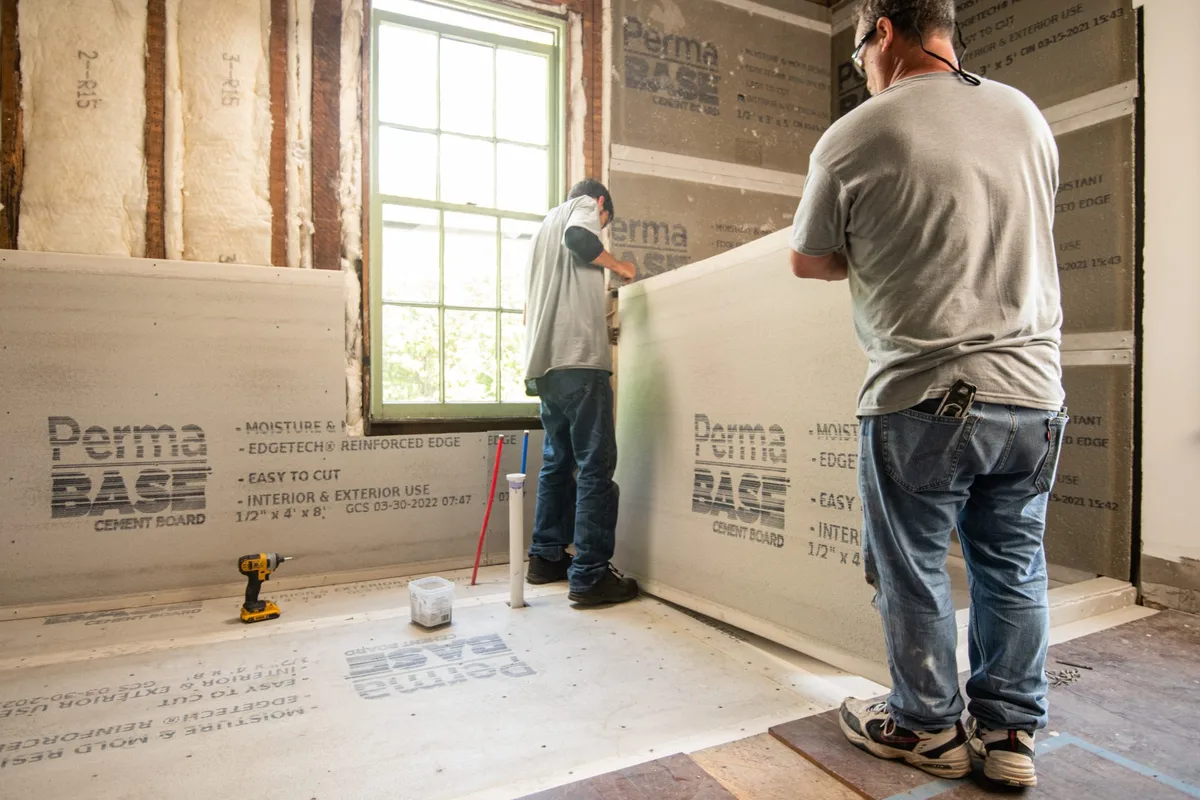
Image source: Bing (Web (fair-use with source credit))
First, the wall must be flat and smooth. No bumps, cracks, old adhesive residue, or peeling paint are acceptable. If you see uneven spots, apply a skim coat or install 1/4-inch cement backer board over damaged drywall.
Second, the surface must be completely clean and dust-free. Wipe away grease, grime, and old caulk with a degreaser, then let it dry fully. Third, unpainted drywall or backer board needs a coat of latex primer to help thinset adhere properly.
If your home was built before 1978, test for lead paint before removing the old backsplash, per EPA lead-safe renovation rules. For small galley kitchens where prep space is limited, taking extra time on wall prep avoids costly rework later, per small kitchen layout best practices.
Layout and spacing: how to get perfectly aligned grout lines every time
A dry layout (laying tiles out without adhesive) is the secret to professional-looking grout lines that align with your countertop edge and cabinet lines. First, measure the total width of your backsplash area, then divide that number by the width of your tile plus your desired grout joint width. Standard grout joints for wall tile range from 1/16 to 1/4 inch.
If the math leaves you with a sliver of tile less than 1 inch wide on one edge, shift your layout to cut both edge tiles to the same width for a balanced look. Mark your starting point with a level, usually the center of the wall behind your stove or sink. Use plastic tile spacers to keep grout joints consistent as you work.
Aligning your grout lines with your cabinet edge creates a seamless, polished finish that looks intentional, not rushed.
Thinset application: the right notched pattern and coverage to avoid slippage
Vertical tile needs non-sag thinset to prevent tiles from sliding down before the mortar cures. For standard 1/4-inch thick ceramic or porcelain tile, use a 1/4-inch square notch trowel to apply polymer-modified thinset. Spread thinset in a 2×2 foot section at a time, combing it in straight, parallel lines.
Press each tile into the mortar with a slight twisting motion to ensure full coverage behind the tile. For large format tile (12×24 inches and up), common in modern tile trends, use a 3/8-inch notch trowel for better adhesion. Wipe excess thinset off the tile face immediately with a damp sponge before it dries.
Tile placement: how to check for lippage and fix it before the thinset cures
Lippage is the term for uneven tile edges, and it’s the most common visible flaw in DIY backsplash installs. At eye level in a kitchen, even a 1/32-inch height difference between tiles is obvious to anyone walking past.
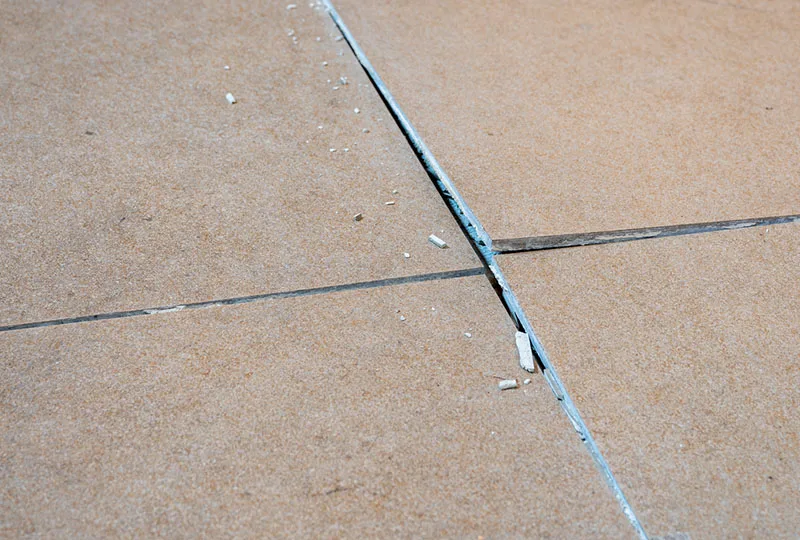
Image source: Bing (Web (fair-use with source credit))
Per Tile Council of North America (TCNA) standards, maximum acceptable lippage for wall tile is 1/32 inch, a tolerance you can’t judge by eye alone. Use a 24-inch level across multiple tile edges every 2 to 3 rows as you work. If you spot a high tile, tap it gently with a rubber mallet to push it deeper into the thinset.
If the lippage is more than 1/32 inch after 10 minutes, remove the tile, add more thinset, and reset it. Catching this early avoids a lumpy, unprofessional finish that’s impossible to fix once the mortar cures.
Cutting tile around outlets and edges: clean cut checks to avoid chipping
Clean, chip-free cuts around electrical outlets and cabinet edges separate amateur installs from professional ones.
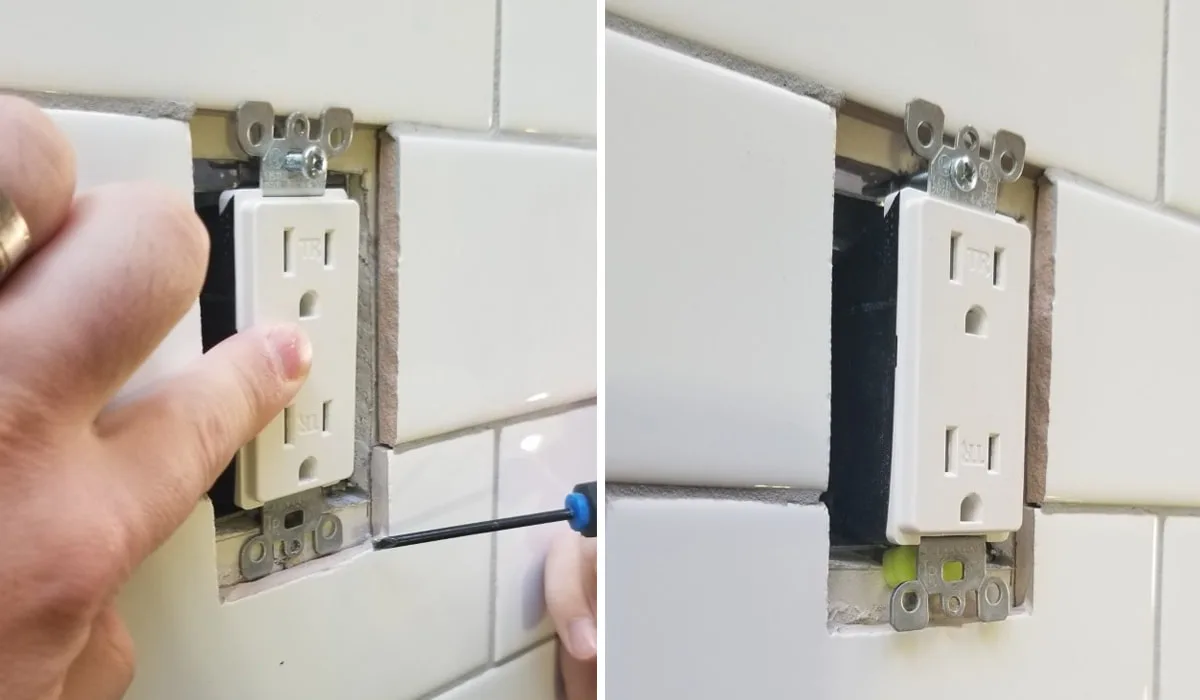
Image source: Bing (Web (fair-use with source credit))
Always turn off power to the outlet at your breaker before measuring or cutting near it to avoid shock. For straight cuts along cabinet edges, use a wet saw with a diamond blade for a smooth, straight edge. For curved cuts around outlet boxes, use a tile nipper to remove small bits gradually, then file the edge smooth.
Test the cut tile against the outlet before setting it to ensure a tight, gap-free fit. Standard outlet boxes sit 12 inches above the countertop, so measure twice to avoid wasting tile. Using a wet saw also limits silica dust exposure, per OSHA safety guidelines for tile cutting.
Grouting: the right consistency and wiping technique to stop excess haze
Grout haze, that cloudy residue left on tile after grouting, is almost always caused by wrong mixing consistency or poor wiping technique. For grout joints 1/8 inch wide or smaller, use unsanded grout to avoid excess abrasion. For joints 1/8 to 1/4 inch wide, use sanded grout for better durability against kitchen splashes.
Mix grout to a thick peanut butter consistency, not runny or crumbly. Apply it with a grout float held at a 45-degree angle, pushing grout firmly into all joints. Wait 30 minutes, then wipe excess grout from tile faces with a lightly damp sponge, rinsing the sponge after every pass.
Buff any remaining haze with a dry microfiber cloth after the grout cures fully. Cement-based grout requires 24 to 72 hours of cure time before exposure to water or grease. Epoxy grout resists stains and moisture far better than cement-based grout as of 2026, but it has a shorter working time, so it’s best for experienced DIYers.
Finishing touches: caulk and sealing visual checkpoints for long-term waterproofing
The final two steps, caulking and sealing, are what keep your backsplash waterproof and prevent mold or water damage behind the tile. Apply 100% silicone caulk, not acrylic, between the backsplash and countertop. Silicone flexes with temperature changes and stays watertight for years, while acrylic cracks and peels quickly in kitchen splash zones.
Run a continuous bead of caulk, smooth it with a wet finger, and let it cure 24 hours before exposing it to water. If you used natural stone tile or cement-based grout, apply a penetrating sealer to the entire surface after the grout cures fully. Most sealers require 24 to 72 hours of cure time before contact with water or cooking grease.
Reseal natural stone annually and cement-based grout every 1 to 2 years to maintain stain resistance. Proper caulking and sealing are non-negotiable steps in kitchen remodel planning to avoid hidden water damage that costs thousands to repair later. For renters using peel-and-stick tile, skip the grout and caulk entirely to avoid wall damage when removing the backsplash later.
7 common visual mistakes that ruin DIY backsplash installs
Most failed backsplash projects come down to skipping one small visual check, not a lack of skill. These are the most frequent errors reported in aggregate DIY feedback:
- Skipping lead paint testing on pre-1978 homes: disturbing lead paint releases toxic dust that requires professional cleanup if safety protocols aren’t followed.
- Using sanded grout in joints narrower than 1/8 inch: sand particles scratch delicate tile surfaces and leave excess haze that’s hard to remove.
- Failing to check lippage before thinset cures: uneven tile edges are obvious at eye level and can’t be fixed without removing all affected tiles.
- Using acrylic caulk instead of 100% silicone: acrylic cracks within 1 to 2 years in kitchen splash zones, letting water seep behind the backsplash and cause mold.
- Not priming unpainted drywall or backer board: thinset won’t adhere properly to unprimed surfaces, leading to tiles falling off within months.
- Cutting tiles without fully scoring the glaze: partial scoring causes chipped edges that look unprofessional and leave sharp points.
- Applying thinset too thick: thick mortar takes longer to cure and can cause tiles to slide out of alignment before it sets.
Cost and timeline breakdown for each backsplash material and install type
Backsplash costs split sharply between material type and whether you hire a pro or do it yourself. As of 2026, standard ceramic tile remains the most budget-friendly option, while natural stone and metal carry premium price tags. A typical kitchen backsplash covers 15 to 40 square feet, so total costs scale directly with that number.
| Material | DIY Cost per Sq Ft | Pro Install Cost per Sq Ft | Typical Lifespan |
|---|---|---|---|
| Ceramic/porcelain tile | $1–$10 | $10–$25 | 20+ years |
| Glass tile | $5–$20 | $15–$30 | 15–20 years |
| Natural stone (marble, slate) | $10–$50 | $20–$40 | 10–20 years (with annual sealing) |
| Peel-and-stick tile | $2–$8 | N/A (DIY only) | 3–5 years |
| Stainless steel | $10–$30 | $15–$35 | 20+ years |
Timeline differences are just as stark. Peel-and-stick installs take 2 to 4 hours with no cure time. Permanent thinset installs take 2 to 3 days total, including 24 hours of thinset cure time and 24 to 72 hours of grout cure time before normal use.
Rapid-set thinset cuts cure time to 2 to 4 hours, but it has a shorter working window, so it’s best for experienced DIYers. For low-budget kitchen refreshes, ceramic or porcelain tile offers the highest ROI per square foot, per budget kitchen renovation data.
Safety rules for pre-1978 homes and tile cutting
Two high-risk areas require strict safety protocols: lead paint disturbance in older homes, and silica dust exposure from tile cutting. If your home was built before 1978, you must test for lead paint before removing any old backsplash material. Per EPA lead-safe renovation rules, disturbing lead paint without proper containment releases toxic dust that requires professional abatement if safety steps are skipped.
Wear an N95 respirator, safety goggles, and disposable coveralls during demo. Seal off the work area with plastic sheeting to contain dust. For tile cutting, OSHA regulations require wet cutting with a diamond blade to limit respirable silica dust, which causes permanent lung damage with long-term exposure.
Always wear cut-resistant gloves when handling wet saws, and turn off power to nearby electrical outlets at the breaker before working within 12 inches of them to avoid shock.
Maintenance checks to keep your backsplash looking new for 10+ years
Proper maintenance extends your backsplash’s lifespan by years, and most steps take less than 10 minutes a month. Clean the surface weekly with mild dish soap and a soft sponge, avoiding abrasive cleaners that etch cement-based grout or scratch glass tile. For natural stone tile, use a pH-neutral cleaner only, as acidic products like vinegar will dissolve the stone’s sealant and cause permanent stains.
Reseal natural stone tile and cement-based grout on the manufacturer’s recommended schedule, typically annually for stone and every 1 to 2 years for grout. Check silicone caulk along the countertop edge every 6 months, and reapply it if you see cracks, peeling, or gaps. Aggregate DIY feedback shows that sealed backsplashes last 10 to 15 years with basic maintenance, while unsealed natural stone can stain permanently within 1 to 2 years of regular cooking use.
If a single tile cracks, you can remove the surrounding grout with a grout saw, pry the tile off, and replace it without redoing the entire backsplash.
Frequently Asked Questions
Can I change a kitchen backsplash myself?
Yes, most DIYers can install a peel-and-stick backsplash in 2 to 4 hours, or a thinset tile backsplash in 2 to 3 days with basic tools. No professional experience is required for standard materials like ceramic or subway tile, as long as you follow visual checkpoint checks for lippage and wall prep.
How much does it cost to change a kitchen backsplash?
DIY backsplash costs range from $2 to $50 per square foot depending on material, with ceramic tile at the low end and natural stone at the high end. Professional installation adds $10 to $25 per square foot, so a 30 square foot backsplash costs $60 to $1,500 for DIY, or $360 to $2,250 for pro install.
Do I need to remove old backsplash before installing new?
Yes, you must remove old tile, old adhesive, and old caulk before installing a new permanent backsplash to ensure proper thinset adhesion. For peel-and-stick installs, you can leave smooth, intact old backsplash in place if it’s clean and flat, but removing old caulk along the countertop edge is still required for a tight seal.
How long does thinset take to dry before grouting?
Polymer-modified thinset takes 24 hours to cure fully before grouting, while rapid-set formulas cure in 2 to 4 hours. Check the manufacturer’s packaging for exact cure times, as humidity and temperature can extend drying time by several hours. Do not grout before the thinset is fully set, or tiles will shift out of alignment.
Can I install a backsplash over existing tile?
Yes, you can install a new tile backsplash over smooth, intact existing tile if you first rough the old surface with sandpaper, clean it thoroughly, and apply a tile bonding primer. This works best for small accent areas, not full backsplashes, as extra thickness can stick out past cabinet edges or cause lippage with countertops.