How Hard Is Replacing a Kitchen Sink? A Realistic Guide
So you're staring at a kitchen sink that's seen better days, and you're wondering if this is a weekend project or a weekend nightmare.
The honest answer is: how hard is it to replace a kitchen sink depends on just two things, and neither is your plumbing skill. If you know what those two things are before you start, the project is very manageable. If you don't, you'll find out the hard way.
Manufacturer specifications indicate a standard drop-in sink replacement takes 1.5 to 4 hours for a first-timer, assuming no surprises. That's roughly the time commitment of a decent gym session plus lunch. It's the polyurethane full weekend and no guaranteed outcome that gets people into trouble.
Image source: Web (Bing) / storage.googleapis.com (Web image (fair-use with source credit))
Quick Answer
Replacing a kitchen sink is moderately difficult, a 5 out of 10. A like-for-like drop-in swap is genuinely straightforward for a determined DIYer. The difficulty jumps significantly for undermount or farmhouse sinks that require countertop work.
Budget 2 to 4 hours for the job. The rest depends on your tools and how stubborn your old sealant is.
The Two Big Variables That Decide Everything
Here's what most articles skip. The plumbing isn't the hard part. Disconnecting a supply line and trap takes maybe twenty minutes, and reconnecting them is just reverse order.
The real difficulty comes from two factors you can assess before touching a single tool.
Variable One: Drop-In vs. Undermount
A drop-in sink has a rim that sits on top of your counter. You lower it into the cutout, and it hangs from that edge. That's your standard builder-grade sink.
An undermount sink is invisible from the top. It's glued and clipped underneath the countertop. To remove it, you're working blind inside a dark cabinet, with one hand holding a tool and the other supporting the bowl so it doesn't crash down and shatter in the cabinet.
The difference in difficulty is huge.
Variable Two: Like-for-Like vs. Changing the Size
A Like-for-like swap is the golden scenario. Your old sink came out of a cutout, and your new sink fits into that exact same opening. You're basically replacing in place.
The moment you want a bigger sink, or you're switching from a double bowl to a single deep one, you'll need to modify the countertop. That means cutting laminate, grinding stone, or figuring out why your farmhouse sink doesn't fit in a standard base cabinet. This is where "how hard is it to replace a kitchen sink" becomes a totally different question.
Let's break down how to diagnose your situation in under two minutes.
Should You Even DIY? A Simple Self-Assessment
Before we go any further, you need to be honest with yourself. Not everyone should be swapping singular sinks with a putty knife, and that's perfectly fine.
You can confidently handle this project if you've done any of the following:
- Tightened a leaky faucet or fixed a running toilet without making a mess
- Used a wrench and understood which direction to turn it
- Read an instruction manual from start to finish
The clues that point to calling a pro will probably jump out at you:
- You see corrosion or rust around the old supply valves below
- The water shutoff valves at the wall are old or haven't been touched in 15 years
- Your sink is in a granite or quartz countertop (cast iron, genuine cast.)
- Your countertop is tile, specifically with tight grout lines you'd need to chip
If you're in the second camp, that's okay. Professional installation for a standard sink swap typically runs $150 to $300, not counting the sink itself.
Of course, the decision also depends on what kind of sink you're wrestling with. Let's compare the main types. Do you remember that table?
| Sink Type | Difficulty Rating | Key Challenge |
|---|---|---|
| Drop-in (top-mount) | 3/10 | Sealant application |
| Undermount | 7/10 | Blind mounting work below |
| Farmhouse / Apron-front | 8/10 | Cabinet modifications, extreme weight |
Sink Showdown: Which Type Are You Dealing With?
Let's identify exactly what's in your kitchen, because every difficulty starts and ends here.
Drop-in sinks are the gatekeepers of DIY. They have a visible lip. You'll see the rim of the sink looking down on the counter. If you pull the sink forward from inside the cabinet, you'll reach up and find holding clips on the inside of the rim.
These are simple, sit on top, and the sealant is easy to reach.
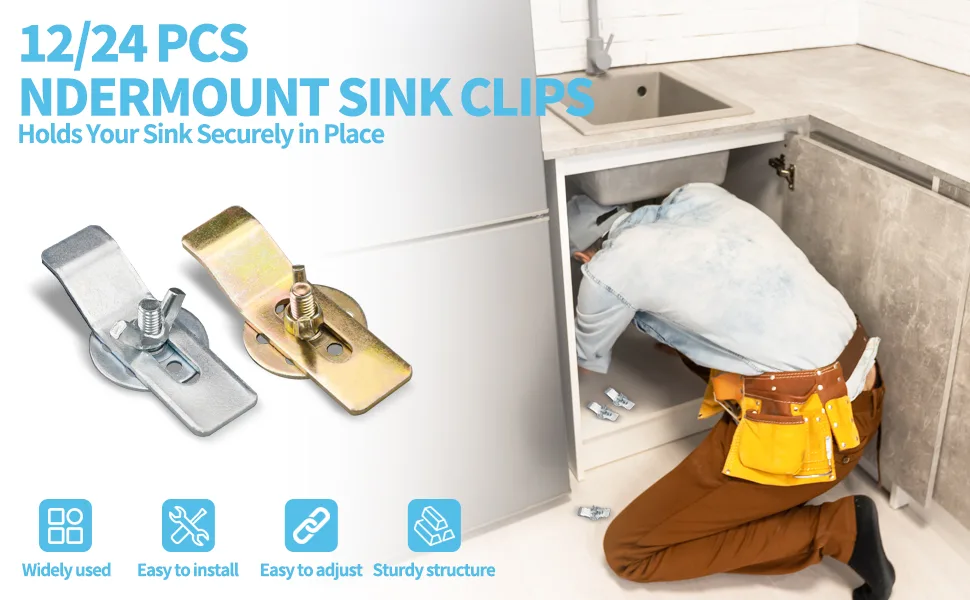
Image source: Web (Bing) / amazon.com (Web image (fair-use with source credit))
The downside is that food and moisture can collect at that rim seam over time. But for replacement, it's the best-case scenario: accessible, forgiving, and no weight-bearing counter challenge.
Undermount sinks hide their mounting hardware. They're placed from the top down, then clipped from the back. That's where the difficulty goes up.
You'll need to hold the sink, tighten clips blind, and carefully lift it over the hole without the whole thing falling.
If the clips are rusted or broken, you'll either snap them or have to spin the whole basin. It's doable, but it's comically important to have a second pair of hands behind the basin to steady it.
Farmhouse / apron-front sinks are the real project. No, a professional removal is not difficult. They are heavier than they look, usually 60 to 100 pounds.
And instead of sitting in a cutout, they clip to a pocket hole on the countertop frame.
If your old one is built into a framed cabinet, you can't just pull it out sideways like a drop-in. You must upgrade the base cabinet to support that weight. This goes beyond a sink replacement and into kitchen remodeling.
That's a whole different project.
Countertop Compatibility: The Secret Culprit
Here's what usually turns a one-hour swap into an entire weekend.
Your sink needs an opening that matches its rim or bowl size. A drop-in sink needs a counter cutout that's slightly smaller than the rim, so the lip catches. An undermount sink needs an exact opening where the bowl fits flush against the stone.
If you're keeping the countertop and just swapping the sink, your new sink must fit inside the existing hole. Measure the cutout first, then order a sink with the exact same width and depth. An inch too large means cutting countertop.
An inch too small means a visible gap that you can't easily fill.
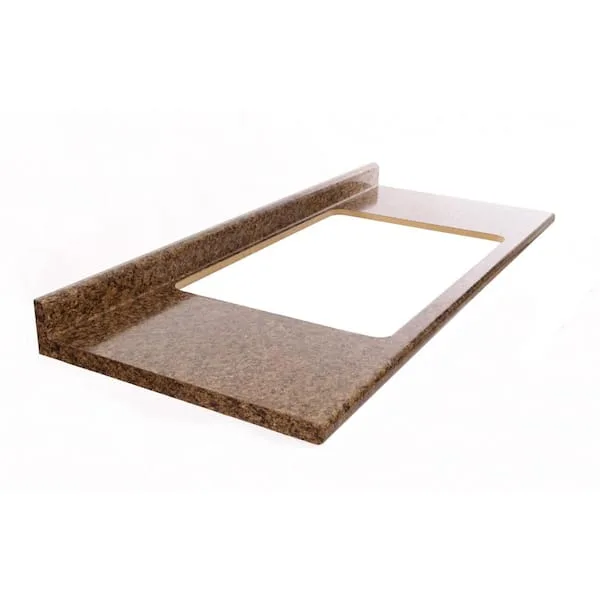
Image source: Web (Bing) / homedepot.com (Web image (fair-use with source credit))
The actual culprit is the countertop material. Cutting laminate is easy with a jigsaw. Cutting granite or quartz requires a diamond-tipped blade and, usually, a pro.
Cutting tile is a nightmare and can easily crack the surrounding pieces.
That's why the like-for-like sizing question is so critical. You have to match the cutout exactly. And if you don't, you'll be learning a new skill.
A quick reality check for your specific surfaces:
- Laminate or solid-surface: you can cut with a jigsaw carefully, but you still have to seal the inside edge afterward.
- Granite or quartz: pre-made templates, professional cutting only, and your old sink was probably installed by a pro, so removing it is almost never worth the extra work.
- Stainless steel: actually pretty straightforward once it's out, but you'll still want to scrape, clean, and inspect the two edges before investing.
Before you decide, we recommend reading up on solid countertop details for both types, especially if you're renovating your whole space. A full remodel always impacts your sink compatibility options.