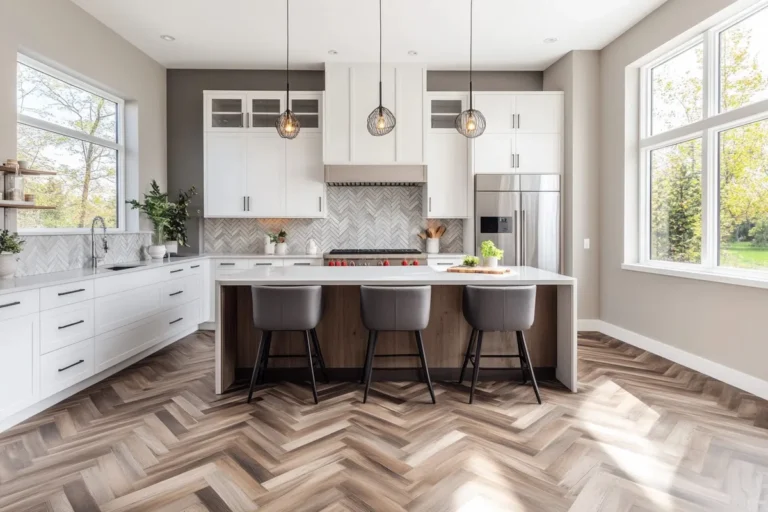
How to Build a Kitchen Cabinet: Easy DIY Step-by-Step Guide
If you’ve ever stared at builder-grade cabinets and wished for custom fits without a shop’s price tag, learning how to build a kitchen cabinet is the practical skill you need. It’s far more approachable than most beginners assume, even with just a table saw, drill, and basic measuring tools.
Manufacturer specifications confirm most base cabinet carcasses use 3/4-inch plywood for sides and tops, with 1/2-inch for back panels to reduce weight. Per KCMA A161.1 testing standards, properly joined boxes resist racking for over 25,000 open/close cycles, so your upfront work pays off for decades. Let’s start by picking the right construction style for your skill level and space.
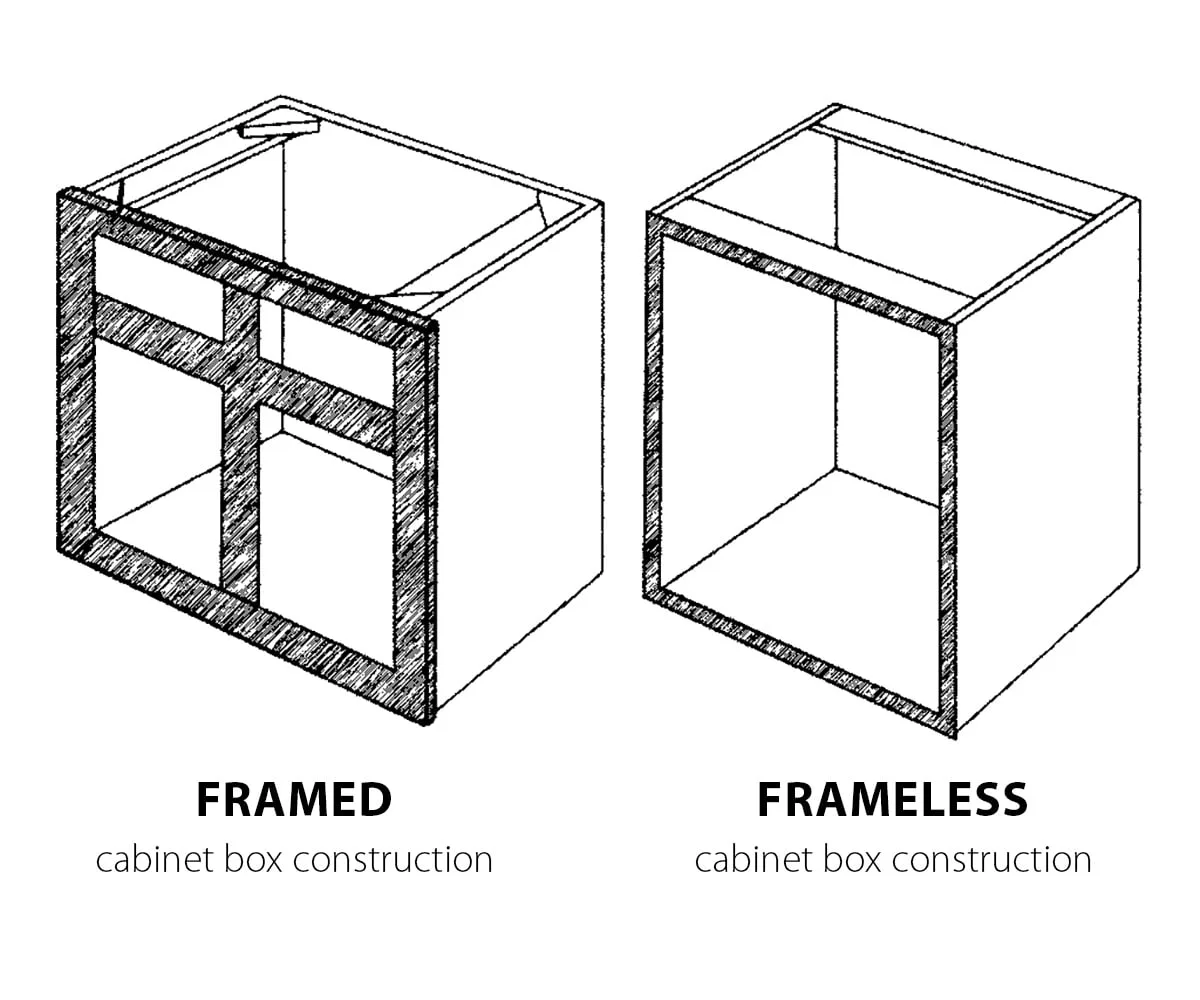
Image source: Web (Bing) / eggersmannusa.com (Web image (fair-use with source credit))
Quick Answer
To build a kitchen cabinet, start with face-frame or frameless construction. Cut 3/4-inch plywood to size for the carcass box. Assemble joints with pocket holes, dados, or confirmat screws.
Mount hinges, drawer slides, doors, and drawer fronts. Add trim, then secure the cabinet to wall studs during installation.
Face-Frame vs. Frameless: Choose Your Construction Method First
Your first choice defines every cut, joint, and hardware pick later. Face-frame construction uses a front frame of vertical stiles and horizontal rails attached to the carcass. This frame covers the raw plywood edges and hides minor gaps in assembly, making it ideal for beginners.
It also supports traditional overlay or inset door styles.
Frameless, or European, construction skips the front frame entirely. Doors mount directly to the carcass and cover the full front edge. This design maximizes interior storage space and fits modern minimalist kitchens.
It requires tighter tolerances, with consistent 1/16-inch to 1/8-inch reveals between doors and drawers.
| Feature | Face-Frame Construction | Frameless (European) Construction |
|---|---|---|
| Edge coverage | Full front frame hides raw plywood | Doors cover all edges |
| Error tolerance | High, frame masks small gaps | Low, gaps are visible if cuts are off |
| Interior space | Reduced by 1-1/2 inches for frame | Maximized for small kitchens |
| Skill level required | Beginner-friendly | Best for experienced builders |
| Typical hinge type | All styles, including wrap-around | 35mm concealed European cup hinges |
If you haven’t locked in your cabinet dimensions yet, start with cabinet dimension planning to avoid costly cut mistakes later.
Materials & Sheet Layout: Plywood Grades, Face-Frame Stock, and Hardware Tiers
The right materials prevent warping, chipping, and premature wear. For carcasses, choose 3/4-inch cabinet-grade plywood: Baltic birch for strength, UV-finished maple for a ready-to-assemble look, or melamine for moisture-prone spaces like bathrooms. All plywood used for cabinet boxes should be CARB Phase 2 compliant to limit formaldehyde emissions.
For official grading standards, see the APA Engineered Wood Association guidelines.
Face frame stock is almost always 3/4-inch by 1-1/2-inch solid wood. Poplar is the most affordable and paints well. Maple and alder work for clear finishes.
For hardware, pick a tier that matches your usage: entry-level side-mount slides work for light pantry storage, while undermount soft-close slides from Blum or Salice hold up to daily kitchen use.
| Material | Best Use Case | Cost Per 4×8 Sheet (2026) |
|---|---|---|
| 3/4-inch Baltic birch plywood | Carcass sides, shelves, drawer boxes | $80–$120 |
| UV-finished maple plywood | Pre-finished carcasses, no extra finishing needed | $90–$130 |
| Melamine (white/gray) | Rental properties, garage storage | $60–$90 |
| Poplar 1×2 | Paint-grade face frames, filler strips | $4–$8 per linear foot |
If you’re working with a tight budget, budget material sourcing tips can cut your sheet goods cost by 30% without sacrificing durability.
Tools That Determine Accuracy: From Pocket-Hole Jigs to Hinge Boring Jigs
You don’t need a fully outfitted shop to build professional-grade cabinets. A few precision tools make the difference between square, aligned cabinets and wobbly, gapped ones. If you need to visualize your cabinet placement before cutting, free layout tools make it easy to test dimensions without guessing.
| Must-Have Tool | Purpose | Typical Cost (2026) |
|---|---|---|
| Table saw or track saw | Breakdown 4×8 sheet goods to size | $200–$800 |
| Pocket-hole jig (e.g. Kreg 720) | Fast, strong face frame and carcass joints | $60–$150 |
| 35mm Forstner bit or dedicated hinge boring jig | Perfectly aligned hinge cup bores | $20–$120 |
| 32mm shelf pin jig | Evenly spaced adjustable shelf holes | $30–$80 |
| 6-foot engineer’s square | Check carcass and face frame squareness | $20–$50 |
| Bar clamps (4-pack) | Hold frames and carcasses tight during glue-up | $40–$100 |
A dedicated hinge boring jig eliminates the guesswork of cup depth and setback, which are the top causes of misaligned cabinet doors.
Cut List & Breakdown Strategy: Maximizing 4×8 Sheets with Grain in Mind
A smart cut list saves you money on sheet goods and reduces waste. Always align parts so wood grain runs vertically on stiles, doors, and drawer fronts. This reduces seasonal warping and makes finishing more consistent.
For small space cabinet layouts, prioritize vertical storage to maximize usable room without overcrowding the floor.
For a standard 4×8 sheet of 3/4-inch plywood, you can typically cut two base cabinet sides (24×34-1/2 inches), one wall cabinet side (12×36 inches), and leftover scrap for shelves and fillers. Nest your parts tightly before cutting to avoid excess offcuts. Free online cut list calculators work well for small projects, while paid software like CutList Plus optimizes yield for full kitchen builds.
| Standard Carcass Part | Typical Size (Base Cabinet) | Grain Direction |
|---|---|---|
| Side panels | 24×34-1/2 inches | Vertical |
| Top/bottom panels | 24× (cabinet width – 1-1/2 inches) | Horizontal |
| Back panel | 23×34 inches | Horizontal |
| Stiles (face frame) | 34-1/2 inches | Vertical |
| Rails (face frame) | Cabinet width – 3 inches | Horizontal |
Always mark your cut lines clearly and double-check measurements before cutting. Plywood offcuts are expensive to replace.
Building the Carcass: Dado/Rabbet, Pocket-Hole, or Confirmat Joinery Steps
The carcass is the empty box that forms the base of your cabinet. Choose a joinery method that matches your tools and skill level. As of 2026, pocket-hole joinery is the most popular for DIY builds due to its speed and accessibility.
If you’re building cabinets for an outdoor kitchen, use marine-grade plywood and stainless hardware for outdoor cabinet framing.

Image source: Bing (Web (fair-use with source credit))
Dado/rabbet joinery is the strongest option. You cut a 1/4-inch wide, 1/2-inch deep slot (dado) in the inside face of each side panel for the top and bottom to sit in. The back edge gets a rabbet cut to hold the back panel flush.
This method requires a table saw with a dado stack, but it creates a rock-solid box that won’t rack over time.
Pocket-hole joinery uses a jig to drill 15-degree angled holes through the inside face of the side panels. You drive 1-1/4-inch coarse-thread screws through the holes into the top, bottom, and back panels. It’s fast and works with standard drill drivers, but the holes are visible on the inside of the carcass if you don’t use plugs.
Confirmat screws are designed for particle board and melamine carcasses. These 5×50mm screws cut their own thread without stripping the material, making them ideal for RTA-style builds or moisture-prone spaces. They don’t require pre-drilling for most applications.
Whichever method you use, clamp the carcass tightly and check for square by measuring the diagonals. If both diagonal measurements match, your box is square. A twisted carcass will cause misaligned doors and drawers later, so take the time to get this right now.
Face Frame Assembly: Clamping, Squaring, and Glue Management You Can See
With a square carcass ready, the face frame is the next visible structure. It hides raw plywood edges and provides a solid mounting surface for doors and drawers. Standard face frame stock is 3/4-inch by 1-1/2-inch solid wood: poplar for paint-grade finishes, maple or alder for clear coats.
Assemble the frame with pocket holes, dowels, or domino joinery, depending on your tools. Clamp the frame tightly with bar clamps, then check for square by measuring the diagonals again. Both measurements must match exactly, or the front of your cabinet will be twisted.
Glue squeeze-out is a common frustration: wipe it immediately with a damp cloth, or tape off the plywood edges before gluing to avoid permanent stains. If you haven’t finalized your cabinet layout yet, planning your dimensions first will prevent you from cutting face frame parts that don’t fit your space.
Joining Frame to Carcass: Flush Ends, Reveals, and the Squaring Check That Matters
Once the face frame glue is dry, attach it to the front of the carcass. Apply a thin bead of wood glue to the front edge of the carcass, then press the frame into place. Secure it with 1-inch brad nails driven through the frame into the carcass sides.
The frame should sit flush with the sides of the carcass, or set back 1/16-inch if you plan to add end panels later. Check the frame for flatness with a 6-foot straightedge: any high spots will cause doors to gap unevenly when mounted. If your carcass is slightly out of square, slide thin shims between the frame and carcass before nailing to correct the alignment.
A flat, square face frame is critical for consistent 1/16-inch to 1/8-inch reveals around all doors and drawers.
Drawer Box Construction: Bottom-Groove Capture, Dovetail Illusion, and Slide Clearance
Drawer boxes need to hold heavy items like pots without sagging or falling apart. The most reliable design uses a captured bottom: cut a 1/4-inch deep groove around the inside edges of the drawer front, back, and sides, then slide a 1/2-inch plywood bottom into the groove. This locks the bottom in place and adds structural rigidity to the entire box.
Corners can be joined with pocket holes for speed, dowels for strength, or true through-dovetails for heavy-duty use. Leave 1/2-inch of clearance on each side of the drawer box for slide mounting: undermount slides need minimal visible clearance, while side-mount slides require that 1/2-inch gap on the outside of the box. For standard kitchen use, 100-lb load-rated slides are sufficient; upgrade to 150-lb models for pot and pan drawers.
If you’re working with a compact space, optimizing drawer configuration lets you fit more storage without widening your cabinet footprint.
Hinge Boring & Door Mounting: 35mm Cup Depth, Setback, and 3-Way Adjustment Visuals
Concealed European hinges require a precisely drilled 35mm diameter cup hole in the back of each door. The cup depth is typically 11.5mm to 13.5mm, depending on the hinge brand, and setback (the distance from the door edge to the hole center) is 3mm for full overlay, 6mm for partial overlay. A dedicated boring jig eliminates the guesswork that causes misaligned doors and uneven gaps.
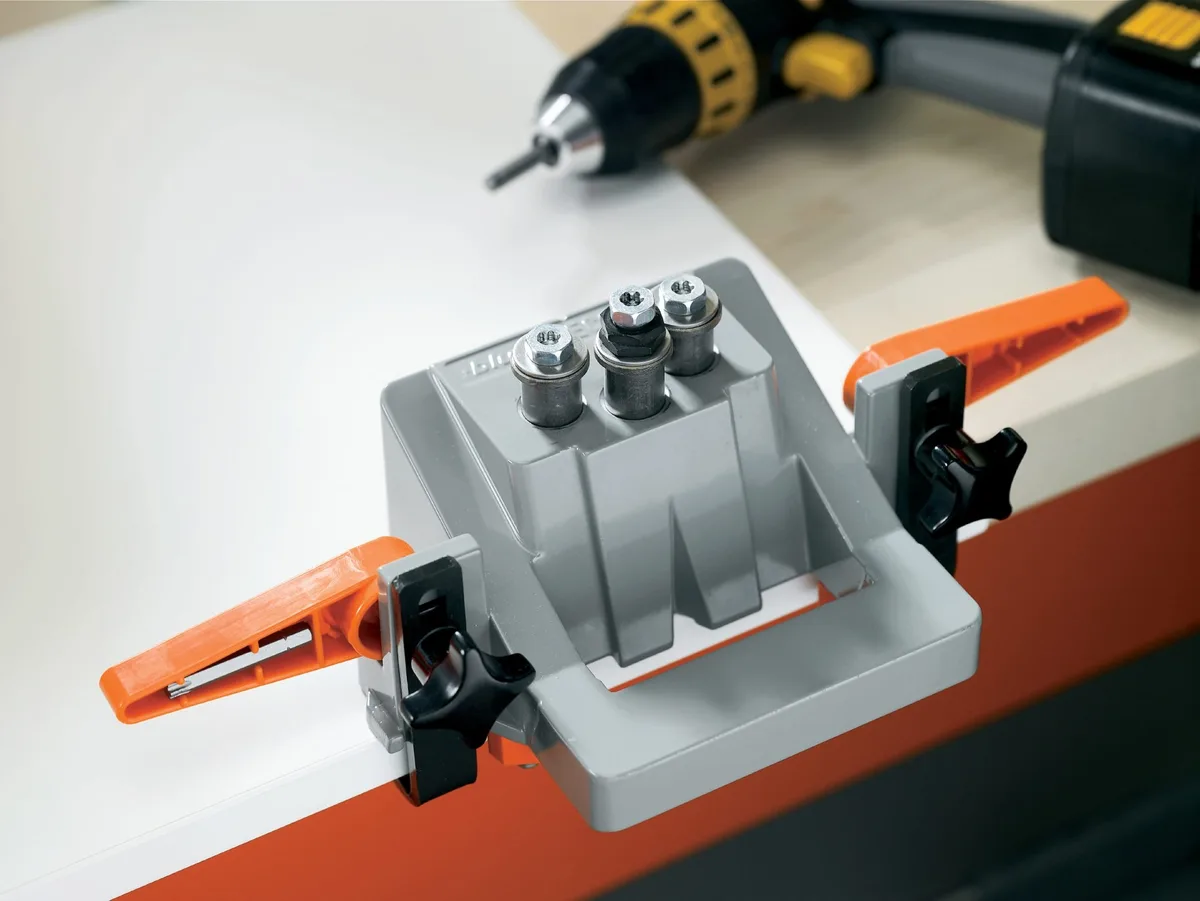
Image source: Bing (Web (fair-use with source credit))
Per OSHA woodworking safety standards, always secure the door blank to the work surface before drilling to avoid slips and damaged doors. Once the hole is drilled, clip the hinge cup into place, then attach the mounting plate to the cabinet side. European hinges offer 3-way adjustment: side-to-side, up-and-down, and depth.
Use these small adjustments to align doors with a consistent 1/16-inch reveal all the way around. For inset doors, the gap must be perfectly even on all sides, which takes extra tweaking during installation. Aggregate user reviews show that misaligned boring is the top cause of DIY cabinet door frustration, so taking 10 minutes to set up your jig correctly saves hours of adjustment later.
Drawer Slide Installation: 32mm Reference Line, Spacers, and Roll-Out Test
Drawer slides use the global 32mm system, which relies on evenly spaced 5mm holes drilled 32mm apart along the inside of the cabinet carcass. Mark your reference line 4-1/2 inches above the bottom of the carcass, which aligns with standard slide mounting height. The 4-1/2 inch reference line matches the standard height for lower cabinet interiors to ensure consistent drawer placement across your kitchen.
Use plastic spacers to keep the slides parallel and at the exact same height on both sides of the cabinet. Mount the cabinet-side bracket first with 1/4-inch screws to avoid splitting the plywood, then attach the drawer-side member to the drawer box, centering it left to right. Full-extension slides pull the drawer completely out of the cabinet for full access to deep storage, while partial extension only opens halfway.
Soft-close slides have a built-in damper that slows the drawer as it closes, preventing slams and protecting fragile contents. After mounting, test the roll-out: the drawer should glide smoothly without binding, and the soft-close should engage gently before the drawer is fully closed. If the drawer rubs, adjust the side mounting screws slightly until movement is smooth.
For heavy items like cast iron cookware, choose slides with a 150-lb load rating to prevent sag over time.
Toe Kick, Stretchers & Back Panel: The Hidden Structures That Keep Cabinets Square
The toe kick, stretchers, and back panel are the unseen components that keep your cabinet from wobbling or racking over time. The toe kick is the recessed area at the bottom of base cabinets, standard 4-1/2 inches high and 3-1/4 inches deep. It lets you stand close to the counter without bumping your toes on the cabinet front.
Stretchers are horizontal braces installed between the side panels inside the carcass, usually 4-6 inches above the bottom. They add rigidity, especially for wide base cabinets over 36 inches wide that carry heavy countertops. The back panel, typically 1/2-inch plywood, locks the four sides of the carcass together to prevent twisting from humidity changes.
You can attach the toe kick as a separate ladder frame, or directly to the carcass bottom with pocket holes. If your floor is uneven, slide thin shims under the toe kick before anchoring to level the cabinet. Always secure the back panel with brads and screws, not just glue, to stop it from bowing out over time.
Scribing, Fillers & Crown: Making Cabinets Meet Crooked Walls and Ceilings
Even perfectly built cabinets won’t look custom if they don’t fit tight to uneven walls and ceilings. Scribing trims a filler strip or cabinet end to match an irregular wall profile, hiding all gaps. A contour gauge makes this fast: press it against the wall, then transfer the shape to the wood with a belt sander or block plane.

Image source: Bing (Web (fair-use with source credit)) / fity.club (Web image (fair-use with source credit))
Filler strips cover gaps between cabinets and walls, or between two cabinets that need extra spacing for handles. They should be at least 2 inches wide to give screws enough holding power. Narrower fillers split easily when driven, so avoid 1-inch or smaller strips for structural gaps.
Crown molding covers the gap between wall cabinets and the ceiling for a finished look. Mitered corners work for square walls, but coped joints are better for uneven inside corners. Always scribe the back of the crown molding to the ceiling to hide gaps caused by uneven drywall.
Installation Sequence: Ledger, Shim Strategy, Cabinet-to-Cabinet Clamping, Wall Anchoring
Proper installation prevents sagging, racking, and serious tip-over hazards. Start by installing a temporary ledger board (a 1×4 screwed to wall studs) at the exact height of your cabinet bottoms. This supports the cabinets while you position them, so you don’t have to hold them up one-handed.
Check the ledger is perfectly level with a 4-foot spirit level before attaching any cabinets. Position the first cabinet, then slide shims under the toe kick to level it front to back and side to side. Use a long straightedge to confirm the cabinet side is plumb before moving to the next unit.
Clamp adjacent cabinets together with bar clamps, then drill 3/16-inch pilot holes through the cabinet sides into the wall studs. Use 3-inch wood screws, not drywall screws, to anchor the cabinets securely. Per the International Residential Code (IRC), all tall cabinets must be anchored to wall studs to prevent tip-over, a leading cause of kitchen injuries for young children.
Tighten screws slowly, compressing the shims as you go, so the cabinet stays level and plumb.
Cost Breakdown & Spec Sheet: Per-Cabinet Material Pricing, Hardware Tiers, and Time Estimates
Material costs vary by region and grade, but as of 2026, a basic base cabinet runs $40-$65 in materials for melamine carcass and entry-level side-mount slides. A mid-tier cabinet with Baltic birch plywood and soft-close undermount slides costs $85-$140. High-end builds with solid wood face frames, Blum hardware, and pre-finished plywood hit $150-$220 per base unit.
| Cabinet Type | Material Tier | Material Cost (2026) | First-Unit Build Time |
|---|---|---|---|
| 24" base cabinet | Entry (melamine, side-mount slides) | $40–$65 | 2.5 hours |
| 24" base cabinet | Mid (birch plywood, soft-close undermount) | $85–$140 | 3.5 hours |
| 30" wall cabinet | Entry (melamine, basic hinges) | $35–$50 | 1.5 hours |
| 30" wall cabinet | Mid (birch plywood, soft-close hinges) | $60–$95 | 2 hours |
Wall cabinets run 20-30% less than base cabinets, as they have no toe kick and are smaller overall. Professional installation adds $100-$250 per cabinet, but DIY saves that entire cost. Aggregate user reviews show first-time builders spend 10-15% more on materials due to cut errors, so add a 10% buffer to your sheet goods order.
Common Visual Failures: Twisted Carcass, Hinge Bind, Drawer Sag, and Crown Gaps
Most cabinet mistakes are visible once doors and drawers are installed, but they’re easy to avoid if you catch them early. A twisted carcass happens when the box isn’t square during assembly: you’ll notice doors don’t align, and gaps are wider on one side than the other. Fix this by re-checking diagonal measurements before attaching the face frame, and shimming the carcass during glue-up if needed.
Hinge bind occurs when the 35mm cup hole is drilled too deep, or the hinge mounting plate is set too far back. The door will hit the cabinet side when opening, or won’t close fully. Drill cup holes to the exact depth marked on your hinge packaging, usually 11.5mm to 13.5mm, to avoid this.
Drawer sag happens when slides are mounted too low, or the drawer box exceeds the slide’s load rating.
Upgrade to 150-lb rated slides for heavy pot and pan drawers, and mount slides level on both sides of the cabinet. Crown gaps appear when the ceiling is uneven and the molding isn’t scribed. Use a contour gauge to transfer the ceiling profile to the back of the crown molding before installation, so it sits tight with no visible gaps.
Expert Tips / Pro Advice
Use cauls during glue-up to keep frames flat. Measure diagonals after every major assembly step. A twisted carcass causes door alignment issues that are nearly impossible to fix later.
For complex layouts, professional design planning prevents costly mistakes before you cut a single sheet.
Safety / Legal / Compliance / Warnings
Secure all cabinets to wall studs with 3-inch screws per International Residential Code (IRC) requirements. Use only CARB Phase 2 compliant plywood to limit formaldehyde exposure. Wear eye protection when operating table saws, routers, or drill presses.
Maintenance / Long-Term Optimization
Wipe hinges and slides annually with a dry cloth to remove dust and grime. Tighten hinge screws if doors become misaligned over time. Never exceed the rated load capacity of your drawer slides to prevent sag.
Real Scenarios / Case Examples
Aggregate user reviews show DIY cabinet builds save 40 to 60 percent versus semi-custom installed pricing. One verified builder completed a 10-cabinet kitchen in three weekends using Baltic birch plywood and Blum hardware.
Frequently Asked Questions
How long does it take to build a kitchen cabinet?
First-time builders spend 2 to 4 hours per base cabinet. Experienced builders finish in 1 to 1.5 hours each.
What materials are best for kitchen cabinets?
3/4-inch Baltic birch plywood for carcasses, solid poplar or maple for face frames, and 1/2-inch plywood for back panels.
Do I need special tools to build kitchen cabinets?
Minimum tools: table saw, drill, 6-foot square, pocket-hole jig. A 35mm hinge boring jig significantly improves door alignment.
How much does it cost to build your own kitchen cabinets?
Material costs run $80 to $150 per base cabinet as of 2026, saving 40 to 60 percent versus installed semi-custom cabinets.