How to Install Kitchen Floor Tile: Complete DIY Guide
Most kitchen floors fail because the prep work stays invisible. Learning how to install kitchen floor tile means mastering the layers nobody sees after grout hits the joints. A pretty pattern hides hollow spots, lippage, and movement cracks that show up six months later.
The difference between a 20-year floor and a two-year headache lives in the mortar ridges and the expansion gap you caulk today.
Per TCNA standards, a residential tile assembly needs 80 percent mortar coverage in dry areas and 95 percent in wet zones. Subfloor deflection must not exceed L/360 for ceramic or porcelain. Miss those numbers and the tile will telegraph every joist flex.
Let's walk through the visual checkpoints that separate pro results from weekend regrets.
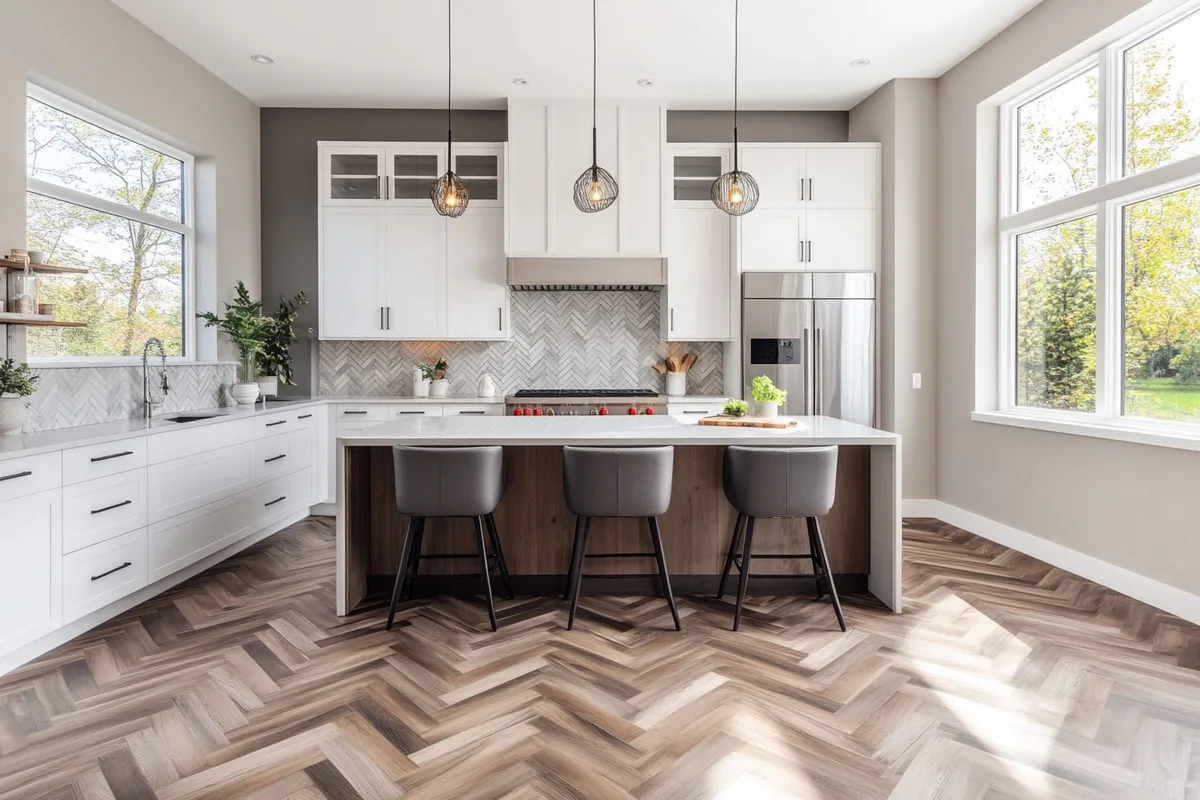
Image source: Bing (Web (fair-use with source credit))
Quick Answer
Install kitchen floor tile by preparing a flat subfloor. Add cement backer or uncoupling membrane. Spread modified thinset with the correct notched trowel.
Set tiles with a wiggle motion. Use leveling clips for large format. Grout after 24 hours.
Seal cement grout at 72 hours. Caulk all perimeter joints with 100 percent silicone.
Why Kitchen Tile Fails: The Visual Red Flags You Can't Ignore
Lippage catches your toe before your eye. That raised edge means the substrate varied more than 1/8 inch in six feet. No leveling system can fix a hump that big.
You see it most at cabinet islands where the subfloor crowned during framing.
Hollow tiles sound dead when tapped. The mortar skinned over before the tile seated. That happens when you spread too far ahead or work in direct sun.
A pulled tile shows less than 50 percent coverage. The fix is smaller batches and a finger test every 15 minutes.
Grout cracks at the wall line signal a missing movement joint. Grout is rigid. The perimeter needs 100 percent silicone caulk.
Without it the floor expands and the grout becomes the relief valve. You will see hairline fractures within the first heating season.
Stained grout lines near the dishwasher mean epoxy was skipped. Cement grout absorbs oil and acid. Epoxy grout resists both.
The upcharge pays for itself in one regrout avoided. As of 2026 epoxy formulations clean with water and a sponge.
The 5-Layer Assembly: What a Durable Tile Floor Actually Looks Like
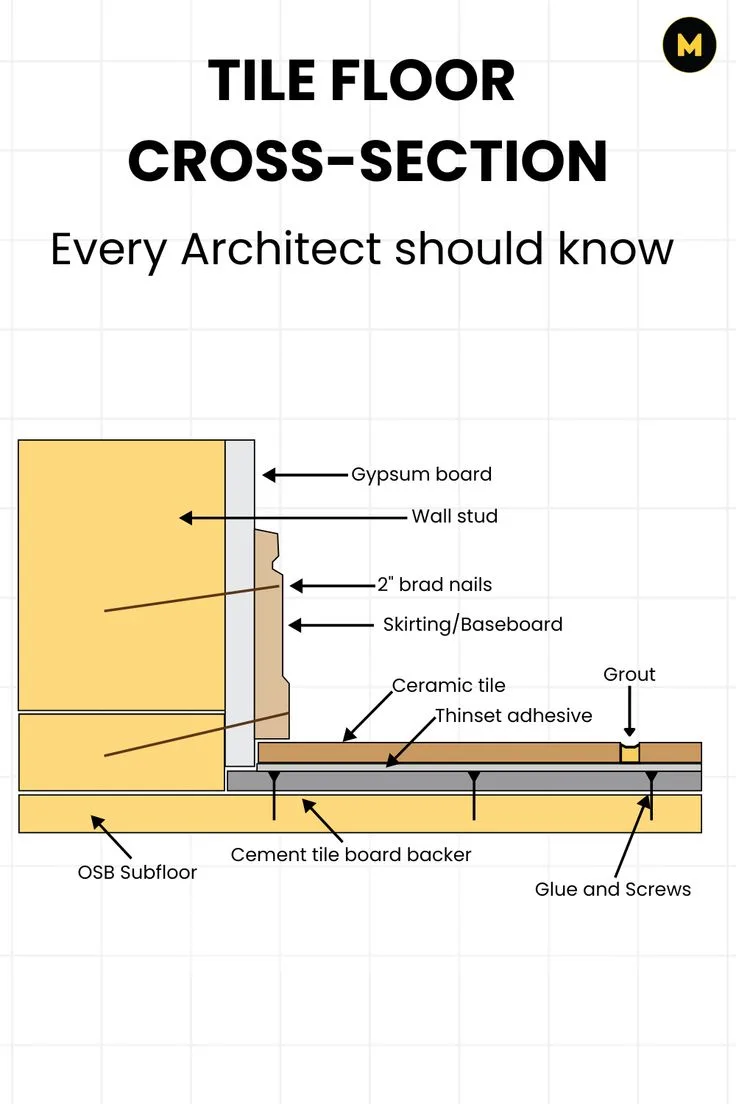
The stack starts with 3/4-inch tongue-and-groove subfloor. Joists at 16 inches on center meet L/360. Sister or block if they don't.
Next comes a layer of modified thinset combed with a 1/4-by-1/4-inch square notch. This bed fills voids and bonds the next layer.
Cement backer board goes down next. Half-inch for floors. Screws every eight inches in the field and six inches on edges.
Alkali-resistant mesh tape covers seams. Thinset feathers over the tape. Total buildup so far is roughly 3/4 inch.
Uncoupling membrane replaces backer in many modern installs. Schluter Ditra adds 1/8 inch. The fleece side embeds in unmodified thinset.
The square cavities let the tile move independently of the subfloor. Vapor equalization prevents trapped moisture. This system saves 3/8 inch of height.
The second mortar layer uses a larger notch. Half-by-half square for standard tile. Three-quarter-by-five-eighth U-notch for large format.
This is where coverage lives. The ridges must collapse fully under tile weight.
The tile itself forms the wear surface. Porcelain at PEI IV or V handles kitchen traffic. Rectified edges allow 1/16-inch joints.
Pressed edges need 3/16-inch. The finished floor sits 1 to 1-1/4 inches above the raw subfloor. Plan transitions accordingly.
Before You Mix a Bag: Subfloor Audit, Layout Lines & Dry-Fit Logic
Walk the room with a 10-foot straightedge. Mark every dip over 1/8 inch. Fill low spots with patch or self-leveler.
Screw down squeaks. Check moisture with a pin meter. Plywood must read 12 percent or less.
High moisture kills mortar bond.
Find the visual center of the room. Not the mathematical center. The center of the main sightline from the entry.
Snap a chalk line through that point parallel to the longest wall. Snap a perpendicular line using the 3-4-5 method. Verify 90 degrees with a framing square.
Dry lay tile along both lines. Use spacers. Step back.
Look at the cuts at cabinets and walls. Avoid slivers under 2 inches wide. Shift the grid until cuts balance.
A 3-inch cut beats a 1/2-inch sliver every time. Mark the final layout lines on the membrane or backer.
Account for the island. Tile under it or stop at the toe kick? Tile under lets you change appliances later.
Tile up to the cabinet saves material but traps you. Most pros tile under. The height buildup must clear the dishwasher legs.
Check the spec sheet before you commit.
Plan the sequence. Start at the intersection. Work toward the exit door.
Never tile yourself into a corner. Mix only what you can set in 20 minutes. Have cuts ready before the mortar hits the floor.
A wet saw station outside saves cleanup time.
Choosing Your System: Cement Backer vs. Uncoupling Membrane (Visual Comparison)
| Factor | Cement Backer Board | Uncoupling Membrane |
|---|---|---|
| Height added | 1/4 to 1/2 inch | 1/8 inch |
| Material cost | $0.70 to $1.30 per sq ft | $1.30 to $2.50 per sq ft |
| Crack isolation | None | Full |
| Vapor management | No | Yes |
| Install speed | Slower (screws, tape) | Faster (roll, embed) |
| Deflection help | Adds stiffness | Decouples movement |
| Best for | Budget, first floor, stiff subfloor | Remodels, second floor, radiant heat |
Backer board adds mass. That helps on bouncy joists. But it does not stop cracks from telegraphing up.
If the subfloor moves the tile moves with it. Membrane breaks that path. The cavities absorb shear.
The tile floats.
Membrane wins on height. A 1/4-inch backer plus mortar pushes transitions to 1 inch. Membrane keeps you under 3/4 inch total.
That matters at doorways and appliance gaps. You avoid custom transitions.
Cost flips on large jobs. Membrane material costs more but labor drops. No screws.
No taping. No feathering seams. A two-person crew rolls 200 square feet in an hour.
Backer takes half a day.
Radiant heat demands membrane. Ditra-Heat or Strata Mat Heat integrate the cable. Backer requires a separate sleepers system.
The membrane spreads heat evenly. No cold spots over cables.
Second floors need membrane. Joist deflection is higher. The decoupling saves cracked grout lines.
Many condo boards require it for sound ratings. Ditra-Heat-Duo hits 50 IIC. Backer alone rarely passes.
Mortar Mechanics: Trowel Selection, Ridge Geometry & The Coverage Test
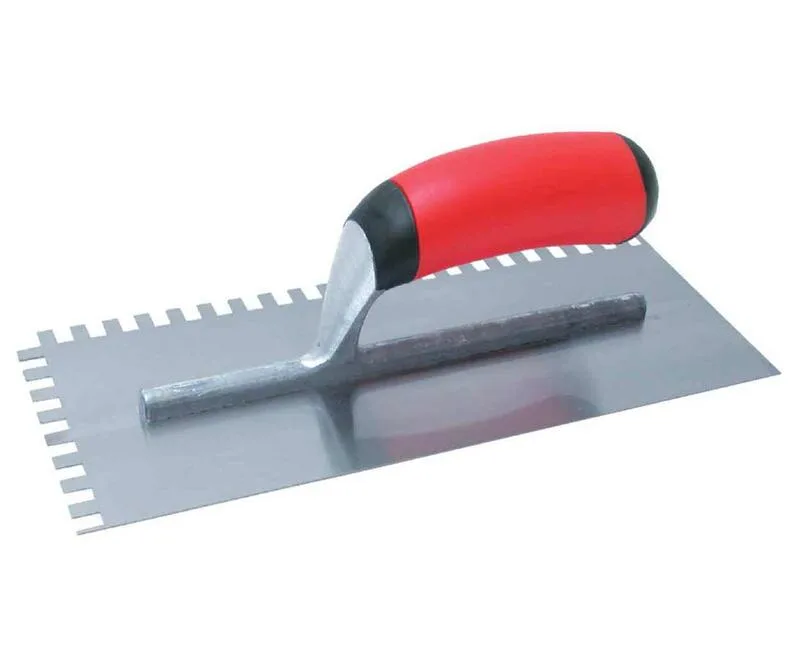
The notch size controls mortar volume. A 1/4-by-1/4-inch square notch leaves ridges 1/4 inch high. That works for tile up to 8 inches.
A 1/2-by-1/2-inch square notch serves 12-to-16-inch tile. Large format over 15 inches needs a 3/4-by-5/8-inch U-notch. The U-shape collapses easier than a square.
Hold the trowel at 45 degrees. Pull straight lines. All ridges must run the same direction.
Comb perpendicular to the tile length. This lets air escape when you set the piece. Cross-hatching traps air pockets.
You get hollow spots every time.
Mix thinset to peanut butter consistency. Cool water first. Add powder.
Mix with a 1/2-inch drill and paddle. Slake 10 minutes. Remix.
No extra water after slake. The polymers activate during that rest. Skip it and the bond drops 30 percent.
Test coverage on the first tile. Set it. Wiggle.
Beat with a rubber mallet and beating block. Pull it up. Look at the back.
You want 95 percent wet mortar contact. No bare corners. No straight ridge lines.
If you see stripes the trowel is wrong or the angle slipped.
Skin-over kills coverage. Press your fingertip into a ridge. No transfer means it's dead.
Scrape it off and re-comb. In 80-degree weather with low humidity you have 15 minutes. Cool damp days stretch to 30.
Check every batch. One bad section ruins the floor.
Back-butter large format tile. Flat side of the trowel. Skim a thin coat on the tile back.
This fills the cupping inherent in pressed tile. It also guarantees 100 percent contact at the corners. The extra minute per tile prevents callbacks.
Setting Tile: The Wiggle-Set-Beat Rhythm & Leveling Clip Placement
Start at the layout intersection. Place the first tile into fresh mortar. Press down with a slight twist.
Wiggle it back and forth about 1/4 inch perpendicular to the trowel ridges. This collapses the ridges and drives out air. You feel the suction break when contact is full.
Beat the tile with a rubber mallet and a beating block. A 2×4 wrapped in carpet works. Tap evenly across the surface.
Check level with a 2-foot level across multiple tiles. Adjust before the mortar skins. You have maybe five minutes per tile once placed.
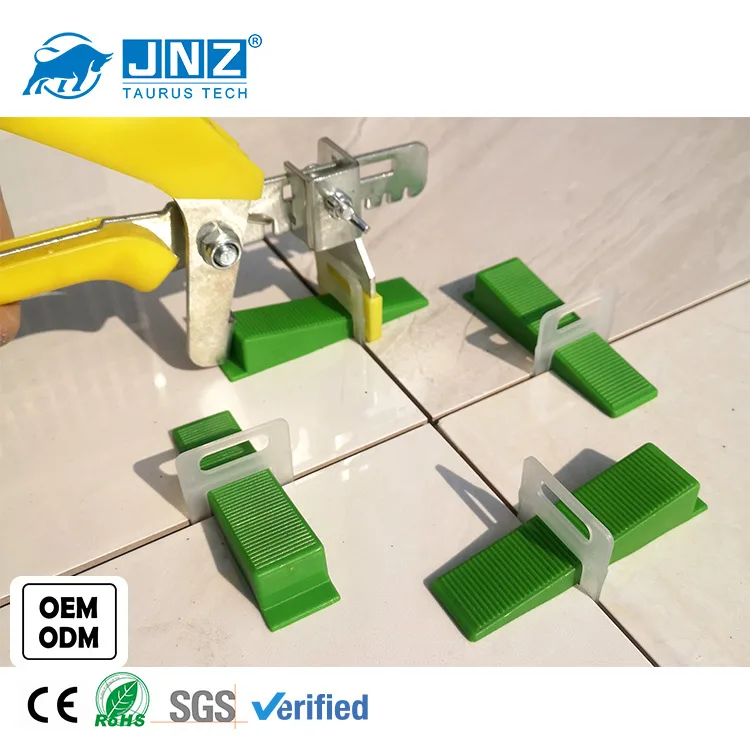
Clip placement follows the tile size. For 12×24 inch tile put clips at 12-inch centers along the long side. For 24×24 use 18-inch centers.
Insert the clip base into the joint before the next tile seats. The wedge goes in after both tiles are beat flat. Tighten until the faces flush.
Pull clips after the mortar sets but before it cures hard. Usually 2 to 4 hours. Kick the wedge sideways with your foot or a clip gun.
The base stays in the joint. The wedge releases. Do not leave clips overnight.
They bond permanently and ruin the grout line.
Work in quadrants. Finish one 4×4 foot section before moving on. This keeps your lines straight and your mortar fresh.
Step back every few rows. Check alignment against the chalk lines. Drift happens fast when you focus on one tile at a time.
Cutting Around Cabinets, Islands & Vents: Template First, Saw Second
Cardboard templates save tile. Cut a piece of cardboard to the exact field tile size. Scribe the cut line against the cabinet toe kick or island base.
Use a compass or a sharp pencil held flat. Transfer the template to the tile face. Mark with a china marker.
Cut to the line.
Wet saw cuts clean on porcelain. Use a continuous rim diamond blade. Feed slowly.
Let the blade do the work. Forcing chips the glaze. Support the offcut so it doesn't bind and snap.
A roller stand on the outfeed side prevents breakage on long rips.
L-cuts for floor vents need two passes. Cut the short leg first. Then the long leg.
Meet at the corner without overcutting. Overcuts show in the grout line. An angle grinder with a diamond blade cleans the corner.
Wear a respirator. Dry cutting makes silica dust.
Toe kicks under cabinets are the tightest cuts. Remove the toe kick if possible. Cut the tile to fit under the cabinet box.
Reinstall the toe kick over the tile edge. This hides imperfect cuts. If the toe kick won't come off use a flush-cut oscillating tool.
Go slow.
Island legs need a paper template. Wrap paper around the leg. Tape it.
Cut the paper to the tile outline. Transfer to tile. Make relief cuts from the edge to the curve.
Nibble the waste with tile nippers. Clean the curve with a rubbing stone. The escutcheon plate covers the gap.
Grouting Without Haze: Float Angle, Strike Timing & The Clean-Water Rule
Wait 24 hours after the last tile sets. 72 hours for epoxy grout. Mortar must cure or moisture migrates into the grout and discolors it. Sweep the joints.
Vacuum. No dust. Damp joints suck water from the grout and weaken it.
Mix grout to a peanut butter texture. Less water than you think. Let it slake 10 minutes.
Remix. No added water. The color lives in the powder.
Extra water washes pigment out. You get blotchy joints that never match.
Hold the float at 45 degrees to the tile. Drag diagonally across the joints. This packs grout deep.
A 90-degree pass skims the surface and leaves voids. Work a 3×3 foot area. Pack every joint full.
Scrape excess off the tile face with the float edge.
Strike the joints when the grout firms to a plastic state. Thumb pressure leaves a clean impression. Usually 15 to 30 minutes.
A rounded striker tool compresses the grout and densifies the surface. This is where strength and color lock in.
Clean haze with a hydrophilic sponge. Rinse in clean water. Wring hard.
Wipe diagonally across joints. One pass per sponge side. Fold.
Rinse. Repeat. Circular wiping pulls grout from the joints.
Change water every 100 square feet. Cloudy water makes cloudy grout.
Final polish comes 2 to 3 hours later. Microfiber towel. Light pressure.
Buff the tile faces. The joints stay untouched. Cement grout cures 28 days.
Keep traffic light for 72 hours. No mopping for a week.
The Perimeter Rule: Why Every Edge Gets Silicone, Not Grout
Grout cracks at walls. The floor expands. The wall doesn't.
A 1/4-inch gap at the perimeter absorbs that movement. Fill it with 100 percent silicone. Color-matched to the grout.
Not acrylic. Not siliconized latex. Pure silicone stays flexible for decades.
Run a bead the full length. Tool it with a wet finger or a caulk tool. Concave profile sheds water.
Wipe excess immediately. Silicone skins in 10 minutes. Once skinned you cannot tool it.
Mask the tile edges with painter's tape for clean lines. Pull tape before the skin forms.
Cabinet bases get the same treatment. The toe kick covers the joint. Silicone seals the gap.
Water from spills never reaches the subfloor. This is the detail that prevents rot at the cabinet toes. Skip it and you'll find black mold on the plywood in two years.
Transitions to other flooring need a movement joint too. A Schluter Reno-T profile with a silicone channel handles the height change and the expansion. Grout across a transition cracks in weeks.
The profile costs $15. The repair costs hundreds.
Movement joints in the field follow TCNA EJ171. Every 20 to 25 feet in each direction. At inside corners.
Over control joints in the slab. These are not optional. They are engineered relief valves.
A floor without them will tent or shear.
Common Visual Mistakes: Lippage, Hollow Tones, Skin-Over & Bad Cuts
Lippage shows at the entry light. Morning sun rakes the floor. Every raised edge casts a shadow.
The fix is prevention. Flat substrate. Correct trowel.
Leveling clips. Beat every tile. Check with a straightedge across three tiles before the mortar sets.
Hollow tones mean money later. Tap every tile with a coin or a mallet handle. A solid thud is good.
A high ping means voids. Mark the bad ones. If it's a few, pull and reset.
If it's a section, the mortar batch was bad or the trowel angle drifted. Re-do it now.
Skin-over is the silent killer. You spread mortar. You get distracted.
Fifteen minutes later you set tile. The ridges look fine. They're not.
The surface filmed. The tile floats on a skin. Coverage drops to 40 percent.
The finger test catches this. Use it religiously.
Bad cuts at the dishwasher opening glare at you every day. The saw wandered. The template shifted.
You rushed. Slow down. Double-check the measurement.
Cut one test piece from a scrap. Fit it. Then cut the real tile.
The extra five minutes saves a $40 tile and an hour of rework.
Grout haze that won't wipe off means you waited too long. Cement grout films in 3 hours. Epoxy films in 45 minutes.
Once polymerized it needs acid wash. Sulfamic acid crystals dissolved in water. Scrub.
Rinse. Neutralize. It's a nightmare.
Clean on time.
Real Cost Breakdown: Materials, Tool Rental & Pro Labor for a 100-sf Kitchen
| Item | DIY Cost Range | Pro Installed Range |
|---|---|---|
| Porcelain tile (mid-grade) | $300–$1,000 | $300–$1,000 |
| Uncoupling membrane | $130–$250 | $200–$400 |
| Modified thinset (4 bags) | $80–$120 | Included |
| Sanded grout + sealer | $40–$60 | Included |
| 100% silicone caulk | $15–$25 | Included |
| Backer board (alt to membrane) | $70–$130 | $150–$250 |
| Wet saw rental (2 days) | $120–$180 | N/A |
| Leveling system kit | $60–$120 | Included |
| Tools (trowels, floats, sponges) | $80–$150 | N/A |
| DIY Total | $825–$2,035 | — |
| Pro Labor | — | $1,000–$2,500 |
| Pro Total | — | $1,825–$4,500 |
Demolition adds $200, $400. Subfloor repair runs $150, $500 if joists need sistering. Radiant heat mat adds $5, $8 per square foot.
Epoxy grout upgrades add $150, $200. Keep 10 percent extra tile for attic stock.
Maintenance That Matters: Sealing Schedule, Caulk Refresh & Crack Isolation
Penetrating sealer on cement grout at 72 hours. Reapply annually in high-traffic zones. Water bead test tells you when.
Sprinkle water. If it soaks in dark the sealer is gone. Epoxy and urethane grouts never need sealing.
Silicone caulk at perimeters lasts 5, 10 years. Check yearly. Pull and replace when it shrinks or discolors.
A $10 tube prevents a $500 subfloor repair. Match the grout color for invisible maintenance.
Crack isolation membrane does not eliminate movement joints. TCNA EJ171 still requires field joints every 20, 25 feet. Silicone those joints on the same schedule as the perimeter.
The membrane protects the tile. The joints protect the assembly.
Clean with pH-neutral cleaner. Acidic cleaners etch cement grout and degrade sealer. Alkaline cleaners dull polished porcelain.
Microfiber mop. Bucket with grit guard. Change water every room.
Standing water on unsealed grout wicks stains deep.
FAQ: Radiant Heat, Second Floors, Asbestos & Tile Over Tile
Can I install tile over radiant heat?
Yes. Use uncoupling membrane rated for heat. Ditra-Heat or Strata Mat Heat.
Expansion joints at 20 feet. LFT mortar. Ramp temperature slowly per manufacturer schedule.
Is a second-floor kitchen install different?
Deflection limit tightens to L/480. Verify joist span. Membrane required.
Sound mat under membrane if condo rules apply. Ditra-Heat-Duo hits 50 IIC.
What if I find 9×9 tile or black mastic?
Stop. Assume asbestos. Test before demo.
Abate if positive. Do not grind. Do not dry scrape.
Encapsulation with membrane is allowed in some jurisdictions. Check local code.
Can I tile over existing tile?
Only if the old tile is solid, clean, and bonded. Scuff with 60-grit. Bond with ANSI A118.11 mortar.
Height buildup adds 1/2 inch minimum. Transitions become a major issue.
DIY or Call a Pro: The Honest Decision Guide
DIY makes sense if you have time, patience, and a flat subfloor. A 100-square-foot kitchen takes 4, 7 days solo. You save $1,500, $3,000.
You own the tools afterward. The learning curve is real. First rows will be slow.
Call a pro if the subfloor needs repair, the layout is complex (herringbone, Versailles), or you have radiant heat. Pros warranty the work. They carry insurance.
They finish in 2, 3 days. The cost delta buys peace of mind.
Hybrid approach: demo and prep yourself. Hire a setter for the tile and grout. You save 30 percent.
The pro handles the critical coverage and lippage control. You handle the heavy grunt work. Clear scope prevents disputes.