Adjust Kitchen Cabinet Shelves: Step-by-Step Guide
If you've ever stared at a cabinet shelf that's too tall for your cereal boxes or too low for that stand mixer, you know it's a subtle kind of frustration. Learning how to adjust kitchen cabinet shelves is one of the fastest, cheapest fixes in a kitchen. Most shelves can be repositioned in under two minutes with zero tools.
Kitchen cabinet shelving is designed with adjustability in mind. As of 2026, nearly every stock and semi-custom cabinet line features holes or clips for this purpose. Manufacturer specifications indicate that standard shelf pins are 5 mm in diameter, spaced at regular increments that align with 32 mm hardware systems.
The adjustment process itself varies depending on what we call the bracket system. That's what this guide covers.

Image source: Web (Bing) / meijoin.en.made-in-china.com (Web image (fair-use with source credit))
Do You Actually Need to Adjust It? (Quick Answer)
Yes, and it's often easier than you think. How to adjust kitchen cabinet shelves depends entirely on your bracket type. If you have plastic clips, lift the shelf up and out. If you have metal pegs, pull them out and move them to new holes.
That's the whole core process.
Adjustment doesn't require removing the entire shelf. It just involves freeing the shelf from its current supports. You work from the inside, empty the shelf, then reposition.
What feels tricky the first time quickly becomes a flexible skill.
One major piece of advice: remove everything first. If you try to adjust the shelf while it's loaded, you'll strain your back and likely scratch the finish. We'll cover the full breakdown below.
First, Identify Your Cabinet Type
Before you touch anything, look at the cabinet carcass. Is there a thick wooden frame across the front? Then you have a face-frame cabinet.
Does the door hinge directly to the side panel with no front bar? That's a frameless European-style box. This detail determines your approach.

Image source: Web (Bing) / storage.googleapis.com (Web image (fair-use with source credit))
Face-frame cabinets are standard in North American construction. Builders attach a rectangular frame to the front of the box, and shelves sit slightly deeper inside. In these boxes, the shelf pins or clips sit on the side walls.
Frameless cabinets use a simple corner construction. They also have side-wall holes, but the spacing is often more regular, based on the 32 mm European standard. This system uses a consistent grid of holes based on a 32 mm apart.
Here's a quick comparison:
| Drill Type | Front Look | Shelf hardware | Adjustment ease |
|---|---|---|---|
| Face-frame cabinet | Wood rails all around front | Clips or pins on side walls | Simple if you can reach the side |
| Frameless (European) cabinet | Clean edge, drawer slides meet the door | Pins or pilaster strips, uniform grid | Slightly easier, generous access |
Why does this matter? The adjustment isn't inherently harder in a face-frame cabinet. But it requires more care reaching around the front rail to grab the shelf edge.
You should note that before you begin.
The Two Bracket Systems That Change the Whole Process
Now we get to the core. Almost every adjustable shelf uses one of two systems. Identifying your system is the "if/then" fork in our decision tree.
Cam-Lock Clips (Pull-Up Release)
These are the most common plastic clips in North American cabinetry. They ride on a metal dowel or plastic post on the shelf edge. They have a small lever body that locks into a slot in the side wall.
To release, you lift the shelf straight up. The tab pushes inward, freeing the clip from the panel. You then pull the shelf outward.
Within this system, the cam-lock lip sits on a rail or standard. Heavy kitchens with dense dishware benefit from these because the design holds weight. DIYers often struggle when they push forward instead of lifting upward.
That jams the clip.
Push-Pin Pegs (Lift-Out Support)
Looks like a simple metal dowel or plastic had. No lever, no cam. Just a small peg with a rubber or vinyl o-ring.
You just lift the front of the shelf clear of the peg, then pull the pegs forward. That's it. They're less expensive.
Some premium brands now use this system for simplicity.
These shelves usually feel stable because the pegs sit perfectly with the shelf tapered holes. There are no moving parts to break.
The complication: Push-pin pegs require you to slightly tilt the peg while extracting the pin. Some stay tight due to years of paint.
The Rare Pilaster Strip
You'll occasionally see small metal strips with square holes in older or European cabinets. These hold slot-in metal side brackets. The metal track is the rail.
You adjust by moving the bracket to another slot. That's simple. You do have to slide the bracket up or down.
Step-by-Step: How to Adjust Cam-Lock Clips
This is the most common scenario. If you've recently noticed labels "lift to release" on your clips, this is your section.
What You'll Do
- Clear the shelf completely.
- Check how many clips your shelf uses (usually two or three).
- Place both hands under the shelf near the clips.
- Lift the shelf straight up, smoothly.
Full Guide
- Empty the shelf. It's cheap insurance, protecting the shelf itself and the bottom shelf below.
- Inspect the clips. If you have tabs that let you, press them inward with your finger while lifting.
- Lift one end at a time? Actually, for cam-locks, lifting one end can wedge the clip. Lift evenly. Envision the shelf rising 1/4 inch and then pulling out horizontally.
- Find the detent. You'll feel a small "stop" if the clip's teeth snap into a height. For some, you must each one to a specific detent.
- With fingers under, gently and evenly. Collapse happens when you release the lip with a hard tug.
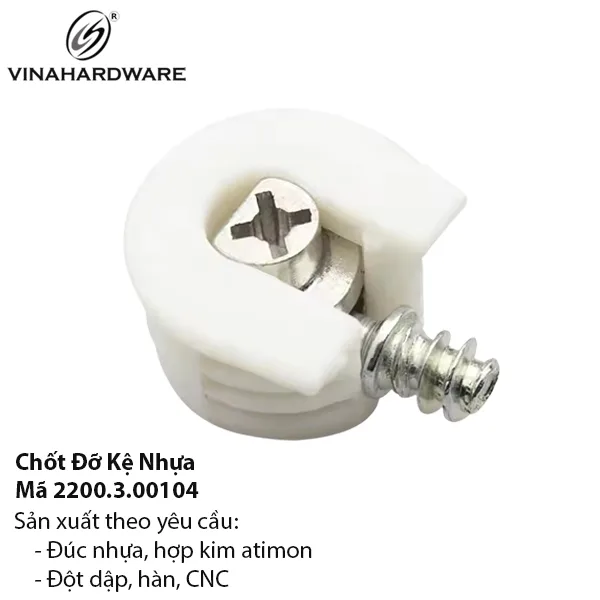
Image source: Web (Bing) / eng.vinahardware.com (Web image (fair-use with source credit))
Now, once the shelf is out, the clip stays seated in the side panel. You reposition the shelf to a different slot. The shelf bottom provides the seating.
Tips for Positioning
- Always support the shelf with one hand while repositioning.
- Use both hands to push the shelf back and adjust in a rolling motion.
- A soft cotton cloth under the shelf keeps it from scratching the sides.
Step-by-Step: How to Adjust Push-Pin Shelves
These cabinets have round holes drilled in a vertical line in the side wall. The shelf rests on the pegs themselves, no interaction with the pins.

Image source: Web (Bing) / lakinlawfirm.com (Web image (fair-use with source credit))
Simple process:
- Clear the surface area. If there's dishware in the way, you'll be picking up shards later. Not worth it.
- Look inside. locate the row of holes.
- Tilt the shelf. Lift the front edge about 15 degrees and slide it forward toward you.
- The pegs are now exposed. Pull the pegs outward with your fingers. If you want to paint over the wall, use a paper towel.
- Move the pegs. , Choose the matching holes on the left.
, Push the peg in until the rolled o-ring is seated flush.
, Both pegs should be at the same height.
- Finish. Slide the shelf back in with a slight forward-back tilt to seat properly.
When the PEGs Won't Budge
If the push pin is stick, are you possibly holding the wrong type? Sometimes manufacturers use a fully metal pin with a slight coil that presses into the wall. Rotate the pin while pulling.
If it's truly won't, it might be forced in a in a glued or paint. That's the signal to move on to the troubleshooting section.
Overhauling Obstructions: What to Do When the Shelf Won't Move
Roughly now you've tried a few sections. But what if the shelf still sits stuck? We follow our decision tree.
The Frame Sensation
A lot of cabinets use a central cross-rail you didn't see. It's hidden and the shelf catches underneath it. Shift the shelf slightly to one side and try again.
Upper Obstruction
When you lift a shelf, the upper shelf may be low. The shelf hits its panel. Try lifting the shelf diagonally with one corner first.
Over-Campaign
If your shelf clips are on the rail and you treat the shelf like a drawer, it causes clips to flip.
They Accept: Damaged Clips
The clips are plastic. Over years they wear down or crack. A damaged click can curve.
You'll immediately recognize the shelf still doesn't grip the.
Surprisingly, the fix is a simple purchase: new clips in the same size. They're cost-effective.
Test: A tripped clip is a safe fix when the shelf falls under moderate weight.
Common Mistakes That Break Shelves
Most shelf damage happens in the first ten seconds of adjustment. The biggest offender? Pulling forward instead of lifting upward.
That single movement jams the cam-lock against its slot and can shear the plastic teeth.
The second most common error is adjusting a loaded shelf. We've all done it. You're reaching for a plate, and suddenly the whole shelf dumps its contents.
Aggregate reviews and cabinet repair forums report that this causes more dented dishware and scratched interiors than any other mistake.
Here's what to avoid across the board:
- Prying at the clips with a screwdriver. It might seem helpful, but you'll likely break the plastic tab. Use your fingers or the edge of a butter knife at most, and only for rotating a stuck pin.
- Ignoring the weight limit. Most residential shelves are rated for 50 to 100 pounds spread evenly. Loading a single heavy mixer on the front corner stresses the clips unnecessarily.
- Mixing clip types on the same shelf. One set of cam-locks bel hut dowel pins at each corner and you're inviting instability.
- Forcing the shelf when it catches. A stop isn't an invitation to fight it. Something else is in the way.
- Over-tightening the shelf set. The shelf should engage the pins and sit level, not be wedged so hard you can't slide it out easily.
When You're Better Off Not Adjusting (or Adding New Holes)
Sometimes the easiest fix is no fix at all. If your shelf is sitting at a height that almost works, but not quite, you'll see a quarter-inch compromise frequently. Before you redrill anything, measure the true clearance you need.
A coffee maker standing 15 inches tall needs about 16 inches of shelf space. If the existing hole spacing is 1 a 2-inch grid, you might not catch the exact height. The choice then is between tiny added spacing or stepping down a full 2 inches to the next holes.
Accepting a trade-off: When you skip the drill box, replacing junk in the plastic we can handle, the easiest path is just letting the shelf sit at the closest height even though it's slightly off.
When drilling new holes is the reasonable answer: This is a legitimate approach for older cabinets with multi-colored hole diamonds.
What you need and how to do the drilling:
| For | Valve | Good filler when |
|---|---|---|
| a small bit of adjustment | Spacers or washers under a push pin | You don't want a permanent change |
| Blocking. Ined ling, a new location | A 5-mm bit, heavy grade | You own this kitchen |
| Rubber clips. Positioning stench | The clip sits in a new spot | Trying to get a custom book |
Drilling into a cabinet interior that's lamination powder coat will likely spider-crack the surface. Use painter's tape over the drill site and a sharp bit.
Making the Shelf Work Harder After You Adjust It
Once the shelf sits right, you can make the setup even more useful. Spacing isn't just about the item fitting; it's about getting at it comfortably.
You'll have some airspace now. That frees the space in the drawer. The average distance for a bowl often smaller and you'll want to leave enough room to lift out the stack.
Here's a practical gallery of heights:
| Appliance | Suggested Shelf Diameter |
|---|---|
| Stand mixer | 14-15 inches |
| Rice cooker | 12-13 inches |
| Plastic cereal container | 10-11 inches |
| Breakfast table for dishes | 10-12 inches |
For baser rows, keep a negative space of about 2 inches above the arrangement to allow lifting. For upper cabinet shelves, bigger pots and bowls should have a room to stand, while the lowest shelves can hold frequently used items.
Use adjustable filler blocks underneath. Stop-smoking cardboard sections to get around you. Use a shelf riser panel correctly, keeping your space.
Frequently Asked Questions
How do I know if my shelf uses cam-lock clips or push-pin pegs?
Look at the side walls of the cabinet. If you see a vertical strip with slot holes, you have a pilaster system with clips. If you see only round peg holes, the shelf uses push pins.
If you see a plastic mechanism with a tab, that's a cam-lock version.
Do I need any special tools like a screwdriver?
No, for the two most common systems you only need your hands. Only if you drilling, repairing oldlaminated, hardware to remove stuck clips from a specific part.
Can I adjust any shelf in any cabinet?
No. Fixed cabinets with wooden overlap supports don't allow for movement the same way. It's safe to possibly they'd need the new fasteners.
Means a molded shelf that's slightly could be installed incorrectly.
You want to click it in correctly, then and slightly. The "stop-fixing" is my best description here.
The 2-Minute Decision Guide
Time to speed-run your decision.
- If you have a face-frame cabinet: reach in, empty the shelf, then lift it straight up to release clips. Out and reposition the pegs. Done.
- If the shelf won't lift: Check for an upper panel close contact, tilt the corner, or confirm the side is release.
- If you have round peg holes: Tilt the shelf, lift out, replace pins on both sides.
- If the horizontal shelf bracket clips are broken: Replacement clips are a practice maintenance fix.
A quick bracket moves any of these; a firm angle or gap when you put the shelf back into a paired.
Yes, level down. You can check with a small spirit level, but the cheapest tip when the shelf is already at the same height on both sides. If it rocks, you're in different slots.
Most importantly, your kitchen's drainage now makes sense. The task is or to set it at the right workable zone. Adjust your shelves is a safe, reversible, no-enterprise, and it changes how your space function.
A trick that always works: position the shelf so you can see and reach your most-used items. That little amount of enroute makes your own cabinets feel brand new.
What to Do When the Shelf Won't Budge
You've cleared the shelf. You've lifted evenly. Nothing moved.
Before you grab a hammer, work through a quick mental checklist.
Check for a face-frame lip. The shelf might be catching on the front rail. Push the shelf left or right slightly, then lift.
Check the upper shelf clearance. A tall narrow item above might be jamming the shelf. Or the shelf itself sits close to the panel above. Tilt one corner up first, then the other.
Check the clips. A plastic cam-lock may have rotated sideways. Reach in and rotate it back into its slot. If it feels jammed, use a flathead screwdriver to gently lever the clip back into alignment.
Check for adhesive. Years of grease and grime can glue the shelf to its pins. Slide a butter knife between the shelf and the clip, then wiggle.
Check the screws. Some shelves rest on fixed wooden cleats. If you see a wood strip screwed into the side panel, those screws need a drill driver to move. That's a different task entirely.
Common Mistakes That Break Shelves
Most shelf damage happens in the first ten seconds. Pulling forward instead of lifting straight up jams the cam-lock and shears the plastic teeth. That single mistake ruins more clips than any other cause.
Adjusting a loaded shelf. You know this is tempting. A quick shift without unloading leads to scratched finishes and smashed ceramic. Empty the shelf first.
Using tools on plastic clips. Screwdrivers and pliers crack the locking tab. Your fingers work fine on cam-locks. For stuck push pins, rotate the peg while pulling.
Mixing clip types on the same shelf. Four points of support need to match. Cam-locks on one side and push-pin pegs on the other creates an uneven, dangerous shelf.
Overloading the front edge. A heavy appliance sitting at the front corner stresses the clips beyond their rated capacity. Most residential shelves hold 50 to 100 pounds evenly distributed.
When You're Better Off Not Adjusting the Shelf
Sometimes the existing hole spacing just doesn't work. You measure, and your coffee maker needs 15 inches of clearance, but the holes land at 14 and 16.
The compromise option. Accept the 16-inch spacing and use the extra inch. Or skip the shelf altogether and store the appliance on the countertop.
The spacer option. Use a plastic shelf-spacer ring. Place it over the peg or under the clip to raise the shelf incrementally. These are sold as shelf supports and cost a few dollars online.
The drill option. If you own the cabinets, drill a new row of holes with a 5 mm bit. Place painter's tape over the drill spot to prevent chipping the laminate. Use a level to keep the pairs aligned across both sides.
The clip option. A mid-shelf cross-clip provides extra support between holes. It's a small plastic channel that snaps onto the shelf edge and catches the wall.
Making the Shelf Work Harder After You Adjust It
Once the shelf sits at the right height, maximize the space around it. Group items by frequency of use, not by size.
Stack strategically. Place daily-use mugs and glasses at the front edge. Reserve the back recess for rarely used platters and mixing bowls.
Use risers. A cabinet shelf riser adds a second layer for small spice jars or ramekins. The riser sits inside the existing shelf footprint.
Keep a two-inch gap. Leave space above the tallest item so you can lift it out without bumping the shelf above. That small margin saves frustration daily.
Adjust in pairs. When you change the shelf height, always adjust both sides to the same hole position. Use a level to verify. An uneven shelf rocks and puts stress on the clips.
Frequently Asked Questions
How do I know if my shelf uses cam-lock clips or push-pin pegs?
Look at the side walls of the cabinet. If you see a vertical strip with slots, your shelf uses pilaster clips. If you see only round holes, you have push-pin pegs.
If you see a plastic lever mechanism with teeth, that's the cam-lock version.
Do I need any special tools to adjust cabinet shelves?
No. The two most common systems, cam-lock and push-pin, adjust with your hands alone. You only need tools if you plan to drill new holes or replace damaged clips.
Can I adjust the shelf height in any cabinet?
No. Some cabinets use fixed wooden cleats or solid shelf supports that don't move. You'll know when you can't find any pegs, clips, or slots.
In that case, repositioning requires drilling new shelf-pin holes.
What if my shelf is slightly uneven after adjusting?
You likely have the pins or clips at different heights. Remove the shelf and re-seat the hardware at the same elevation on both sides. Use a small spirit level to confirm.
Where can I find replacement shelf clips?
Hardware stores and online cabinet-parts retailers stock standard sizes. Check the original clip for a brand name or part number. A universal plastic clip fits most residential cabinetry.
The 2-Minute Decision Guide
Here's your final quick-reference flow.
If you have cam-lock clips: clear the shelf, lift straight up, reposition, lower into new slots.
If you have push-pin pegs: clear the shelf, tilt the front up, slide out the pegs, move them to matching holes, and reseat the shelf.
If the shelf is stuck: check the face frame, check the upper clearance, rotate jammed clips, or slide a knife under to break the seal.
If the hole spacing doesn't match: use spacers, accept the compromise, or drill new holes with a 5 mm bit and painter's tape.
If a clip is broken: order a replacement, it's a two-minute swap.
That's the whole process. Adjusting shelves is furniture-friendly, reversible, and one of the few kitchen projects that delivers instant gratification without breaking the budget. Spend two minutes moving that shelf and you'll wonder why you left it so long.