How to Adjust Kitchen Cabinet Hinges in Minutes
Your kitchen cabinet door is sagging. The gap between the doors is uneven, and every time you close it, something scrapes. You don't need a new cabinet, and you definitely don't need a contractor.
You need to know how to adjust kitchen cabinet hinges, and it's a ten-minute job with a single screwdriver.
Most cabinet hinges made in the last thirty years are designed with built-in adjustment. The European concealed hinge, sometimes called a euro hinge or cup hinge, dominates modern cabinetry. As of 2026, manufacturers like Blum, Hettich, and Salice ship millions of these units worldwide, each one offering three axes of adjustability.
Up and down. Left and right. In and out.
All you need is a Phillips screwdriver and a few minutes.
Quick Answer
Turn the front screw to move the door up or down. Turn the rear screw to move the door left or right. Turn the cam screw to push the door closer or pull it away from the cabinet.
Most euro hinge screws adjust within a two to three millimeter range. That's roughly one-eighth of an inch.
Test the door swing after each adjustment. Work in small quarter-turn increments. Loosen the mounting plate screws slightly before major adjustments, then retighten them when you're done.
Rule One: Identify Your Hinge Before You Touch a Screwdriver

Image source: Web (Bing) / infoupdate.org (Web image (fair-use with source credit))
Let's be blunt. Nothing gets you professional results faster than knowing exactly which hinge is on your cabinet. It's basically choose your own adventure.
Most modern kitchens, especially those built in the last two decades, use what's called a euro hinge. That's also known as a concealed hinge because you can't see it when the cabinet door is shut. It's made of two main parts: the cup, which is the circular recess drilled into the door, and the mounting plate, which screws onto the cabinet wall.
The arm connects the two. These are the workhorses of European frameless cabinetry.
The other common type is the face-frame hinge. You'll find these on older American-style cabinets where there's a visible wooden frame at the front of the cabinet box. Face-face-face-face-face-frame hinges have two flat leaves, often with a pin connecting them.
They typically attach to the door and the frame edge. Some versions are self-closing. But most face-frame hinges on older cabinets are simpler: they swing, they but have a single pivot point, and they might not have adjustment at all.

Image source: Web (Bing) / fity.club (Web image (fair-use with source credit))
How to tell them apart at a glance
- Euro hinge: You'll see a smooth metal arm and something that looks like a shallow dish near the door edge. The mounting plate is visible on the inside of the cabinet wall. Screws are exposed on the arm and the plate.
- Face-frame hinge: Two flat rectangular plates, joined by an open pin. It's mounted directly on the door's surface and the frame's surface. No cup. No hidden arm.
Once you figure out what you're working with, you can figure out what adjustments are even possible. Euro hinges are three-way adjustable. Face-frame hinges are hit-or-miss.
If you have basic butt hinges or a piano hinge, you're usually stuck with repositioning the hinge instead of tweaking a screw.
What the sections won't show you:
In the photos, you'd see the cup pressed into the back of the door. You'd see the mounting plate screwed to the cabinet's side wall. And you'd see the adjustment screws sitting on the arm, just waiting explained.
Once you know those parts, everything else falls into place.
The Quick Answer: What Each Adjustment Screw Actually Does
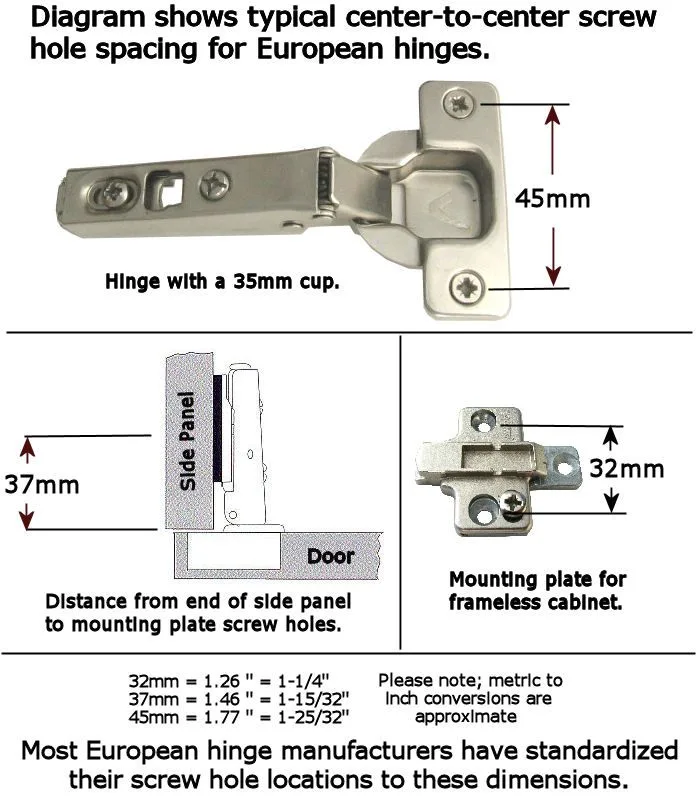
Image source: Web (Bing) / gerribush.blogspot.com (Web image (fair-use with source credit))
This is the heart of the whole process. On a standard euro hinge, every adjustment lives in a few screws and cams. There are usually three of them, but they don't all look the same.
Finding the right one is the secret.
Here's your cheat sheet:
| Screw | Location | Movement | Direction to Turn |
|---|---|---|---|
| Front screw (A) | On the hinge arm | Vertical (up/down) | Clockwise raises the door, counterclockwise lowers |
| Rear screw (B) | On the hinge arm, behind the front | Horizontal (left/right) | Clockwise moves the door right, counterclockwise moves it left |
| Depth cam or screw | On the mounting plate area | In/out from the cabinet | Turning a cam pushes the door closer or pulls it away |
The front screw is usually the one closest to the door's face. It's the one you'll see before anything else. When you turn it, it moves a cam mechanism inside the hinge that lifts or drops the door.
It doesn't matter whether you're tightening or loosening, what matters is the relative cuivern.
The rear screw is positioned further back on the hinge arm. It works with a second cam that slides the arm side-to-side. This is your go-to when there's an uneven gap between two doors.
Turn it in small amounts, check the gap, and turn again.
The depth cam depends on the brand. On some hinges, it's a knurled knob on the mounting plate. On others, it's a flathead screw on the plate's edge.
Either way, it adjusts how tightly the door seals against the cabinet. Since it moves the door toward or away from the body, it doesn't affect up-down or left-right.
A pro tip, though. Manufacturer specs like those from Blum's catalog tell us that these screws typically work within a two to three millimeter total adjustment range. That's about one-eighth of an inch. If you're trying to move a door a full half inch, you don't need to adjust the hinge, you need to reposition the plate.
Know that before you go unscrewing the whole cabinet.
The Tools You Need (and the One You Shouldn't Use)
You will not need a cordless drill, an impact driver, or a specialized hinge tool. This whole fix usually takes a single screwdriver, but not you can make it work with a bit you found in the kitchen drawer.
What you'll actually need:
- A Phillips #2 screwdriver. This is the most common screwdriver size for cabinet hinge screws. It fits into screw heads with a plus-shaped cross.
- A flat-blade screwdriver for any of the screws that have a single straight slot. Some depth cams use these.
- A small level if you want the doors exactly square. Even a tiny torpedo level will work.
- A pencil to mark screw plate locations if you need to move them.
- Optional: Painter's tape to hold the door in position while you work on the hinge.
The tool you should never use: a drill with a screwdriver bit. Routers go too fast. The cam screws on most cabinet hinges are delicate.
A drill will let you drift past the sweet spot in millisecond and strip the head. If you've ever turned a screw until it's just spinning uselessly, you know exactly what I'm talking about. Use your hands.
Good old manual hand-strength.
Phillips #2 is different from plus-or-minus #1 or #0. If your screwdriver tip is too small, it will cam out. That means it slides up and out of the screw head. You'll grind a little bit of the cross away each time.
The right fit matters more than any other nuance of the job.
What to check in your soldier's kit:
- Test the screwdriver grip in the screw head before you apply any force.
- If the tip is rounded or worn, replace it. A brand-new bit cuts the risk of stripping edges.
There's one slight mistake people make here. They grab the multi-bit screwdriver with a bunch of different tips, pick the one that's "close enough," and try to torque the screw. It is a poor fit.
The tip is too long, the shank is too long, and the screw head breaks. Match your screws. It's the entire job.
How to Raise or Lower a Sagging Cabinet Door: Step-by-Step
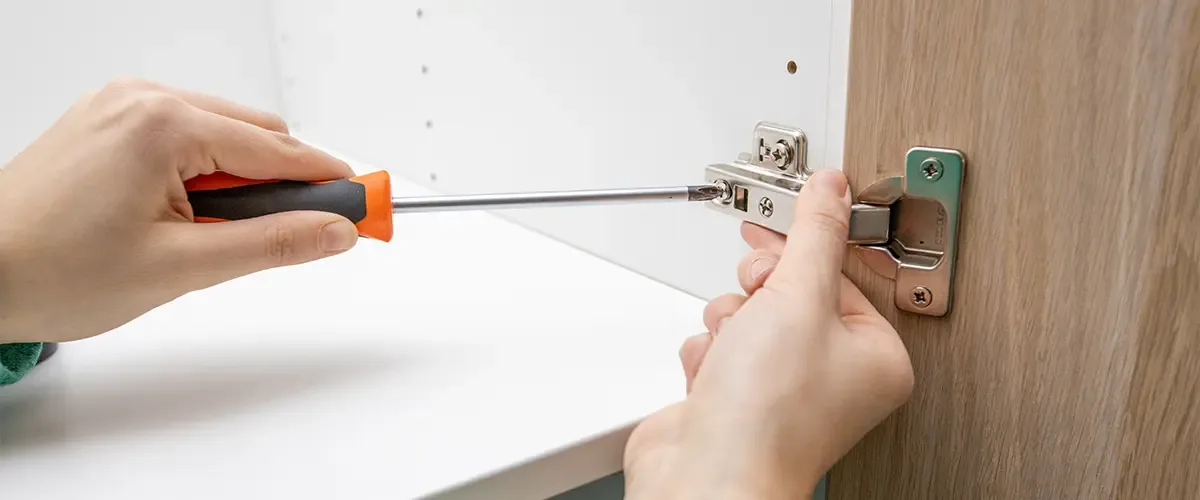
Image source: Bing (Web (fair-use with source credit))
A sagging door is the most common entry point into cabinet hinge adjustment. It hangs to one side, touches the floor, or just doesn't feel right in the frame. The good news: that's fixable in under five minutes, and you don't need to take the door down.
Order of operations matters. Do not just start turning the front screw on the top hinge. You need adjust both the top and bottom hinges, but not necessarily equally.
Here's the process, step by step.
Step 1: Loosen the mounting plate screws slightly
Both on the top and bottom hinges. You don't want them loose enough to move freely. Just crack them, maybe a half turn.
This helps if the door is binding because the plate itself is tilted. Always work with the plate when you're adjusting for height fold.
Step 2: Find the front adjustment screw on the top hinge
That's the one closest to the door's face. Now here's the trick: the screw on the top hinge controls the top corner of the door. If the top is lower than it should be, turn that screw clockwise a quarter to half a full turn.
If the top needs to come down, turn it counterclockwise.
Step 3: Locate the front screw on the bottom hinge
This controls that bottom corner. Same logic. Top that screw to move the bottom corner up or down.
Step 4: Do a quick visual check
Close the door without slamming. Look for reveals. The line between your door and the cabinet faces should be level.
Run your fingers down that gap. Then open the door and close it again, watching the bottom edge as well.
Step 5: Adjust back 1/4 turn at a time
It's easy to overshoot and make the door lean the opposite way. Start slow. Turn, close, check.
That rhythm is the workflow. Usually two or three rounds gets it to you.
Step 6: Retighten the plate screws
Don't camp the down. Just firm. Then test the door again.
It should sag no longer, and it should be level along both edges.
A common simple mistake. This starter tension comes from joints when you're closing the door. People nicely look down the edge of the door and think it's level, but the door might be any gap on the other side. Set the door against the cabinet's face.
Use your level to confirm, don't trust your eyes or the door frame.
What if the screws don't move the door at all?
If you turn the front screw and nothing changes, you're probably turning it without the shoe sliding. Mounting plates need to be loosened to allow the plate to slide, and the cam on many hinges works by the plate moving in relation to the arm. If it's cranking free, the part is full, it's binding point is the plate being pinched against the wall.
Loosen the plate screws more (not much, but more) and then, per careful, turn the cam a bit. You'll feel it seat, then start moving.
That's the fix. Vertical adjustment typically takes less than three tries and rounds. If an entire door is sitting diagonal, both the top and bottom hinges need attention.
Work the as a pair, never into a single point. Adjusting just one hinge when you have two is virtually always a temporary fix.
A the q-aid tip: Some euro hinges also have built-in soft-close dampers. When you're raising a door, make sure you aren't pinching the damper mechanism inside the arm. Move the door slowly.
If you hear a hydraulic rod scraping, you're pushing in the wrong direction or too fast.