
How to Install a Kitchen Vent Fan: Step-by-Step Guide
Learning how to install a kitchen vent fan starts with accepting that no two kitchens share the same constraints. Your duct path, your cooktop fuel, your ceiling height, and your local code all change the job. A single universal guide does not exist.
This article walks you through the decision tree so you match the install to your reality.
The International Residential Code requires makeup air for any hood rated above 400 CFM. Most manufacturers size duct collars at 6 inches for units under 300 CFM and 8 inches or larger above that. Let's start with the first branch point that shapes every other choice.
Quick Answer
Installing a kitchen vent fan means choosing ducted or recirculating based on exterior access. Pick a hood matched to your cooktop width and BTU output. Run rigid metal duct the shortest straight path to an exterior wall or roof cap.
Seal every joint with foil tape and mastic. Power the unit on a dedicated 15 or 20 amp circuit with GFCI and AFCI protection. Pull permits and schedule inspections before closing walls.
Why This Install Isn't One-Size-Fits-All
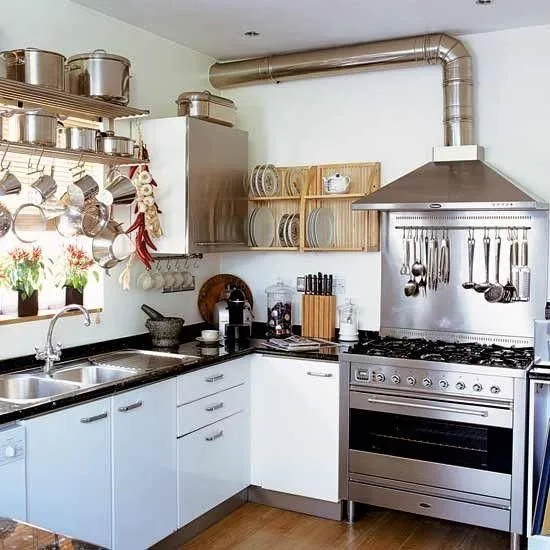
Image source: Bing (Web (fair-use with source credit))
Every kitchen ventilation project begins with a different starting line. Some of you have an existing duct chase and a dedicated circuit ready to go. Others face an island cooktop with joists running the wrong way and no attic access.
The hood you buy, the duct you run, the electrical you pull, and the permits you need all branch from those conditions. A wall-mount chimney hood on an exterior wall with a straight 6-foot duct run is a weekend project. An island hood with a 25-foot duct run through a finished ceiling, an inline fan, and a makeup air interlock is a multi-trade coordination effort.
The code requirements shift too. The 2021 IRC M1503.6 makeup air trigger sits at 400 CFM but California Title 24 drops it to 300 CFM and demands demand-controlled operation. Your local building department has the final say.
Check their website or call the mechanical inspector before you buy anything. If you are planning a full remodel, see how the ventilation fits into the overall sequence for a kitchen remodel.
First Decision: Vented or Recirculating — What Your Kitchen Allows

Image source: Web (Bing) / accurehome.com (Web image (fair-use with source credit))
This is the fork that eliminates half the options instantly. Vented hoods exhaust air outside through ductwork. Recirculating hoods filter air through charcoal and return it to the room.
You can only go vented if you have a path to an exterior wall or roof. Condos, high-rises, and some HOAs prohibit penetrations. That forces recirculating.
If you have exterior access, vented wins on performance. It removes heat, moisture, grease, and combustion byproducts. Recirculating only captures grease and some odor.
Charcoal filters saturate fast. They need replacement every three to six months. They add static pressure that cuts rated CFM by 30 to 50 percent.
Some high-end hoods offer convertible kits. You install the duct collar now and cap it if you later lose exterior access. That flexibility costs extra.
Most pros recommend vented whenever possible. The energy penalty of conditioned air loss gets offset by makeup air systems in tight homes. For smaller kitchens where duct space is tight, a compact design approach may limit your hood depth options.
Second Decision: Mount Type Dictates Everything Else
The hood body you choose locks in the framing, the duct orientation, and the difficulty level. Under-cabinet hoods slide into the bottom of a wall cabinet. They need a 3¼×10-inch or 6-inch round duct transition.
Wall-mount chimney hoods anchor to studs and vent straight up or back. Island hoods hang from ceiling joists and vent straight up. Insert hoods mount inside a custom canopy or cabinet.
Downdrafts rise from behind the cooktop and vent down through the floor. Each type has a template. Print it at full scale.
Tape it to the wall or ceiling. Verify stud or joist alignment before you cut. A 36-inch wall chimney hood typically needs two studs at 16-inch centers.
An island hood needs blocking between joists. If your joists run parallel to the duct, you cross them with framing. That eats headroom.
Measure your ceiling height. The bottom of the hood should sit 24 to 30 inches above an electric cooktop and 30 to 36 inches above gas. Check the manufacturer spec.
Some pro-style hoods demand 36 inches minimum. If your cabinets are standard depth, confirm the hood depth clears the doors. Lower cabinet depth often determines maximum hood projection.
Third Decision: Duct Route — Short & Straight Wins Every Time

Image source: Bing (Web (fair-use with source credit))
Duct layout determines whether the hood performs to its rating. Every elbow adds equivalent length. A 90-degree elbow equals 15 to 30 feet of straight pipe depending on radius.
A wall cap adds 30 feet. A roof cap adds 50 feet. Most manufacturers cap total equivalent length at 100 feet.
You want the shortest route with the fewest turns. Vertical through the roof often beats horizontal through a wall if the roof run stays straight. Horizontal runs need a ¼-inch per foot slope toward the exterior so condensation drains out.
Never vent into an attic, soffit, or crawlspace. That dumps moisture and grease into the building envelope. It violates IRC M1503 and IMC 504.
Use rigid metal duct. Semi-rigid aluminum flex is acceptable for short transitions only. Standard white vinyl flex is forbidden for range hoods.
It melts, traps grease, and fails fire rating. Seal every joint with UL 181 foil tape and brush on duct mastic. Support horizontal runs every 4 feet.
Support vertical runs every 6 feet. Insulate duct running through unconditioned space with R-6 wrap and vapor barrier. The 2021 IECC requires insulation on supply and return ducts in unconditioned space.
Exhaust-only duct is not explicitly called out but condensation control makes it smart practice. If you are framing a new kitchen, plan the duct chase early. Coordinate with cabinet design to avoid conflicts.
Sizing the System: CFM, Duct Diameter, and Equivalent Length
Match the hood CFM to your cooktop. The rule of thumb: 100 CFM per 10 inches of electric cooktop width. 150 CFM per 10 inches of gas cooktop width. A 36-inch gas cooktop needs at least 540 CFM.
High-BTU pro ranges push that higher. Check the hood HVI rating at 0.25 inches static pressure. That reflects real duct resistance.
Marketing numbers at 0.1 inches are optimistic. Now pick duct diameter. Undersized duct chokes airflow and roars.
Oversized duct costs more and fits harder but runs quieter. General guide: up to 300 CFM use 6-inch. 300 to 600 CFM use 7 or 8-inch. 600 to 900 CFM use 8 to 10-inch. Over 900 CFM use 10-inch or larger.
If the hood collar is 8-inch and you run 6-inch, you lose 40 percent of rated airflow. Use a reducer at the hood only. Never reduce mid-run.
Calculate equivalent length. Straight feet plus fitting equivalents. If you exceed 100 feet equivalent, upsize the duct one diameter or add an inline booster fan.
Inline fans mount in the duct run, usually in the attic. They quiet the kitchen but add a maintenance point. Size the inline fan for the duct diameter and system static pressure.
Wire it to the hood control board so it switches with the hood. For a compact kitchen where every inch counts, understanding lower cabinet dimensions helps you position the duct transition without losing storage.
The Makeup Air Trap: When You Need It and How to Size It
Makeup air replaces the air your hood exhausts. Without it the house goes negative. That pulls combustion gases down flues.
It sucks radon through foundation cracks. It drags cold air through every gap. The IRC triggers makeup air at 400 CFM.
California Title 24 triggers at 300 CFM. Some local amendments go lower. Check your building department.
If your hood exceeds the threshold you must provide a path for replacement air. Passive wall vents work for modest CFM in leaky homes. They need a motorized damper interlocked to the hood switch.
Powered makeup air fans match exhaust CFM one for one. They cost more but guarantee balance. ERV or HRV systems can serve double duty if sized right.
Size the makeup air opening at 1 square inch per 1 CFM for passive. For powered systems match the fan curve to the hood curve. Wire the interlock so makeup air runs whenever the hood runs.
Never rely on a cracked window. Inspectors will fail it. If you are designing a new kitchen, plan the makeup air path early.
It often needs a dedicated duct chase. For smaller spaces, a compact kitchen layout may limit where you can run that chase.
Electrical Path: Dedicated Circuit, GFCI/AFCI, and Disconnect Rules
The hood needs its own circuit. Sharing with a microwave or disposal invites nuisance trips. NEC 210.8 requires GFCI protection for kitchen receptacles.
Hardwired hoods are exempt but many inspectors still want it. NEC 210.12 requires AFCI for kitchen circuits. A dual-function breaker satisfies both.
Use 12 AWG copper for a 20 amp circuit. Use 14 AWG for 15 amp. Most residential hoods draw under 5 amps.
Pro units with inline fans can draw 10 to 15 amps. Check the nameplate. The disconnect must be within sight of the hood or lockable at the panel.
A cord-and-plug connection counts as a disconnect if the receptacle is accessible. Hardwired units need a local switch or a lockable breaker. Run NM-B in protected framing.
Run MC cable where exposed. Support cable every 4.5 feet and within 12 inches of boxes. Leave 6 inches of free conductor in each box.
Label the breaker clearly. If you are updating an older kitchen, verify the panel has space. A full panel may need a subpanel or tandem breakers.
When planning a kitchen remodel, coordinate the electrical layout with the hood location early.
Permits, Inspections, and Code Checkpoints You Can't Skip
Most jurisdictions require a mechanical permit for the duct and an electrical permit for the circuit. Some bundle them. Pull permits before you start.
The fee is usually under $200 total. Schedule rough-in inspection after duct and wiring are in but before drywall. The inspector checks duct material, support spacing, termination, firestopping at penetrations, and wire type.
They verify GFCI/AFCI at the panel. They check disconnect location. They confirm makeup air if required.
Final inspection happens after the hood is mounted and powered. Bring the manufacturer instructions. The inspector may verify CFM with a flow hood.
Failed inspections cost reinspection fees and delay the project. Unpermitted work voids insurance claims for fire or water damage. It complicates resale.
If you hire a pro, confirm they pull permits in their name. Homeowner permits are allowed in many areas but you own the liability. For a full renovation, see how permits fit into the overall remodel sequence.
Step-by-Step: Replacing an Existing Under-Cabinet Hood (Easiest Path)
Turn off the breaker. Verify dead with a non-contact tester. Remove the old hood.
Disconnect wiring. Note the duct connection. Measure the cabinet opening.
Verify the new hood fits. Check the duct collar size. If the old duct is 3¼×10 and the new hood is 6-inch round, install a transition.
Clean the duct interior. Replace flex with rigid if accessible. Mount the new hood template.
Drill mounting holes. Install mounting screws into studs or blocking. Connect duct to collar with foil tape and mastic.
Connect wiring: black to black, white to white, ground to ground. Use wire nuts. Tuck wires into the junction box.
Install the hood onto the mounting screws. Level it. Shim if needed.
Install filters. Turn on the breaker. Test all speeds.
Test lights. Verify damper opens at the exterior. Schedule final inspection.
This path typically takes 3 to 4 hours. If you are also updating cabinets, coordinate the hood install with the cabinet renovation timeline.
Step-by-Step: New Vented Wall-Mount Hood with Fresh Duct Run
Plan the duct route. Minimize elbows. Target an exterior wall.
Cut the wall opening for the cap. Use a hole saw for round duct. Frame the opening.
Install the wall cap with integrated damper. Flash and seal the exterior. Run rigid duct from the cap to the hood location.
Support every 4 feet. Seal every joint. Install blocking between studs at the hood height.
Mount the hood template. Verify level. Drill lag bolts into studs.
Hang the hood. Connect duct to collar. Seal with tape and mastic.
Run a new circuit from the panel. Install a dual-function breaker. Fish cable to the hood junction box.
Connect wiring per the diagram. Install a local disconnect switch if required. Mount the hood canopy.
Install filters and lights. Power up. Test airflow with a tissue or anemometer.
Verify exterior damper opens fully. Schedule rough-in and final inspections. This path takes 6 to 10 hours depending on duct length.
If you are framing a new kitchen, run the duct chase before drywall.
Step-by-Step: Island Hood — Ceiling Joists, Long Runs, and Inline Fans
Island hoods vent straight up through the ceiling. Locate joists with a stud finder. The hood mounts between two joists.
If joists run parallel to the duct, install blocking perpendicular. Cut the ceiling opening per the template. Frame the rough opening with doubled joists.
Run rigid duct up through the roof. Keep the run straight. A 25-foot vertical run with two 45-degree elbows equals about 55 equivalent feet.
Stay under the 100-foot limit. Use an inline fan in the attic to boost airflow and quiet the kitchen. Mount the inline fan on vibration isolators.
Wire it to the hood control board. Seal the roof penetration with a pitched flashing and storm collar. Install a roof cap with bird screen and backdraft damper.
Insulate the duct in the attic with R-6 wrap. Support duct every 6 feet vertically. Hang the hood from the framed opening.
Level it with the adjustable mounting brackets. Connect duct to the hood collar. Run a dedicated circuit from the panel.
Use a dual-function breaker. Fish cable through the ceiling joists. Connect wiring at the hood junction box.
Install filters and lights. Test all speeds. Verify the inline fan spins the right direction.
Check roof damper operation. Schedule rough-in and final inspections. This path takes 1 to 2 days.
Step-by-Step: Recirculating Install — When You Have No Exterior Access
Recirculating hoods filter and return air. No duct run needed. Mount the hood per the template.
Secure to studs or blocking. Install the charcoal filter kit behind the grease filters. Charcoal filters last 3 to 6 months.
Mark the replacement date on the filter frame. Wire a dedicated circuit same as vented. GFCI and AFCI protection still required.
No makeup air needed since no air leaves the house. Performance drops 30 to 50 percent versus vented. Grease capture stays good with baffle filters.
Odor removal is limited. Clean grease filters monthly in the dishwasher. Replace charcoal on schedule.
This path takes 2 to 3 hours. It works for condos and historic districts where penetrations are banned. If you later gain exterior access, some models convert to vented with a duct kit.
Common Fail Points: Flex Duct, Undersized Pipe, Missing Damper, Shared Circuits

Image source: Web (Bing) / reddit.com (Web image (fair-use with source credit))
Crushed flex duct kills airflow. A 6-inch flex compressed to 4-inch loses 60 percent capacity. Undersized duct roars and starves the motor.
A 6-inch duct on an 8-inch collar cuts CFM by 40 percent. Missing backdraft damper lets cold air pour in. It also lets exhaust recirculate on windy days.
Shared circuits trip breakers when the microwave runs. No GFCI or AFCI fails inspection. Venting into the attic rots sheathing and grows mold.
No firestop at ceiling penetration spreads fire. Screws inside the duct catch grease and block cleaning. Duct tape fails in heat.
Use foil tape and mastic. Uninsulated duct in the attic sweats and drips. Unsecured duct vibrates and transmits noise.
Every one of these shows up on inspection punch lists.
Pro Tips: Sealing, Supporting, Testing Airflow, and Quieting the System
Seal every joint with UL 181 foil tape then brush duct mastic over it. Tape alone dries out. Mastic alone gaps.
Together they last decades. Support horizontal duct with 1-inch strapping every 4 feet. Use insulated hangers to break vibration transfer.
Size the duct one size up if the run is long. A 600 CFM hood on 8-inch duct runs quieter than on 7-inch. Install the inline fan in the attic not the kitchen.
It moves the noise source away. Use a variable speed control. Low speed handles simmering.
High speed handles searing. Clean baffle filters monthly. Grease buildup adds static pressure.
Test airflow with a garbage bag. A 13-gallon bag should inflate in 2 seconds at 300 CFM. An anemometer gives real numbers.
Aim for 80 percent of rated CFM at the hood. Check the exterior damper opens fully. Lubricate damper pivots annually with silicone spray.
Decision Guide: Match Your Situation to the Right Install Path
| Situation | Recommended Path | Key Constraint |
|---|---|---|
| Exterior wall, existing duct, dedicated circuit | Replace under-cabinet | Fastest, lowest cost |
| Exterior wall, new duct, open walls | New wall-mount vented | Best performance per dollar |
| Island cooktop, attic access | Island hood with inline fan | Joist direction, roof pitch |
| No exterior access, condo/HOA | Recirculating with charcoal | Filter maintenance, lower CFM |
| Gas pro range >600 CFM | Vented + makeup air interlocked | Code trigger, energy penalty |
| Tight budget, DIY electrical comfort | Replace only, no new wiring | Permit still required |
Pick the row that matches your kitchen. Follow that column's workflow. Skip the others.
Frequently Asked Questions
How high should a range hood be above the cooktop?
24 to 30 inches for electric. 30 to 36 inches for gas. Check the manufacturer spec. Pro hoods often require 36 inches minimum.
Do I need a permit to replace a range hood?
Yes if you alter ductwork or wiring. A like-for-like swap with no changes may not need one. Call your building department.
Can I use flexible duct for a range hood?
Only semi-rigid aluminum for short transitions. Never white vinyl flex. It fails fire rating and traps grease.
What size duct for a 600 CFM hood?
7 or 8 inch diameter. Match the hood collar. Never reduce mid-run.
When is makeup air required?
IRC at 400 CFM. California Title 24 at 300 CFM. Check local amendments.
Can I vent a range hood through the soffit?
No. IRC M1503 prohibits soffit termination. Use a wall cap or roof cap.


