Assemble IKEA Kitchen Cabinets Like a Pro: Complete Guide
Learning how to assemble ikea kitchen cabinets starts with accepting that the instructions contain zero words. Every step is a diagram, and a single misread arrow adds hours of rework. The SEKTION system (METOD in Europe) uses a 32-millimeter hole pattern and cam-lock joinery that is unforgiving of guesswork.
Most first-timers discover this only after a cabinet frame sits twisted on sawhorses.
Manufacturer specs rate the FRÖJERED suspension rail at 300 kilograms per meter when lag-bolted into studs, but drywall anchors fail at a fraction of that load. A 10-by-10-foot kitchen typically runs $3,000 to $6,000 in cabinets alone as of 2026. The following sections walk through the visual cues that keep the build on track.

Image source: Web (Bing) / easyrebuild.com (Web image (fair-use with source credit))
Quick Answer
How to assemble ikea kitchen cabinets starts with sorting parts by cabinet code. Build frames on sawhorses. Insert dowels, turn cams so arrows point toward edges, then nail the back panel.
Mount the suspension rail level into studs with lag bolts. Hang wall cabinets, add safety brackets, level base cabinets, then install toe-kicks, doors, and drawers.
Why IKEA's Diagram-Only Instructions Demand Visual Thinking
IKEA's assembly manuals use exploded-view line drawings with no text labels. This works globally but leaves critical details invisible: cam arrow direction, dowel seating depth, and the exact lag-bolt pattern for the suspension rail. A photo of a correctly built frame shows the back-panel nail spacing (150 millimeters) and the cam-lock orientation at a glance.
Without that reference, installers routinely seat cams 180 degrees out, stripping the particleboard. The FRÖJERED rail drawing shows a level line but not the stud-finding process or the 5/16-inch by 3-inch lag bolt requirement. Visual cues bridge the gap between diagram and reality.
What Arrives in the Boxes: Frames, Hardware, and Door Packs Identified
Delivery splits into three box types: frame boxes (brown, labeled with AA-XXXXXX codes), hardware boxes (small white, containing cams, dowels, screws, hinges), and door/drawer-front boxes (larger white, often stacked). Each cabinet code corresponds to a specific frame size, for example, SEKTION base cabinet 30 inches wide is AA-230456. Hardware packets are not universal; a wall cabinet gets two UTRUSTA hinges and a suspension bracket, while a base cabinet gets four adjustable legs and a toe-kick clip track.
Open every hardware box before building; missing cam locks or hinge dampers are the most common shortage. Cross-reference the packing slip with your Kitchen Planner export list.
| Box Type | Label Color | Contents | Key Identifier |
|---|---|---|---|
| Frame | Brown | Particleboard panels, back panel | AA-XXXXXX code |
| Hardware | White (small) | Cams, dowels, screws, hinges, brackets | Cabinet-specific packet |
| Door/Front | White (large) | Door, drawer front, cover panels | Style/finish code |
Workspace Setup: Sawhorses, Lighting, and the Impact Driver Clutch Setting
Two sawhorses spaced 600 millimeters apart support a base frame without sag. Lay a moving blanket on top to protect melamine surfaces. Lighting matters: a 4,000-lumen shop light positioned overhead eliminates shadows in cam holes.
Use an 18-volt impact driver with the clutch set to 4 (approximately 4 newton-meters), higher torque snaps cam posts. Keep a 3-millimeter drill bit for pilot holes in cover panels, a 5-millimeter bit for hinge-plate screws, and a 7/16-inch socket for lag bolts. A 1200-millimeter level, a stud finder with deep-scan mode, and a handful of 3-millimeter plastic shims complete the kit.
Organize hardware packets in muffin tins labeled with cabinet codes.
Frame Assembly: Cam Arrow Orientation, Dowel Depth, and Back Panel Nailing
Lay side panels flat, insert wooden dowels into the 32-millimeter system holes until they bottom out (roughly 12 millimeters deep). Place the top/bottom panel onto the dowels, then insert cam locks into the face holes. The cam arrow must point toward the panel edge, this engages the locking ramp when turned clockwise. Turn each cam exactly one half-turn; over-rotation strips the particleboard.
Flip the frame, check for square by measuring diagonals (difference under 3 millimeters), then nail the back panel using 25-millimeter wire brads spaced 150 millimeters apart. A pneumatic brad nailer speeds this up; a hammer works but risks denting the melamine.

Image source: Web (Bing) / storage.googleapis.com (Web image (fair-use with source credit))
Suspension Rail: Finding Studs, Leveling to 1/16", and Lag Bolt Placement
The FRÖJERED rail carries all wall-cabinet weight. Locate studs with a deep-scan finder (standard 16 or 24 inches on center) and mark centers vertically. Hold the rail at the planned cabinet-top height (typically 54 inches above finished floor for 30-inch wall cabinets) and level it to within 1/16 inch over its full length.
Drill 3/16-inch pilot holes through the rail at every stud, two lags per stud bay minimum. Drive 5/16-inch by 3-inch Grade-5 lag bolts with a 1/2-inch impact socket until the washer seats flush. Never use drywall anchors; they pull out at roughly 50 pounds shear. For concrete or block walls, use 6-millimeter by 60-millimeter sleeve anchors instead.
The rail must be solid, any flex transfers directly to door misalignment.
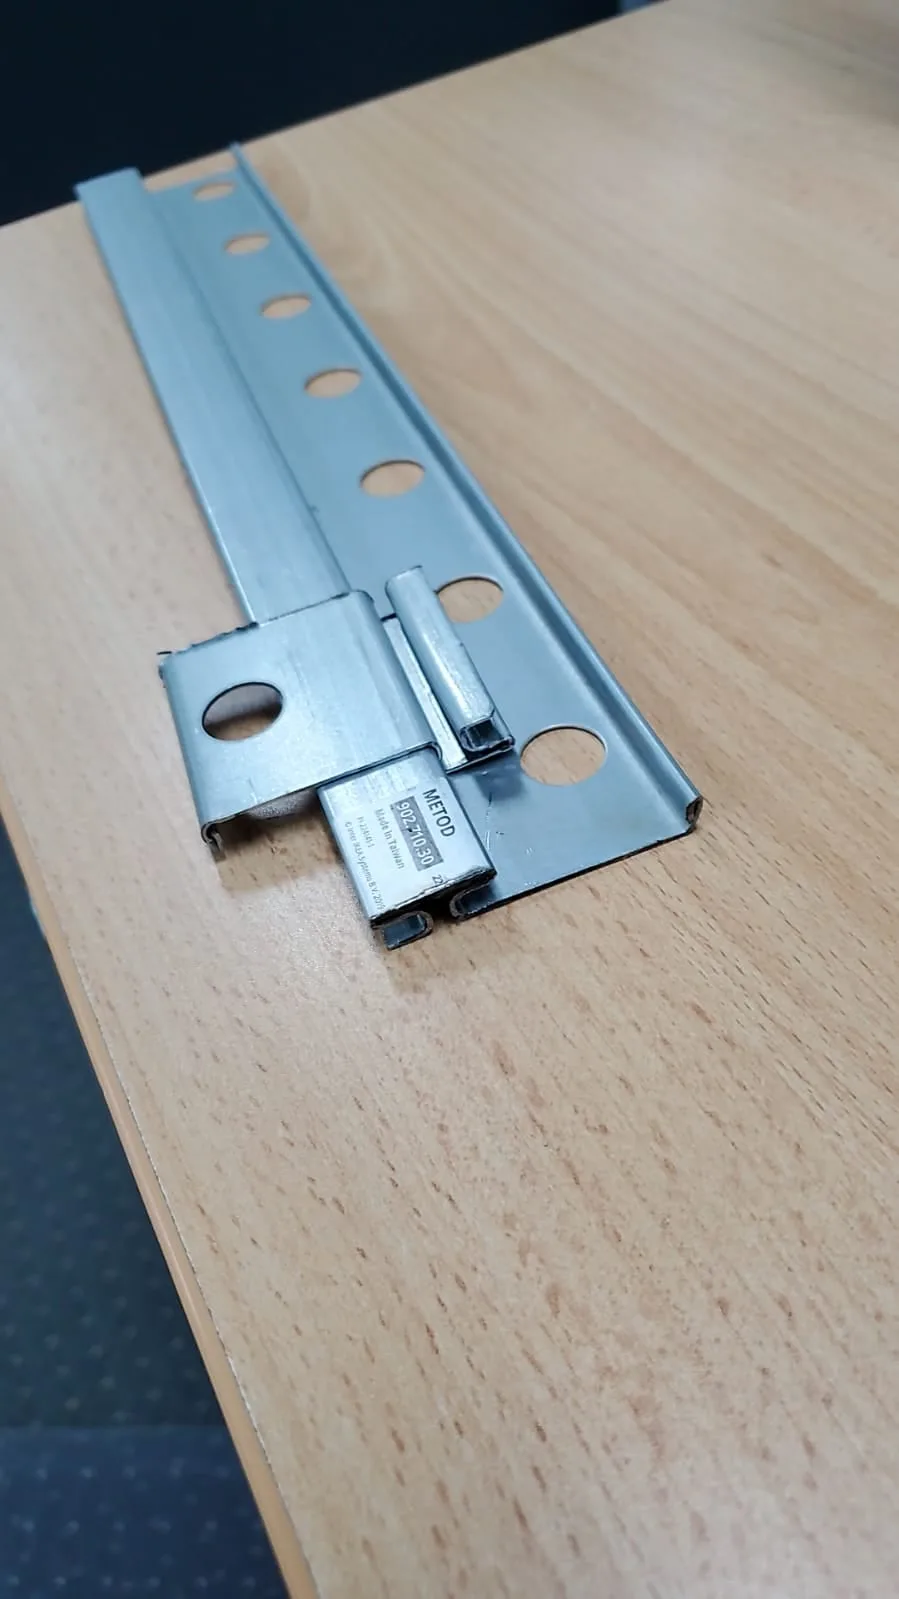
Image source: Web (Bing) / reddit.com (Web image (fair-use with source credit))
Hanging Wall Cabinets: Rail Hooks, Safety Brackets, and the Two-Person Lift
Each wall cabinet has two steel hooks on its back panel that engage the FRÖJERED rail. Lift the cabinet straight up, hook it, then lower it until the hooks seat fully. A 30-inch wall cabinet weighs roughly 35 kilograms, always use two people.
Once hooked, drive the included safety bracket screws through the cabinet top into the rail. These brackets prevent upward bounce if someone leans on the countertop later. Skip them and the warranty voids.
Check level again after the first cabinet; shim behind the rail hooks with plastic packers if the reveal to the ceiling is uneven. Clamp face frames of adjacent cabinets together before screwing them through the side-panel pilot holes.
Base Cabinet Install: Leg Leveling, Shim Strategy, and Face-Frame Clamping
Adjustable legs thread into the four corner sockets of each base cabinet. Turn them until the cabinet top sits 34.5 inches above the subfloor (standard countertop height). Use a laser level or a long straightedge across multiple cabinets to spot high spots.
Shim under legs with 3-millimeter plastic horseshoe shims, never wood, which compresses over time. Clamp face frames flush at the top and bottom, then drive the supplied 25-millimeter connector screws through the pre-drilled holes. A 10-by-10 kitchen typically needs eight base cabinets.
Connect them in sequence from a corner outward so errors don't compound. Verify plumb on the front edge before final tightening.
Toe-Kick Tracks: The Clip Direction That Prevents Trapped Panels
Toe-kick clips snap onto the front leg brackets with the open side facing down. This orientation lets the toe-kick panel slide up into the clip and lock. Install clips on every leg before standing the base row in its final position.
If you forget, the panel traps behind the cabinets and you must dismantle the row to fix it. Cut toe-kick panels to length with a fine-tooth blade; the melamine chips easily. Leave a 2-millimeter gap at each end for expansion.
Snap the panel in by angling it up and pressing down until you hear the click. A putty knife helps release a panel if you need to adjust.
Door Hinges: Plate Mounting, Hinge Snap, and the Three Adjustment Screws
Mount the UTRUSTA hinge plate to the cabinet side panel using two 5-millimeter euroscrews driven into the pre-drilled 32-millimeter pattern holes. Snap the hinge arm onto the plate, it clicks when seated. Each hinge offers three independent adjustments: the front screw moves the door left or right (side), the rear screw tilts the door in or out (depth), and the cam screw on the plate raises or lowers the door (height).
Start with all screws at mid-range. Hang the door, then adjust for a consistent 1.5-millimeter reveal around all edges. Soft-close dampers are built into MAXIMERA hinges; older models need a retrofit damper pressed into the hinge cup.
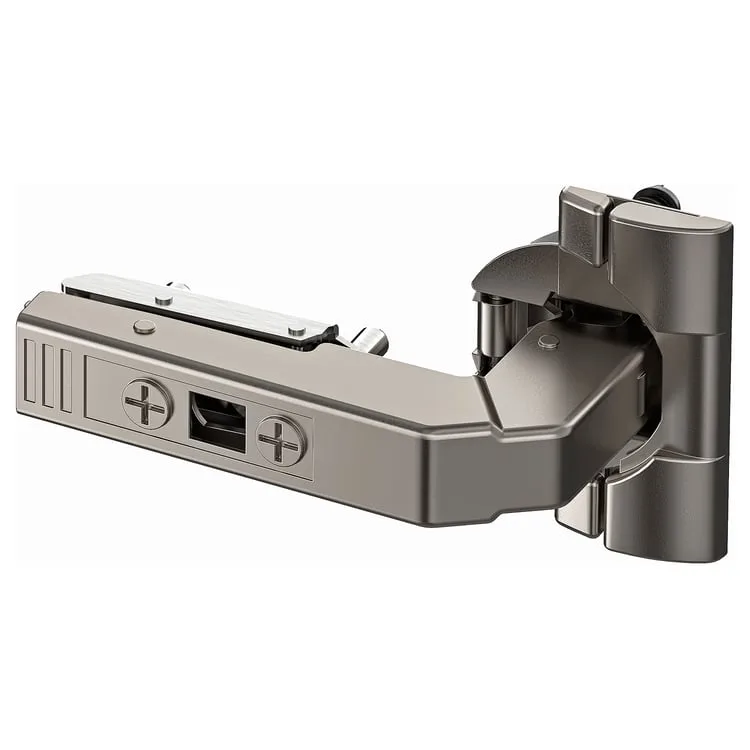
Image source: Web (Bing) / ikea.com (Web image (fair-use with source credit))
MAXIMERA Drawers: Box Assembly, Slide Mounting, and Reveal Alignment
Assemble the drawer box by inserting dowels into the side panels, adding the bottom panel into the groove, then locking the back panel with cams. The cam arrows point toward the back panel edge. Mount the left and right slides to the cabinet sides using the 32-millimeter holes, the slide's front hook catches the front hole, the rear screw goes into the third hole back.
Slide the drawer box onto the runners until the safety clicks engage. Adjust the front tilt with the orange cam on the slide side so the drawer face sits flush with the cabinet face frame. Test full extension; the drawer should glide without binding and soft-close from any position.
Common Visual Mistakes: Upside-Down Cams, Sagging Rails, and Bound Drawers
The most frequent error is cam locks installed with arrows pointing away from the panel edge, they feel tight but disengage under load. A close-up photo of a correct cam shows the arrow aimed at the seam. Suspension rails mounted to drywall anchors instead of studs sag within weeks; the rail deflects visibly when you press the cabinet front.
Drawer slides bound when the cabinet frame is racked out of square; measure diagonals before nailing the back panel. Hinge plates screwed into the wrong 32-millimeter holes offset the door by 32 millimeters, impossible to adjust out. Cover panels cut to the plan width but not scribed to the wall leave gaps that no deco strip hides.
Pro Tips: The Magnet Trick for Hinge Plates, Drywall Anchor Avoidance, and Filler Strip Scribing
A rare-earth magnet on the end of a 1/4-inch driver bit holds hinge-plate euroscrews so you can start them one-handed inside a tight cabinet. Never use drywall anchors for the suspension rail, if studs don't align, add a 2×4 horizontal backer between studs and lag into that. Scribe filler strips against the wall with a compass set to the largest gap, then belt-sand to the line for a tight fit.
Pre-drill 2-millimeter pilot holes in cover panels to prevent melamine blowout. Label every door and drawer front with painter's tape before removing them for painting or transport. Keep a spare hardware packet from each cabinet type; cams and dowels are not sold individually.
Safety Non-Negotiables: Anti-Tip Brackets, Stud-Only Rail Mounts, and Range Clearances
Wall cabinets must have the supplied safety brackets screwed through the top rail into the FRÖJERED rail, two per cabinet minimum. The suspension rail requires 5/16-inch Grade-5 lag bolts into wood studs or 6-millimeter sleeve anchors into concrete; toggle bolts and plastic anchors are not rated for the 300-kilogram-per-meter load. Maintain 30 inches of clearance between the cooktop surface and any combustible cabinet above per IRC Section M1901.1.
Install a GFCI-protected receptacle at the sink base. Secure freestanding tall cabinets to the wall with the included bracket even if they sit on the floor. Keep the receipt and a photo of the installed rail brackets for the 25-year warranty claim.
Frequently Asked Questions
What if hardware packets are missing cams or dowels?
Contact IKEA with the order number and cabinet code; they ship replacement hardware free. Do not substitute generic hardware, cam post diameter and thread pitch are proprietary.
How do I level base cabinets on a sloped floor?
Use the adjustable legs (100 to 150 millimeter range) and plastic horseshoe shims under the low legs. Check level across the full run with a 6-foot level or laser.
Can I mix SEKTION and METOD parts?
No. SEKTION uses imperial sizing (inches) and METOD uses metric (centimeters). Hole patterns, rail profiles, and hinge plates are incompatible.
Does ENNHET assemble faster than SEKTION?
Yes. ENNHET frames come with pre-assembled sides and integrated drawer slides, cutting frame build time roughly 40 percent. Door and hinge steps are identical.
How do I prove correct installation for the warranty?
Photograph the lag-bolted suspension rail, safety brackets on every wall cabinet, and the receipt. IKEA may request these images for any structural claim.
What tool makes cam installation easiest?
A 4-millimeter hex bit on a cordless drill with clutch set to 4. Hand-turn the final quarter-turn to feel the cam engage the ramp.