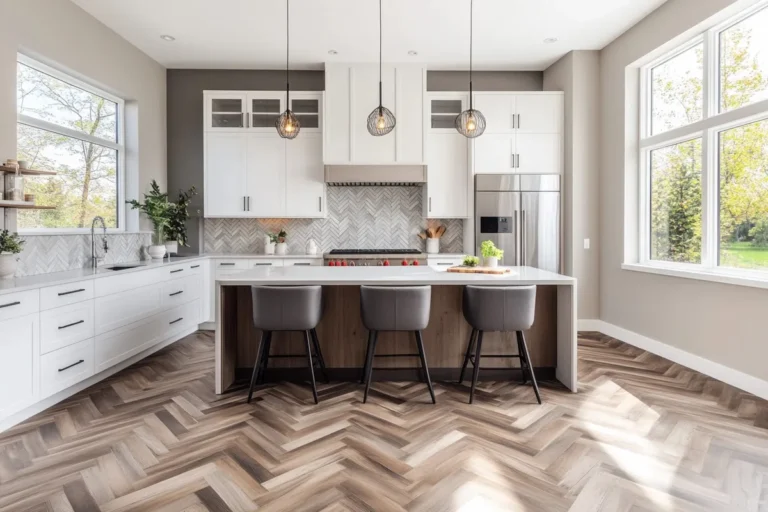
How to Customize IKEA Kitchen Cabinets: 15 Ideas

Image source: Web (Bing) / artofit.org (Web image (fair-use with source credit))
You've got IKEA cabinets, and honestly, they're solid. But they also look exactly like everyone else's. If you're wondering how to customize ikea kitchen cabinets without gutting your budget, you're in the right place.
The trick is knowing which path fits your situation before you buy a single can of paint.
A quick reality check: IKEA doors are around 1/2-inch thick in the Sektion system, and the hinge bore spacing sits at 45mm from the edge on most newer frames. That one spec determines whether you can paint, replace, or reface your fronts without turning the whole project into a headache. Start by identifying your configuration, then the rest falls into place naturally.
Quick Answer
To customize IKEA kitchen cabinets, choose one of three paths: paint your existing doors, swap in new IKEA fronts, or order third-party replacements that fit IKEA hardware frames. Measure your hinge bore spacing and door thickness first. Paint works best for fiberboard or laminate fronts with light wear.
Replacements suit dated or damaged doors. Third-party doors offer premium styles without replacing the framework.
What Kind of Customization Do You Actually Want?
This is the fork in the road. Your answer here changes everything downstream, from your budget to how long the project takes. Think of it as a decision tree with three branches:
Branch 1: Paint the existing doors. This is the cheapest route. It's best for new finishing certifiers, but you'll need a bonding primer designed for laminate. The catch: painted panels can chip near the hinges if you skip proper prep.
You're also limited to smooth or slab fronts, since paint won't hide textured grain.
Branch 2: Swap door fronts through IKEA itself. This is helpful if you just want a different color or style. IKEA sells dozens of fronts that match the same hinge pattern. Cost is moderate, and it's a clean order-cutting process.
The downside is that you're still limited to IKEA's catalog. If everything wants boutique options, this doesn't fully deliver.
Branch 3: Order third-party door fronts. This route lets you buy solid wood, high-gloss, or veneer doors with the correct boring precision configured for IKEA frames. It's the strongest recipe for a truly custom look. The downside is that you need to measure carefully on your side, and you have to account for hinge bore gaps that differ slightly between suppliers.
The deciding question: Do you love your current color but want a fresh finish? checking your layout can make creation faster. Fine.
Now trace your system.
The Skill-Level Check
This is a quick self-assessment, not a label. Are you comfortable with sandpaper, a drill, and patience under a two-week timeline? If yes, all three branches are open to you.
If painting a single surface sounds stressful, stick with swapping doors only. Keep your skill set honest and you'll save yourself a world of trouble.
Before You Touch Anything: Know Your Cabinet System
Get this wrong, and traps don't align. IKEA uses a suite of systems in different countries, and the spacing geometry is not interchangeable.
The three systems:
| System | Region | Door Thickness | Hinge Bore Spacing | Notes |
|---|---|---|---|---|
| Sektion | US/Canada | ~1/2" (12.7mm) | 45mm | Standard in North America |
| Metod | Europe/UK/AU | ~1/2" (12.7mm) | 45mm | Metric widths, similar hinge mount |
| Akurum | Legacy, global | ~3/4" (19mm) | Different hinge angle | Obsolete but common in old builds |
Look at the inside of an existing door near the hinge. If you see a 45mm center distance between the two bore holes, you're on Sektion or Metod. That means IKEA's current hinge line fits perfectly.
If the spacing looks closer to 38mm, you've got an Akurum build, and you'll need replacement hinges or adapters before moving forward.
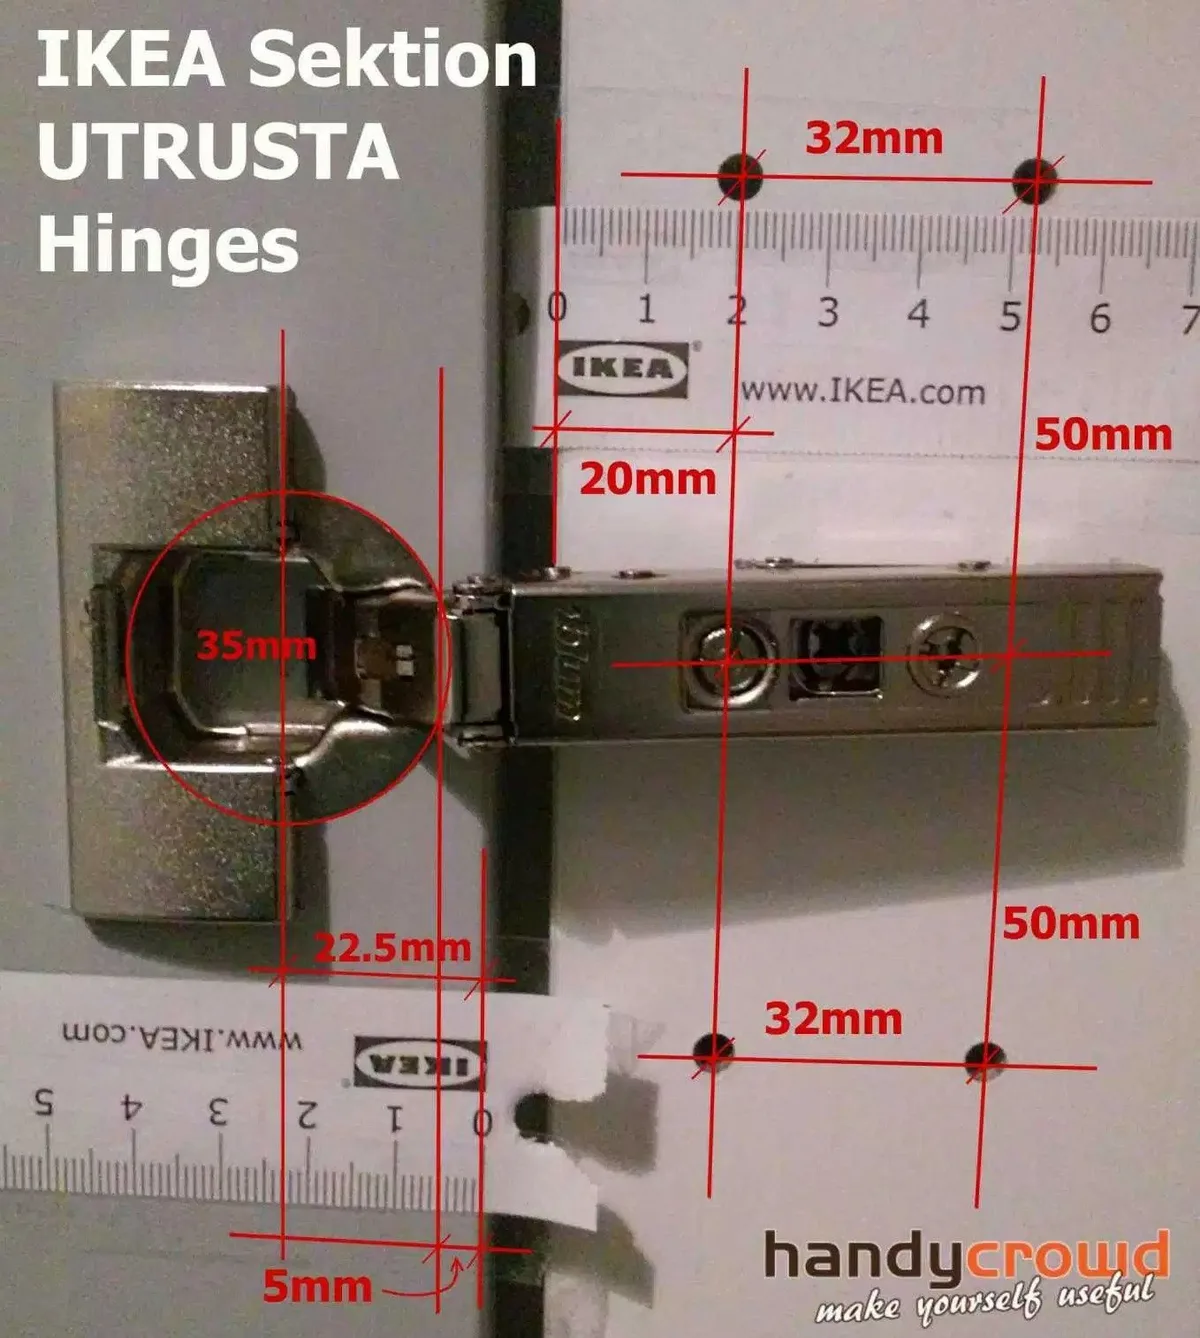
Image source: Web (Bing) / pinterest.com (Web image, fair use with source credit)
Why this matters: IKEA's hinge system uses a clip-top mechanism. That doesn't require screws through the back, but it does mean the hinge cup has to be centered correctly on the new door. Offcenter holes = clicking won't work.
That's the most common find when people buy custom fronts that don't fit.
The step to take: open a door, and use a ruler to measure from the edge of the door to the center of the nearest hinge hole. If it reads 45mm, you're in the safe zone. If you're at 48mm, that's still fine.
The modern IKEA hinge clips into either a 45 or 48mm center width. Any measurement outside that range? You've got a custom or off-brand frame in the mix.
Time to pause.
This is also when you should decide about your base cabinet depth. If you're dealing with the old 24" depth (US) or the metric 60cm (EU), that changes clearance for new fronts and handles. Aggregation keep in mind: the frame underside floor gets chaplain, all IKEA frames fit standard hinges, despite the country of origin.
But the requirements for a finished look vary.
The Paint Path: When You Want to Keep the Existing Doors
This is the DIY-friendly middle ground. You get a color change, possibly a texture refresh, and you only spend money on paint and sanding pads, not new wood. It's also the route that sends people to the comments section when the paint starts peeling, so know what you are signing up for.

Really Source: Web (Bing) / storage.googleapis.com (Web image with fair use credit)
The Pros
- Cost: roughly $30 to $50 in supplies for a 10-door set, versus $300+ for new fronts.
- Time: The 2 to 3 hours of active work plus 2 days of dry/cure time.
- Eco-friendly: You're reusing the existing doors, keeping them out of the trash.
The Cons
- Durability ceiling: Paint on laminate will never be as resistant to water or impact as factory foil surfaces. Touch-ups happen.
- Visible texture: Evening-out spray guns, but a brush roll acceptable.
- Hinge risk: If you paint over the hinge, the soft-close clip might not engage.
The Step-by-Step Process:
- Remove the doors entirely. Label each door with a strip of painter's tape. That little vague "top left" label saves you from a hinge matching crisis.
- Clean with TSP (trisodium phosphate) or a degreaser. Grease builds up near the handle, and paint won't stick to oil.
- Sand lightly with 220-grit. The goal is to open the laminate surface a bit, not tear it off.
- Prime with bonding primer. This is not a full primer. It is a water- or solvent-based product labeled "high adhesion for LPL" (low-pressure laminate). Standard drywall primer will peel.
- Apply two thin coats of paint. Let each coat dry for at least 4 hours. Wait a full 24 hours before re-hanging the doors so soft-close hardware gets a clean press.
Mistakes to avoid: don't paint the inside of the hinge cup. The hinge needs to fit friction-fit; paint in the cup changes the hinge angle, and you get a door that won't shut straight. Instead, whole tape over the cup before painting.
That's a 5-second step that saves you a 20-minute hinge adjustment.
Honest verdict on paint:
Paint works best for doors that are in good shape and you're fine with a "fresh but still IKEA" look. If you're aiming for a full high-end transformation, the paint path is a stepping stone, not the destination.
The Replacement Path: Custom Doors, Third-Party Doors, and Door Swaps
This is where IKEA customization really delivers. You can order custom door fronts that fit these frames, and the supplier ships them ready to clip in. You get all the benefits of a bespoke kitchen on a fraction of the price you'd pay a cabinet maker for a whole kitchen.
What you're actually getting: Door fronts, drawer fronts, and sometimes panels. Nothing changes about the cabinet framework, the so-called guts. The hinges stay, the drawers stay.
You're just swapping the visible surface.
The critical measurements you need to place an order:
- Door height and width: measure to the nearest mm, or check IKEA's current catalog specs.
- Door thickness: target about 1/2" (12.7mm). If you specify thicker standard solid wood, like 3/4", the bore depth might leave the hinge cup sticking out the back.
- Bore hole center: ask for 48mm or 45mm spacing options. Most third-party suppliers ask this upfront because it's the hinge-mounting lock.
- Slide fit gap: leave a 1/16" gap between doors and edges for movement.
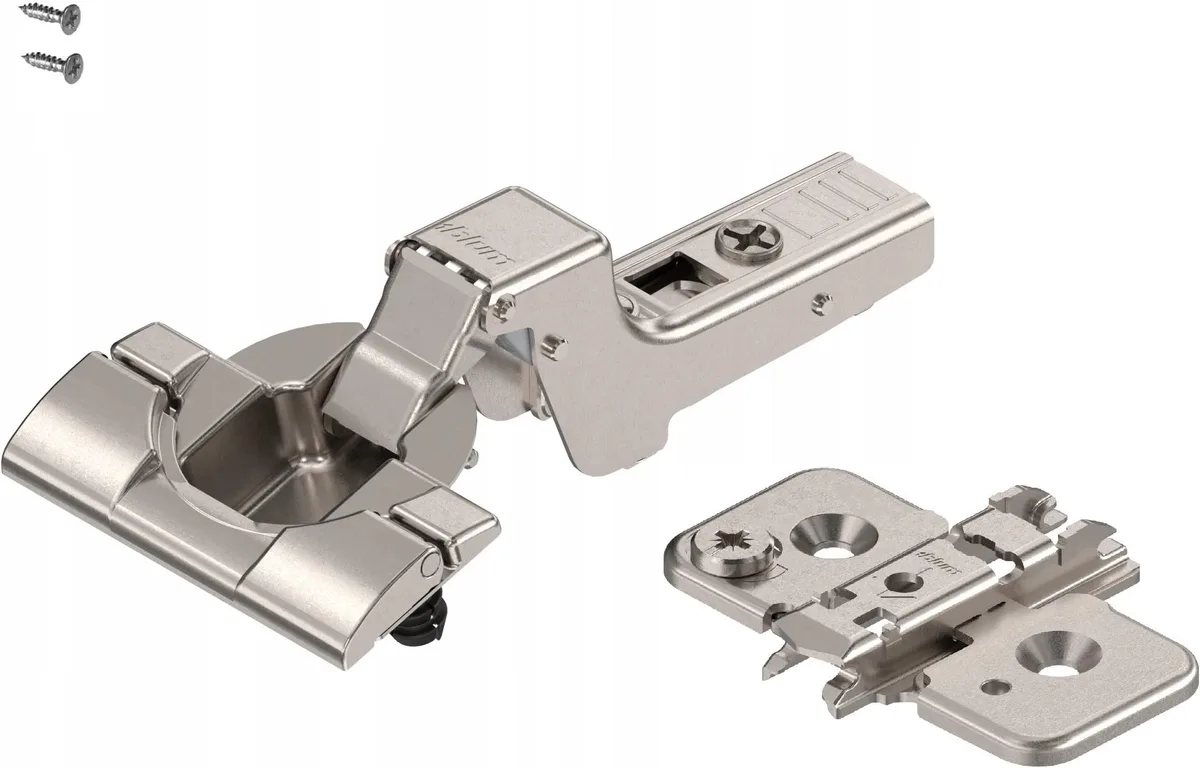
Image source: Web (Bing) / amazon.com (Web image with fair use credit)
Do third-party doors work with IKEA hinges?
Yes, if the bore spacing matches. IKEA uses the European "clip-top" standard. Many manufacturers (especially in Europe) already produce door fronts that fit this pattern.
You often pay more for that bold bleed, but the click-on installation is worth the premium.
The concrete steps to ordering:
- Measure all your door sizes and make a list.
- Pick your material: wood veneer, high-gloss acrylic, matte lacquer, or colored laminate.
- Choose your boring option. Select "IKEA-ready" if available, otherwise "drill for 45mm".
- Order one door first to test the fit and color patch before spending on the entire kitchen.
- Re-hinge with new hinge plates if you ever tried these on an Akurum frame.
Key truth: This path is often faster than painting. No drying time, no sanding. You buy the new fronts, you include the old, you clip, and you finish adjusting.
The Pro Move: Custom Door Fronts, Sektion's Aftermarket
If you're sticking with Sektion and want the same exact IKEA hinge compatibility without the third parties guessing, consider using custom fronts built for Sektion frames. These are typically offered by smaller independent shops rather than direct manufacturers, and they bridge the gap between the old system and factory supplied.
Why this is pro-grade: Instead of patching your cabinets with fillers, the custom-fitted fronts cover the entire door with a full slab panel, so the frame edge doesn't show at all. That's the look that separates designer kitchens from "IKEA hack" shots.
How it works:
- Bifold the old door to the back? No, you're attached to the back of the new custom front with a growing base.
- Then the two-layer construction slides into the same hinge.
- No, IKEA hinge line is impacted because the bolt holes are drilled through both layers.
When it's overkill: If you're only going for a color change (wanma paint), this is unnecessary. If you're chasing a high gloss, mirror-surface look, or a natural oak texture that IKEA doesn't sell, it's a genuine blockbuster.
The extra work: Wood veneer doors need a protective coat. High-gloss laminates need a gentle rub with flash or cheap microfiber. And you have a small hardware cost premium vs.
IKEA stock fronts and whether you go to a local builder.
Cost context: A fully custom door for a base cabinet may run you $400 to $900 per door with boring, depending on the finish. You mentioned this against an IKEA full cabinet box, which can be in the same ballpark. So if you're redoing the whole kitchen, skip the custom door path and start from scratch with new Sektion frames.
If you're working with an existing box, though, the custom fronts double the look at half the price.
Frequently Asked Questions
Can I paint IKEA laminate without sanding?
Yes, but you still need a bonding primer after a light degrease. Bonding primer sticks to smooth laminate without sanding eroding the surface. If you skip sanding AND primer, the topcoat peels in sheets.
Do third-party doors work unspecial on IKEA hinges?
Only if the bore hole spacing matches (45mm or 48mm standard). Most custom suppliers offer and this option. Measure your existing door's bore distance before you order.
How much does it cost to replace IKEA cabinet doors?
IKEA door grade runs from about $15 to $50 per front, depending on color and depth of gloss. Custom third-party doors range from $80 to $150 per full door, depending on material, increasing the cost.
Can I add interior organizers after customizing?
Yes. The IKEA interior hardware (kunjana, hooks, pullouts, Lazy Susans) all attach to the frame's pre-drilled holes. They're configured the same whether or not you've swaped fronts.
Will my warranty remain if I paint the doors?
Probably not. IKEA's 10-year warranty covers factory finished surfaces. This custom paint change voids the finish warranty, but doesn't affect the structural warranty on wood or particleboard.
Final Recommendation
The best path depends entirely on your starting point. If you want the cheapest refresh and you can handle touch-ups, paint your existing doors. If the boxes were new or were tired, but you love the layout, buy replacement fronts from IKEA.
If you're chasing a unique style and okay with paying for premium, order third-party custom fronts with IKEA-compatible clip system.
Take your measurement. Know your system. Or perhaps line up the perfect front replacement.
One that pattern keeps the pain away: spending a few extra minutes from the start saves you a full weekend at the end.
[Check your spacing carefully] (https://kitchenoma.com/how-to-design-kitchen-cabinets/) allows you to have new fronts fits; sometimes a small remodel goes further than a paint refresh. And if you're money-intensive, the budget approach often points you to this very project.
High-Gloss, Matte, or Wood Veneer: The Trade-Off
Finish choice drives durability more than the door material itself. High-gloss acrylic bounces light around small kitchens and makes them feel bigger. It also shows every fingerprint and water spot.
Matte or satin laminate hides smudges and grease. That makes it the low-maintenance pick for family kitchens. The catch is that matte can develop a chalky haze near cooktops or dishwashers.
Wood veneer adds warmth you can't fake with foil. It scratches, and it needs periodic oiling. Solid wood fronts also weigh more, so verify your soft-close clips handle the load.
Blum's hinge spec chart lists weight limits per hinge model.
Who should pick what:
- High-gloss: design lovers, small spaces, low traffic
- Matte: kids, rentals, heavy daily use
- Wood veneer: classic looks, natural light, owners who don't mind upkeep
The Step-by-Step Process (Either Path)
Both paths follow the same skeleton: measure, remove, prep, install. Number every door and drawer front before you take them down. You'll save yourself an hour of hinge adjusting later.
For painting:
- Clean with TSP or degreaser.
- Sand lightly at 220 grit.
- Apply bonding primer to the laminate.
- Paint two thin coats.
- Wait 24 hours before rehanging.
For swapping:
- Measure hinge bore spacing (45mm or 48mm).
- Order one test door first.
- Check the fit and color against existing panels.
- Clip on all fronts and adjust the soft-close tension.
The clip system follows a European standard. Check the weight of your new doors against Blum's hinge specifications before committing. Heavy fronts need a sturdier hinge.
Avoiding the Expensive Errors: The "Hacks" That Backfire
The most common mistake is filling old hinge holes with standard wood filler. IKEA frames are particleboard with a melamine coating. Regular filler doesn't bond there.
Use epoxy or buy hinge adapter plates instead.
Screwing too tight is a close second. Particleboard strips out fast, usually at 15 inch-pounds of torque. Finish the final turn by hand, not with a drill.
Adding heavier doors without upgrading hinges causes slamming. The standard IKEA hinge handles roughly 13 pounds per door. Solid wood fronts push past that.
Plan for a heavy-duty upgrade.
Never skip the filler panel gap. Walls are never perfectly square. Use scribe strips or cover panels to hide a 1/4-inch gap.
That's the detail that separates a custom look from a flat-pack one.
Real-Life Scenarios: See It in Practice
Scenario one: a 2015 Akurum kitchen with dated oak foil fronts. The owner painted 30 doors for $85 in paint and supplies. The project took three weeks with drying time.
The fresh matte white finish transformed the rental for very little money. The downside came later. Paint near the sink started peeling after a year of steam and splashes.
Scenario two: a Sektion kitchen with glossy white fronts that looked builder-grade. The owner ordered 15 custom matte grey doors from an EU supplier for $1,100. Installation took one weekend.
The hinges clipped right onto the existing 45mm boring. No drilling, no filler, no sanding. The kitchen sold for $8,000 above asking.
The pattern is clear. Paint is a short-term refresh. Replacement is a long-term investment.
Maintenance and Long-Term Care
Clean new fronts with a damp microfiber cloth and a drop of dish soap. Avoid abrasive pads and citrus degreasers on matte surfaces. They dull the topcoat over time.
Check hinges every six months. A quarter turn on the mounting screws keeps doors aligned and prevents cover panels from rubbing. It also catches small issues before they become stripped holes.
For painted doors, reapply a clear protective topcoat after two years if you see wear. Keep touch-up paint in a labeled jar. You'll thank yourself later when you only need to fix one scratch, not a whole door.
If you're thinking about a larger layout shift, cabinet depths matter when ordering new fronts. And if the frames themselves are worn, refreshing the cupboards might serve you better than new doors.
Cost Breakdown (What It Actually Costs Each Way)
Prices vary by region, but the ratios stay consistent. Paint runs about $85 in supplies for 30 doors. New IKEA fronts start around $300 total for an average 10-door layout.
| Path | Typical Cost (10 doors) | Time | Effort |
|---|---|---|---|
| Paint existing doors | $50-100 | 3 weeks (with drying) | High |
| Replace with IKEA fronts | $300-700 | 2 days | Low |
| Third-party custom fronts | $800-1,500 | 1 weekend | Low |
Tool costs matter too. A bonding primer roller set runs about $25. A hinge jig for custom bores costs $35.
Factor those in before you start.
Frequently Asked Questions
How long does the whole customization take?
Paint takes two to four weeks including cure time, replacement for a few days, custom thirds for one weekend plus shipping lead time. Budget a weekend for hinge adjusting and cleanup.
Can I reuse my old IKEA hinges on custom doors?
Yes, if the bore spacing stays consistent. Swap the hinge cups directly into the new door.
Which finish holds up best near the stove?
Matte or satin laminate outperforms high-gloss in greasy areas. High-gloss can yellow slightly in heat and shows every splash.
The Smart Customizer's Decision Guide
Check your layout and condition first. If the frames are sound, choose replacement doors.
If you love strong colors and textures, paint. If you want permanence, order custom fronts.
Make one box and leave no sign of the other. Ten minutes of measuring beats a weekend of regret.