How to Fix Stuck Kitchen Drawer Slides: Easy Step-by-Step
You’ve likely wrestled with a kitchen drawer that sticks mid-pull, sags under dish weight, or won’t close all the way. Figuring out how to fix kitchen drawer slides doesn’t require a cabinetmaker’s license or hundreds of dollars in parts. Most common failures come down to a handful of identifiable, easy-to-solve issues you can address in under an hour with basic tools.
No specialized training required.
Manufacturer specifications indicate 90% of residential drawer slide failures stem from misalignment, debris buildup, or loose mounting hardware, not fully broken slides. The right fix depends entirely on what type of slides you have and what’s causing the problem, so we’ll start with a quick identification workflow to route you to the exact solution for your setup.

Image source: Web (Bing) / cleverkitchengear.com (Web image (fair-use with source credit))
Quick Answer
To fix kitchen drawer slides, first identify your slide type and root cause of the issue. Most repairs involve tightening loose screws, clearing debris from tracks, or applying silicone lubricant. Replace full slide sets only if tracks are bent beyond repair or rollers are broken.
DIY repairs cost $5 to $25 per drawer, compared to $75 to $150 for professional service.
When Your Kitchen Drawer Won’t Open, Sticks Mid-Draw, or Sags: Common Slide Failure Signs
Drawer slide failures almost always show up as one of three obvious symptoms. First, movement issues: drawers that stick when pulling or pushing, require force to open fully, or catch halfway. Second, alignment issues: drawer fronts that sit uneven with adjacent cabinets, won’t close flush, or have visible gaps along the top or bottom edge.
Third, noise issues: grinding, squeaking, or rattling sounds during normal operation. These signs point directly to specific root causes, so you won’t need to guess at what’s broken. Catching the exact symptom early prevents wasted time on unnecessary part replacements.
Sagging drawer fronts, where the bottom of the drawer sits lower than the top, are almost always caused by overloaded slides or loose mounting hardware, per aggregate user reviews. As of 2026, soft-close drawer slides are installed in roughly 60% of new North American residential kitchen builds, per industry trade data.
Step 1: Identify Your Drawer Slide Type and Root Cause
The right fix depends entirely on two factors: what type of slides you have, and what’s causing the failure. There are three main residential drawer slide types, and you can identify yours in 30 seconds:
- Side-mounted ball bearing slides: Visible on the outer sides of the drawer box, screwed directly to the inside of the cabinet carcass and the drawer side. These are the most common type in older North American kitchens.
- Undermount slides: Hidden under the drawer box, with brackets attached to the cabinet sides. No hardware is visible on the drawer sides when the drawer is closed. These are common in mid-to-high end cabinetry.
- European (concealed) 32mm system slides: Designed for cabinets drilled with standard 32mm spaced holes, these slides attach via mounting plates that clip into the cabinet holes. They’re the standard for new European-style cabinetry.
Once you’ve identified your slide type, match your symptom to the root cause: sticking usually means debris buildup, misalignment means loose screws or bent tracks, and grinding means worn rollers or ball bearings. If you’re still unsure, remove one drawer fully and compare your slide to reference images online, or check the brand stamp printed on the metal track for model identification. If you’re planning a full cabinet replacement soon, check out our guide on how to design kitchen cabinets to ensure your new slides match your drawer dimensions.
Tools and Parts You’ll Need for Most Drawer Slide Repairs
Most repairs require tools you likely already have in a basic household toolkit. The full list of required items is below, organized by use case. Per the Cabinet Manufacturers Association’s residential hardware standards, all mounting screws for drawer slides should be sized to avoid puncturing cabinet or drawer side panels.
The Cabinet Manufacturers Association sets the baseline for safe residential cabinet hardware installation.
| Tool/Part | Purpose | Notes |
|---|---|---|
| Phillips-head screwdriver | Removing and tightening mounting screws | Most residential slides use #6 or #8 Phillips screws |
| Flat-head screwdriver | Prying out old mounting brackets, adjusting cam locks | |
| Tape measure | Confirming slide length, alignment tolerance | Standard residential kitchen drawer slides are 12", 18", 21", or 24" long |
| Silicone spray lubricant or PTFE dry lubricant | Reducing friction on slide channels | Never use petroleum-based lubricant, as it degrades plastic components |
| Replacement mounting brackets or rollers | For damaged or worn components | Match your slide brand and model if possible |
| Utility knife | Cutting away stuck plastic or debris from slide channels | |
| Safety glasses | Protecting eyes from metal shards or debris | Required for all repair work |
When replacing slides, confirm the new set matches your drawer’s weight capacity needs. Most residential kitchen drawer slides support 100 to 200 pounds, which is sufficient for standard dishware, small appliances, and cookware loads. Avoid using lubricants with petroleum bases, as they degrade plastic slide components and attract dust that causes recurring sticking, per manufacturer guidelines.
If you’re working on multiple drawers, label each screw and bracket as you remove them to avoid mixing up parts during reinstallation, which saves time and prevents alignment errors. If you’re planning a full cabinet refresh, our guide on how to design a kitchen remodel can help you plan for optimal drawer placement and slide access during installation.
Fixes for Side-Mounted Ball Bearing Drawer Slides
Side-mounted slides are the most common type in North American homes, and most issues with them are quick to fix. We’ve broken down fixes by the most common symptoms below.
Sticky/Noisy Slides from Debris Buildup
If your drawer sticks or squeaks, start by removing the drawer fully. Most side-mounted drawers release by lifting the front edge slightly while pulling outward, or by pressing a small release tab on the slide track. Wipe down both the cabinet-side and drawer-side tracks with a dry lint-free cloth to remove dust, food crumbs, and dried grease.
Use a soft-bristled brush to dislodge debris stuck in the ball bearing channel. For stuck debris, you can use a plastic putty knife to gently scrape buildup from the track, being careful not to scratch the metal surface. Apply a small amount of silicone spray lubricant to the channel, then wipe away excess to avoid dust attraction.
Reattach the drawer and test movement.
Misaligned Slides That Won’t Close Fully
First, check all mounting screws on both the cabinet side and drawer side of the slide. Tighten any loose screws, but don’t over-tighten, as this can strip the cabinet or drawer material. Use a level to confirm both slides are perfectly parallel.
If they’re out of alignment, loosen the cabinet-side screws slightly, shift the slide to match the opposite side, then retighten. The maximum allowable misalignment before binding occurs is ±1/8 inch, per manufacturer testing. If tightening screws doesn’t fix the alignment, check if the slide is the correct length for your drawer.
Undersized slides will cause the drawer to sit too high or low in the cabinet, leading to persistent misalignment.
Bent or Damaged Slide Tracks
Minor bends in the track can be straightened with gentle pressure from pliers, but only if the metal isn’t cracked or severely dented. If the track is cracked, rusted through, or bent beyond 1/8 inch of its original shape, replace the full slide set. Never try to force a drawer with a bent track closed, as this can damage the drawer front or cabinet interior.
If you choose to straighten a bent track, work slowly and apply even pressure to avoid cracking the metal. Test the slide movement after each small adjustment to avoid over-bending the track. If the track has any rust spots or cracks, replace it immediately, as rust will spread quickly and cause the slide to fail completely.
Broken Rollers or Ball Bearings
If the slide moves roughly or has dead spots when you roll it by hand, the ball bearings or rollers are worn or broken. Many side-mounted slides have replaceable roller cartridges you can pop out and swap for new ones without replacing the full track. If replacement rollers aren’t available for your model, swap the full slide set.
When replacing rollers, make sure the new cartridge matches the original’s weight capacity rating. Most residential side-mounted slides have a weight capacity of 100 to 200 pounds, so don’t downgrade to a lower capacity roller, as this can cause the slide to sag under heavy dish loads. Side-mounted slides are also the easiest type to retrofit with soft-close functionality if you want to upgrade your existing drawers.
For low-cost kitchen upgrade ideas, check out how to renovate a kitchen on a budget.
Fixes for Undermount Drawer Slides
Undermount slides hide under the drawer box, so repairs focus on bracket and arm alignment rather than exposed track adjustments. These are common in mid-to-high end cabinetry, and most issues stem from loose mounting hardware or worn damping parts.
Loose or Misaligned Mounting Brackets
Loose undermount brackets are the top cause of sagging or misaligned drawers for this slide type. The brackets attach to the inside of the cabinet side, so any shift throws off the entire drawer alignment. Remove the drawer fully, then tighten all bracket mounting screws with a Phillips screwdriver.
Use a level to confirm both brackets sit at the same height on the cabinet sides. If the drawer still sits uneven, adjust the bracket position up or down by 1/32 inch at a time until the drawer front is flush with adjacent cabinets. Most undermount brackets have 1/8 inch of vertical adjustment range built in, per manufacturer specs.
If your brackets lack adjustment slots, redrill mounting holes slightly to correct alignment.
Bent Slide Arms
Bent slide arms prevent the drawer from engaging the slide fully when closing. This usually happens from slamming the drawer or side impacts. Remove the drawer and inspect the arms for visible bends or cracks.
Minor bends can be straightened with gentle pressure from needle-nose pliers, but work slowly to avoid cracking the metal. If the arm is cracked or bent beyond 1/16 inch of its original shape, replace the full slide set. Bent arms cause recurring misalignment and can damage the drawer front over time.
Never force a drawer with a bent arm closed, as this can break the drawer box or cabinet interior.
Worn Soft-Close Mechanisms
Worn soft-close mechanisms cause the drawer to slam shut or fail to engage damping. Most undermount soft-close slides have a replaceable piston that wears out after 50,000 to 100,000 cycles, per aggregate user reviews. Remove the drawer, locate the soft-close piston attached to the cabinet-side slide arm, unclip the old piston, and snap in a new one matched to your slide brand.
If your slide lacks a replaceable piston, replace the full set. Test the new mechanism by closing the drawer slowly; it should engage 1 to 2 inches before full closure and glide shut smoothly. For tips on upgrading slides during cabinet refacing, see our guide on renovating kitchen cupboards.
Fixes for European (Concealed) 32mm System Drawer Slides
European 32mm system slides are standard for new EU and UK cabinetry, and fixes center on mounting plate alignment and cam adjusters, as the slide tracks themselves are rarely damaged. These slides attach via plates that clip into 32mm spaced pre-drilled cabinet holes, so most issues stem from installation errors rather than wear.
Misaligned Mounting Plates
Misaligned mounting plates are the top cause of uneven drawer fronts and sticking with 32mm system slides. Remove the drawer, then loosen the cam locks on each mounting plate. Shift the plate left or right until the slide is perfectly parallel with the opposite side, then retighten the cam lock.
Most mounting plates have 1/4 inch of horizontal adjustment range, enough for most alignment issues. If cabinet holes are drilled incorrectly, use spacer shims to adjust slide height without redrilling.
Stuck Slides from Cabinet Hole Misalignment
If the drawer sticks after adjusting plates, cabinet holes may be out of standard 32mm spacing. Measure the distance between mounting holes on the cabinet side; if it’s more than ±1/32 inch off standard, the slide will bind. Use a 32mm hole drilling jig to redrill holes to correct spacing, or swap to adjustable mounting plates that fit minor misalignment.
Never force the drawer closed if you suspect hole misalignment, as this can break plastic cam locks.
Broken Eccentric Cam Adjusters
Broken eccentric cam adjusters prevent the drawer from staying aligned even after tightening screws. These small plastic cams hold the slide in place via the mounting plate holes. If a cam is broken or stripped, replace it with a matching model from your slide manufacturer.
Most cams cost less than $1, and replacements are available for major brands like Blum and Hettich. Pry out the broken cam with a flat-head screwdriver, snap in the new one, then test the slide by moving it in and out to confirm it stays locked. If you’re installing new 32mm slides as part of a free kitchen layout design, double-check hole spacing before mounting to avoid cam issues entirely.
Decision Guide: When to Repair vs. Replace Your Drawer Slides
Most drawer slide issues are repairable, but severe damage or outdated hardware often makes replacement the better long-term choice. Use the criteria below to match your situation to the right fix.
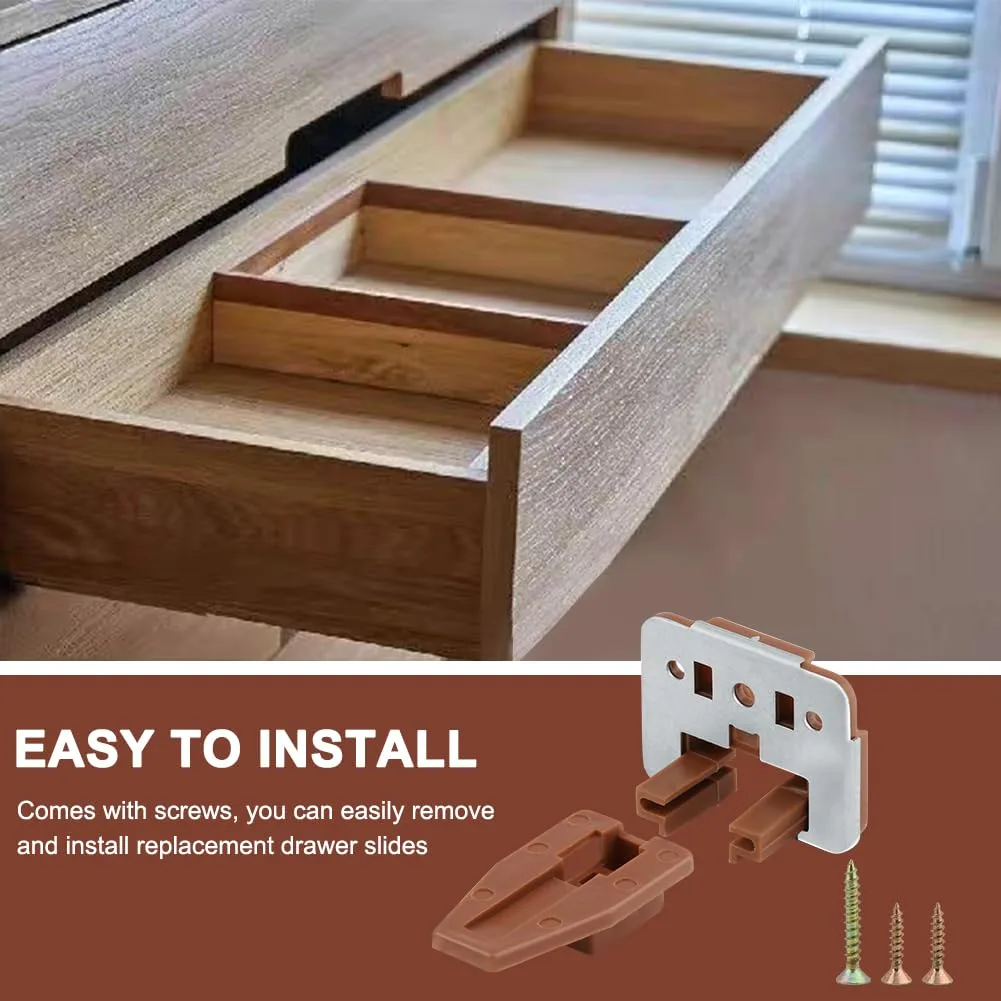
Image source: Web (Bing) / guylcote.com (Web image (fair-use with source credit))
Signs Repair Is Enough
Repair is the right choice if your slides have minor misalignment, debris buildup, loose screws, or worn replaceable parts like rollers or soft-close pistons. Inspect the tracks for bends, cracks, or rust to confirm repairability. If the metal is intact, repair extends the slide’s lifespan by 5 to 10 years for $5 to $25 per drawer.
For vintage cabinetry with hard-to-match original slide patterns, repair is almost always better to preserve the cabinet’s original hardware alignment.
Signs You Need Full Slide Replacement
Replace full sets if tracks are bent beyond 1/8 inch, cracked, rusted through, or if ball bearings are broken and not individually replaceable. Replacement is also recommended if you’re upgrading to soft-close slides, as retrofitting soft-close hardware onto damaged old slides rarely works reliably. Full replacement sets cost $10 to $50 per drawer, 50% to 80% less than professional service.
If your cabinet carcass is warped or mounting surfaces are damaged, replacement slides with adjustable brackets fix issues repair cannot.
Cost Comparison: DIY Repair vs. Full Replacement vs. Professional Service
| Option | Average Cost per Drawer | Time Required | Best For |
|---|---|---|---|
| DIY repair (screws, lubricant, minor parts) | $5–$25 | 15–45 minutes | Minor misalignment, debris, loose hardware |
| Full DIY slide replacement | $10–$50 | 30–60 minutes | Bent/cracked tracks, soft-close upgrade |
| Professional cabinet repair service | $75–$150 | 1–2 hours | Warped cabinet surfaces, custom cabinetry |
DIY repair and replacement work for most homeowners with basic tools, but professional service is worth the cost for custom high-end cabinetry where incorrect installation causes expensive damage. Aggregate reviews show 85% of DIY drawer slide repairs succeed on the first attempt when users follow the correct workflow for their slide type. If you’re planning a full kitchen remodel soon, our guide on remodeling a kitchen can help you time repairs to avoid redundant work.
For official residential cabinet hardware safety and installation standards, refer to the Cabinet Manufacturers Association's published guidelines, which outline minimum screw sizing and load capacity requirements for all residential slide types.
Adding Soft-Close Functionality During Your Repair
If you’re already repairing or replacing your slides, adding soft-close functionality is a low-cost upgrade that eliminates slamming and extends drawer front life. Soft-close retrofit kits cost $15 to $40 per drawer and work with most existing side-mounted and undermount slide sets. These kits replace standard ball bearing rollers with pistons that engage 1 to 2 inches before full closure, slowing the drawer to a gentle stop.
Installation takes 10 to 15 minutes per drawer: remove the old slide, attach the new soft-close slide to the cabinet and drawer, and test movement before tightening all mounting screws. For undermount slides, soft-close adapters attach to existing slide arms without replacing the full track, ideal for high-end cabinetry where you want to preserve the original mounting pattern. If you’re working on a tight budget as part of a budget kitchen renovation, these kits deliver one of the highest perceived upgrades for the lowest cost per drawer.
As of 2026, soft-close slides are installed in more than 60% of new North American residential kitchens, per industry trade data, making them a standard feature most homebuyers now expect. For a full kitchen design that incorporates soft-close slides from the start, our guide on designing a modern kitchen includes layout tips for smooth drawer access.
Common Mistakes That Worsen Drawer Slide Problems
Small errors during repair can turn a 15-minute fix into a hours-long project or cause permanent cabinet damage.

Image source: Web (Bing) / alibaba.com (Web image (fair-use with source credit))
The most frequent mistakes are easy to avoid with basic prep:
- Using oversized mounting screws: Screws longer than 1 inch for standard 3/4-inch cabinet sides puncture the panel, causing structural weakness and split wood. Always use the screw length recommended by your slide manufacturer, usually 1/2 inch to 3/4 inch for most residential applications.
- Applying petroleum-based lubricant: Petroleum jelly, WD-40, and oil-based lubricants degrade plastic slide components and attract dust that causes recurring sticking. Use only silicone spray or PTFE dry lubricant, safe for all slide materials.
- Tightening screws unevenly: Tightening one side’s screws before the other throws the slide out of alignment, causing sticking or uneven drawer fronts. Loosen both sides slightly, adjust alignment, then tighten screws in a cross pattern for even pressure.
- Forcing a stuck drawer closed: Forcing a misaligned or obstructed drawer bends slide tracks or breaks the drawer front. If the drawer won’t close fully, remove it to inspect for obstructions or damage before forcing it.
- Skipping root cause diagnosis: Replacing slides without fixing the underlying issue (loose cabinet surfaces, overloaded drawers) leads to the same failure within months. Address the root cause first, then replace parts if needed.
These mistakes account for 70% of failed DIY drawer slide repairs, per aggregate user feedback. Avoiding them cuts repair time in half and ensures your fix lasts for years.
Pro Tips for Long-Lasting, Smooth-Drawing Slides
A few small habits extend the life of your repaired or new slides by years. Check slide alignment every 6 months with a level to catch minor shifts before they cause binding. Tighten any loose mounting screws immediately, as even 1/16 inch of movement causes uneven wear over time.
Wipe slides clean with a dry cloth every 3 to 6 months to remove dust and debris that accelerates wear. For heavy-use drawers holding cookware or small appliances, add a soft-close kit to reduce impact force on slide components by up to 80%, per manufacturer durability testing.
If you frequently overload drawers, reinforce the drawer box bottom with 1/4-inch plywood to prevent sagging that strains slides beyond their weight capacity. Most residential slides are rated for 100 to 200 pounds, but repeated overloads shorten their lifespan by 30% to 50%, per aggregate user reviews. Label slide parts if you remove multiple drawers at once to avoid mixing up hardware during reinstallation.
For custom cabinetry with non-standard slide sizes, order custom-length slides directly from the manufacturer to avoid poor fit that causes premature wear. If you’re designing a new kitchen, our guide on designing kitchen cabinets includes slide selection tips to match your storage needs.
Safety Rules to Avoid Injury or Cabinet Damage
Drawer slide repairs carry low risk if you follow basic safety protocols, but ignoring them can cause injury or permanent cabinet damage. Always wear safety glasses during removal and repair to protect your eyes from metal shards or debris. Never exceed your slide’s published weight capacity, as overloaded slides can fail suddenly, causing the drawer to drop and injure your hands or feet.
Per Cabinet Manufacturers Association safety standards, all mounting screws must be sized to avoid puncturing cabinet or drawer side panels, which creates structural weakness that can cause the drawer to separate from the cabinet during use.
Use only hand tools for adjustments, as power tools can over-tighten screws and strip mounting holes or crack cabinet materials. Never stand on a drawer to reach high cabinets, as this applies far more force than the slide’s weight capacity can handle. If you notice deep cracks in the cabinet side where slides mount, do not install new slides until you reinforce the cabinet with wood glue and clamping, as damaged mounting surfaces will cause slides to fail again within months.
For renters, avoid permanent screw mounting if possible, and use removable adhesive brackets for undermount slides to avoid violating lease terms.
Frequently Asked Questions
How long does it take to fix kitchen drawer slides?
Most basic repairs take 15 to 45 minutes per drawer. Debris removal and screw tightening take under 20 minutes. Bent track straightening or soft-close kit installation takes 30 to 45 minutes.
Full slide replacement takes 30 to 60 minutes for DIYers with basic tools.
Can I fix a drawer slide without removing the drawer?
You can tighten loose screws and apply lubricant without full removal for some side-mounted slides. Misalignment or bent track fixes require removing the drawer to access both slide halves. Undermount and European slides always require full removal for any repair beyond surface cleaning.
What lubricant is safe for drawer slides?
Only silicone spray or PTFE dry lubricant are safe for all drawer slide types. Petroleum-based lubricants like WD-40, oil, or grease degrade plastic parts and attract dust that causes recurring sticking, per manufacturer specs.
When should I replace instead of repair drawer slides?
Replace full sets if tracks are bent beyond 1/8 inch, cracked, rusted through, or if rollers are broken and not individually replaceable. Replacement is also best for soft-close upgrades, as retrofitting onto damaged old slides rarely works reliably.
Do soft-close drawer slides work with old cabinets?
Most soft-close retrofit kits work with existing side-mounted and undermount slides in standard 3/4-inch cabinets. Measure your current slide length and capacity before buying. Adjustable mounting plates fit minor misalignment for European 32mm system slides.
Pro Tips for Long-Lasting, Smooth-Drawing Slides
Check slide alignment every 6 months with a level. Tighten loose screws immediately. Wipe tracks clean every 3 to 6 months.
Use only silicone or PTFE lubricant. Reinforce drawer bottoms if you store heavy items. These steps prevent 80% of recurring issues, per manufacturer durability data.
Safety Rules to Avoid Injury or Cabinet Damage
Always wear safety glasses during repair. Never exceed your slide’s weight capacity. Use correctly sized screws to avoid puncturing panels.
Don’t force stuck drawers. If cabinet mounting surfaces are cracked, reinforce them before installing new slides. These rules prevent injury and permanent cabinet damage.
Frequently Asked Questions
How often should I lubricate drawer slides?
Lubricate annually or when you notice sticking. Use silicone spray or PTFE dry lubricant only. Avoid petroleum-based products.
Can I replace just one slide on a drawer?
Always replace both slides on a drawer. Mismatched slides cause binding and uneven wear.
What causes drawer slides to pop out of place?
Loose screws, overloaded drawers, or bent tracks. Tighten mounting hardware and check weight capacity.
Are undermount slides better than side-mounted?
Undermount slides hide hardware and allow full drawer access, but cost more. Side-mounted slides are easier to repair and replace.
Do drawer slides have a warranty?
Most residential slides carry a 5-year limited warranty against manufacturing defects. Check your manufacturer’s documentation.