How to Install Kitchen Base Cabinets: Step-by-Step DIY Guide
Installing kitchen base cabinets starts with accepting that your floor is not level and your walls are not square. The keyword how to install kitchen base cabinets hides the real work: diagnosing every high spot, bow, and plumbing stub-out before a single screw goes in. Most failures trace back to chasing the floor instead of establishing a fixed benchmark.
That benchmark becomes the only surface every cabinet trusts.
Per NKBA guidelines the finished countertop height lands at 36 inches which puts the cabinet top at 34.5 inches. A rotary laser level locked to that line absorbs floor variation up to an inch without shim stacks. Let’s walk through the process from benchmark to toe kick.
Quick Answer
Install base cabinets by finding the floor high point. Set a laser level at 34.5 inches. Shim or adjust legs to that line.
Clamp face frames together. Screw through backs into studs. Check diagonals for square.
Install toe kick last.

Image source: Web (Bing) / bangingtoolbox.com (Web image (fair-use with source credit))
Why Base Cabinet Install Goes Sideways
The floor slopes toward the drain. The wall bows out at the sink base. The corner cabinet hits a pipe chase.
These are not edge cases. They are every kitchen. When you screw cabinets to an uneven floor the doors bind.
The drawers sag. The countertop fabricator calls you with a template that rocks.
A 2023 NKBA installer survey found that 68 percent of callbacks stem from reveal gaps exceeding one eighth inch. The root cause is almost always skipping the benchmark step. Pros call it running the bases.
Amateurs call it hanging boxes. The difference shows up in the reveal lines.
Common failure points include:
- Chasing the floor with shims instead of legs
- Forcing a filler strip against a bowed wall
- Ignoring the dishwasher rough opening width
- Missing the anti-tip bracket on a freestanding range
Each of these turns a weekend job into a week of callbacks.
The One Thing That Makes It Work: A Level Benchmark Line
A rotary laser on a tripod projects a single horizontal plane. That plane becomes your truth. Every cabinet leg adjusts to it.
Every shim stack references it. The floor becomes irrelevant.
Set the laser at 34.5 inches above the highest floor point. Mark that line on every wall segment. Measure down to the floor at each cabinet location.
That measurement tells you exactly how much leg extension or shim thickness each box needs.

Image source: Web (Bing) / ketlogistik.com (Web image (fair-use with source credit))
Key setup steps:
- Spin the laser. Let it self-level.
- Measure up from the high spot to 34.5 inches.
- Mark the wall at that height.
- Verify with a receiver on a grade rod.
A green beam rotary laser costs $250 to $400. A red beam line laser costs $80. Both work.
The rotary covers a 20-foot run without moving. The line laser needs repositioning. For a full kitchen the rotary pays for itself in time.
How Base Cabinets Actually Hang: Carcass, Legs, Cleats, and Scribes
A base cabinet is a box with four critical interfaces. The legs carry weight. The cleat transfers load to studs.
The back panel keeps the box square. The scribe filler closes the wall gap.

Image source: Web (Bing) / ebay.co.uk (Web image (fair-use with source credit))
Leg levelers thread into the carcass bottom. Most offer three quarters inch of travel. That covers most floor variation.
For deeper dips use plastic horseshoe shims under the leg foot. Never shim above the leg. That lifts the leg off its bearing surface.
A French cleat rail mounts to studs at 34.5 inches. The cabinet back hooks over it. This lets one person hang a 120-pound box.
Screw through the back into studs every 16 inches. Use #10 washer-head screws two and a half inches long.
The back panel is either quarter-inch plywood in a dado or half-inch full back. Full backs resist racking better. They also give you more screw surface for the cleat.
Scribe molding covers the gap between the cabinet side and the wall. Cut it to the wall contour with a compass and a belt sander. A three-inch filler strip is standard.
Rip it to match the widest gap.
Tools, Materials, and Hardware You'll See on Site
The right tools cut install time in half. The wrong ones damage cabinets. Here is the core kit.
| Category | Items | Notes |
|---|---|---|
| Layout | Rotary laser, tripod, grade rod, receiver | Green beam preferred |
| Fastening | Impact driver, #10 washer-head screws 2.5", trim-head screws 1.25" | GRK or Spax |
| Leveling | Plastic horseshoe shims, cedar shims, composite shims | Color-coded by thickness |
| Clamping | 24-inch bar clamps, face-frame clamps, C-clamps | Minimum four clamps |
| Cutting | Track saw, circular saw, jigsaw, belt sander | For fillers and scribes |
| Safety | Anti-tip brackets, GFCI tester, stud finder | Code required |
Material list per 10-foot run:
- Base cabinets per plan
- Filler strips 3-inch and 6-inch
- Toe kick board 4.5-inch tall
- Scribe molding 8-foot sticks
- Construction adhesive for toe kick
- Touch-up marker kit
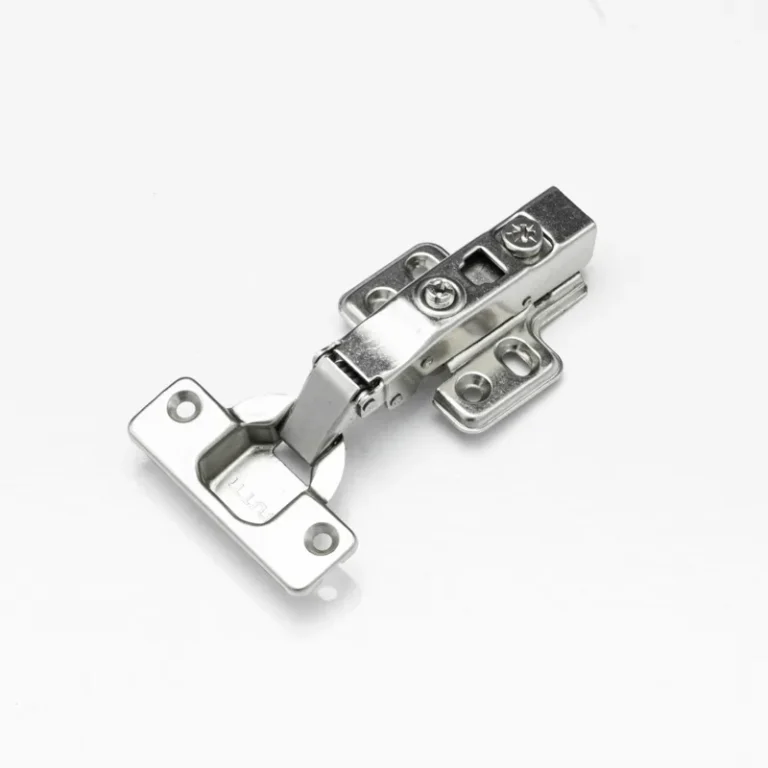
Hardware specifics matter. European hinges need a 35-millimeter cup bore. Face-frame hinges need a wrap-around mount.
Undermount slides need a half-inch side clearance. Side-mount slides need three-quarters inch. Confirm specs before you drill.
Step-by-Step: From High Spot to Toe Kick
The sequence never changes. The adjustments do.
- Find the high spot. Run a straightedge or laser receiver across the floor. Mark the highest point.
- Set the benchmark. Laser at 34.5 inches above that mark. Line on all walls.
- Dry fit the run. Place cabinets without fasteners. Check dishwasher opening. Check sink base plumbing clearance.
- Start at the high corner. Set the first cabinet. Adjust legs to the laser line. Check level front to back and side to side.
- Clamp and screw. Clamp face frames flush. Screw through stile into adjacent stile. Two screws top and bottom.
- Secure to wall. Screw through back into studs. Two screws per stud bay.
- Check diagonals. Measure corner to corner. Adjust until equal. This squares the box.
- Repeat down the run. Each cabinet references the laser line and the previous face frame.
- Scribe fillers. Compass the wall profile onto the filler. Cut and sand. Install with brad nails.
- Install toe kick. Clip or screw the toe kick board last. Protect it during countertop templating.

Image source: Bing (Web (fair-use with source credit))
Pro tip: Keep a level on the cabinet top while you drive the first wall screw. The torque can pull the box off line. A second pair of hands prevents this.
For more on planning the layout before boxes arrive see our guide on mapping the workflow early. It covers traffic zones and landing areas that affect base cabinet placement.
What Wrong Looks Like: Gaps, Leans, and Misaligned Reveals
A cabinet that looks plumb can still fight you at the door. The reveal, the gap between door and frame, tells the real story. A tight top reveal with a wide bottom reveal means the cabinet is twisted.
A consistent gap that widens at the floor means the wall bows out.
Check reveals with a feeler gauge set. Target one eighth inch plus or minus one sixteenth. If the gap varies more than that across a single door the hinge adjustment won't fix it.
The box is racked.
Common visual defects and root causes:
| Defect | Likely Cause | Fix |
|---|---|---|
| Top reveal tight bottom wide | Cabinet twisted clockwise | Shim rear leg or loosen wall screw |
| Bottom reveal tight top wide | Cabinet twisted counter-clockwise | Shim front leg or tighten wall screw |
| Reveal widens toward floor | Wall bows out | Scribe filler wider at bottom |
| Reveal narrows toward floor | Wall bows in | Scribe filler wider at top |
| Doors bind at hinge side | Face frames not flush | Loosen clamp screws realign retighten |
| Drawer front sits proud | Slide mounted too high | Remount slide on 32mm system holes |
A twisted box often traces back to the first cabinet. If the starter box isn't dead level and square the error compounds down the run. That's why pros check diagonals on every single cabinet before the next one goes up.
Pro Moves That Save Hours
Small habits separate a two-day install from a four-day slog. These are the ones that show up on every efficient job site.
Pre-drill every face frame screw. A 7/64-inch bit prevents splitting hard maple stiles. It also keeps the screw from wandering and pushing the frame out of flush.
Use a face frame clamp with a quick-release lever. Standard bar clamps work but they're slow. A dedicated face frame clamp like the Bessey K-Body or Pony Jorgensen closes the joint and holds it while you drive screws with one hand.
Mark stud locations on the floor before cabinets cover them. A piece of painter's tape at each stud bay saves fishing later. The laser line on the wall gives you height. The floor tape gives you left-right.
Run a chalk line on the floor for toe kick alignment. Snap it at 3 inches from the wall. Every cabinet toe kick edge kisses that line. No guessing.
No drifting.
Keep a shim kit sorted by color. Blue is 1/16. Red is 1/8. Black is 1/4.
Yellow is 3/8. Grab the right stack without measuring. Composite shims don't compress like cedar.
They hold dimension under 200 pounds.
Install the sink base last if the plumbing rough-in is tight. You can rotate the cabinet slightly to clear supply lines. Once the adjacent boxes are locked you lose that wiggle room.
Code, Safety, and the Anti-Tip Bracket
The 2021 IRC requires an anti-tip device on every freestanding range. Most manufacturers supply a bracket that screws to the floor or wall behind the range. Install it before the range slides in.
You cannot reach it afterward.
Seismic zones add more requirements. California CBC Section 1208.2 mandates positive attachment of all cabinets to framing. That means screws through the back into studs at 16 inches on center minimum.
No exceptions for particleboard backs.
GFCI protection is non-negotiable. NEC 210.8(A)(6) requires GFCI for all countertop receptacles. Test every outlet with a three-light tester before the countertop goes on.
A bad ground shows up as an open ground light. Fix it now.
Lead-safe work practices apply if the home was built before 1978. EPA RRP rule requires certification for any disturbance of painted surfaces. That includes removing old cabinets.
Check the build date before demo starts.
OSHA material handling guidelines suggest team lifts for anything over 50 pounds. A 36-inch sink base with a full back hits 130 pounds. Use a panel cart or appliance dolly.
A back injury costs more than the rental.
Quick Answers to the Most Asked Questions
Do I install flooring before or after base cabinets?
Tile and stone go down first. The cabinets sit on top. Hardwood and LVT go after.
The cabinets sit on the subfloor. The flooring butts to the toe kick. This avoids height transitions at the dishwasher.
How far apart should cabinet screws be?
Two screws per stud bay through the back. Studs are typically 16 inches on center. That puts screws every 16 inches vertically.
Add screws at the top and bottom rail if the cabinet is tall.
Can I use drywall screws for cabinets?
No. Drywall screws are brittle. They snap under shear load.
Use #10 washer-head cabinet screws. GRK R4 RSS Spax PowerLag all carry ICC-ES reports for structural use.
What if my floor slope exceeds leg adjustment?
Build a tapered shim platform from plywood. Rip strips that feather from zero to the needed height. Glue and screw the platform to the subfloor.
Set the cabinet on the platform. Legs fine-tune from there.
How do I handle a blind corner cabinet?
Pull the blind cabinet 6 to 12 inches from the corner wall. The exact pull depends on the door width and hardware. Check the manufacturer spec.
Leave the filler strip loose until the adjacent cabinet is set. Scribe it in place.
Your Install Plan: DIY Weekend or Pro Crew?
A 10-foot straight run with level floors and square walls takes a pro crew four hours. A DIYer with a helper budgets twelve. Add two hours per corner.
Add three hours per island. Add four hours if the floor needs a shim platform.
Cost breakdown per linear foot as of 2026:
| Scope | Material | Labor | Total |
|---|---|---|---|
| RTA particleboard | $120 | $80 | $200 |
| Semi-custom plywood | $250 | $120 | $370 |
| Custom frameless | $450 | $180 | $630 |
DIY saves the labor column. You add tool rental ($60/day for rotary laser) and time. A first-timer should expect 30 hours for a full kitchen.
A pro crew finishes in 10.
Hire a pro if:
- The floor slope exceeds one inch in ten feet
- Walls are plaster over brick (stud finding fails)
- You need permit drawings for structural changes
- The layout includes a peninsula or island with electrical
Do it yourself if:
- The run is under 15 feet
- Floors are concrete or plywood subfloor
- You own an impact driver and a laser level
- You can recruit a second pair of hands
Either way the benchmark line stays the same. The laser doesn't care who holds it.
Frequently Asked Questions
How long does it take to install kitchen base cabinets?
A professional crew installs 10 linear feet in about four hours. A DIYer with a helper should plan 12 to 15 hours for the same run. Corners islands and floor prep add time.
What height do I set base cabinets?
Set the cabinet top at 34.5 inches above the highest floor point. This yields a 36-inch finished countertop height with a 1.5-inch countertop thickness. Use a rotary laser to carry that line around the room.
Do base cabinets need to be screwed to studs?
Yes. Building code requires positive attachment to framing. Drive two #10 washer-head screws through the back panel into each stud bay.
For frameless cabinets with full backs add screws through the top and bottom rails.
Can I install base cabinets on a floating floor?
Tile and stone go under cabinets. Floating laminate LVT and hardwood go around cabinets. The cabinets sit on the subfloor.
Leave a 1/4-inch expansion gap at the toe kick covered by the toe kick board.
What screws do professionals use for cabinet installation?
GRK R4 RSS Spax PowerLag and FastenMaster HeadLok in #10 x 2.5-inch washer-head. These carry ICC-ES evaluation reports for structural connections. Drywall screws and deck screws are not rated for cabinet hanging.
How do I fix a gap between cabinet and wall?
Cut a filler strip to width. Scribe the wall contour onto the filler with a compass. Belt sand to the line.
Install with brad nails or trim-head screws. Paint or stain to match before installation.