How to Install a Kitchen Sink and Garbage Disposal: DIY
Learning how to install a kitchen sink and garbage disposal means working in a cramped three-dimensional space where drain slope, disposal orientation, and sealant choice all interact. A single misclocked outlet or missed knockout plug turns a weekend project into a callback. Most DIYers underestimate the spatial reasoning this job demands.
The fix is visual thinking before you pick up a wrench.
Per IPC 419.2 the dishwasher drain must connect above the trap weir and the disposal discharge must slope at least 1/4 inch per foot toward the P-trap. Manufacturer specs for undermount sinks require epoxy beads spaced no more than 12 inches apart on stone tops. Those numbers drive every decision in the next sections.
Quick Answer
Install the sink first. Mount the disposal flange with putty. Clock the outlet toward the drain.
Build the drain stack from basket strainer to wall stub. Wire the disposal to a GFCI-protected circuit. Test for leaks before use.
Why This Install Demands Visual Thinking
Text alone cannot show why the disposal outlet must face the drain before you tighten the mounting ring. A photo reveals the 15-degree window where the discharge tube aligns without stress. A diagram shows how a 1/4-inch slope per foot looks across a 24-inch cabinet floor.
Without that visual reference you guess and often guess wrong.
The sink-to-counter seal is another visual decision. Plumber's putty works on stainless but stains porous quartz. Silicone works everywhere but requires a 24-hour cure before clamping.
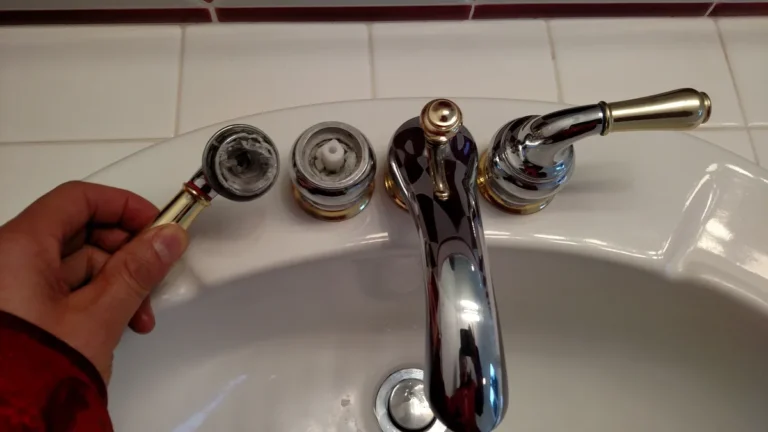
A close-up of the putty bead diameter (3/16 inch rope) prevents the most common leak path. See the hero image below for the finished spatial layout.

Image source: Web (Bing) / bestonlinecollegesdegrees.com (Web image (fair-use with source credit))
The electrical side also benefits from visual planning. The disposal cord exits the bottom at a fixed angle. The GFCI receptacle or switch location dictates cable routing.
A wiring diagram prevents the classic error of crossing the neutral and ground on the disposal terminal block. NEC 422.16(B) limits cord length to 18, 36 inches for plug-connected units.
Know Your Parts Before You Start
Every install uses the same core components but the names vary by brand. The disposal mounting assembly includes a sink flange, backup flange, mounting ring, and snap ring. The drain stack uses a basket strainer, tailpiece, dishwasher wye or branch tailpiece, and a P-trap with slip-joint nuts and washers.
Supply lines connect angle stops to the faucet.
| Component | Typical Spec | Common Variant |
|---|---|---|
| Sink flange | 3-1/2 inch ID | 4 inch commercial |
| Mounting ring | 3-bolt EZ Mount | Twist-lock proprietary |
| Tailpiece | 1-1/2 inch OD, 6–12 inch | Telescopic adjustable |
| P-trap | 1-1/2 inch schedule 40 PVC | Deep-seal, low-profile |
| Supply line | 1/2 inch FIP × 3/8 inch comp | Braided stainless, 12–20 inch |
The disposal itself comes in continuous-feed and batch-feed models. Continuous-feed runs while the wall switch is on. Batch-feed requires a magnetic stopper to activate.
Motor power ranges from 1/3 HP for light use to 1 HP for heavy households. Grind chamber material (stainless vs galvanized) affects lifespan more than horsepower.
Tools you need: basin wrench, channel locks, pipe cutter or hacksaw, voltage tester, wire strippers, putty knife, flashlight, and a bucket. A disposal wrench (jam buster) comes with most units. Rent a sink clamp set for undermount installs on stone.
The cost for tools and consumables runs $80, 150 if you own basics.
Sink Types & Mounting: What You're Working With
Drop-in sinks sit in a cutout with the rim on the countertop. They seal with silicone or putty and clamp from below with metal clips. Undermount sinks hang from the countertop underside.
They need epoxy adhesive plus mechanical clips spaced per the manufacturer template. Farmhouse sinks require a custom cabinet face frame and support ledger.
Stainless gauges run 16 to 18 gauge. Lower number means thicker steel. Fireclay and cast iron are heavy; verify cabinet floor can support 150+ pounds.
Composite sinks (quartz/acrylic blend) resist chips but need specific silicone. Bowl configuration changes drain layout: single bowl centers the disposal, double bowl offsets it, low-divide sits between.
Countertop material dictates sealant. Laminate and solid surface take putty. Natural stone and engineered quartz need 100% silicone to avoid staining.
The reveal (gap between sink rim and countertop edge) can be positive (sink shows), zero (flush), or negative (counter overhangs). Positive reveal is easiest for DIY.
Cabinet width must exceed sink width by at least 3 inches for clip access. A 33-inch cabinet fits a 30-inch sink. Check the template before cutting stone.
Most fabricators cut the hole; you verify the template matches the sink model. If you're planning a full redesign, reviewing how to design kitchen cabinets helps coordinate sink base dimensions with adjacent storage.
Disassembly & Prep: Clear the Deck
Shut off water at the angle stops. Disconnect supply lines with a basin wrench. Loosen the P-trap slip nuts; keep a bucket under the trap.
Remove the old basket strainer, a strainer wrench or large channel locks works. Scrape all old putty and silicone from the countertop and sink flange surfaces.
If the disposal is hardwired, turn off the breaker and verify dead with a non-contact tester. Disconnect the wire nuts. Remove the disposal by inserting the wrenchette into the bottom lugs and turning counterclockwise.
The mounting ring stays on the sink; pry the snap ring off with a flat bar.
Clean the countertop cutout with denatured alcohol. Dry fit the new sink. Check reveal consistency around the perimeter.
For undermount, dry-fit clips on the sink rim and mark clip positions on the countertop underside. Most templates show 12-inch spacing; follow the sink manufacturer's drawing.
Remove the faucet if it blocks sink access. Label hot and cold supply lines with tape. This is also the moment to inspect the cabinet floor for water damage.
Rot softens particle board; replace any spongy sections before setting the new sink. A quick check of how deep are lower kitchen cabinets confirms you have room for the deeper drain stack some disposals need.
Setting the Sink: Seal, Seat, Secure
Roll a 3/16-inch rope of plumber's putty or run a continuous silicone bead on the sink flange underside. For undermount on stone, apply epoxy dabs every 8, 10 inches plus a perimeter silicone bead. Lift the sink into position.
Press evenly to seat the flange. Wipe excess putty from the interior rim immediately.
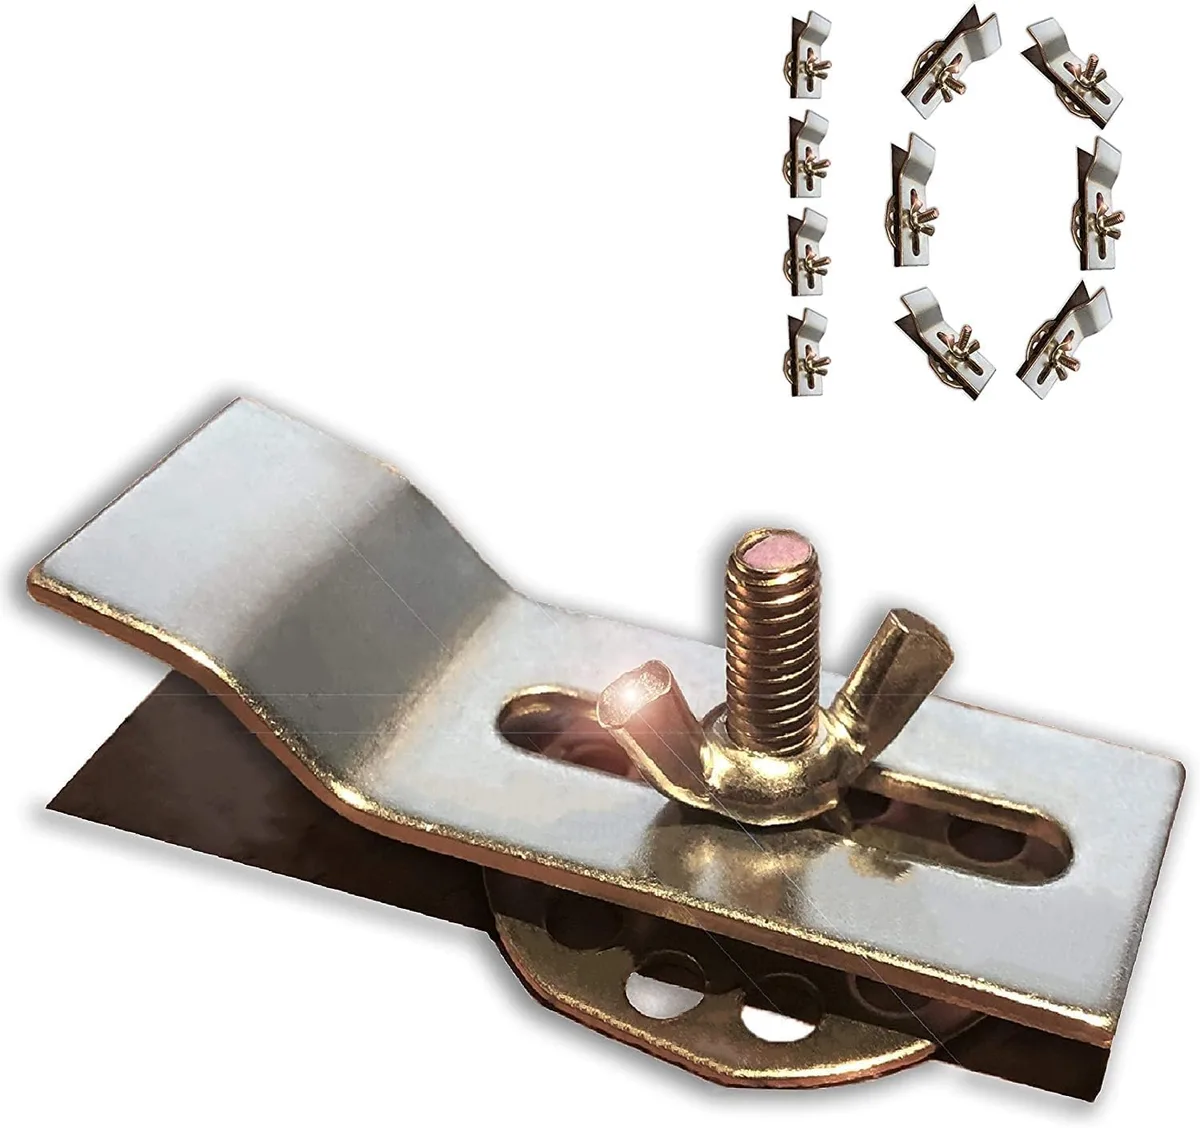
Image source: Web (Bing) / amazon.com (Web image (fair-use with source credit))
Install undermount clips while the epoxy is wet. Tighten each clip until the sink rim pulls tight to the countertop underside. Do not over-tighten; stone cracks under point pressure.
Drop-in sinks use the supplied brackets; snug them against the countertop underside. Let silicone cure 24 hours before connecting drain weight.
Install the basket strainer next. Coat the strainer flange with putty. Push through the sink drain hole.
From below, slide the rubber gasket, friction washer, and locknut. Tighten the locknut by hand plus one-quarter turn with channel locks. The strainer body must not spin in the sink.
Check the tailpiece length. Measure from the strainer outlet to the trap inlet on the wall. Cut the tailpiece 1/2 inch short of that measurement to allow slip-joint engagement.
Deburr the cut end. Slide the slip nut and washer onto the tailpiece with the washer bevel facing up. This orientation prevents leaks.
If the dishwasher drains into the disposal, remove the knockout plug now. Insert a screwdriver into the disposal inlet and tap sharply. Retrieve the plug from the grind chamber.
Leaving it in causes a flood on the first dishwasher cycle. This step is invisible once the disposal mounts, do it now.
Mounting the Disposal: Flange, Ring, Clock the Outlet
Roll a fresh putty rope for the disposal flange. Press the flange into the sink drain hole from above. From below, slide the backup flange, then the mounting ring with the three ears facing up.
Engage the snap ring over the mounting ring ears. Tighten the mounting bolts by hand, then snug each a quarter turn with a screwdriver. The flange must sit flat.

Image source: Web (Bing) / casaderatones.es (Web image (fair-use with source credit))
Now clock the disposal outlet. Rotate the disposal body so the discharge tube points directly at the drain stub-out on the wall. Most units allow 360-degree rotation before the mounting ring locks.
Tighten the mounting ring bolts fully once aligned. The outlet centerline should sit 1/4 to 1/2 inch above the trap inlet to maintain slope.
Attach the dishwasher connector if needed. Slip the hose clamp onto the dishwasher drain hose. Push the hose onto the disposal inlet barb.
Tighten the clamp with a nut driver. The hose must loop up to the bottom of the countertop before running to the dishwasher. This high loop prevents backflow if the disposal clogs.
Check the splash guard. It sits in the sink flange and reduces noise. Some models snap in; others screw.
Verify it seats fully. A loose guard vibrates and leaks. If the guard has a silverware insert, install it now.
The insert catches utensils before they reach the grind chamber.
Building the Drain: Tailpiece, Dishwasher, P-Trap
Start at the basket strainer. Slide the slip nut and washer onto the tailpiece. Connect the tailpiece to the strainer outlet.
Hand-tighten the slip nut. Do not use tools; plastic threads strip easily. The washer bevel faces up toward the nut.
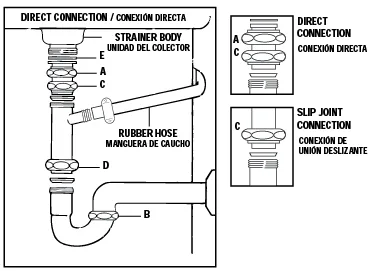
Image source: Web (Bing) / keeneymfg.com (Web image (fair-use with source credit))
Add the dishwasher wye or branch tailpiece if the dishwasher drains here instead of the disposal. The branch inlet faces up. Connect the dishwasher hose to the branch with a clamp.
The hose still needs a high loop. Secure the loop to the cabinet sidewall with a zip tie.
Assemble the P-trap. The trap inlet connects to the tailpiece or branch tailpiece outlet. The trap outlet connects to the wall stub.
Use slip nuts and washers at both joints. The trap arm must slope 1/4 inch per foot toward the wall. Measure the drop over the run; adjust tailpiece length if needed.
Tighten all slip nuts by hand plus a quarter turn. Over-tightening cracks the trap body. Check alignment: no joint should pull sideways.
If the wall stub is too high or low, use a telescopic tailpiece or a trap adapter. Do not force PVC into misalignment.
Double-check the dishwasher connection height. IPC 419.2 requires the dishwasher drain inlet to be above the trap weir. The weir is the highest point of the trap bend.
If your branch tailpiece sits below the weir, raise it or use a disposal inlet instead. This prevents sewer gas from entering the dishwasher.
Wiring the Disposal: Cord, Connections, GFCI
Remove the disposal wiring cover plate. Inside you see three terminals: black (hot), white (neutral), green (ground). Strip the cord wires 1/2 inch.
Connect black to black, white to white, green to the ground screw. Use wire nuts sized for the gauge. Tug each connection to verify grip.
Route the cord through the strain relief connector. Tighten the connector screws onto the cord jacket, not the wires. Replace the cover plate.
The cord must not contact sharp edges or hot surfaces. NEC 422.16(B) allows 18 to 36 inches of cord for plug-connected units. Hardwired units need NM cable and a clamp connector.
Plug the cord into a GFCI-protected receptacle under the sink. The receptacle must be accessible, not behind the disposal. If the circuit serves the dishwasher too, use a 20-amp breaker and 12-gauge wire.
A dedicated 15-amp circuit works for disposal only. GFCI protection is required by NEC 210.8(A)(6).
Test the circuit before finalizing. Turn on the breaker. Press the GFCI reset button.
Flip the disposal wall switch. The motor should spin freely. If the GFCI trips, check for a neutral-ground bond in the disposal terminal block.
Some older units bond them; remove the bonding strap for GFCI compatibility.
Label the breaker. A simple "Kitchen Disposal" tag saves confusion later. If you used an air switch, mount the button on the countertop or sink deck.
Run the air tubing to the control box plugged into the receptacle. Keep tubing away from sharp edges and heat. No kinks allowed.
Water Supply Lines: Connect, Pressurize, Check
Wrap the faucet supply shanks with two turns of Teflon tape. Thread the supply line nuts onto the shanks by hand. Tighten a half turn past hand-tight with a wrench.
Hold the shank with a second wrench to prevent twisting the faucet body. Connect the other ends to the angle stops the same way.
Open the angle stops slowly. Check each connection for weeping. A drop every few seconds means the washer needs reseating.
Tighten a quarter turn more. Do not overtighten; the compression ring deforms. Run both hot and cold for two minutes to clear debris from new lines.
Inspect the faucet base for leaks. Water tracking down the shank indicates a bad deck seal. Remove the faucet, clean the surface, and reapply silicone or putty.
This is easier now than after the cabinets are loaded. Verify the faucet swivels freely and the sprayer hose retracts.
Check the supply line routing. Lines should have a gentle loop for expansion. No kinks, no contact with the disposal body, no rubbing against cabinet edges.
Secure loose lines with a plastic clamp screwed to the cabinet sidewall. This prevents vibration wear over time.
If the angle stops are old quarter-turn ball valves, consider replacing them while the water is off. New 1/4-turn stops cost $8 each and last 20 years. Sweat or compression connections depend on your pipe type.
This upgrade prevents the classic "stuck stop" emergency during a future faucet swap.
First Run: Test Sequence & What to Watch
Fill both sink basins with water. Pull the stoppers. Watch the drain flow.
The water should clear in 15, 20 seconds per basin. Slow drainage means a slope issue or a partial blockage. Check the P-trap for debris first.
Then verify the tailpiece slope with a level.
Run the disposal with cold water flowing. Feed a few ice cubes to clean the grind chamber. Listen for rattling, that's a loose mounting bolt or a foreign object.
The motor should hum steadily at 1725 RPM (standard) or 2800 RPM (high-speed). A growl means a jam; insert the wrenchette and turn manually.
Check every joint under the cabinet with a flashlight. Look at the sink flange, basket strainer, tailpiece slip nuts, trap joints, disposal outlet, and supply connections. Wipe each joint dry with a paper towel.
Wait five minutes. Any dampness means a leak. Tighten the offending slip nut a quarter turn.
Test the dishwasher drain cycle. Start a short cycle. Listen for the pump-out sound.
Check the disposal inlet and the high loop for leaks. The dishwasher hose should not vibrate against the cabinet. Secure it with a zip tie if it moves.
Verify the air gap (if present) does not spit water.
Run the GFCI test button. The disposal should lose power. Press reset.
The disposal should regain power. If the GFCI does not trip, replace it. A non-tripping GFCI provides no protection.
Monthly testing is recommended by UL 943. Mark the test date on the receptacle cover with a Sharpie.
Clean up. Remove the bucket. Wipe the cabinet floor dry.
Reinstall the cabinet doors. Store the wrenchette and disposal manual in a zip bag taped to the cabinet sidewall. You'll need them for the first jam.
The install is complete.
Common Visual Mistakes & How to Spot Them
A disposal outlet clocked 90 degrees off the drain forces the discharge tube into an S-bend. That trap kills slope and clogs fast. The fix: loosen the mounting ring, rotate the disposal until the outlet points at the wall stub, retighten.
The photo in the mounting section shows the correct clock position.
Putty smeared on quartz leaves a permanent yellow ring. Silicone on stainless can peel if the sink shifts. Match sealant to countertop: putty for laminate and stainless, 100% silicone for stone and quartz.
A clean bead 3/16 inch thick prevents both leaks and stains.
Slip-joint washers installed upside down leak every time. The bevel must face the nut. A flashlight held at joint level reveals the orientation.
If the washer sits flat side up, flip it. Hand-tight plus a quarter turn seats it without cracking the trap.
A dishwasher hose without a high loop siphons dirty water back into the machine. The loop must reach the countertop underside. Zip-tie it to the cabinet sidewall.
If the hose kinks at the loop, replace it with a longer reinforced hose.
Quick-Reference Visual Cheat Sheet
| Step | Visual Cue | Pass/Fail |
|---|---|---|
| Sink seal | Uniform bead, no gaps | No squeeze-out on stone |
| Disposal clock | Outlet points at drain stub | 15° tolerance max |
| Tailpiece slope | Level shows 1/4" per foot drop | Water clears in 20 sec |
| Trap washers | Bevel faces nut | Dry paper towel test |
| Dishwasher loop | Hose hits cabinet ceiling | No kinks, secured |
| GFCI | Test button kills power | Reset restores power |
Print this table. Tape it to the cabinet door during install. Check each row before moving to the next step.
The photos in earlier sections match these cues.
When to Call a Pro
Call a licensed plumber if the drain rough-in sits more than 2 inches off spec. Moving a wall stub requires opening the wall and possibly reventing. Call an electrician if the panel lacks space for a dedicated circuit or if aluminum wiring is present.
GFCI retrofit on shared neutrals needs pro diagnosis.
Undermount sinks on stone over 36 inches wide need two-person setting and professional epoxy work. The risk of a cracked slab outweighs the savings. Farmhouse sinks require cabinet modification; a carpenter ensures the face frame and ledger carry the weight.
Septic systems change the rules. Many counties prohibit disposals on septic or require a larger tank and effluent filter. Check local health department guidelines before buying the unit.
A compost bin may be the only code-compliant option.
Frequently Asked Questions
Can I install a garbage disposal on a single-bowl sink?
Yes. The disposal mounts directly to the 3-1/2-inch drain opening. A basket strainer goes in the other bowl if you have a double sink.
Do I need a GFCI for the disposal?
Yes. NEC 210.8(A)(6) requires GFCI protection for all kitchen receptacles serving countertop surfaces.
How long does plumber's putty take to cure?
Putty never fully cures. It stays pliable. Silicone needs 24 hours before water exposure.
Epoxy for undermount clips sets in 30 minutes, full strength in 24 hours.
What size P-trap do I need?
Standard kitchen drains use 1-1/2-inch schedule 40 PVC or ABS. Match the material to your existing drain piping.
Can I use an air switch instead of a wall switch?
Yes. Air switches mount on the countertop or sink deck. The control box plugs into the GFCI receptacle under the sink.
No wiring in the wall required.
Why does my disposal hum but not spin?
The motor is jammed. Insert the wrenchette into the bottom center hole and turn back and forth until it spins freely. Remove the object with tongs, never fingers.