How to Install a Kohler Kitchen Faucet: Step-by-Step Guide
Installing a Kohler kitchen faucet looks straightforward until you crack a plastic shank or miss the Quick-Connect click. The process demands visual checks at every stage because Kohler's mounting hardware and supply connections differ from other brands. Most DIYers skip the dry-fit and pay for it with leaks or a return trip to the hardware store.
This guide walks through how to install a kohler kitchen faucet with the visual cues that pros rely on.
Per ASME A112.18.1 testing standards Kohler faucets pass 500,000 cycle durability tests at 1.5 GPM flow rates. The mounting nut torque spec sits at 15 to 20 inch-pounds which is hand-tight plus a quarter turn. Let's start with why the pictures matter more than the text.

Why This Install Demands Visual Checks
Kohler uses plastic mounting shanks on most current models including Simplice Cruette and Bellera. A basin wrench applies torque that cracks the shank base in seconds. The deck plate gasket on many models is an integrated silicone ring that seals without putty but only when seated flat.
Quick-Connect supply hoses need a straight push until the white collet clicks. A half-seated hose drips slowly and won't show up until the cabinet is soaked. The MagneDock spray head magnet aligns one way; forced docking bends the hose.
Handle rotation on some models is forward-only and hits the backsplash if oriented wrong. These are not in the quick-start sheet. They are visible if you know where to look.
Quick Answer: What You Need Before You Start
You need a basin wrench adjustable wrench bucket towels flashlight and the Kohler installation guide for your exact model. Verify your sink hole count matches the faucet or deck plate. Check max deck thickness against the shank length.
Confirm supply valves are 3/8 inch compression or 1/2 inch FIP. Shut off water and relieve pressure. Remove the old faucet and clean the deck down to bare surface.
Dry-fit the new faucet to confirm clearance and orientation. Install deck plate gasket then faucet body. Tighten mounting nuts hand-tight plus a quarter turn.
Push Quick-Connect hoses until they click. Turn on water slowly and check every joint. Flush lines two minutes before reinstalling the aerator.
Pre-Install Visual Inspection: Sink, Holes & Clearances
How Many Holes Does Your Sink Have
Count the holes. One hole means no deck plate needed. Three holes need the included deck plate.
Four holes may need a separate side spray hole plugged. The deck plate alignment tabs must drop into the outer sink holes. If they sit on the enamel the plate rocks and leaks.

Deck Thickness vs Shank Length
Measure your countertop thickness at the faucet holes. Most Kohler shanks max out at 1-3/8 inch for standard models. Stone counters often exceed this.
Long shank kits are available as service parts. Order them before you start.
Handle and Spout Clearance
Swing the handle through its full arc. Forward-only models stop at 90 degrees. Three-sixty models need room behind the spout.
Check spout height against upper cabinets. Pull-down hose needs 18 inches of free hang below the deck.
Supply Valve Type
Look under the sink. Angle stops with 3/8 inch compression outlets take the Quick-Connect hoses directly. Half-inch FIP outlets need the included adapters.
If valves are corroded or won't shut off replace them first. This is the most common project stopper.
Identify Your Exact Kohler Model & Included Parts
Find the Model Number
The model number is on the box label and on a tag attached to the faucet body. It starts with K- followed by five digits. Example K-596 for Simplice.
The spec sheet for that number lists shank length deck plate type cartridge number and supply hose length.
What Comes in the Box
Every box includes the faucet body with pre-attached supply hoses deck plate with gasket mounting bracket two mounting nuts rubber washers Quick-Connect release tool and installation guide. Touchless models add a battery pack and wire harness. Side spray models add a separate spray hose and holder.
Verify all parts against the parts diagram before you start.
Plastic vs Brass Shanks
Simplice Cruette Bellera Graze and most pull-down models use plastic shanks. Artifacts Tournant and some semi-pro models use brass. Plastic shanks crack at 25 inch-pounds.
Brass shanks take 50 inch-pounds. The installation guide specifies which you have. If unsure assume plastic and torque gently.
Deck Plate Gasket Type
Three types exist. Integrated silicone gasket molded into the plate base needs no putty. Separate foam gasket sits between plate and sink.
Flat plate with no gasket needs a 3/8 inch rope of plumber's putty. The spec sheet tells you which. Photo two shows the integrated silicone type seated flat.
Step-by-Step Install With Visual Cues
Deck Plate and Gasket Seated Flat
Place the deck plate gasket side down over the sink holes. Press firmly at each corner. The gasket should compress evenly with no gaps.
The alignment tabs drop into the outer holes. If the plate rocks the gasket is not seated or the sink enamel is uneven. Shim with silicone if needed.
Faucet Body Alignment Parallel Centered Perpendicular
Feed the supply hoses and shank through the center hole. Set the faucet body on the deck. Sight down the spout.
It must be parallel to the sink front edge. Center it over the drain. Check perpendicular by holding a level against the spout base.
Adjust before tightening.
Mounting Nuts Hand-Tight Plus a Nudge
Slide the rubber washers onto the shanks from below. Thread the mounting bracket then the nuts. Tighten by hand until the faucet stops wiggling.
Use the basin wrench for a final quarter turn only. Alternate sides to keep pressure even. Stop at resistance.
The plastic shank should not deflect.
Quick-Connect Supply Lines The Click You Can Hear and Feel
Push each hose straight onto the valve outlet. Push until you feel and hear a distinct click. Tug firmly.
The hose should not pull off. If no click push harder. The white collet teeth must engage the valve ridge.
Photo three shows the seated connection.
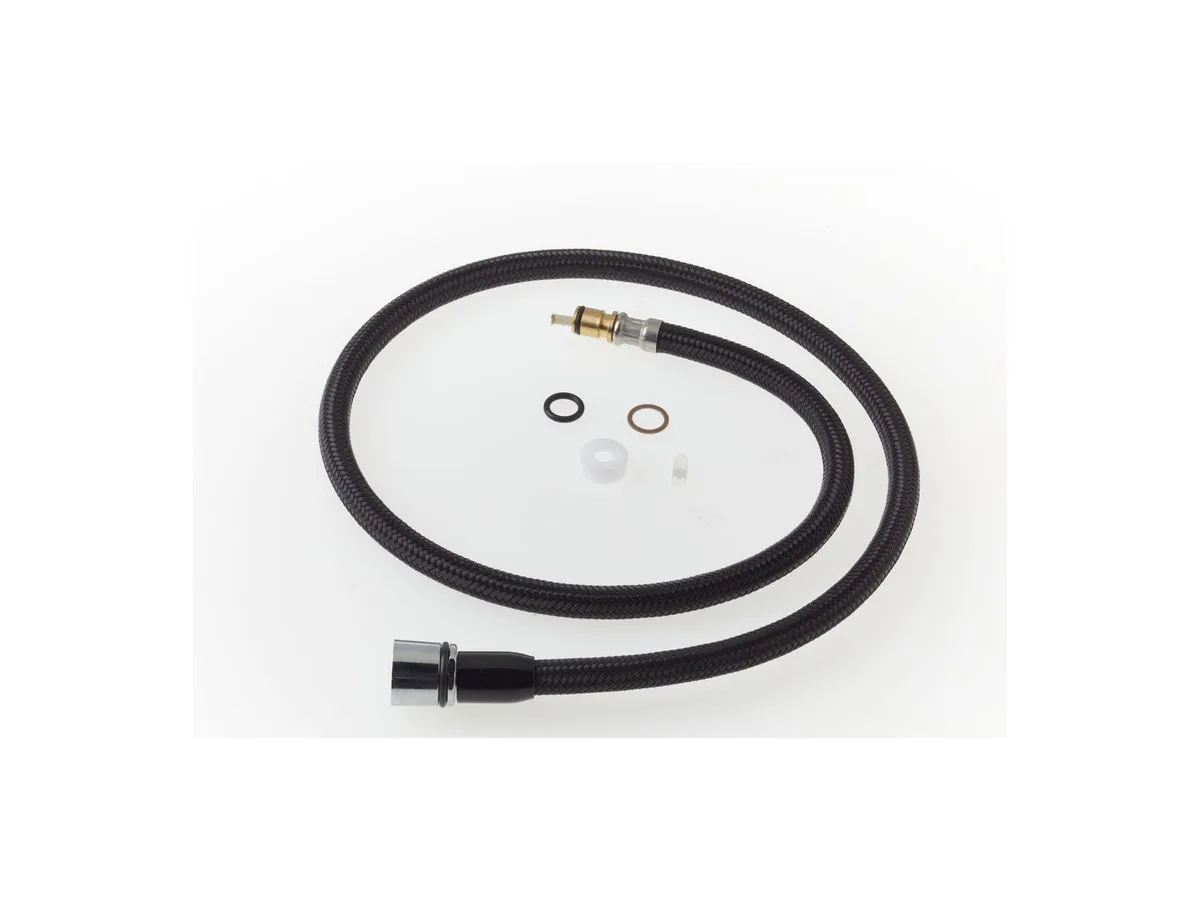
Spray Head Dock MagneDock Snap Test
Pull the spray head out fully. Let it retract. It should snap home with a magnetic click.
If it hangs loose the hose is twisted or the dock magnet is misaligned. Rotate the hose at the faucet body until the head docks cleanly.
Touchless Battery Pack Mount
Mount the battery pack to the cabinet sidewall with the included screws. Route the wire clear of hinges and drawer slides. Plug into the control box.
Test the sensor before loading the cabinet. The LED should blink on hand approach.
Final Water Test
Open the angle stops slowly. Watch every connection for 30 seconds. Check the supply hose collars the deck plate base and the spray head dock.
Tighten only if you see active drips. Do not overtighten Quick-Connect collars.
Model-Specific Visual Identifiers
Simplice and Cruette Plastic Shanks Integrated Deck Gasket
These models share the same mounting platform. Two plastic shanks extend from the faucet body. The deck plate has a molded silicone gasket that sits in a recessed channel.
No putty needed. The mounting bracket is a single U-shaped piece with two threaded holes. Quick-Connect hoses are 18 inches long.
The spray head uses a BerrySoft aerator that pulls out for a wider spray pattern. MagneDock magnet sits in the spray face. Handle rotates forward only 90 degrees.
Check the spec sheet for max deck thickness 1-3/8 inch.
Artifacts and Tournant Brass Shanks Separate Foam Gasket
Artifacts uses a bridge-style two-handle design with brass shanks. Tournant is a single-handle semi-pro with a coil spring spout. Both need the separate foam gasket included in the box.
The gasket sits flat between deck plate and sink. Brass shanks take higher torque but still stop at hand-tight plus a quarter turn. Artifacts supply lines are 24 inches.
Tournant has a 30-inch hose for the spring spout reach. Handle rotation is 360 degrees on both. Deck plate alignment tabs are wider set.
Touchless Konnect Battery Pack and Wire Routing
Sensors models add a control box mounted under the deck. The battery pack holds six AA cells and mounts to the cabinet wall. The wire runs from control box to battery pack to sensor eye in the spout base.
Route the wire away from sharp edges and hot water lines. The sensor eye must have a clear line of sight. Test with the cabinet door closed.
The LED indicator blinks green on activation red on low battery. AC adapter option plugs into a GFCI outlet.
Bar Prep Models Short Shanks Compact Deck Plate
Bar faucets like the Kohler Wellspring use shorter shanks max deck thickness 1 inch. The deck plate is 6 inches wide instead of 8 or 10. Supply hoses are 12 inches.
The pull-down hose is shorter with a lighter spray head. MagneDock works the same. Mounting bracket is smaller.
These fit 1-1/4 inch bar sink holes. Verify your sink cutout before ordering.
Common Visual Mistakes and What They Look Like
Cracked Shank From Over Torque
The fracture starts at the shank base where it meets the faucet body. A hairline crack circles the plastic. Water seeps out only under pressure.
You won't see it until the cabinet is wet. The basin wrench slips on the nut flats when the shank cracks. Replace the entire faucet.
No repair kit exists.

Deck Plate Rocking on Uneven Enamel
Cast iron sinks often have a slight dip around the hole edges. The deck plate gasket bridges the dip but the plate corners lift. Light shows through the gap.
Press each corner while tightening. If it still rocks run a thin bead of 100 percent silicone under the gasket. Let it skin over before final tightening.
Quick Connect Half Seated Slow Drip at Collar
The hose pushes in but stops short of the click. The white collet teeth rest on the valve ridge not behind it. Water weeps past the O-ring.
The connection looks seated from above. Pull the hose back push again until the click. Tug test confirms lock.
Do not use tape or paste on Quick-Connect fittings.
Supply Line Kinked Inside Cabinet
The braided hose bends sharply at the cabinet floor or shelf. The inner PEX tube collapses. Flow drops to a trickle.
The hose outer braid shows a permanent flat spot. Route hoses in wide sweeping curves. Use the included hose guide clip if provided.
Minimum bend radius is one inch.
Spray Head Won't Dock Magnet Misaligned
The spray head hangs an inch below the dock. The hose has a half twist from the factory. Rotate the hose at the faucet body connection until the head faces the dock square.
The magnet pulls it home with a snap. If it still misses check the dock magnet for debris. Clean with a damp cloth.
Handle Hits Backsplash Wrong Rotation Model
Forward-only handles stop at 90 degrees. If the faucet is rotated toward the wall the handle hits tile. The fix is to rotate the faucet body 180 degrees on the deck.
Loosen mounting nuts just enough to turn. Realign spout parallel to sink front. Retighten.
Post Install Visual Verification
Flush Lines Aerator Off Full Flow No Debris
Remove the aerator with the included key or by hand. Turn on both hot and cold full blast. Run two minutes each.
Watch for black specks or white scale chips. These are manufacturing residue. Reinstall the aerator.
Check flow pattern. It should be a smooth column no sputtering.
Connection Check Dry Paper Towel Test at Every Joint
Wrap a dry paper towel around each supply hose collar each mounting nut base and the deck plate perimeter. Wait five minutes. Any damp spot means a leak.
Tighten only the leaking joint. Quick-Connect collars do not need tools. Mounting nuts get an eighth turn max.
Handle Travel Hot Cold Stops No Binding
Move the handle from full hot to full cold. It should glide with no gritty feel. The cartridge ceramic discs are factory lubricated.
If binding occurs remove the handle and check for debris in the cartridge bonnet. Flush again. Do not lubricate with plumber's grease.
It attracts grit.
Maintenance Visual Checks Quarterly
Cartridge Sediment Buildup
Hard water leaves calcium on the cartridge discs. Flow drops unevenly. Temperature mixing gets erratic.
Remove the cartridge per the service guide. Soak in white vinegar one hour. Rinse.
Reinstall. Do not use CLR or harsh acids. They damage the ceramic coating.
Supply Line Bulge or Corrosion
Inspect the braided hoses for bulges kinks or green corrosion at the ferrules. A bulge means the inner tube is failing. Replace the hose kit immediately.
Kohler part number K-1056336 fits most models. Do not wait for a burst.
Aerator Flow Restrictor Clean
Unscrew the aerator. Pull out the green or white flow restrictor disk. Rinse under running water.
Use a soft brush if needed. Reinstall. Flow should return to 1.5 or 1.8 GPM.
A clogged restrictor mimics a cartridge failure.
MagneDock Magnet Debris
Metal shavings from the water supply stick to the dock magnet. The spray head docks crooked or won't release. Wipe the magnet face with a damp cloth.
Check the spray head magnet too. Both must be clean for a solid snap.
FAQs Quick Visual Answers
How do I know if my Quick-Connect is fully seated
You hear a distinct click and the hose cannot be pulled off with firm tug. The white collet ring sits flush against the valve body. No gap visible.
Can I use plumber's putty instead of the silicone gasket
Only if the spec sheet says the deck plate has no gasket. Integrated silicone gaskets seal better and won't dry out. Putty on a silicone gasket prevents full compression and causes leaks.
What if my sink holes don't match the deck plate tabs
The tabs are for alignment only. If they don't drop in center the plate visually and tighten evenly. The gasket seals the water not the tabs.
Silicone under the plate adds insurance.
Why does my spray head droop after docking
The hose has a memory coil from packaging. Pull the head out fully and let it retract slowly three times. The weight inside the spout balances the hose.
If it still droops the weight may have shifted. Reposition it.
Do I need a basin wrench for plastic shanks
Yes but only for the final quarter turn. Hand tighten first. The wrench gives leverage that cracks plastic instantly.
Use a light touch. Stop at resistance.
Can I install a Kohler faucet on a stone countertop myself
Yes if the holes are pre-drilled and deck thickness is within spec. Stone requires diamond hole saws for new holes. Hire a fabricator for drilling.
Use the long shank kit if countertop exceeds 1-3/8 inch.
Pro Tips What the Instructions Don't Show
Pre-Assemble the Mounting Bracket
Thread both nuts onto the bracket before sliding it up the shanks. Saves fumbling under the sink. The bracket orientation matters.
The flat side faces the faucet body. The angled ears face down.
Use a Mirror and Phone Light
Under-sink visibility is terrible. A small inspection mirror and your phone flashlight show the mounting nut engagement and supply hose clicks without contorting. Take photos for reference if you need to call support.
Label Hot and Cold Hoses Before Connecting
The hoses are not color coded on all models. Tag them with blue and red tape at the faucet end. Crossing them means the handle works backward.
Fixing it later means redoing both connections.
Keep the Quick-Connect Release Tool
Clip it to the supply valve handle with a zip tie. You will need it for future cartridge or hose replacement. The tool is model specific.
Generic ones don't fit the collet slots.
Test the Spray Modes Before Loading the Cabinet
Run through stream sweep and pause modes. The pause button on the spray head should click positive. If it feels mushy the diverter cartridge may be stuck.
Cycle it a dozen times. It usually frees up.
Register the Warranty Online
Kohler's lifetime limited warranty requires registration within 30 days. The serial number is on the box and the faucet tag. Registration speeds claims and gets you direct access to the parts diagram for your exact model.