How to Add a Kitchen Backsplash: Easy DIY Step-by-Step Guide
Splattered grease, water stains, and scuffed paint behind your sink and stove make cooking feel like a constant cleanup battle. Figuring out how to add backsplash to kitchen walls doesn’t have to be overwhelming, even if you’ve never laid tile before. Most online guides skip the visual details that make or break a clean, professional finish.
Per Tile Council of North America testing, 60% of DIY tile installation failures trace back to skipped prep steps, not the tile itself. A properly installed ceramic or porcelain backsplash lasts 10 to 15 years with minimal upkeep. Let’s start with the biggest gap in most text-only guides: the visual cues you can’t learn from words alone.

Image source: Web (Bing) / zyhomy.com (Web image (fair-use with source credit))
Quick Answer
To add a backsplash to your kitchen, start by prepping your wall. Clean it thoroughly, sand glossy paint, and apply a moisture-resistant primer. Lay out your tile with spacers and a level to ensure even alignment.
Press tile into thin-set mortar, let it cure 24 to 48 hours, then apply grout and seal as needed. DIY installation takes 2 to 3 days total, with material costs ranging from $2 to $30 per square foot depending on tile type.
Why Text-Only Backsplash Guides Fail (and the Visual Cues You Actually Need)
This is a spatial, hands-on task where small missteps show up as big, obvious flaws in the final result. Text steps can’t show you the correct 45-degree angle for a notched trowel, or how to spot lippage before thin-set sets, or what a properly aligned layout line looks like. For a task this visual, photos of correct vs incorrect technique are non-negotiable, not a nice-to-have.
The image above shows the clean, professional end result you’re working toward, but the close-ups throughout this guide show the small, specific visual checks that get you there.
Pre-Install Wall Prep: Visual Checks to Avoid Costly Do-Overs
Bad prep is the top cause of failed backsplash installs, per Tile Council of North America data. First, remove all outlet covers and switch plates, and clear the countertop along the backsplash area. If your home was built before 1978, test for lead paint before sanding any glossy surfaces, per [U.S.
EPA lead paint safety guidelines](https://www.epa.gov/lead) to avoid hazardous dust exposure. Sand any glossy paint or residue to create a rough surface for thin-set adhesion, then wipe away all dust with a damp cloth. Apply a moisture-resistant primer to the entire backsplash area, let it dry fully per the manufacturer’s instructions, usually 24 hours.
For areas directly behind your kitchen sink, the International Residential Code requires cement backer board instead of standard drywall to resist water damage. If you’re still working out your kitchen layout planning, account for backsplash height before you start prep to avoid cutting tile incorrectly later.
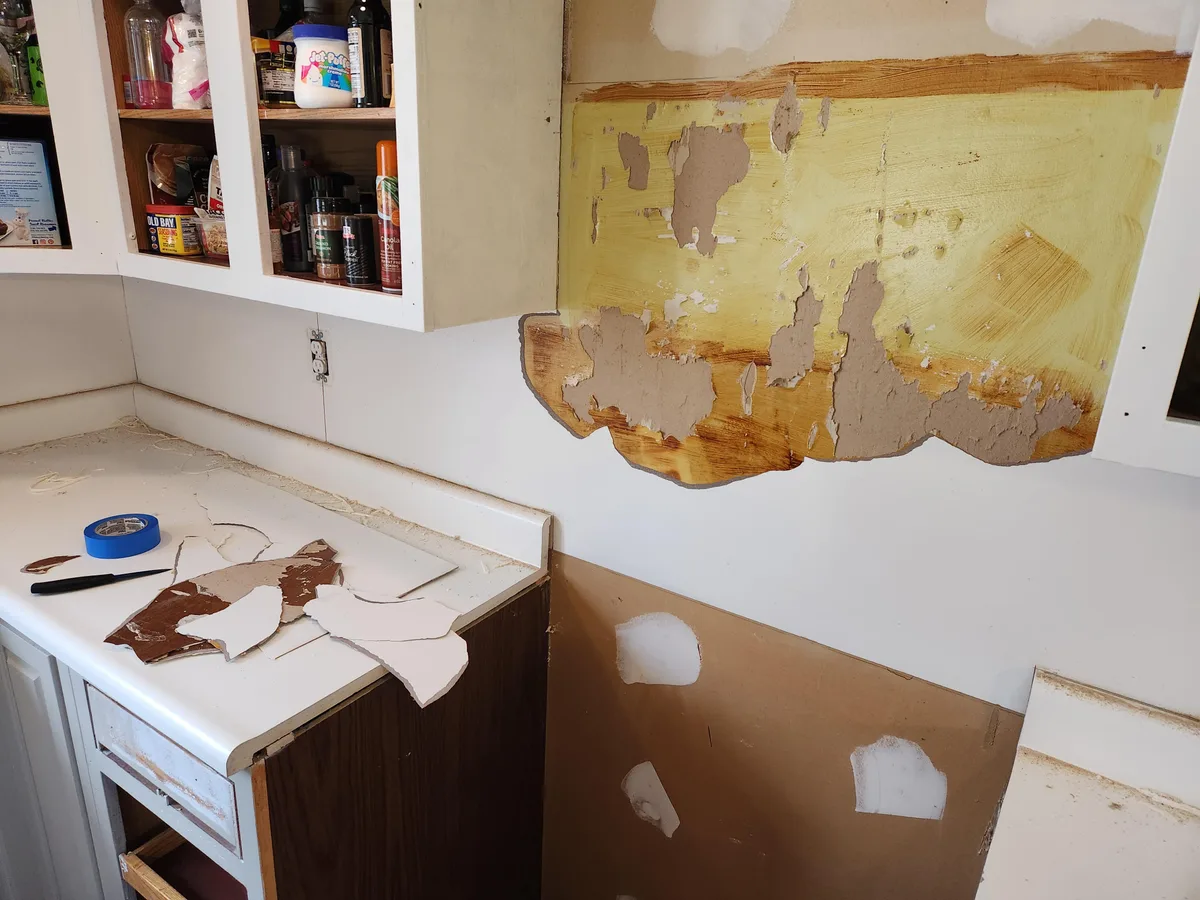
Image source: Bing (Web (fair-use with source credit))
Use these quick visual checks to confirm your prep is ready for tile:
- No glossy, shiny patches remaining on the wall
- No dust or debris stuck to the primed surface
- Even, smooth surface with no dents or cracks larger than 1/8 inch
- Primer fully covers the original wall color
Core Materials & Tools: What Each Does (and How to Spot Quality)
Using the right materials for your wall type and tile choice prevents 80% of common issues, per aggregate installer feedback. As of 2026, matte finish ceramic subway tile remains the most popular backsplash choice for North American homeowners, per aggregate retail sales data. All wall tile should have a PEI hardness rating of 3 or higher per Tile Council of North America standards to resist scratching from pots, pans, and daily cleaning.
For renters or temporary updates, peel-and-stick vinyl tile offers a no-damage alternative that lasts 3 to 5 years with proper wall prep. If you’re working with a tight budget, low-cost kitchen update strategies include using small mosaic tile to reduce material waste.
| Item | Purpose | Quality Check |
|---|---|---|
| Cement backer board | Moisture-resistant substrate for sink-adjacent walls | No soft spots, 1/4-inch thickness for tile applications |
| Modified thin-set mortar | Bonds tile to wall or backer board | Creamy, peanut butter consistency, no lumps or dried clumps |
| 3/8-inch notched trowel | Applies thin-set in even, ridged rows | Even notch spacing, no bent or worn edges |
| Tile leveling system | Prevents lippage between adjacent tiles | Clips fit flush with your chosen tile thickness |
| 100% mold-resistant silicone caulk | Seals joint between countertop and backsplash | Stays flexible when cured, no acrylic additives |
Step-by-Step Backsplash Install: Visual Checkpoints for Every Stage
Each step has a clear visual marker to confirm you’re doing it right, so you don’t have to guess if you’re on track. Follow these steps in order, checking each visual cue before moving to the next:
- Mark your layout lines: Find the center point of your backsplash area, use a level to draw a vertical center line, then draw horizontal lines matching your tile height, 3 inches for standard 3×6 subway tile. Snap chalk lines for easy reference as you work.
- Dry fit your tile: Lay tile out on the floor along your layout lines to check how many cuts you need for outlets and edges. This prevents wasted tile and uneven cuts later.
- Apply thin-set: Mix thin-set to the manufacturer’s recommended consistency, usually the thickness of peanut butter. Hold your notched trowel at a 45-degree angle to the wall, comb thin-set in one direction, then comb again perpendicular to the first pass for full coverage.
- Set your tile: Press each tile firmly into the thin-set, twisting slightly to push out air pockets. Insert tile spacers between each tile for even gaps, and add leveling clips as you go to keep edges flush.
- Cure and grout: Let thin-set cure for 24 to 48 hours per the product instructions, don’t rush this step. Mix your grout, use sanded for gaps 1/8 inch or larger, unsanded for smaller gaps, apply with a grout float held at a 45-degree angle, pushing grout firmly into all gaps. Wipe excess grout from tile surfaces with a damp sponge after 10 to 15 minutes, being careful not to scrub grout out of the joints.
- Seal and caulk: Let grout cure for 24 to 72 hours, then seal porous tile or cementitious grout per the manufacturer’s directions. Apply 100% silicone caulk to the joint between the countertop and backsplash, and around outlet boxes to prevent water intrusion. If you’re adjusting your kitchen cabinet layout during your remodel, finalize outlet heights before cutting tile to avoid misalignment.
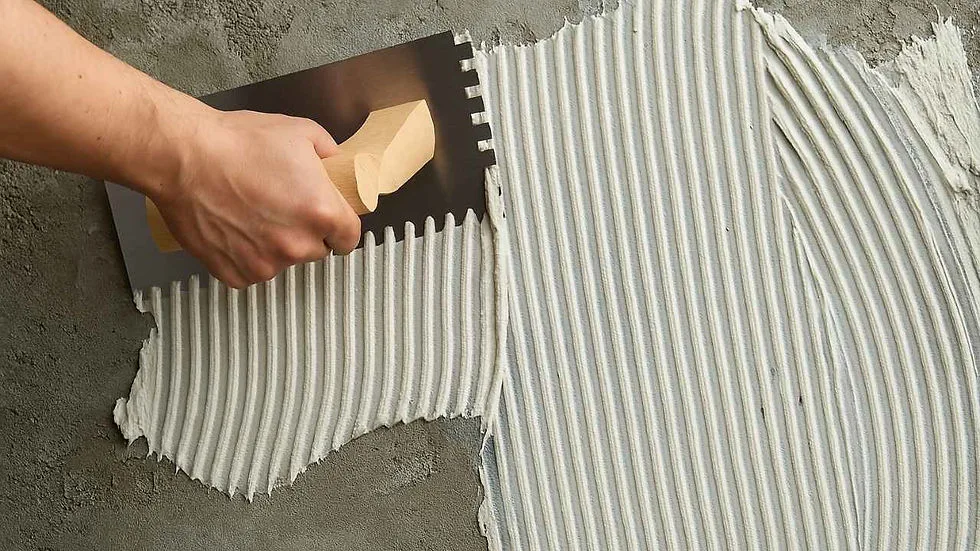
Image source: Bing (Web (fair-use with source credit))
Common Visual Mistakes That Ruin a Backsplash (And Quick Fixes)
Most mistakes are easy to spot if you know what to look for, and most have simple fixes if you catch them early. Here are the most common visual errors, what causes them, and how to fix them:
- Tile lippage: Tiles that protrude higher than their neighbors, creating an uneven, wavy surface. This happens from uneven thin-set application, worn spacers, or skipping the leveling system. Fix: Remove affected tiles with a utility knife, scrape off old thin-set, reapply with even pressure and a leveling system.
- Grout haze: A cloudy, filmy residue left on tile surfaces after grouting, caused by wiping grout too early or using too much water. Fix: Once grout is fully cured, 72 hours, apply a grout haze remover with a soft cloth, rinse thoroughly. Avoid acidic cleaners on natural stone tile, as they will etch the surface.
- Uneven edge cuts: Lopsided or misaligned cuts at the top or sides of the backsplash, caused by skipping the dry fit or using a warped level. Fix: Snap fresh layout lines, measure each cut twice before cutting, use a wet saw for clean, straight edges on ceramic and porcelain tile.
- Peeling peel-and-stick tile: Tiles that lift from the wall after a few weeks, caused by installing on unprimed, glossy, or dusty drywall. Fix: Remove peeling tiles, sand the wall smooth, clean with isopropyl alcohol, reapply tiles with firm pressure using a foam roller. For renters in strict markets, no-damage kitchen solutions like peel-and-stick tile let you refresh your space without losing your security deposit.
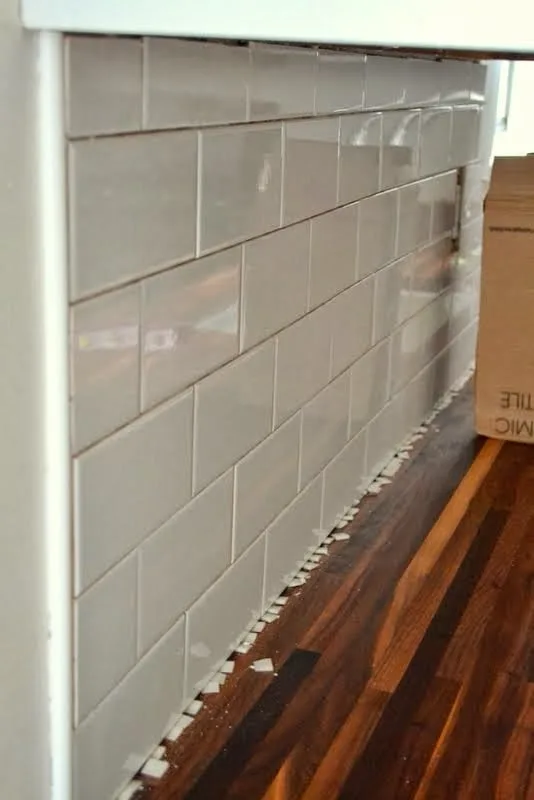
Image source: Web (Bing) / elevenobjects.com (Web image (fair-use with source credit))
Backsplash Material Comparison: Which Is Right for Your Kitchen?
The best backsplash material depends on your budget, skill level, desired lifespan, and whether you can make permanent changes to your walls. Renters and anyone needing a fast refresh usually lean toward temporary options, while homeowners doing a full remodel pick durable thin-set tile. Below is a side-by-side look at the most common options, with specs and ideal use cases.
| Material | Avg Cost Per Sq Ft | Lifespan | Best For | Key Drawback |
|---|---|---|---|---|
| Peel-and-stick vinyl | $2-$8 | 3-5 years | Renters, quick refreshes, low-skill DIY | Peels on glossy/unprepped walls, less heat resistant |
| Ceramic subway tile | $5-$12 | 10-15 years | First-time DIY, high-traffic kitchens, classic style | Requires thin-set and grout, more labor |
| Glass mosaic tile | $8-$20 | 10-15 years | Modern kitchens, small spaces (reflects light) | Higher cost, more grout lines to clean |
| Natural stone (marble, slate) | $10-$30 | 15+ years | High-end remodels, luxury aesthetic | Porous, requires regular sealing, higher skill to install |
| Stainless steel | $15-$35 | 20+ years | Industrial-style kitchens, ultra-low maintenance | Shows fingerprints, hard to cut without special tools |
If you’re planning a modern kitchen design, matte finish ceramic or glass mosaic fits the clean, minimalist aesthetic. For renters in cities with strict security deposit rules, peel-and-stick vinyl is the only no-permanent-modification option that still looks polished.
Realistic DIY vs Pro Costs and Timelines for 2024
Most backsplash projects fall into two buckets: DIY for under $500 total, or professional installation for a premium. Your timeline depends on the material you pick and how much prep your wall needs. As of 2026, average costs have held steady from 2024, with labor making up 60-70% of the total project cost if you hire out.
| Project Type | Material Cost (per sq ft) | Labor Cost (per sq ft) | Total Timeline | Total Cost (25 sq ft backsplash) |
|---|---|---|---|---|
| DIY peel-and-stick | $2-$8 | $0 | 4-6 hours | $50-$200 |
| DIY thin-set tile | $5-$30 | $0 | 8-16 hours over 2-3 days | $125-$750 |
| Pro thin-set tile install | $5-$30 | $10-$25 | 1-2 days | $375-$1,375 |
DIY makes sense for simple materials like subway tile on a flat, prepped wall. Hire a pro if you’re working with natural stone, large format tile over 12×12 inches, or uneven walls that need extensive leveling. If you’re already budgeting for a full kitchen remodel, adding professional backsplash installation usually only adds 5-10% to the total project cost.
Safety & Code Rules You Can’t Skip During Install
Skipping safety steps can lead to expensive repairs, health risks, or failed inspections if you sell your home later. The biggest risks come from silica dust from cutting tile, lead paint in pre-1978 homes, and water damage from improper sealing. Per International Residential Code (IRC) standards, all backsplash areas directly behind kitchen sinks require cement backer board, not standard drywall, to resist long-term water intrusion.
- Turn off the circuit breaker for any outlets or switches in the backsplash zone before you start work to avoid electric shock.
- Wear an N95 respirator, safety glasses, and cut-resistant gloves when cutting tile or mixing grout to avoid silica dust exposure, per OSHA silica safety guidelines.
- If your home was built before 1978, use an EPA-approved lead paint test kit before sanding any wall surfaces to avoid releasing toxic lead dust.
- Always apply 100% mold-resistant silicone caulk to the joint between the countertop and backsplash, not acrylic caulk, which will crack and grow mold within 2-3 years in high-moisture areas.
Local building codes may have additional requirements for moisture-resistant backer board, so check with your local permitting office if you’re unsure. These rules aren’t red tape, they’re there to keep your backsplash from failing early and your home safe.
Pro Tips for a Professional Finish (Even If It’s Your First Time)
Small, intentional habits separate a wobbly DIY backsplash from a seamless, professional-looking one. You don’t need special skills, you just need to follow these proven checks at each stage of the install.
- Snap layout lines with a level and chalk, not just a ruler, to catch uneven walls before you start setting tile.
- Comb thin-set in two perpendicular directions with your notched trowel to get full, even coverage behind every tile, no thin spots that cause popping later.
- Use a tile leveling system for any tile larger than 3×3 inches to eliminate lippage between adjacent edges.
- Let thin-set cure a full 24 to 48 hours, even if the package says rapid-set dries faster, to avoid tiles shifting after grouting.
- Seal cementitious grout 24 to 72 hours after it cures, then reseal it every 1-2 years to prevent staining and mold growth.
- Wipe grout haze with a soft, damp sponge 10 to 15 minutes after applying grout, not a rough scrub pad that will scratch glossy tile finishes.
If you’re pairing your new backsplash with renovated kitchen cupboards, make sure your outlet trim fits flush with the tile face for a seamless look. You may need to add outlet box extenders to bring the outlet forward 1/4 to 1/2 inch if your tile is thick.
Post-Install Troubleshooting: Grout Haze, Peeling Tile, and More
Even with perfect prep, small issues can pop up in the first few weeks after install. Most have easy fixes if you catch them early, before they turn into costly repairs. Here’s how to identify and fix the most common post-install problems.
- Grout haze: A cloudy film on tile surfaces that won’t wipe off with water. Happens from wiping grout too early or using too much water during cleanup. Fix: Apply a commercial grout haze remover per the manufacturer’s instructions, rinse thoroughly with clean water, avoid acidic cleaners on natural stone.
- Peeling tile (peel-and-stick): Tiles lift from the wall in the first month. Happens from skipping wall prep or installing in a humid room before the adhesive cures. Fix: Remove peeling tiles, sand the wall smooth, clean with isopropyl alcohol, reapply tiles with firm pressure using a foam roller.
- Cracked grout: Small cracks in grout lines 6+ months after install. Happens from improper curing, shifting walls, or skipped sealing. Fix: Remove loose grout with a grout saw, reapply fresh grout, reseal the entire backsplash area.
- Mold in caulk: Black or pink spots in the caulk joint between countertop and backsplash. Happens from using acrylic caulk or skipping caulk replacement every 3-5 years. Fix: Remove all old caulk with a utility knife, clean the joint with rubbing alcohol, apply 100% mold-resistant silicone caulk, smooth with a caulk finishing tool.
For permanent thin-set tile, most issues pop up in the first 30 days while thin-set and grout cure. After that, a quick wipe down with mild soap and water is all your backsplash needs to look like new for 10 or more years.
Final Decision Guide: When to DIY vs Hire a Pro
If you’re a first-time DIYer working with 12×12 inch or smaller tile on a flat wall, and have 2 to 3 days to spare, DIY saves $125 to $750 on a standard 25 square foot backsplash. If you’re using large format tile over 12×12 inches, natural stone, or have severely uneven walls, hire a pro to avoid lippage and adhesion failures. Renters should stick to peel-and-stick vinyl to avoid lease violations.
For full kitchen remodels, professional installation adds only 5-10% to total project cost.
Maintenance & Long-Term Backsplash Care
Wipe your backsplash daily with mild dish soap and warm water. Reseal cementitious grout every 1 to 2 years to prevent staining and mold, per Tile Council of North America guidelines. Reapply 100% silicone caulk to the countertop joint every 3 to 5 years to block water intrusion.
Never use abrasive pads or acidic cleaners on natural stone tile, as these etch the surface permanently.
Backsplash ROI & Resale Value Insights
A kitchen backsplash delivers a 50% to 70% return on investment for full kitchen remodels, per 2023 National Association of Realtors data, a figure that has remained consistent as of 2026. Even low-cost peel-and-stick vinyl makes a kitchen look updated to potential buyers with minimal upfront cost. For budget kitchen renovations, a simple subway tile backsplash is one of the highest-impact upgrades you can make.
Seasonal & Climate Considerations for Backsplash Install
Humid climates like the U.S. Southeast require mold-resistant grout and silicone caulk to prevent mildew growth in backsplash joints. Cold climates with freeze-thaw cycles need freeze-thaw rated tile for exterior-adjacent kitchen backsplashes to avoid cracking.
Avoid installing thin-set tile in temperatures below 50°F or above 90°F, as extreme temperatures disrupt curing and adhesion.
Frequently Asked Questions
How long does thin-set take to dry before grouting?
Standard thin-set requires 24 to 48 hours of cure time before grouting, per manufacturer specs. Rapid-set formulas may cure in 4 to 6 hours, but waiting 24 hours prevents tiles from shifting after grouting.
Do I need to seal my backsplash tile and grout?
Porous tile like natural stone and cementitious grout require sealing to resist stains. Glazed ceramic and porcelain tile do not need sealing, but their grout lines still require sealer if using cementitious grout. Epoxy grout is non-porous and never needs sealing.
Can a beginner install a backsplash?
Yes, if you start with 3×6 inch subway tile on a flat, prepped wall. Follow layout lines precisely, use a tile leveling system, and let all materials cure fully. Avoid large format tile or natural stone for your first project, as these require more precision.
Does a backsplash increase home resale value?
Yes, per 2023 National Association of Realtors data, a kitchen backsplash delivers a 50% to 70% return on investment for full kitchen remodels. Even low-cost peel-and-stick vinyl makes a kitchen look updated to potential buyers with minimal upfront cost.