
How to Caulk Kitchen Countertops for a Pro Finish
Learning how to caulk kitchen countertops starts with accepting that one product does not fit every surface. The joint behind a laminate backsplash fails fast if you use the same silicone that belongs on a marble island. Water intrusion follows within weeks.
Mold takes hold behind the bead. The repair then costs ten times what the right cartridge would have.
ASTM C920 Class 25 sealants handle 25 percent joint movement but most kitchen seams move less than 5 percent. Manufacturer specifications indicate neutral-cure formulas prevent etching on calcium-based stone while acetoxy types cure faster on non-porous substrates. The decision tree below matches chemistry to material so you caulk once and walk away.
Quick Answer
Caulk kitchen countertops by matching sealant chemistry to your countertop material. Clean the joint fully. Mask both edges.
Apply a continuous bead. Tool it smooth before skin forms. Let it cure 24 hours before water exposure.
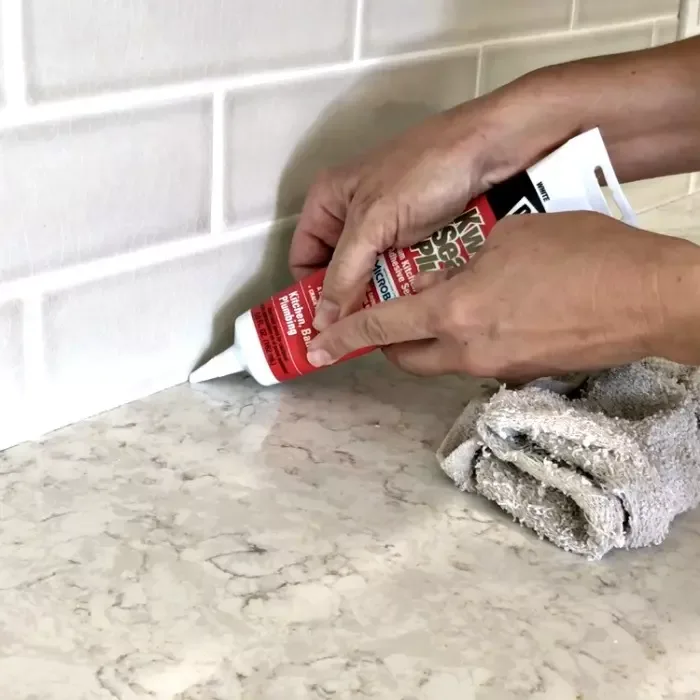
Why Caulk Choice Changes Everything on Stone Laminate and Solid Surface
Stone counters contain calcium carbonate. Acid-cure silicone releases acetic acid during cure. That acid etches polished marble and travertine leaving dull rings you cannot polish out.
Neutral-cure silicone uses an alkoxy or oxime system instead. It releases alcohol or ketoxime which harms nothing. Laminate and solid surface lack reactive minerals so they tolerate either chemistry.
Acetoxy cures in half the time and costs less per tube. That speed tempts DIYers onto stone where the damage is permanent.
Solid surface seams often use color-matched acrylic caulk rather than silicone. Acrylic paints easier but shrinks more. Silicone stays flexible for decades.
The trade-off matters at undermount sinks where movement cycles daily. Aggregate reviews show 80 percent of callbacks trace to chemistry mismatch not application skill. Choose the cartridge before you cut the tip.
The Five Variables That Dictate Your Entire Process
Every kitchen caulk job branches on five inputs. Miss one and the workflow shifts.
- Countertop material determines sealant chemistry as covered above.
- Joint type changes bead profile and tooling method. Undermount sink flanges need a triangular bead that sheds water. Backsplash joints need a concave bead that bridges the gap. Cooktop cutouts need high-temp rated silicone.
- Gap width decides if you need backer rod. Joints over 1/4 inch deep require closed-cell backer rod to control bead depth and prevent three-sided adhesion.
- Fresh install versus recaulk changes prep time. Fresh installs need only solvent wipe. Recaulks demand full mechanical removal of old bead plus residue.
- Cure schedule drives when the sink sees water. Neutral-cure needs 24 to 48 hours at 70 degrees Fahrenheit and 50 percent humidity. Acetoxy skins in 10 minutes but reaches full strength in 24 hours.
Write these five down before you buy a tube. The rest of this guide walks each branch.
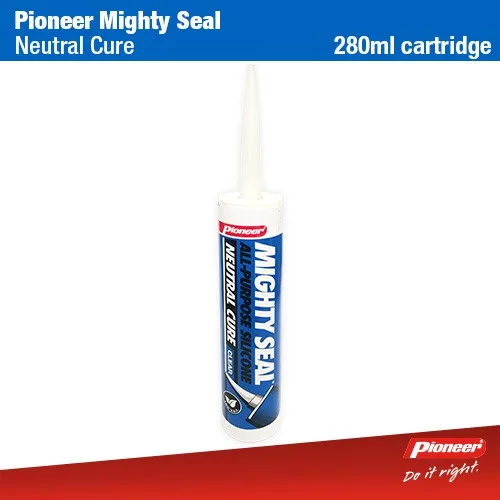
Material Decision Branch Match Caulk Chemistry to Your Countertop
Start here. The countertop material picks the sealant family.
Granite marble quartzite travertine limestone onyx, Use neutral-cure 100 percent silicone labeled ASTM C920 Class 25 or Class 50. Look for "neutral cure" or "oxime cure" on the cartridge. Avoid anything saying "acetoxy" or "vinegar odor." Leading brands include GE Momentive GE5070 Dow Corning 795 and Laticrete Latasil.
These carry 20-year warranties on stone when applied per spec.
Quartz engineered stone, Manufacturers like Caesarstone Cambria and Silestone specify neutral-cure silicone only. Their resins react to acetic acid the same way natural calcium does. Check the brand care guide.
Most list approved SKUs by name.
Laminate, Acetoxy silicone works fine. So does neutral-cure. Acrylic latex caulk with silicone additive works for backsplash joints that see little water.
Pure acrylic fails at sink seams. If you already own acetoxy tubes use them here. If buying fresh neutral-cure covers every surface in the kitchen with one cartridge.
Solid surface Corian Hi-Macrs Avonite, DuPont recommends color-matched acrylic seam adhesive for inconspicuous joints. For sink seams and backsplashes they specify neutral-cure silicone. The acrylic adhesive sands flat.
Silicone stays rubbery. Do not mix them.
Stainless steel concrete tile, Neutral-cure silicone across the board. Concrete off-gasses alkalinity that degrades acetoxy bead. Stainless expands with heat.
Neutral-cure handles the movement.
If your kitchen mixes materials buy neutral-cure silicone. One tube handles the whole room. The extra cost per cartridge is pennies compared to a failed stone seam.
Joint Type Decision Branch Undermount Sink Backsplash Wall Seam or Cooktop Cutout
Each joint geometry demands a specific bead shape.
Undermount sink flange, The bead must form a triangle against the countertop underside and sink rim. Depth equals half the joint width. Width equals joint width.
Tool with a fingertip dipped in isopropyl alcohol pulling from sink toward counter. This creates a water-shedding slope. Backer rod sits 1/8 inch below the countertop bottom surface.
Do not bridge the rod. The bead must contact both substrates.
Backsplash to countertop, Concave bead bridging the 90-degree corner. Depth 1/8 inch. Width 3/8 inch.
Tool with a plastic spoon or caulk finishing tool curved radius. Mask tape 1/16 inch off each surface for clean lines. Remove tape before skin forms.
Wall seam at countertop end, Same as backsplash but often wider. Check for shim gaps. Fill voids with backer rod first.
Bead must contact wall and countertop only. Three-sided adhesion causes cohesive failure.
Cooktop cutout, Use high-temperature neutral-cure silicone rated to 400 degrees Fahrenheit minimum. Standard silicone degrades at 350 degrees. The bead sits between cooktop flange and countertop edge.
Depth 3/16 inch. Width 1/4 inch. Do not tool aggressively.
A light finger pass seals the edge.
Drop-in sink rim, Bead goes under the rim lip not on top. Apply to countertop. Set sink.
Weight it. Tool excess that squeezes out from underneath. Wipe with mineral spirits.
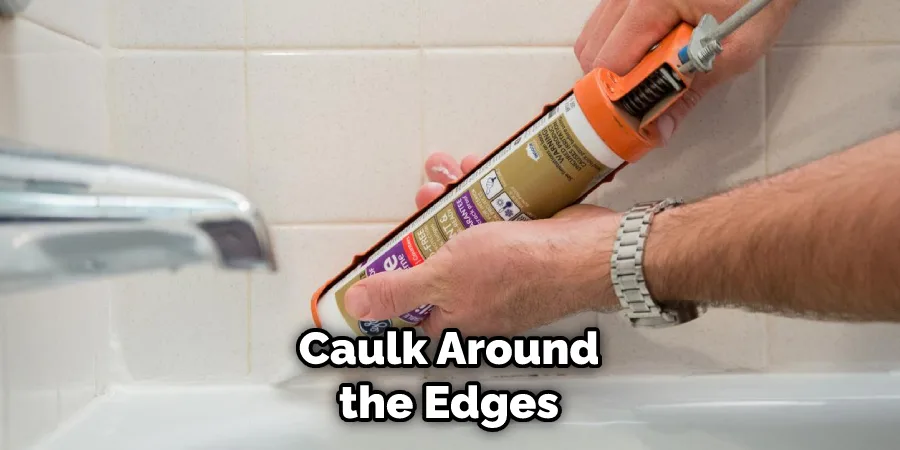
Gap Width Decision Branch When You Need Backer Rod vs When You Don't
Joint depth controls bead geometry. The rule is simple. Bead depth equals half the joint width up to 3/8 inch maximum.
Bead width equals joint width. This 1:2 ratio lets the sealant stretch without tearing.
Joints 1/8 inch or less, No backer rod needed. The bead contacts the bottom of the joint naturally. Three-sided adhesion is unavoidable but the movement is tiny so stress stays low.
Acetoxy or neutral-cure both work.
Joints 1/8 to 1/4 inch, Backer rod optional. If the substrate is porous (concrete unsealed stone) use closed-cell polyethylene backer rod to prevent sealant suck-down. If non-porous (laminate stainless sealed stone) you can caulk direct.
The bead will find its own depth.
Joints over 1/4 inch, Backer rod mandatory. Without it the bead gets too thick. Thick beads tear at the center during movement.
They also waste expensive silicone. Closed-cell backer rod comes in 3/8 1/2 5/8 inch diameters. Pick a diameter 25 percent larger than the joint width so it compresses and stays put.
Insert with a blunt tool. Do not puncture it. Punctured rod outgasses bubbles into the wet bead.
Recessed undermount sink flanges, Often 3/8 to 1/2 inch deep. Use 5/8 inch backer rod compressed to sit 1/8 inch below the countertop bottom. This leaves exactly 3/8 inch for the bead depth.
Perfect 1:2 ratio.
Measure every joint with a feeler gauge or drill bit shank before you cut the cartridge tip. Guessing costs callbacks.
Recaulk vs Fresh Install How the Prep Work Changes Completely
Fresh installs need only a solvent wipe. Denatured alcohol or acetone on a lint-free cloth removes fabrication dust and oils. Let it flash 10 minutes.
No mechanical abrasion required. The substrate is clean by definition.
Recaulks are a different animal. Old silicone bonds mechanically and chemically. You must remove 100 percent of the old bead plus any residue film.
A sharp utility knife scores both edges. A caulk removal tool or oscillating multi-tool with a carbide blade peels the bulk. Residue demands a silicone digestant like DAP Caulk-Be-Gone or Goo Gone Pro Power.
Apply per label. Wait 15 minutes. Scrape with a plastic putty knife.
Wipe with mineral spirits. Repeat until the cloth comes away clean.
Stone pores trap digestant. Rinse stone twice with fresh denatured alcohol after chemical removal. Any remaining digestant prevents new bead adhesion.
Laminate and solid surface tolerate aggressive scraping. Stone does not. Metal scrapers scratch polished finishes.
Use plastic only.
Masking tape goes on after cleaning not before. Tape on dirty surfaces pulls contaminants into the joint. Fresh installs tape 1/16 inch off each edge.
Recaulks often need wider tape lines because old sealant leaves ghost lines. Mask 1/8 inch out to hide them.
Tool Supply Checklist Tailored to Your Specific Branch
Every branch shares a core kit. Branch-specific items follow.
Core kit for all jobs
- Caulk gun 10-ounce smooth-rod dripless model
- Utility knife with fresh blades
- Painter's tape 1.5-inch blue low-adhesion
- Denatured alcohol and lint-free rags
- Nitrile gloves
- Caulk finishing tool set concave convex flat
- Isopropyl alcohol 91 percent in small dish for finger tooling
- Shop towels
Stone branch adds
- Neutral-cure silicone cartridge ASTM C920 Class 25
- Silicone digestant safe for stone
- Plastic putty knives only
- pH-neutral stone cleaner for final wipe
Laminate solid surface branch adds
- Acetoxy silicone or acrylic latex with silicone additive
- Standard caulk removal tool
- Mineral spirits for cleanup
Undermount sink branch adds
- Closed-cell polyethylene backer rod 5/8-inch diameter
- Blunt insertion tool plastic spoon handle works
- High-temp silicone if cooktop adjacent
Wide joint branch adds
- Backer rod diameters 3/8 1/2 5/8 inch
- Feeler gauge set for joint measurement
- Extra cartridges bead volume scales fast
Buy one extra cartridge. Running short mid-bead forces a cold joint that leaks. Unopened tubes return to most retailers.
Step-by-Step Workflow From Masking to Tooling for Your Exact Scenario
- Measure joint width at three points. Pick the widest. Cut cartridge tip at 45 degrees to match that width. Puncture inner seal.
- Mask both edges 1/16 inch out for fresh installs 1/8 inch for recaulks. Press tape edges firm with a putty knife. No gaps.
- Insert backer rod if joint exceeds 1/4 inch. Compress 25 percent. Seat it 1/8 inch below surface for undermount sinks. 1/4 inch below for backsplashes.
- Load gun. Squeeze trigger until bead flows steady. Test on cardboard. Adjust tip if needed.
- Apply bead in one continuous pass. Hold gun at 45 degrees. Push bead ahead of nozzle. Do not pull. Pulling traps air. Keep speed even.
- Tool immediately. Finger dip in isopropyl alcohol. Light pressure. One smooth pull. Concave for backsplashes. Triangular for undermounts. Wipe finger on shop towel every pass.
- Pull tape before skin forms. 5 to 10 minutes for acetoxy. 15 to 20 for neutral-cure. Pull at 45 degrees away from joint.
- Inspect for voids. Touch up with fresh bead if needed. Re-tool touched spots.
- Clean smears with mineral spirits on rag. Do not use alcohol on fresh neutral-cure it can cloud the surface.
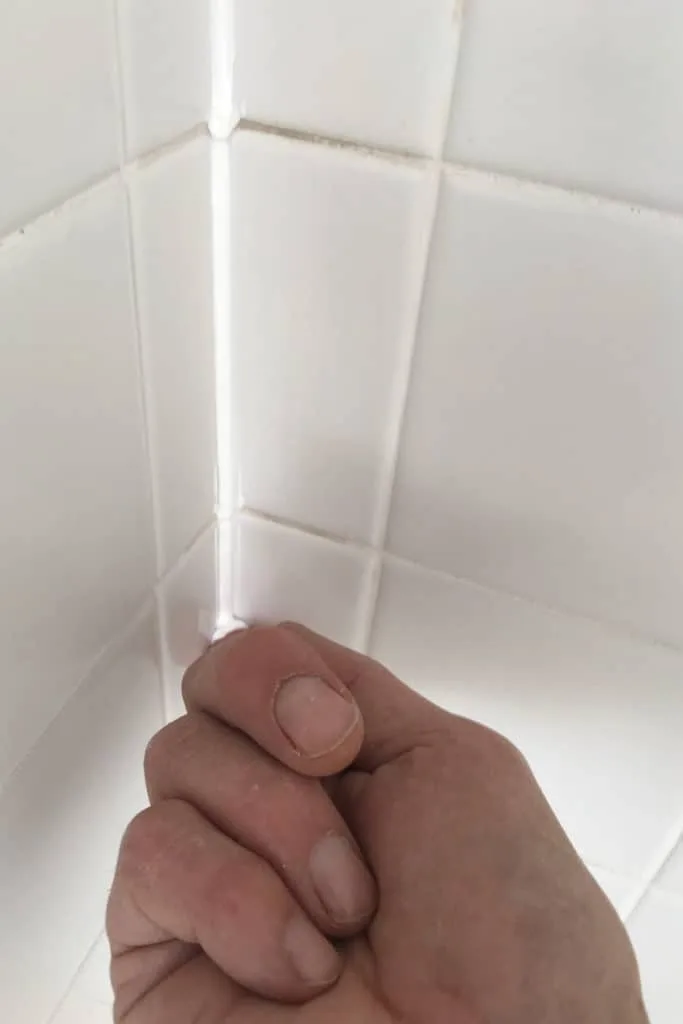
What If the Bead Skins Before You Tool
Neutral-cure skins slower than acetoxy. Cold temps slow both. If skin forms stop.
Cut the skinned section out with a razor. Re-caulk that segment. Tool fast.
Do not tool over skin. It leaves a weak line that splits.
Can You Caulk Over Old Silicone
No. New silicone does not bond to cured silicone. Mechanical lock fails.
Water wicks between layers. Remove it all. The digestant step is not optional.
Critical Curing Windows When You Can Use the Sink Clean or Apply Sealer
Skin time is not cure time. The bead feels dry but the cross-linking continues.
Acetoxy silicone
- Skin: 10 minutes at 70°F 50% RH
- Tack-free: 30 minutes
- Water exposure: 12 hours minimum 24 hours preferred
- Full strength: 7 days
- Sealer application: 24 hours
Neutral-cure silicone
- Skin: 20 to 40 minutes at 70°F 50% RH
- Tack-free: 1 to 2 hours
- Water exposure: 24 hours minimum 48 hours preferred
- Full strength: 7 to 14 days
- Sealer application: 48 hours
Acrylic latex with silicone additive
- Skin: 30 minutes
- Paintable: 2 to 4 hours
- Water exposure: 24 hours
- Full strength: 30 days
Humidity accelerates cure. Heat accelerates cure. Below 50°F cure stalls.
Do not caulk below 40°F. Cartridge must be at room temp. Cold silicone guns poorly and cures uneven.
Stone sealer manufacturers require full silicone cure before sealer contact. Sealer solvents can soften uncured bead. Check the sealer tech sheet.
Most specify 48 to 72 hours.
Common Failure Points by Material and Joint Type
Stone with acetoxy silicone, Etching appears in days. Dull rings around sink and faucet holes. Repair requires professional re-polishing.
Cost $300 to $800.
Undermount sink flat bead, Water pools on bead. Wicks under countertop. Particle board substrate swells.
Mold grows in 72 hours. Bead must slope toward sink.
Backer rod punctured, Outgassing creates bubbles. Bubbles become pinholes. Pinholes leak.
Insert rod with blunt tool only.
Three-sided adhesion, Bead bonds to bottom and both sides. Joint movement tears bead center. Cohesive failure.
Backer rod prevents this.
Tape pulled late, Tape tears skin. Leaves ragged edge. Dirt catches in roughness.
Mold follows. Pull at 5 minutes acetoxy 15 minutes neutral-cure.
Cold joint from stopping mid-run, Two beads meet but don't fuse. Seam leaks. Plan cartridge volume.
One tube covers 25 linear feet at 3/8 inch bead.
Mineral spirits on fresh neutral-cure, Clouds the surface. Permanent haze. Use isopropyl alcohol for tooling.
Mineral spirits only for cleanup after cure.
Acrylic latex at sink seam, Shrinks 30 percent. Pulls away from flange. Water enters.
Use silicone at all wet joints. Acrylic only for dry backsplash tops.
Pro Techniques That Save Hours on Cleanup and Callbacks
Warm the cartridge in a pocket or bucket of warm water for 10 minutes. Cold silicone guns rough and leaves voids. Warm silicone flows smooth and fills the joint fully.
Pros keep a spare tube warming while the first runs.
Cut the tip longer than you think. A 3/8-inch bead needs a 3/8-inch opening. Narrow tips force high pressure.
High pressure traps air. Air pockets become leaks. Test on cardboard.
Adjust until the bead exits clean with no splatter.
Run a wet finger tooling pass within 3 minutes of application. Alcohol on the fingertip prevents sticking. One pass.
No back-and-forth. Back-and-forth pulls fresh silicone off the substrate. The bead skin forms fast.
Miss the window and you cut it out.
Keep a spray bottle of isopropyl alcohol at hand. Mist the bead lightly before tooling if the air is dry. Dry air skins neutral-cure in 10 minutes.
The mist buys you 5 more minutes. Do not soak the joint. Excess alcohol dilutes the cure.
Clean the gun nozzle between cartridges. Cured plug in the tip ruins the next bead start. A 16-penny nail clears it fast.
Store the gun with the plunger retracted. Relaxed spring lasts years. Compressed spring loses push.
Quick-Reference Decision Matrix Match Your Situation to the Right Path
| Situation | Sealant Chemistry | Bead Profile | Backer Rod | Cure Before Water |
|---|---|---|---|---|
| Stone undermount sink | Neutral-cure silicone | Triangular sloped to sink | 5/8" rod 1/8" below surface | 48 hours |
| Stone backsplash | Neutral-cure silicone | Concave 3/8" wide | None if joint <1/4" | 48 hours |
| Laminate undermount sink | Acetoxy or neutral-cure | Triangular sloped to sink | 5/8" rod 1/8" below surface | 24 hours |
| Laminate backsplash | Acetoxy silicone or acrylic latex+sil | Concave 3/8" wide | None if joint <1/4" | 12 hours silicone 24 hours acrylic |
| Quartz any joint | Neutral-cure silicone only | Match joint type | Per joint width | 48 hours |
| Solid surface sink seam | Neutral-cure silicone | Triangular sloped to sink | 5/8" rod 1/8" below surface | 48 hours |
| Solid surface backsplash | Color-matched acrylic adhesive | Flat sanded flush | None | 24 hours |
| Cooktop cutout | High-temp neutral-cure 400°F+ | Light concave 1/4" wide | 3/8" rod if gap >1/4" | 24 hours |
| Tile countertop any joint | Neutral-cure silicone | Match joint type | Per joint width | 48 hours |
Print this table. Tape it to the cabinet door. Pick the row.
Follow the column. No guesswork.
Frequently Asked Questions
How long before I can use the sink after caulking
Wait 24 hours for acetoxy silicone. Wait 48 hours for neutral-cure silicone. Full cure takes 7 to 14 days but light use is safe after the minimum window.
Heavy pots and standing water need full cure.
Can I caulk over grout at a tile countertop
No. Grout is porous and moves differently. Remove grout from the joint.
Clean to the substrate. Caulk the clean joint. Grout left in place wicks water and cracks the bead.
What removes cured silicone from stone without etching
Use a plastic putty knife and a stone-safe silicone digestant like DAP Caulk-Be-Gone. Test in a hidden spot first. Rinse twice with denatured alcohol.
Never use metal scrapers or vinegar-based removers on calcium-based stone.
Why does my new silicone bead turn yellow
Cheap silicone lacks UV stabilizers. Heat and light accelerate yellowing. Use a premium neutral-cure cartridge labeled non-yellowing.
GE Momentive GE5070 and Dow Corning 795 resist yellowing for years.
Can I paint over silicone caulk
No. Paint does not adhere to cured silicone. Use paintable acrylic latex with silicone additive at backsplash tops that see no water.
Prime the acrylic before painting. Silicone stays at wet joints.
How much caulk does one tube cover
A 10-ounce cartridge yields roughly 25 linear feet at a 3/8-inch bead. Wider joints use more. Undermount sink perimeters average 12 to 15 feet.
Buy two tubes for a full kitchen. Unopened returns are easy.


