How to Install a Kitchen Backsplash: Complete DIY Guide
Learning how to apply backsplash in kitchen starts with accepting that the wall will show every shortcut. A crooked first row, thinset that skinned over, grout haze you missed, they all stay visible for years. Most failures trace back to skipping layout or rushing cure times, not lack of skill.
This guide walks through the visual checkpoints that separate a lasting install from a redo.
Per TCNA standards, tile bonds require 95 percent mortar coverage in wet areas and 80 percent in dry zones. Manufacturer specs confirm that thinset open time drops by half above 85 degrees Fahrenheit. As of 2026, epoxy grout remains the only cement-free option that never needs sealing.
The following sections break down each phase with the visual cues pros watch.
Quick Answer
Apply backsplash by prepping the substrate, waterproofing, laying out cuts, spreading thinset with a notched trowel, setting tile with spacers, grouting after 24 hours, and caulking perimeter joints. Use cement backer board, polymer-modified thinset, and sanded grout for joints wider than one-eighth inch. Seal cement grout at 72 hours.
Keep expansion joints at countertops and corners.
Why This Project Lives or Dies by What You Can See
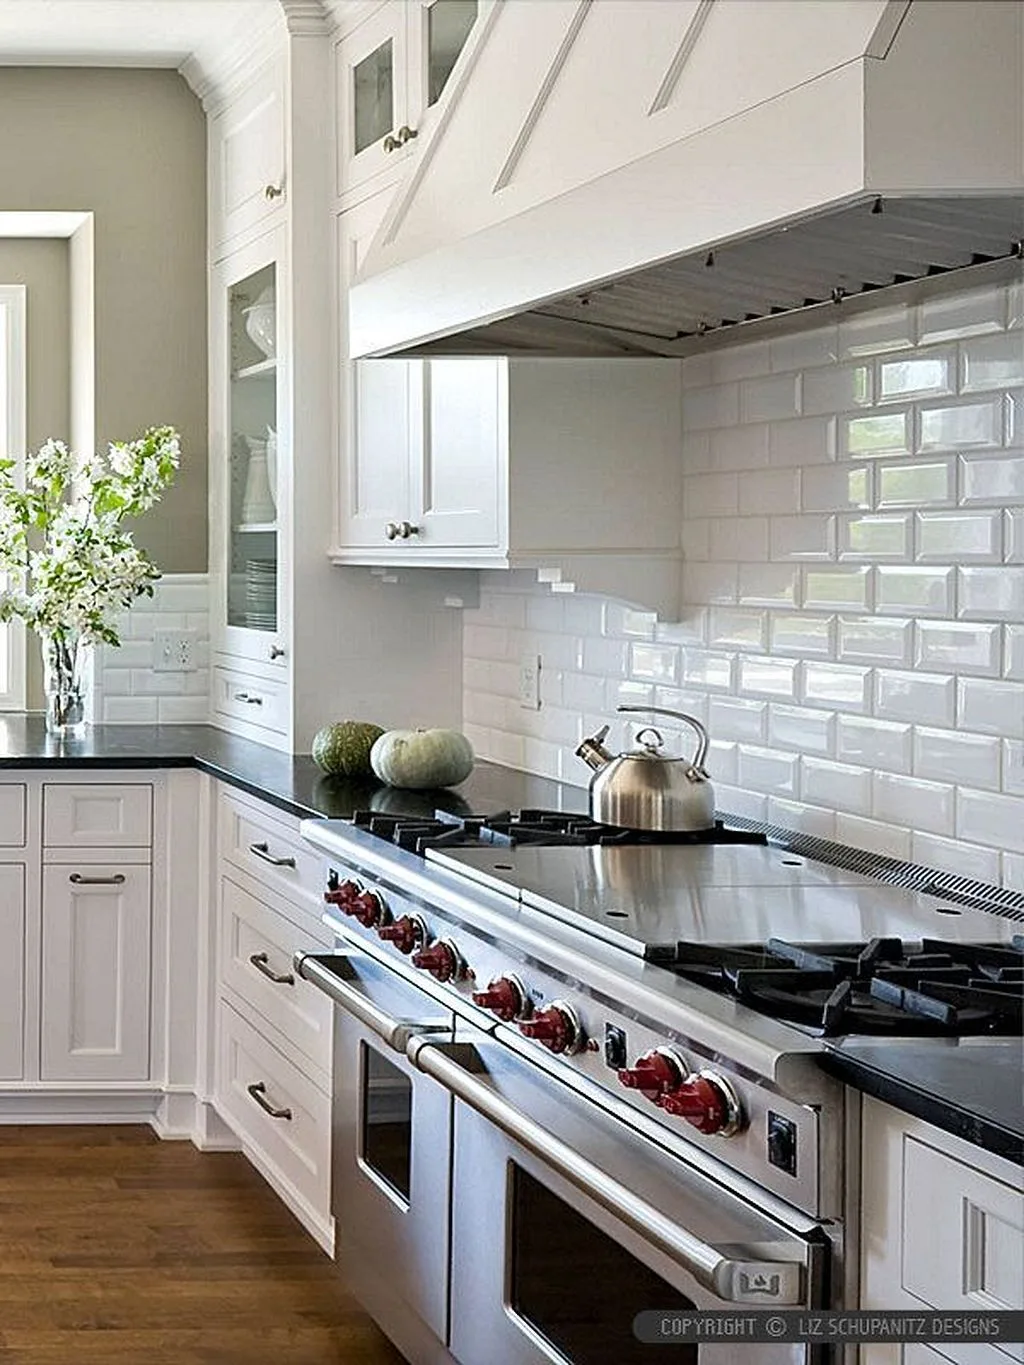
Image source: Web (Bing) / zyhomy.com (Web image (fair-use with source credit))
Tile work is unforgiving because the evidence stays on display. A lippage ridge catches every sponge. A hollow-sounding tile means mortar voids that will crack.
Grout haze turns white subway tile cloudy. These flaws cannot be painted over. The good news: every critical error shows up during install if you know where to look.
Pros pull a tile every few rows to verify coverage. They check coursing with a laser level every three feet. They clean grout at the exact moment it firms, not before, not after.
This section trains your eye to catch those moments.
Substrate movement telegraphs through grout lines first. A hairline crack at the countertop joint means missing silicone. Efflorescence blooming on grout means moisture behind the tile.
Both are preventable with proper waterproofing and expansion joints. The visual inspection habit starts before you mix the first bucket. Check the wall for flatness with a straightedge.
Mark high spots. Plan the layout so cut tiles at edges exceed half-width. These steps take minutes but prevent days of rework.
Tile, Mortar, Grout: The Three Materials That Actually Matter
Tile choice drives every other decision. Ceramic and porcelain dominate for durability. Glass adds depth but shows mortar ridges.
Natural stone requires sealing and white thinset to prevent staining. PEI rating III or higher handles kitchen splatter. Vitreous or impervious absorption ratings (under three percent) resist moisture.
Large-format tile over fifteen inches any side demands medium-bed mortar and back-buttering.
Thinset is not interchangeable. Polymer-modified (ANSI A118.4) covers most backsplashes. Rapid-set cuts open time to fifteen minutes, useful for pros, risky for beginners.
Mastic (Type 1 only) works for small ceramic in dry areas but fails behind ranges and sinks. Epoxy mortar bonds to anything but costs three times more and sets fast. Match trowel notch to tile size: quarter-by-quarter for up to eight inches, quarter-by-three-eighths for eight to sixteen, half-by-half for larger.
Grout width follows tile edge type. Rectified edges take sixteenth to eighth inch. Pressed edges need eighth to three-sixteenths.
Rustic or handmade tiles need quarter inch. Sanded grout for joints eighth inch or wider. Unsanded for narrower and for glass or metal tile.
Epoxy grout handles all widths, resists stains, never seals. Cement grout costs less but requires penetrating sealer at 72 hours and annually after. Urethane grout splits the difference, premixed, flexible, moderate stain resistance.
| Material | Best For | Key Spec | Watch Out |
|---|---|---|---|
| Porcelain tile | High heat, wet zones | PEI IV, <0.5% absorption | Requires wet saw, heavy |
| Ceramic tile | Standard backsplash | PEI III, <3% absorption | Softer, easier to cut |
| Glass tile | Visual depth | Non-porous, reflective | Shows mortar ridges |
| Polymer-modified thinset | Most installs | ANSI A118.4, 250 psi | Slake 10 min, remix |
| Epoxy grout | Stain-proof joints | ANSI A118.3, no seal | 45 min pot life, pricey |
| Sanded cement grout | Joints ≥1/8" | ANSI A118.6 | Must seal, color shift |
Tools Worth Buying vs. Tools Worth Renting
Buy the tools you use on every project. Rent the ones you need once. A quality quarter-by-three-eighths square-notch trowel costs fifteen dollars and lasts decades.
A margin trowel, rubber grout float, and hydrophilic sponge add twenty more. Tile spacers cost pennies. A laser level saves hours of rework, buy a basic line laser for fifty bucks.
Knee pads protect joints during long grout sessions.
Wet saws rent for fifty to eighty dollars per day. Most big-box stores offer four-hour rates. A manual snap cutter handles straight cuts on ceramic but chips porcelain.
Nippers manage notches around outlets. An angle grinder with a diamond blade cuts curves and holes. Hole saws for tile run twenty dollars and save outlet-cut headaches.
Leveling clip systems (Raimondi, QEP, Tuscan) cost fifteen cents per clip, buy a bucket for large-format tile.
| Tool | Buy / Rent | Price Range | Notes |
|---|---|---|---|
| Notched trowel (1/4×3/8) | Buy | $12–$18 | Core tool, match to tile |
| Laser level | Buy | $40–$80 | Self-leveling, green line |
| Wet saw | Rent | $50–$80/day | Diamond blade, water cooled |
| Manual snap cutter | Buy | $30–$60 | Ceramic only, score and snap |
| Grout float (medium rubber) | Buy | $10–$15 | 45° angle, diagonal pack |
| Hydrophilic sponge | Buy | $5–$8 | Rounded corners, clean water |
| Leveling clips + wedges | Buy | $15–$25/bucket | 100 clips covers ~30 sf |
| Hole saw (tile) | Buy | $15–$25 | Carbide or diamond grit |
| Margin trowel | Buy | $8–$12 | Mixing, scooping, detail |
Skip specialty tools marketed for one task. A margin trowel beats a "grout bag" for forcing grout into joints. A cheesecloth rag beats a "haze remover pad" for final buff.
If a tool has a single-purpose plastic handle, you probably don't need it.
Prep That Prevents Failure: Demo, Backer Board, Waterproofing
Demo reveals the substrate. Remove old backsplash, scrape adhesive residue, vacuum dust. If drywall paper tears, skim-coat with setting-type compound.
Never tile over glossy paint, sand to dull, wipe with denatured alcohol. If you hit cement board in good shape, clean and proceed. If you hit greenboard or bare drywall, replace with cement backer board (quarter-inch for walls).
Fastener schedule matters. Alkali-resistant screws every eight inches on edges, twelve inches in field. Tape seams with fiberglass mesh tape.
Thinset the tape flat, no ridges. This creates a monolithic panel that moves as one. Skip this step and joints telegraph through tile within a year.
Waterproofing is non-negotiable behind sinks and ranges. Roll liquid membrane (RedGard, Hydro Ban) two coats perpendicular. Target ten to twelve mils dry film, verify with a wet film gauge.
One gallon covers fifty-five square feet at two coats. Let cure one to two hours between coats. Extend six inches past wet zone boundaries.
At the countertop joint, leave a one-eighth-inch gap for silicone. Do not bridge waterproofing across that joint.
For full-wall installs, waterproof the entire area. The cost difference is minimal and the insurance is total. Per IRC R702.4.2, tile in wet areas requires water-resistant backing.
Cement board qualifies. Greenboard does not. If your local inspector follows code, greenboard fails.
Layout Strategy: Where to Start, How to End, Handling Outlets
Start with a ledger board. Screw a straight one-by-two to studs, level, at countertop height plus one-eighth inch. This supports the first row while thinset cures.
Remove after twenty-four hours. Find the horizontal center of the main wall. Dry-lay a row with spacers.
Check end cuts. If the last tile is less than half-width, shift the start point half a tile. Symmetry beats perfection.
Mark every outlet and switch box. Measure from the countertop and from the nearest corner. Transfer measurements to tile.
Cut before setting. A wet saw with a straight edge makes clean cuts. Nippers trim the notch.
Hole saws cut round holes for pipes. Dry-fit every cut piece. Adjust grout joint slightly if it saves a sliver cut, nobody notices a sixteenth-inch variance.
Vertical layout follows the same logic. Find center between countertop and cabinet bottom. Dry-lay a column.
Adjust so cuts at top and bottom are balanced. If upper cabinets sit tight to ceiling, start a full tile at the countertop and let the top cut fall hidden. If open shelving, center the pattern.
Outlets need box extenders when tile adds thickness. Quarter-inch, half-inch, three-quarter-inch depths cost one to three dollars each. NEC 314.20 requires boxes flush with finished surface.
Install extenders before tiling. Cut tile to fit around the extended box, not the old one. Leave one-eighth inch clearance for the cover plate ears.
For complex patterns (herringbone, chevron), snap chalk lines at forty-five degrees from center. Dry-lay the first V-shape. Verify the pattern tracks.
One degree of error compounds fast. Use a digital angle finder. Lock the layout with a few reference tiles before spreading thinset.
Mixing and Troweling Thinset: The Visual Cues Pros Watch

Image source: Bing (Web (fair-use with source credit))
Mix thinset with cool water in a clean bucket. Add powder to water, not water to powder. Mix to peanut-butter consistency.
Let slake ten minutes. Remix without adding water. The slurry should hold a notch shape without slumping.
If it spreads flat, it's too wet. If it crumbles, it's too dry.
Hold the trowel at forty-five degrees. Comb straight lines in one direction. No swirls.
No back-and-forth. The ridges should stand sharp and uniform. A quarter-by-three-eighths notch leaves ridges three-eighths inch high.
Press hard enough to hear the trowel teeth scrape the board. That sound means full contact. Spread only what you can cover in fifteen minutes.
In hot dry air, cut that to ten.
Check the comb lines after a few strokes. They should look like parallel cords. No bare spots.
No collapsed ridges. If the mortar skins, turns dull and forms a crust, scrape it off and spread fresh. Skinned mortar will not bond.
You cannot revive it with a spray bottle. The open clock starts at first spread.
Setting Tile: Coverage Checks, Leveling Clips, Cut Handling
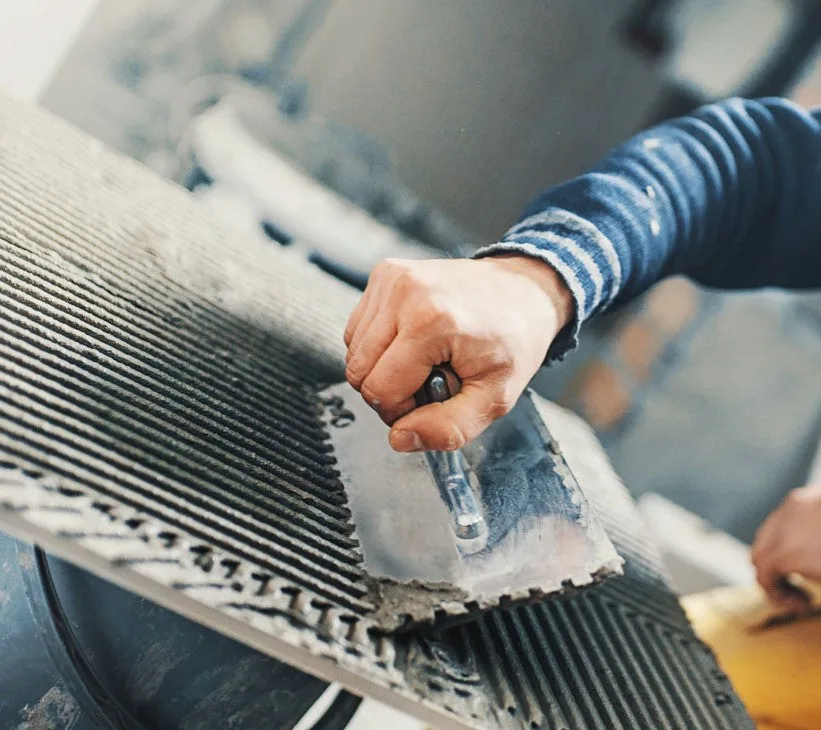
Image source: Web (Bing) / tilechoices.com (Web image (fair-use with source credit))
Press each tile into the combed mortar with a slight twisting motion. That twist collapses ridges and maximizes contact. Wiggle, don't slide.
Sliding drags mortar into joints. Set spacers or leveling clips immediately. For large-format tile, back-butter the tile with a flat trowel before setting.
Fill the cupped back. This prevents voids.
Pull the first tile after setting three more. Check the back. You want ninety-five percent coverage minimum.
No voids at corners. No bare stripes. If coverage is low, your trowel is too small or your pressure is too light.
Switch to a larger notch. Press harder. Re-check every few rows.
This habit catches problems before they cure.
Leveling clips eliminate lippage on large tile. Insert the clip base under the tile edge. Slide the wedge in by hand.
Tighten with pliers until tiles are flush. Do not overtighten, you can crack the tile. Remove wedges after thinset sets, usually twenty to thirty minutes.
Kick the clip base out sideways with your foot or a mallet. Leave the base in the joint.
Cut tiles as you go. Dry-fit every piece. Mark cuts with a wax pencil.
Wet saw for straights. Nippers for notches. Hole saw for pipes.
If a cut edge will show, smooth it with a rubbing stone. Rough edges catch grout and look amateur. Keep a bucket of water at the saw.
Dust kills blades and lungs.
Grouting Without the Haze: Timing, Technique, Clean-Up
Wait twenty-four hours after the last tile sets. Thinset must cure. Mix grout to peanut butter.
Let slake five minutes. Remix. Work in three-foot sections.
Pack grout diagonally across joints with a rubber float at forty-five degrees. Force it deep. Scoop excess off the surface.
Move fast. Grout firms in fifteen minutes.
First wipe: wait until grout is firm to thumb pressure, usually fifteen to twenty minutes. Use a barely damp hydrophilic sponge. Wipe diagonally across joints.
Light pressure. Rinse sponge often. Change water when cloudy.
Do not dig grout out of joints. You are cleaning the tile face only.
Second wipe: two hours later. Haze will appear. Buff with a cheesecloth or microfiber towel.
Circular motion. Clean water. If haze persists, use a sulfamic acid grout haze remover per label.
Never use vinegar on cement grout, it etches. Epoxy grout haze needs epoxy-specific cleaner within twenty-four hours.
Final cure: seventy-two hours before sealer on cement grout. Epoxy grout cures in twenty-four. Keep traffic off.
No splashing. Cover with plastic if the sink must be used. Temperature affects cure.
Below sixty degrees, add twenty-four hours. Above eighty, subtract twelve.
Caulk Lines, Sealers, and the Finishing Details That Last
Caulk every change of plane. Countertop joint. Inside corners.
Tile-to-cabinet edges. Penetrations. Use one-hundred-percent silicone.
Not acrylic latex. Not "siliconized" acrylic. Pure silicone stays flexible for decades.
Cut the tip for a three-sixteenths bead. Tape both sides for clean lines. Tool with a wet finger or caulk tool.
Pull tape immediately.
Seal cement grout at seventy-two hours. Penetrating sealer soaks in. Topical sealer sits on top, avoid for kitchen.
Apply two coats. Wipe excess at five minutes. Test with water bead.
Re-seal annually. Epoxy grout never seals. Urethane grout seals once at install.
Install edge trim where tile ends. Schluter-JOLLY for outside corners. Schluter-RONDEC for rounded edges.
Metal bullnose for traditional looks. Set trim in thinset with the tile. Align carefully.
Crooked trim is obvious. Use a level on every piece.
Clean the site. Vacuum dust. Wipe tile with pH-neutral cleaner.
Remove ledger board. Patch screw holes. Reinstall outlet covers with extenders.
Test GFCIs. The job is not done until the site is clean and powered.
Common Visual Mistakes: Lippage, Skinning, Haze, Bad Cuts

Image source: Web (Bing) / homeoomph.com (Web image (fair-use with source credit))
Lippage shows as a shadow line at tile edges. Run a credit card across joints. If it catches, lippage exceeds one-thirty-second inch, the TCNA limit for tiles up to fifteen inches.
Fix it by lifting and resetting before thinset cures. Leveling clips prevent it on large tile. Spacers alone cannot fix a warped tile.
Thinset skinning looks like a dull crust on combed ridges. It forms in hot wind or when you spread too far ahead. The fix: scrape and re-spread.
No exceptions. A skin prevents mechanical bond. The tile will sound hollow and eventually crack.
Check by pressing a fingertip into a ridge. If it doesn't stick, it's skinned.
Grout haze is a milky film that refuses to wipe. It happens when you clean too early (smearing wet grout) or too late (haze hardens). The window is narrow.
First wipe at firm thumb-print. Second wipe at two hours. Third buff at twenty-four.
Miss the window and you need acid wash, which risks etching tile.
Bad outlet cuts show as gaps, chips, or misaligned holes. Measure twice. Cut once.
Use a hole saw for round holes. Nippers for square notches. Leave one-eighth clearance for cover plates.
If the cut is ugly, the cover plate hides minor sins. Major gaps need a recut. Keep spare tiles for this reason.
Cost Breakdown: Material, Tools, Waste, and Hidden Line Items
Material drives the budget. Ceramic runs one to fifteen dollars per square foot. Porcelain three to twenty-five.
Glass seven to thirty. Natural stone ten to fifty. Peel-and-stick one to five.
Thinset, grout, backer board, waterproofing, and screws add three to five dollars per square foot. Tools: buy fifty dollars, rent wet saw fifty to eighty per day. Waste factor: ten percent straight lay, fifteen percent diagonal, twenty percent herringbone.
Add five percent attic stock. Hidden costs: outlet extenders, GFCI tester, silicone, sealer, trim profiles.
| Item | Low End | High End | Notes |
|---|---|---|---|
| Tile (sf) | $1 | $50 | Material only |
| Setting materials (sf) | $3 | $5 | Thinset, grout, board |
| Tools (buy) | $50 | $120 | Trowels, float, level |
| Wet saw rental | $50 | $80 | Per day |
| Pro install (sf) | $15 | $60 | Varies by region |
When to Call a Pro: Scope, Substrate, and Code Triggers
Call a pro if the substrate needs repair beyond a skim coat. Structural movement, rot, or mold require a contractor. Moving outlets or adding circuits triggers electrical permit, hire an electrician.
Full-wall waterproofing with liquid membrane on large areas benefits from pro spray equipment. Complex patterns (herringbone, chevron) on large-format tile have low error tolerance. Historic districts may require certified installers.
If the project exceeds your tool budget or timeline, a pro costs less than a redo.
Maintenance Reality: Cleaning, Resealing, Repairing a Cracked Tile
Daily: wipe with pH-neutral cleaner. Avoid acidic or abrasive products. Weekly: scrub grout lines with soft brush.
Annually: test cement grout with water bead. If it absorbs, reseal. Two coats penetrating sealer, wipe excess at five minutes.
Epoxy grout never seals. Cracked tile: remove grout around it, chisel out tile, clean substrate, set new tile with thinset, regrout, reseal. Keep attic stock for matches.
Do not use caulk in place of grout, it fails.
Quick-Reference Spec Card: Trowel Sizes, Coverage, Cure Times
| Tile Size | Trowel Notch | Thinset Coverage (50 lb bag) | Open Time (70°F) |
|---|---|---|---|
| ≤8" | 1/4×1/4 sq | 60–70 sf | 20–30 min |
| 8–16" | 1/4×3/8 sq | 40–50 sf | 20–30 min |
| >16" | 1/2×1/2 sq | 35–45 sf | 20–30 min |
| Large format (back-butter) | 1/2×1/2 + flat | 30–40 sf | 15–20 min |
Grout: sanded for joints ≥1/8", unsanded for <1/8". Cure: cement grout 72 hrs before seal, epoxy 24 hrs. Thinset cure: 24 hrs before grout.
Temperature: install 50, 95°F. Below 60°F add 24 hrs cure. Above 85°F cut open time in half.
Frequently Asked Questions
Can I tile over existing tile?
Yes, if the old tile is solid, clean, and scuff-sanded. Use polymer-modified thinset. Add 1/4 inch to outlet depth.
Not recommended for wet zones.
Do I need backer board over drywall?
Yes, for any wet area. Cement board or waterproof membrane over drywall per code. Greenboard is not approved for tile in wet zones.
How long before I can use the kitchen?
Light use after grout cures (24 hrs epoxy, 72 hrs cement). Full cure and sealer at 72 hrs. Avoid heavy splashing for a week.
What grout for behind the stove?
Epoxy grout. Heat resistant, stain proof, no sealing. Cement grout will stain and crack over time.
How do I cut tile around outlets?
Measure from countertop and corner. Transfer to tile. Use hole saw for round, nippers for square.
Leave 1/8 inch clearance. Install box extenders first.
When do I caulk vs grout?
Grout tile-to-tile joints. Caulk all changes of plane: countertop joint, inside corners, tile-to-cabinet, penetrations. Use 100% silicone.