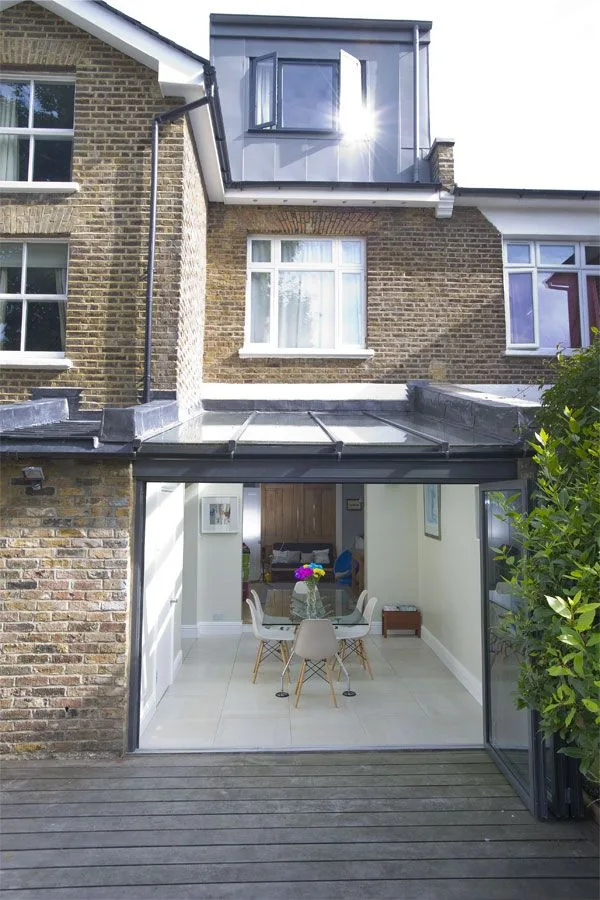
Standard Kitchen Countertop Height: Dimensions & Ergonomics
Most homeowners ask how high are kitchen countertops and get a single number: thirty-six inches. That answer works for almost no one. Your height, your tasks, and your local code all shift the real target.
The result is often back pain, failed inspections, or a kitchen that simply feels wrong.
The standard thirty-six-inch finished height comes from a 34.5-inch base cabinet plus a 1.5-inch countertop slab. NKBA guidelines confirm this as the industry baseline. But ergonomic research shows the ideal prep surface sits three to four inches below your bent elbow.
That difference changes everything.
Quick Answer
Standard kitchen countertops finish at thirty-six inches. Accessible counters max out at thirty-four inches per ADA. Baking stations drop to thirty to thirty-two inches.
Bar-height seating rises to forty-two inches. Your correct height depends on the primary cook's elbow measurement and the work zone.
Why Standard 36-Inch Countertops Fail Most Cooks
The thirty-six-inch rule was set decades ago using average male anthropometry. It assumes a five-foot-nine user doing light prep. Modern kitchens serve multiple cooks of different heights.
They also handle specialized tasks like rolling pastry or kneading dough. A single height forces compromise on every front.
Short cooks hunch their shoulders at thirty-six inches. Tall cooks bend at the waist. Both patterns drive repetitive strain injuries over time.
Wheelchair users cannot roll under a thirty-six-inch counter. The knee clearance falls short by two inches. Bakers lose leverage on dough when the surface sits too high.
The standard works as a rough starting point. It fails as a final spec.
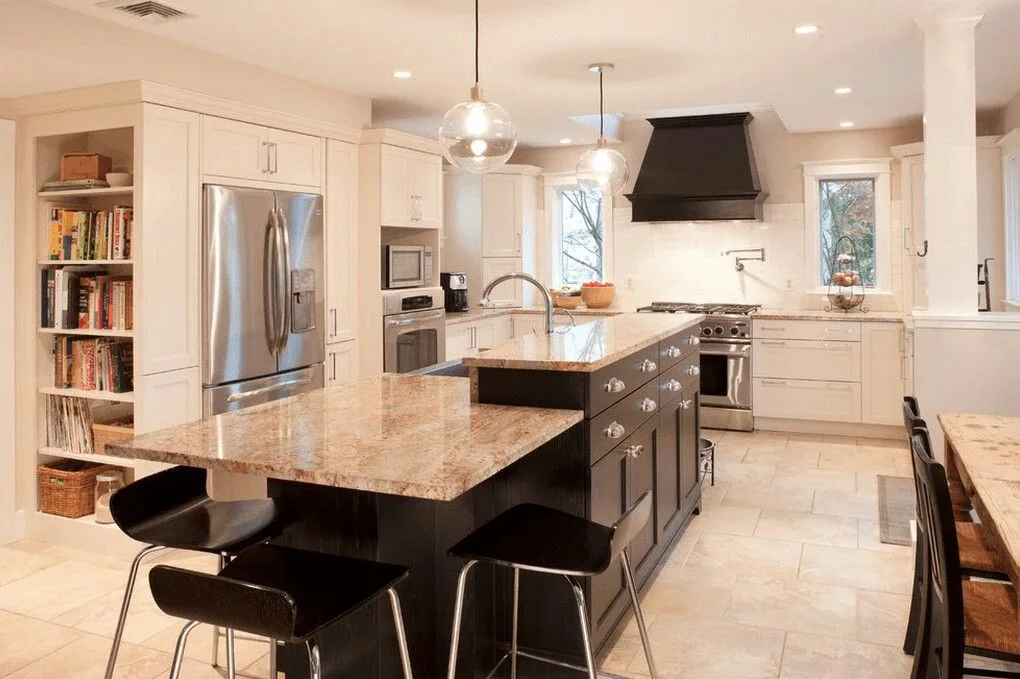
Image source: Bing (Web (fair-use with source credit))
Manufacturers build base cabinets at 34.5 inches because that dimension fits the supply chain. Countertop fabricators add 1.25 to 1.5 inches of stone. The math is easy for the industry.
It is not easy for your body. NKBA planning guidelines now recommend variable heights by zone. The code has not caught up in most jurisdictions.
You have to do the adjustment yourself.
The Quick Answer: It Depends on Your Height, Your Zones, and Your Code Requirements
Your finished countertop height is not a single number. It is a set of targets tied to specific work zones. The primary prep zone follows your elbow.
The baking zone drops lower. The seating zone rises higher. The accessible zone caps at thirty-four inches.
Each zone has a different job. Each job demands a different height.
| Zone | Typical Finished Height | Primary Driver |
|---|---|---|
| Main prep | Elbow minus 3 to 4 inches | Cook height |
| Baking / pastry | 30 to 32 inches | Leverage for rolling |
| Cooking / range | Matches prep or 1 inch lower | Pan handling |
| Cleanup / sink | Matches prep | Workflow continuity |
| Seating / bar | 42 inches | Standard stool height |
| Accessible / ADA | 34 inches max | Knee clearance |
Code requirements vary by location. Some municipalities adopt the 2021 IRC with local amendments. Others enforce ANSI A117.1 for multifamily units.
Always verify with your building department before ordering cabinets. A quick call saves thousands in rework.
How Countertop Height Actually Works: Elbows, Zones, and Finished Dimensions
Finished height is the sum of three layers. The cabinet box sits on the floor. The substrate rests on the cabinet.
The countertop slab sits on the substrate. Each layer adds thickness. The total must match your ergonomic target.
Cabinet boxes come in standard heights. Thirty-four and a half inches is the default. Thirty-two inches serves universal or accessible lines.
Thirty-six and a half inches exists for tall users. Thirty inches appears in baking-specific cabinets. Custom heights are available from semi-custom and custom lines.
The box height sets the floor for everything above it.
Substrate adds three-quarters of an inch typically. Plywood is common. MDF appears in some laminates.
Cement board backs tile installations. The substrate distributes load and prevents telegraphing. It also raises the finished surface.
Forget it in your math and you gain an extra inch you did not plan for.
Countertop thickness varies by material. Two-centimeter stone runs three-quarters of an inch. Three-centimeter stone runs one and three-sixteenths inches.
Built-up edges push one and a half inches or more. Solid surface runs half an inch. Laminate runs one inch with buildup.
The slab thickness is the final variable. Add box plus substrate plus slab. That is your finished height.
Toe-kick recess matters too. Standard toe-kick stands four and a half inches high and three and a half inches deep. ADA toe-kick goes six inches high and nine inches deep.
The recess lets you stand close to the counter. Without it your toes hit the cabinet face. That forces a backward lean.
The lean strains your lower back. Deep toe-kicks also allow wheelchair front casters to tuck under.
Step-by-Step: Find Your Ideal Height for Every Kitchen Zone
Start with the primary cook. Stand barefoot on the finished floor. Bend your elbow ninety degrees.
Measure from the floor to the point of the olecranon. That is your elbow height. Subtract three and a half inches for the main prep zone.
Subtract six inches for a dedicated baking zone. Add four inches for a bar seating tier.
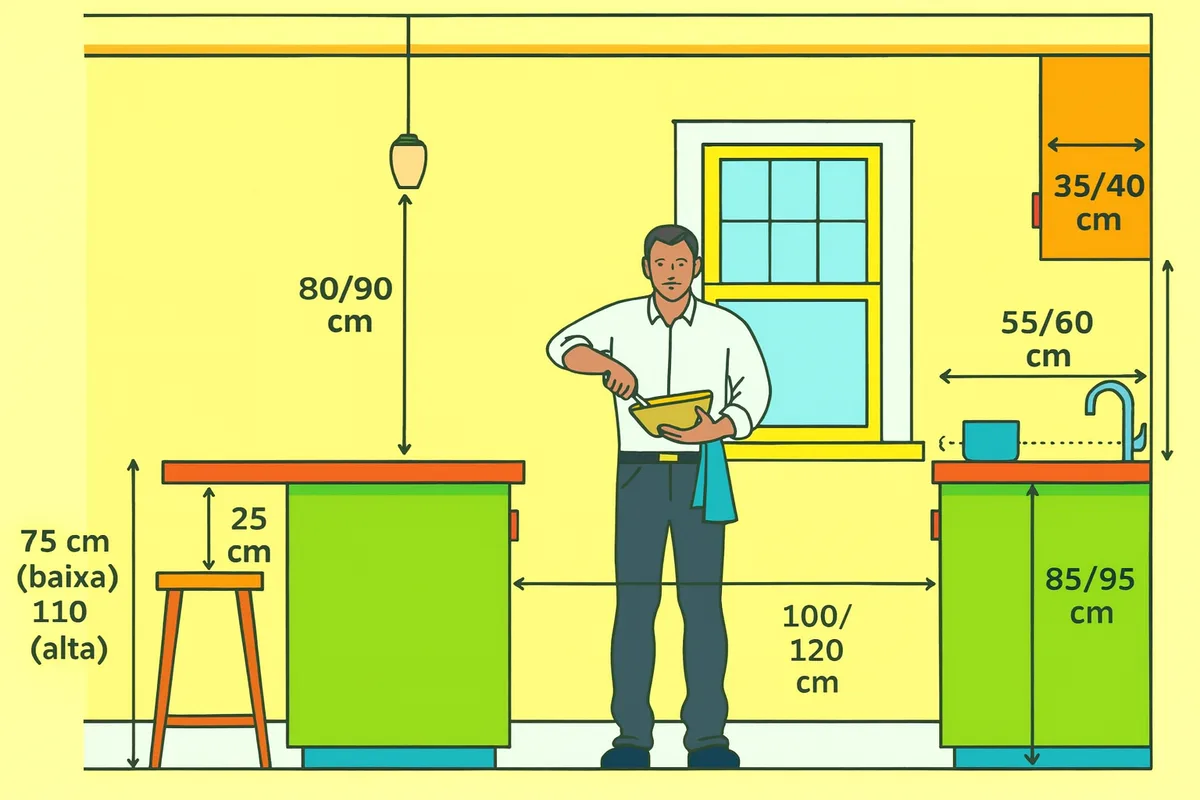
Image source: Web (Bing) / storage.googleapis.com (Web image (fair-use with source credit))
Record each target. Map your kitchen into zones. Most layouts have three to five distinct zones.
Prep near the sink. Cooking at the range. Baking at a dedicated stretch.
Cleanup at the dishwasher. Seating at the island or peninsula. Assign a target height to each zone.
Note where zones touch. Transitions need mitered seams or stepped edges.
Check appliance clearances next. Dishwashers need a thirty-four-inch opening. That demands at least a 34.5-inch cabinet box.
Wall ovens have trim kits that sit proud. Cooktops have flanges that add a quarter inch. Confirm every appliance spec against your planned finished height.
A mismatch here stops the install cold.
Verify code requirements. Pull your local amendment to the IRC. Check for ANSI A117.1 adoption.
If the project touches an accessible unit the counter cannot exceed thirty-four inches. Knee clearance must meet the 27 by 30 by 19 envelope. Toe clearance needs nine inches deep at six inches high.
Document every requirement before you sign a cabinet order.
Decision Branches: Which Height Profile Matches Your Household
Single-height perimeter works when one cook dominates and no accessibility needs exist. Choose a 34.5-inch box with 3-centimeter stone. Finished height lands near thirty-six inches.
This is the lowest cost path. It fits standard appliance specs. It resells easily.
It fails for short cooks tall cooks bakers or wheelchair users.
Multi-height perimeter splits zones by function. Prep runs at the elbow-derived height. Baking drops to thirty inches via a shorter cabinet box.
Cooking matches prep or sits one inch lower. Seating rises to forty-two inches on a raised bar tier. Transitions use mitered waterfall edges or stepped returns.
This approach costs more. It requires custom or semi-custom cabinets. It delivers the best ergonomics for serious cooks.
Adjustable-height systems serve aging-in-place or multi-generation homes. Electric lifts raise and lower entire counter sections. Manual pin systems adjust in one-inch increments.
These systems carry a premium. They add mechanical complexity. They future-proof the kitchen.
They also satisfy ADA when set to thirty-four inches.
Universal design baseline targets thirty-two-inch cabinet boxes with 2-centimeter stone. Finished height reaches thirty-three inches. This splits the difference for average users.
It leaves room for a thicker slab later. It keeps knee clearance viable for seated work. It is a strong default when the household mix is unknown.
Resale sensitivity pushes toward standard heights in speculative builds. Buyers expect thirty-six inches. Deviations raise questions.
A multi-height island reads as a feature. A multi-height perimeter reads as a flaw. Know your market.
In high-end custom markets variable heights signal sophistication. In tract-home markets they signal risk.
Single Height vs. Multi-Height vs. Adjustable: How to Choose
Single-height perimeters win on budget and simplicity. Every cabinet box is 34.5 inches. Every appliance fits standard rough openings.
The fabricator templates one height. Installation moves fast. Resale is straightforward.
The tradeoff is ergonomic compromise for everyone not five-foot-nine.
Multi-height perimeters cost fifteen to twenty percent more in cabinetry. You need at least two box heights. Semi-custom lines like KraftMaid or Schrock offer 32-inch and 30-inch boxes alongside the standard.
Custom shops build whatever you spec. The fabricator must template each zone separately. Seams at transitions need mitered waterfall edges or stepped returns.
The payoff is a kitchen that fits every user and every task.
Adjustable systems add eight to twelve thousand dollars for a single lift section. Electrical rough-in must be planned early. The mechanism sits inside the cabinet box reducing storage depth.
Manual pin systems cost less but require tools to change. Both options future-proof for aging in place. They also satisfy ADA when locked at thirty-four inches.
Choose adjustable only if the household mix will shift dramatically over ten plus years.
Hybrid approach works for most remodels. Keep the perimeter at a single ergonomic height based on the primary cook. Build the island multi-height with a prep zone at elbow minus three and a half inches a baking zone at thirty inches and a forty-two-inch bar tier.
This captures eighty percent of the benefit for thirty percent of the upcharge.
Common Mistakes That Lead to Back Pain, Code Violations, or Expensive Rework
Forgetting substrate thickness tops the list. Designers spec a 34.5-inch box with 3-centimeter stone and call it thirty-six inches. The three-quarter-inch plywood substrate pushes finished height to thirty-six and three-quarters.
That extra inch ruins the elbow calculation. Always add box plus substrate plus slab plus adhesive buildup.
Mismatching appliance clearances stops jobs cold. A dishwasher needs a thirty-four-inch opening. If you raise the perimeter to thirty-seven inches for a tall cook the dishwasher no longer fits.
You must either drop that cabinet box or buy a low-profile unit. Wall oven trim kits and cooktop flanges add fractions of an inch. Stack them without checking and the counter hits the appliance.
Ignoring toe-kick depth creates chronic discomfort. Standard three-and-a-half-inch depth works for shoes. Barefoot or socked feet need more.
Wheelchair casters need nine inches. If the toe-kick is too shallow you stand too far back. Your center of gravity shifts.
Lower back takes the load. Deep toe-kicks cost nothing extra during cabinet order. They cost everything to fix later.
Overlooking transition details leaves visible gaps. A thirty-inch baking zone meeting a thirty-six-inch prep zone needs a mitered seam or a deliberate step. A forty-two-inch bar tier meeting a thirty-six-inch counter needs a supporting corbel or a waterfall leg.
Skipping the detail creates a dirt trap and a visual flaw. Plan every junction on the elevation drawing before the saw touches wood.
The Numbers You Need: Cabinet Boxes, Stone Thickness, Toe-Kicks, and Clearances
| Component | Standard | Universal / ADA | Tall User | Baking Zone |
|---|---|---|---|---|
| Cabinet box | 34.5 in | 32 in | 36.5 in | 30 in |
| Substrate | 0.75 in | 0.75 in | 0.75 in | 0.75 in |
| 2 cm stone | 0.75 in | 0.75 in | 0.75 in | 0.75 in |
| 3 cm stone | 1.1875 in | 1.1875 in | 1.1875 in | 1.1875 in |
| Built-up edge | +0.3125 in | +0.3125 in | +0.3125 in | +0.3125 in |
| Finished (3 cm) | 36.44 in | 33.94 in | 38.44 in | 31.94 in |
| Toe-kick height | 4.5 in | 6 in | 4.5 in | 4.5 in |
| Toe-kick depth | 3.5 in | 9 in | 3.5 in | 3.5 in |
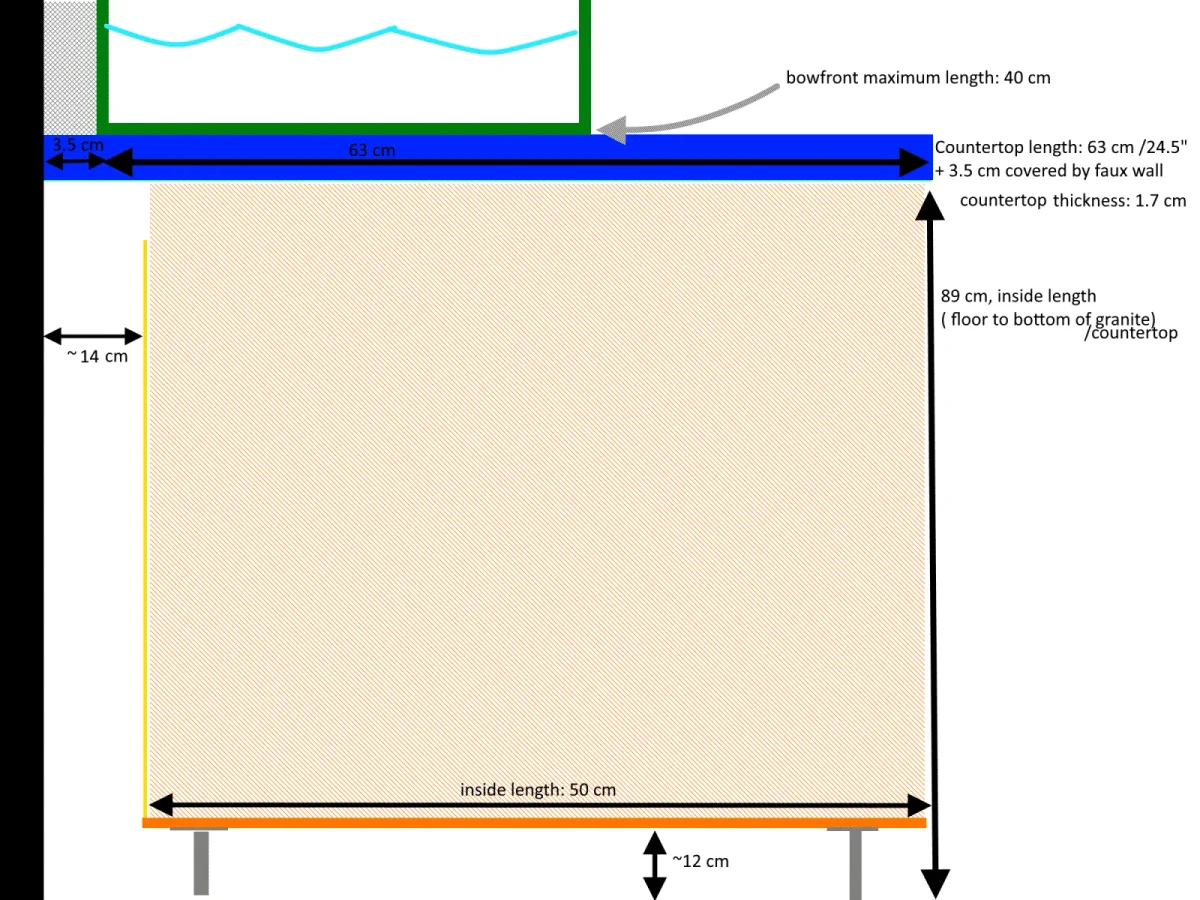
Image source: Web (Bing) / fishforums.net (Web image (fair-use with source credit))
Knee clearance minimums come from ANSI A117.1. Twenty-seven inches high. Thirty inches wide.
Nineteen inches deep. The clearance must extend seventeen inches minimum under the counter. Toe clearance adds nine inches deep at six inches high.
These dimensions are non-negotiable for accessible units. They are smart practice for any household planning to age in place.
Overhang for seating follows NKBA guidelines. Twelve inches minimum knee space. Fifteen to eighteen inches comfortable.
Beyond eighteen inches requires corbels or a steel support bracket every twenty-four inches. The overhang depth plus the countertop thickness determines the lever arm. Engineer the support for the worst-case load.
A adult leaning on the edge exerts surprising force.
Dishwasher rough opening drives the lowest cabinet box you can use. Standard units need thirty-four inches clear. That forces at least a 34.5-inch box.
Low-profile models accept thirty-two and a half inches. If you want a 32-inch box for universal height you must specify a low-profile dishwasher. Confirm the model number before the cabinet order locks.
ADA, Building Code, and Aging-in-Place Requirements You Can't Ignore
ADA 2010 Standards section 804.3.2 sets the ceiling. Accessible countertops cannot exceed thirty-four inches finished height. Knee clearance must meet the 27 by 30 by 19 envelope.
Toe clearance requires nine inches deep at six inches high. The clear floor space in front needs thirty by forty-eight inches. These apply to any unit covered by the Fair Housing Act or local accessibility ordinance.
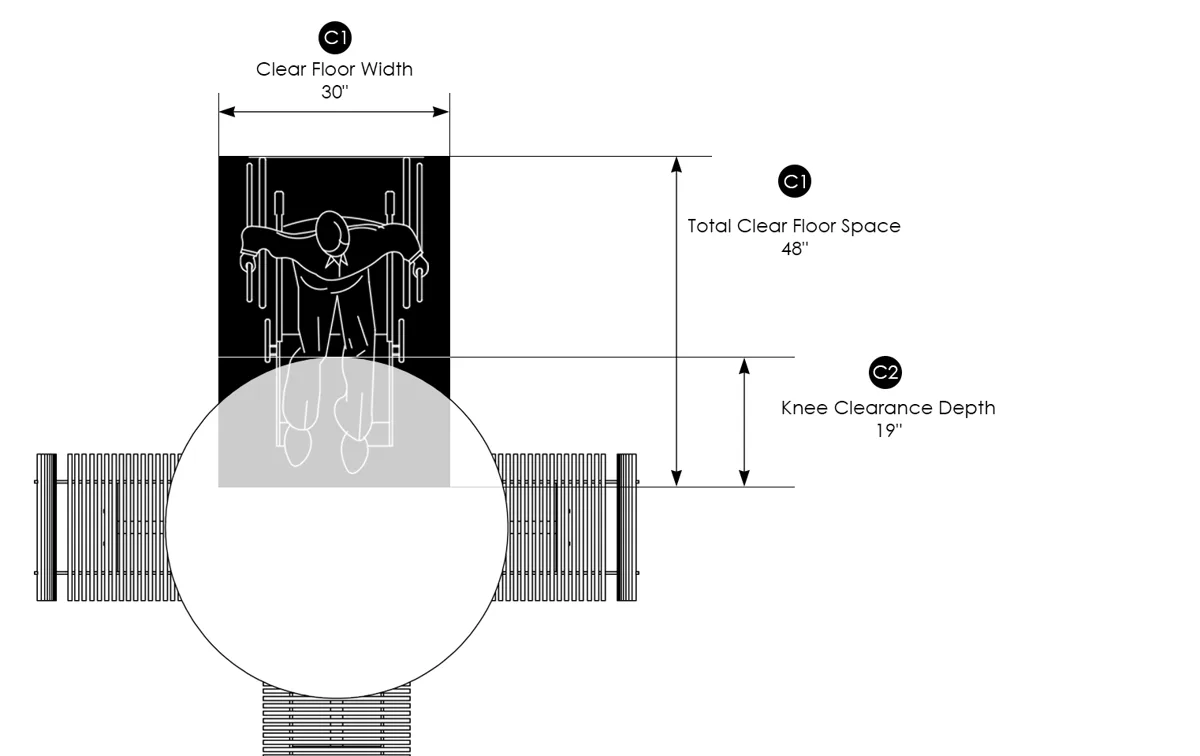
Image source: Web (Bing) / fity.club (Web image (fair-use with source credit))
IRC does not mandate countertop height for single-family homes. It defers to appliance clearances and means of egress. Local amendments often adopt ANSI A117.1 for multifamily or rental projects.
Some cities like Seattle and Washington DC enforce thirty-two-inch maximums for designated accessible units. Verify with your building official before finalizing plans. A phone call prevents a failed final inspection.
Aging-in-place design goes beyond code minimums. NKBA recommends thirty-two-inch cabinet boxes with two-centimeter stone for a thirty-three-inch finished height. This serves standing and seated users without a lift.
It keeps knee clearance viable. It leaves room for a thicker slab if the homeowner upgrades later. It costs the same as standard boxes from semi-custom lines.
Reach ranges matter for storage above the counter. Forward reach maxes at forty-eight inches for unobstructed. Side reach maxes at fifty-four inches.
Obstructed forward reach over a thirty-six-inch counter drops to forty-four inches. Plan upper cabinet bottom shelves accordingly. A pull-down shelf insert adds cost but restores full access.
Grab bar blocking is cheap insurance. Add two-by-six blocking behind the splash at the sink and cooktop during framing. Future installation takes minutes not days.
The blocking adds zero visible change today. It enables a safe transition tomorrow. Most remodelers skip it.
Smart ones include it by default.
Pro Tips from Fabricators and Kitchen Designers
Template the finished floor not the subfloor. Flooring thickness varies. Hardwood adds three-quarters of an inch.
Tile plus mortar adds one inch. LVT adds three-sixteenths. If the fabricator measures to the subfloor your finished height shifts.
Insist on a final measure after flooring installs. It saves a re-cut.
Order a mock-up countertop in cheap laminate for complex multi-height islands. Clamp it to the cabinets. Work at it for a day.
Roll dough. Chop vegetables. Sit at the bar tier.
Feel the transitions. Adjust before the stone ships. A fifty-dollar laminate sheet prevents a five-thousand-dollar mistake.
Specify seam locations on the shop drawings. Don't leave it to the fabricator. Seams at sink cutouts fail.
Seams at cookout cutouts fail. Seams at transitions between heights must be mitered. Mark every seam on the elevation.
Approve the layout in writing. Fabricators follow the drawing. They do not read minds.
Ask for a dry-fit before final silicone. The installer sets the slabs on shims. You check every height with a laser level.
Verify the elbow targets. Verify the ADA max. Verify the bar tier at forty-two inches.
Sign off only when every number matches the plan. Silicone makes changes expensive.
Use a corner radius of at least three-eighths inch on all inside corners. Sharp inside corners crack. Stone has no tensile strength.
A three-eighths radius distributes stress. It costs nothing extra. It prevents the number one failure mode in natural stone.
Quartz benefits too though it handles sharp corners better.
Your Personal Decision Guide: Walk Through the Tree and Lock In Your Specs
Start with the primary cook's elbow height. Subtract three and a half inches. That is your prep target.
If the result falls below thirty-three inches use a 32-inch box with 2-centimeter stone. If it lands above thirty-seven inches use a 36.5-inch box with 3-centimeter stone. If it sits between thirty-three and thirty-seven a standard 34.5-inch box with 3-centimeter stone works.
Next map your zones. Mark baking at thirty inches. Mark seating at forty-two inches.
Mark accessible at thirty-four inches max. Draw every transition. Note each appliance rough opening.
Confirm dishwasher fits the lowest box. Confirm cooktop flange clears the slab.
Check code. Pull your local amendment. Verify ADA applicability.
Verify Fair Housing Act coverage. Document the max height allowed. If thirty-four inches is the ceiling your prep target cannot exceed it.
Adjust the box down not the slab up.
Choose your cabinet line. Stock lines lock you to 34.5-inch boxes. Semi-custom lines like KraftMaid or Wellborn offer 32-inch and 30-inch boxes.
Custom shops build any height. Match the line to the number of distinct heights you need.
Order a final measure after flooring installs. Give the fabricator the exact finished floor elevation. Approve the shop drawings with every seam and height called out.
Sign off on the dry-fit before silicone. That is the last moment to catch errors.
Frequently Asked Questions
What is the standard kitchen countertop height?
Standard finished height is thirty-six inches from a 34.5-inch cabinet box plus 1.5-inch countertop.
How do I measure for my ideal countertop height?
Stand barefoot. Bend your elbow ninety degrees. Measure floor to olecranon.
Subtract three and a half inches for prep.
Can I have different countertop heights in one kitchen?
Yes. Multi-height islands and perimeters are common. Each zone gets its own cabinet box height.
What is the ADA maximum countertop height?
Thirty-four inches finished with twenty-seven inches knee clearance high by thirty inches wide by nineteen inches deep.
Does countertop thickness change the finished height?
Yes. Two-centimeter stone adds three-quarters inch. Three-centimeter stone adds one and three-sixteenths inches.
Substrate adds three-quarters inch.
Should I raise my countertops for resale?
Keep perimeter at standard thirty-six inches for broad appeal. Multi-height islands read as a feature not a flaw.