How to Replace a Kitchen Sink: Step-by-Step DIY Guide
Figuring out how to replace a kitchen sink stops being a single project the moment you look under the counter. The mount style, countertop material, and cabinet layout each demand a completely different approach. A drop-in on laminate takes an afternoon.
An undermount on quartz risks a cracked slab if you rush the epoxy. A farmhouse sink often means rebuilding the cabinet face frame.
Per IRC P2705.1, every sink must be sealed to its countertop with a waterproof joint, and supply lines must meet NSF/ANSI 372 lead-free standards. Most DIYers budget four to eight hours but discover hidden plumbing mismatches halfway through. The first step is identifying which of the three main installation paths matches your kitchen.
Let's break down the decision variables so you choose the right path before turning a wrench.

Why Replacing a Kitchen Sink Isn't One Job — It's Three Different Jobs
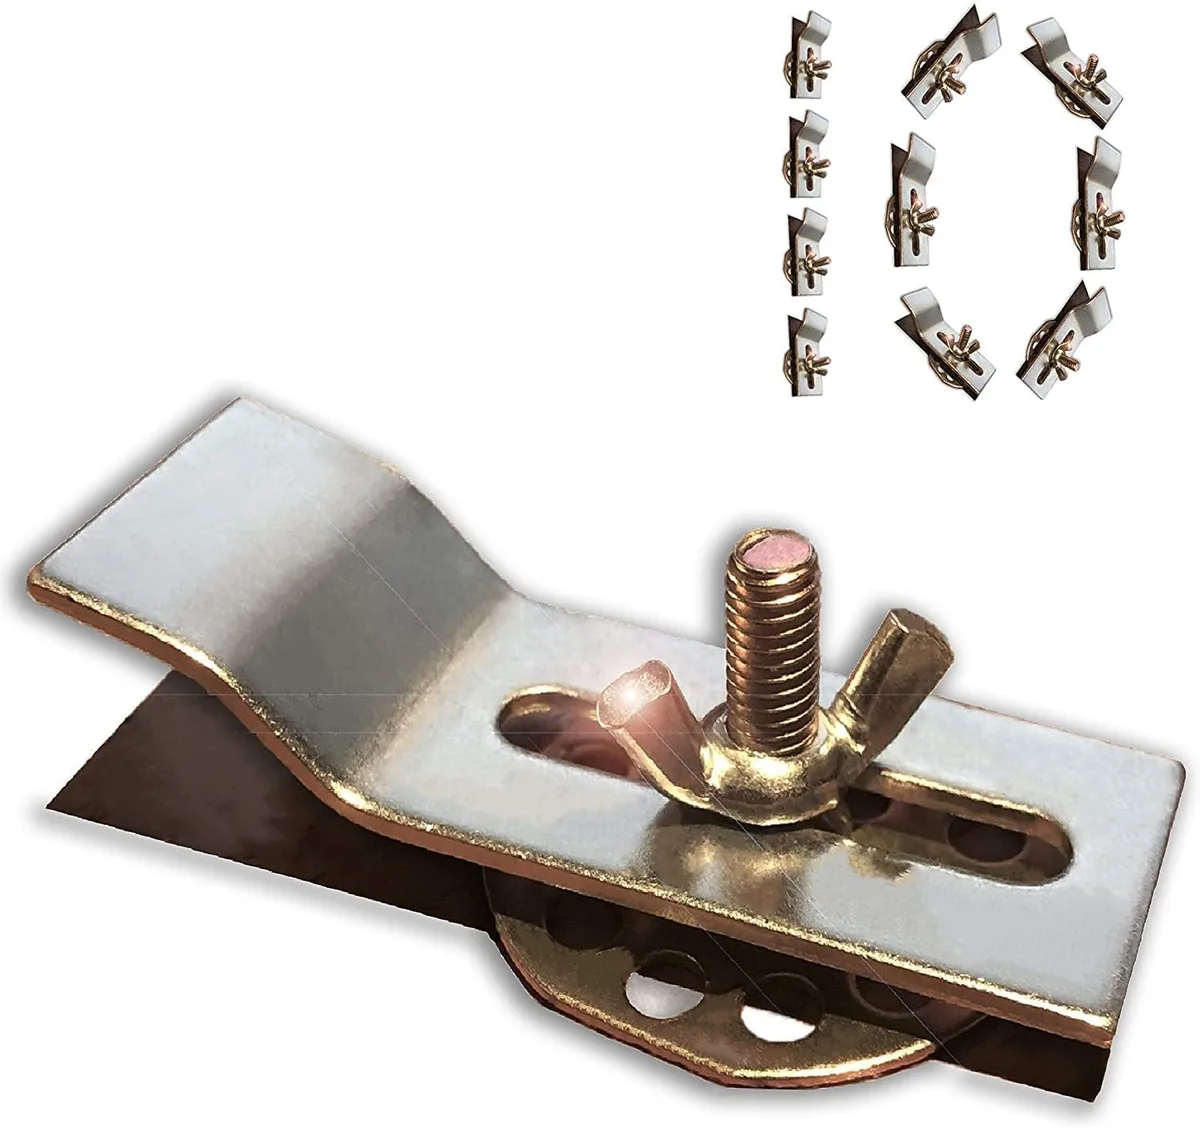
The mount type splits the work into three distinct workflows. If the sink rim sits on top of the counter, you have a drop-in. Clips hold it from above.
Caulk seals the perimeter. Removal means cutting caulk and lifting straight up. If the sink hangs from the underside, you have an undermount.
Epoxy bonds the rim to the stone. Clamps hold it for 24 hours. Removal means supporting the weight, cutting the epoxy bond, and lowering carefully.
If the sink apron replaces the cabinet face frame, you have a farmhouse. The cabinet front gets cut away. A ledger board carries the weight.
The face frame gets rebuilt or trimmed. Each path uses different tools, different timelines, and different failure points. Mixing steps between paths causes leaks, cracked counters, or cabinets that won't close.
Quick Answer: Your Sink Type, Countertop, and Cabinet Dictate Everything
Replacing a kitchen sink follows one of three paths based on mount type. Drop-in sinks sit on the countertop and clamp from above. Undermount sinks bond to the underside with epoxy and require 24-hour clamping.
Farmhouse sinks need the cabinet face frame cut away for the apron front. Your countertop material and plumbing layout then dictate the exact steps.
The Four Variables That Choose Your Path: Sink Mount, Counter Material, Cabinet Config, Plumbing Layout

Four variables lock in your workflow before you buy a single tool. First, identify the sink mount. Drop-in, undermount, and farmhouse each follow a separate decision branch.
Second, name the countertop material. Laminate routes with a jigsaw. Granite, quartz, and marble need diamond blades and wet cutting.
Solid surface allows router cuts and seamless seams. Butcher block needs sealant on fresh edges. Third, measure the cabinet interior.
Standard sink bases run 30 to 36 inches wide. Farmhouse sinks need 33 to 39 inches of clear width. Depth clearance must fit the bowl plus plumbing.
Fourth, map the plumbing. Center drain versus offset drain changes tailpiece length. Garbage disposal adds height and requires a specific flange.
Wall stub-out height sets the trap elevation. Deep bowls with disposals often push the P-trap too low. If any variable shifts, the whole plan shifts.
Write down all four before shopping.
Path A: Drop-In Sink on Laminate or Solid Surface — The DIY-Friendly Route
Drop-in replacement stays in the DIY lane for most homeowners. The rim sits on the countertop. Clips screw into the countertop substrate from underneath.
A bead of 100% silicone seals the perimeter. If the new sink matches the old cutout, you swap in place. If the cutout differs, you route the laminate.
Use a straight bit and template guide. Wear a respirator. Pre-1980 laminate may contain asbestos in the backing.
Test before cutting. Solid surface routes cleanly with a carbide bit. Sand the cut edge smooth.
Apply silicone to the new sink rim. Set it in the hole. Tighten clips evenly.
Wipe excess silicone. Connect plumbing. Test for leaks at 5 minutes, 30 minutes, and 24 hours.
Typical time: two to four hours. Material cost: silicone tube, clip set, supply lines if reused ones leak. Pro labor runs $250 to $500.
This path forgives small measurement errors. The rim hides the cutout.
Path B: Undermount Sink on Stone (Granite, Quartz, Marble) — High Risk, High Reward
Undermount on stone delivers the cleanest look but punishes mistakes. The sink rim bonds to the polished underside with two-part epoxy. No clips.
No mechanical fasteners. The bond carries the full weight. A 300-pound cast iron sink needs flawless epoxy.
A 16-gauge stainless sink still needs 24-hour clamp pressure. Removal starts with supporting the old sink. Build a wooden frame across the cabinet opening.
Rest the sink on it. Cut the epoxy bond with a thin wire or oscillating tool. Work slowly.
Heat helps. Lower the old sink onto the frame. Clean every trace of epoxy from the stone.
Any residue prevents the new bond. Dry-fit the new sink. Verify reveal, positive, negative, or flush.
Mix epoxy per manufacturer specs. Apply beads to sink rim and countertop underside. Lift sink into place.
Clamp with bar clamps every 6 to 8 inches. Use shims to set reveal. Wipe squeeze-out immediately.
Wait 24 hours before removing clamps. Then connect plumbing. Typical time: four to eight hours plus cure.
Material cost: epoxy kit, clamps, shims, silicone for drain seal. Pro labor runs $400 to $900. Stone fabricators often warranty only their own installs.
If you crack the slab, replacement costs $3,000 to $6,000. This path demands patience. Rushing the cure causes callbacks.
Path C: Farmhouse / Apron-Front Sink — Cabinet Surgery Required
Farmhouse sinks replace the cabinet face frame with their own apron. The existing face frame gets cut away. A ledger board mounts inside the cabinet to carry the sink weight.
The sink sits on the ledger. The apron covers the cabinet front. Most stock cabinets need modification.
Measure the sink exterior width. Subtract 1/4 inch for clearance. That is your cut width.
Mark the face frame stiles. Cut with a reciprocating saw. Remove the cut section.
Install a 2×4 or 2×6 ledger across the cabinet interior. Level it front to back. Secure with 3-inch screws into the cabinet sides.
The ledger top must sit 1/8 inch below the countertop underside. Dry-fit the sink. The apron should touch the floor or sit on a trim board.
Rebuild the face frame above the apron if needed. Use pocket screws for the new rails. Typical time: six to twelve hours.
Material cost: ledger lumber, trim, pocket-hole jig, screws. Pro labor runs $600 to $1,500. The sink weight, often 200 to 400 pounds, demands a solid ledger.
Skip the ledger and the cabinet sides bow.
Path D: Integral Sink (Solid Surface) — Not a Sink Swap, a Countertop Swap
Integral sinks mold into the countertop as one piece. Corian, Hi-Macs, and Avonite use this method. You cannot replace the sink alone.
The entire countertop comes out. Template the new top with the sink included. Order from a certified fabricator.
Installation means seaming, clamping, and sanding seams invisible. This path belongs to pros. DIYers lack the vacuum press, seam setter, and color-matched adhesive.
Cost runs $3,000 to $6,000 for a typical kitchen. Timeline: two to three weeks for fabrication plus one day install. If your integral sink cracks, budget for a full top replacement.
No workaround exists.
Universal Prep: Shutoffs, Supply Lines, Trap, and the "Photo Before You Touch" Rule
Every path starts the same way. Turn off the angle stops under the sink. If they leak or won't turn, shut off the main.
Open the faucet to relieve pressure. Place a bucket under the P-trap. Loosen the slip nuts.
Remove the trap. Photograph every plumbing connection. Label hot and cold supply lines with tape.
Disconnect supply lines from the faucet. Use a basin wrench for the faucet nuts. Remove the faucet if the new sink needs different hole spacing.
Inspect the shutoff valves. Replace 1/4-turn ball valves if they seep. Keep the old supply lines only if they are braided stainless and less than five years old.
Otherwise buy new. Clean the countertop cutout area. Remove all old caulk, epoxy, or putty.
A razor scraper works on laminate. Acetone helps on stone. Let the surface dry completely.
This prep takes thirty to sixty minutes. Skipping it causes leaks later.
Step-by-Step: Drop-In Removal and Install (With Clips, Caulk, and Template Check)
Remove the old sink. Cut the perimeter caulk with a utility knife. Unscrew the mounting clips from underneath.
Lift the sink straight up. Clean the cutout. Check the new sink template against the hole.
The cutout should be 1/8 inch larger than the sink bowl dimensions on all sides. If the hole is too big, the clips won't grab. If too small, route the laminate.
Apply a continuous 3/16-inch bead of 100% silicone to the sink rim. Set the sink in the hole. Press down evenly.
Install clips every 12 inches. Tighten until the rim compresses the silicone. Do not overtighten.
Wipe excess silicone with a damp rag. Let cure one hour before plumbing. Connect the basket strainer.
Use plumber's putty under the flange. Tighten the locknut from below. Connect the tailpiece.
Install the P-trap. Connect supply lines. Turn on water.
Check every joint. Retighten if needed.
Step-by-Step: Undermount Removal on Stone (Epoxy, Support, and the 24-Hour Clamp)
Build the support frame first. Cut two 2x4s to span the cabinet width. Lay them across the front and back rails.
Screw a third 2×4 across the center. This frame carries the sink weight. Have a helper hold the sink.
Cut the epoxy bond with a braided wire. Saw back and forth. Work from the corners inward.
Heat gun on low softens stubborn epoxy. Lower the old sink onto the frame. Scrape all epoxy off the stone underside.
A plastic putty knife prevents scratches. Acetone removes residue. Dry-fit the new sink.
Set shims to achieve your chosen reveal. Positive reveal shows 1/8 inch of sink rim. Negative reveal hides the rim.
Flush reveal aligns rim with countertop edge. Mix epoxy per instructions. Apply 1/4-inch beads to sink rim and stone.
Lift sink onto shims. Clamp every 6 inches with bar clamps. Use padded cauls to distribute pressure.
Check reveal with a feeler gauge. Wipe squeeze-out with acetone. Wait 24 hours.
Remove clamps. Install basket strainer with silicone under the flange. Connect plumbing.
Test at 5, 30, and 1440 minutes.
Step-by-Step: Farmhouse Retrofit (Face Frame Cut, Ledger Build, and Trim Rebuild)
Remove the cabinet doors and drawer fronts. Mark the cut line on the face frame stiles. The top of the cut sits 1/8 inch below the countertop underside.
Use a multi-tool with a wood blade for clean cuts. Cut the horizontal rails first. Then cut the vertical stiles.
Remove the cut section. Build the ledger from 2×6 lumber. Rip it to match the cabinet depth minus 1/2 inch.
Mount it flush with the cabinet sides. Secure with four 3-inch structural screws per side. Check level front to back and side to side.
Shim as needed. The ledger top supports the sink flange. Dry-fit the sink.
The apron should cover the cabinet front completely. If the apron sits proud, plane the ledger. If it sits low, shim the ledger.
Rebuild the upper face frame. Pocket-screw new rails to the existing stiles. Match the original rail height.
Install trim boards along the apron sides if gaps exist. Caulk the apron-to-counter joint with 100% silicone. Reinstall doors and drawers.
Adjust hinges for the new frame dimensions. Typical time: eight to twelve hours.
Plumbing Reconnect: Basket Strainer, Disposal Flange, P-Trap, and Supply Line Matching

Install the basket strainer first. Roll plumber's putty into a rope. Press it under the flange.
Insert the strainer through the sink drain. From below, slide the rubber gasket then the friction ring. Tighten the locknut by hand plus one quarter turn.
Wipe excess putty. For garbage disposal, use the manufacturer's flange. It locks into the disposal mounting assembly.
No putty needed. The flange seats with a snap ring. Connect the tailpiece to the strainer.
Use a slip-joint nut and poly washer. If the disposal outlet sits lower, use an extended tailpiece. Assemble the P-trap.
The trap arm slopes 1/4 inch per foot toward the wall. Cut the trap arm to length with a hacksaw. Deburr the cut.
Connect supply lines. Match the shutoff outlet: 3/8-inch compression, 1/2-inch FIP, or push-fit. Use braided stainless lines.
Hand-tighten plus one half turn. Do not use thread tape on compression fittings. Turn on water slowly.
Check every joint. Tighten any weep.
The Mistakes That Cost Money: Cracked Slabs, Leaky Drains, Seized Valves, Wrong Reveal
Cracked stone tops the list. Undermount removal without a support frame snaps the slab. Epoxy cleanup with metal tools scratches polished surfaces.
Wrong reveal leaves a gap that traps water. Positive reveal on a negative-reveal sink exposes the rim. Negative reveal on a positive-reveal sink hides the mounting surface.
Leaky drains come from dry-fitting the strainer without putty or silicone. Overtightening the locknut cracks the sink flange. Seized angle stops force a main shutoff and valve replacement.
Always test stops before starting. Supply line mismatch, 3/8-inch OD compression versus 1/2-inch FIP, sends you to the store mid-job. Buy universal lines with 3/8-inch compression x 1/2-inch FIP ends.
P-trap too low for the wall stub-out means cutting the trap arm shorter or opening the wall. Deep bowl plus disposal equals 18 inches from sink bottom to trap inlet. Measure before buying.
Faucet hole mismatch leaves exposed holes. Order a deck plate or new faucet. Caulk failure comes from siliconeized acrylic instead of 100% silicone.
Acrylic shrinks. Silicone lasts ten years.
Cost Breakdown: Sink, Materials, Pro Labor, and Hidden Extras by Path
| Path | Sink Cost | Materials | Pro Labor | Hidden Extras |
|---|---|---|---|---|
| Drop-in on laminate | $150–$600 | $30–$60 | $250–$500 | Countertop routing $100–$300 |
| Undermount on stone | $250–$1,200 | $50–$100 | $400–$900 | Stone cutout $300–$600, epoxy kit $30 |
| Farmhouse retrofit | $400–$2,000 | $80–$150 | $600–$1,500 | Cabinet modification $200–$500 |
| Integral replacement | N/A | N/A | $3,000–$6,000 | Full countertop fabrication |
Shutoff valve replacement adds $15, $30 each. Supply line set adds $15, $25. Disposal flange kit adds $20, $40.
Permit fees run $50, $200 where required. Asbestos testing adds $100, $300 if laminate is pre-1980. Budget 20 percent over the estimate for surprises.
Code, Safety, and When You Need a Permit (IRC, UPC, ADA, Asbestos, Silica)
IRC P2705.1 requires a watertight seal between sink and counter. UPC and IPC limit trap arm length to 24 inches for 1-1/2-inch pipe. Vent must connect within 5 feet of the trap weir.
ADA 606 caps bowl depth at 6.5 inches for accessible sinks. Knee clearance needs 27 inches high, 30 inches wide, 19 inches deep. Faucet controls must be lever type.
NSF/ANSI 372 mandates lead-free faucets and supply lines. Asbestos in pre-1980 laminate backing requires EPA-certified testing before routing. Silica dust from cutting stone triggers OSHA 1926.1153.
Use wet methods and N95 or better respirator. Most jurisdictions require a plumbing permit for drain relocation or new rough-in. Sink swap in the same location often exempt.
Check your local building department. Electricians need a permit for garbage disposal wiring if not on an existing circuit. GFCI protection required for all countertop receptacles per NEC 210.8(A)(6).
Decision Guide: Match Your Setup to the Right Path — Or Know When to Walk Away
Drop-in on laminate with matching cutout? DIY in half a day. Drop-in with new cutout?
DIY if you own a router and test for asbestos. Undermount on stone? Pro install recommended.
The epoxy bond, 24-hour clamp, and slab risk exceed most DIY skill sets. Farmhouse retrofit? Pro carpentry for the face frame cut.
DIY only if you have pocket-hole tools and finish carpentry experience. Integral sink cracked? Call a fabricator.
No DIY path exists. Shutoff valves seized? Call a plumber.
Main shutoff required. Drain relocation needed? Permit and pro required.
ADA compliance needed? Pro design and install. Your decision matrix: if the countertop is stone and the sink is undermount, budget for pro labor.
If the cabinet face frame must be cut, budget for pro carpentry. If the plumbing moves, budget for permits. Walk away when the risk exceeds the savings.
Frequently Asked Questions
Can I reuse my old faucet with a new sink?
Yes if the faucet hole count and spacing match the new sink deck. Measure center-to-center. Standard widespread is 8 inches.
Single hole needs one opening. Mismatch requires a deck plate or new faucet.
Will my garbage disposal fit the new sink?
Check the disposal flange diameter. Most use 3.5-inch. Fireclay and composite sinks often need a specific flange kit.
Verify with the sink manufacturer before buying.
Should I use plumber's putty or silicone under the basket strainer?
Plumber's putty for stainless and enameled sinks. 100% silicone for stone, composite, and fireclay. Putty stains porous materials. Silicone seals all surfaces.
How long before I can use the sink after install?
Drop-in: one hour after silicone skins. Undermount: 24 hours after epoxy cures. Farmhouse: immediate after plumbing test.
Integral: 24 hours after seam adhesive cures.
Do I need a permit to replace a kitchen sink?
Most jurisdictions exempt like-for-like swaps. Permits trigger when you relocate the drain, add a disposal circuit, or modify cabinet structure. Check your local building department.
What if my angle stops won't shut off?
Close the main water valve. Replace the angle stops with 1/4-turn ball valves. Do not force old multi-turn stops.
They snap and flood the cabinet.