How to Paint Kitchen Units Like a Pro
Kitchen units take a beating. Learning how to paint kitchen units is one of the most effective budget upgrades in a home. The good news is you don't need to rip anything out.
A fresh coat of paint can rescue the whole room for a fraction of what new units would cost.
Before we get into the nitty-gritty, here's the part the professionals want you to know: the paint job is only as strong as the prep underneath it. Manufacturer specifications for kitchen cabinet paint consistently stress clean, lightly sanded, properly primed surfaces. As of 2026, modern water-based acrylic paint is durable enough for everyday kitchen life, but it still relies on that groundwork.
In our research, most failed paint jobs trace back to one skipped step. So let's walk through the process, starting with whether painting even makes sense for your cabinets.

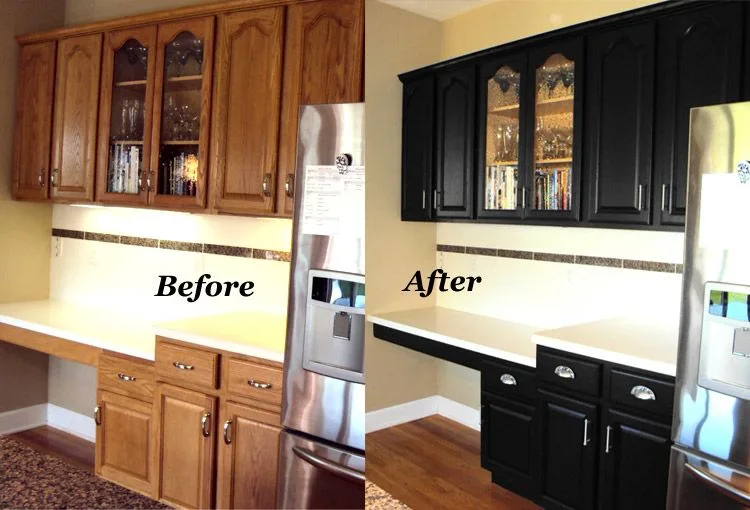
Image source: Web (Bing) / pinterest.com (Web image (fair-use with source credit))
Quick Answer
Painting kitchen units works best when you remove all doors and drawer fronts. Clean with a degreaser, sand lightly, and apply primer. Add two or three thin coats of satin or eggshell paint.
Let every layer dry completely. Expect two to four days including cure time.
Is Painting Your Kitchen Units the Right Move?
Straight answer: usually yes, if the units themselves are solid and you simply hate the look.
If the doors close properly, the hinges are tight, and there's no water damage, painting is a legitimate project. If the cabinet boxes are swollen, the joints are splitting, or the doors have softened around the edges, paint won't fix that. You'd just be decorating a problem.
Cost matters here too. Replacing a mid-sized kitchen can easily run £1,500 to £5,000. Painting the same kitchen with good materials costs £50 to £250.
That's the same reason so many people try painting first. If you're already working to a tight budget, that gap matters a lot.
The big exception is thermofoil doors. That plastic film doesn't accept paint well, and even with an adhesion primer the finish is prone to chipping. If your doors are thermofoil, you're better off replacing just the doors and painting the frames instead.
First, Identify What Your Kitchen Units Are Actually Made Of
Before you buy a single tin, take a door off and inspect it. The material tells you which primer and paint you need. Get this wrong and you'll be sanding and repainting in a year.

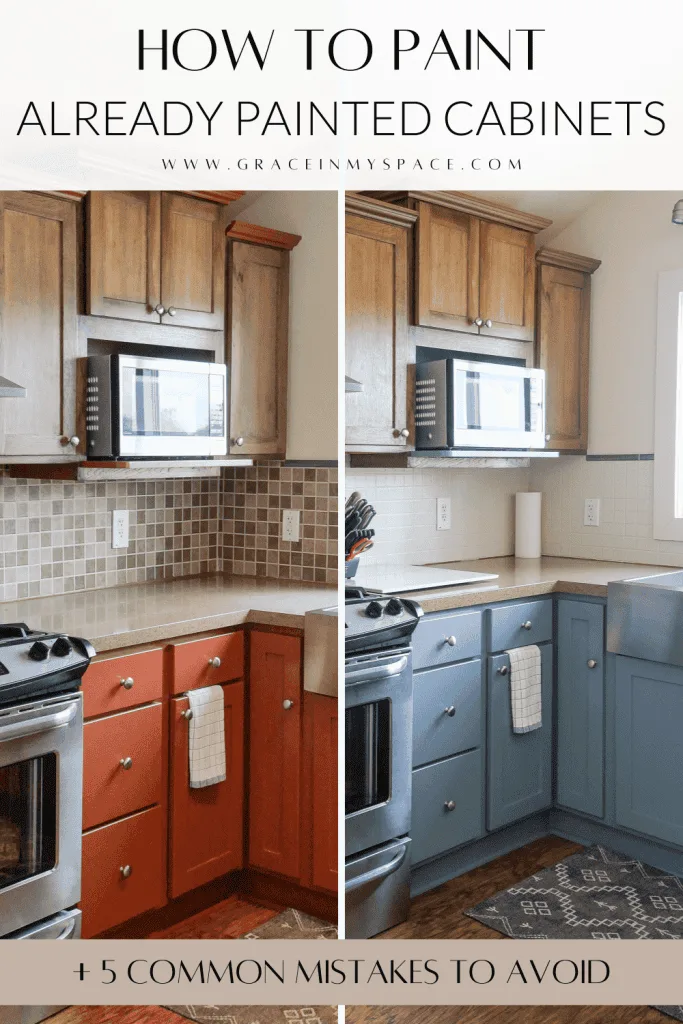
Image source: Web (Bing) / readytopaintcabinetdoors.com (Web image (fair-use with source credit))
Look at the front edge and the raw cut edge where the hinge sits. That gives away the material quickly.
| Material | How to spot it | Painting verdict |
|---|---|---|
| Solid wood | Visible grain, natural edges | Excellent. Sand and prime |
| MDF | Smooth, dense, greyish edge | Very good. Seal the cut edges |
| Laminate | Glossy or printed surface | Good. Needs adhesion primer |
| Melamine | Smooth, shiny, white or grey core | Good. Needs adhesion primer |
| Thermofoil | Plastic wrapper, rounded corners | Risky. Paint often fails |
| Wood veneer | Thin wood layer over a core | Good. Light sand only |
Not sure which one you've got? Try the water test. Put a drop of water on an unobtrusive spot.
If it soaks in, you're working with bare wood. If it beads, you're dealing with a coated surface.
For MDF, pay special attention to the edges. They soak up moisture and swell fast. Sealing them with a primer before painting prevents that.
If you're also thinking about the overall look, the structure and proportions guide the whole space. Our article on cabinetry design details covers that side of it.
Check the Condition of Your Units Before You Commit
Paint is a cosmetic fix, not a structural one. It can't un-warp a door, fill a rotten corner, or resurrect a hinge that's pulled free from the carcase.
- Sound hinges and doors? Paint.
- Splitting joints or swollen boxes? Repair or replace first.
- Old peeling paint? Strip back to a stable layer. Paint will cling to anything, including the last bad layer, and then pull it off.
- Greasy surfaces? Clean before sanding, not after.
- Water stains near the sink? Those doors are beyond paint.
- Pre-1960s home? Test for lead paint before sanding.
That last point is a real safety issue. If your home was built before 1960, treat any old paint as a potential lead hazard. Sanding it releases dust you don't want in your kitchen.
Check the EPA's lead paint guidance before you disturb anything.
If you're starting to suspect the units need more than a cosmetic refresh, a full kitchen overhaul might be the more honest solution. Painting is a great option, but it's not a cure-all.
Choose the Right Paint for Your Cabinet Surface
Here's the part where DIYers stare at the wall of tins. The good news is you don't need a specialist product for most kitchens.
| Paint type | Finish | Best for | Cleanup |
|---|---|---|---|
| Water-based acrylic | Satin or eggshell | MDF, wood, primed laminate | Water |
| Oil-based alkyd | Gloss or semi-gloss | Bare wood, heavy wear | White spirit |
| Chalk paint | Matt | Upcycling projects, needs topcoat | Water |
Water-based acrylic with a satin finish is the sweet spot for most people. It's hard-wearing, dries quickly, and cleans up easily. It also smells far less than oil-based paint.
Aggregate reviews from DIY forums and manufacturer specs both point the same way.
Oil-based paint still has fans because it levels nicely and leaves a hard shell. The tradeoff is solvent fumes, longer drying times, and brushes you have to clean with white spirit. Unless you're painting bare timber with heavy wear, most people don't need it.
Chalk paint is a separate beast. It gives a lovely flat, matte look and sticks to all sorts of surfaces without much sanding. But it's softer and needs a protective topcoat, otherwise your kitchen units will mark and scuff.
It's tempting for a quick flip, but it's not the hard-wearing choice for a working kitchen.
On paint tins labeled "self-priming," treat the label with a bit of scepticism. A separate primer is still the smarter move on laminate and melamine. If you do use a self-priming paint, at least give the surface a light sand and a wipe with deglosser first.
If your cupboards are otherwise fine and you just want to refresh the color, this part of the process is where you decide whether the end result will look like a trade job or a rushed weekend project.
The Prep Work That Decides Whether the Paint Sticks
Every paint failure we've seen in research starts in the prep stage. It's unglamorous, but it's the difference between a kitchen that stays looking fresh and one that starts peeling within months.

Image source: Bing (Web (fair-use with source credit))
Here's what prep looks like before the first drop of paint touches anything.
- Take off the doors and drawer fronts. Number every one with painter's tape. Write the location on the tape instead of relying on your memory.
- Remove all handles and hinges. Store the screws in a labeled jar. That saves a lot of swearing later.
- Clean everything with a degreaser. TSP substitute or sugar soap works well. Pay special attention to the area above the oven and around the handles.
- Rinse with clean water and let everything dry thoroughly. Grease that survives under the paint will eventually push through.
- Fill holes and dents with wood filler. Sand flush once dry.
- Sand each surface with 120 to 180 grit. You're not stripping the finish. You're scuffing it so the paint has something to grip.
- Wipe away the dust with a tack cloth. For laminate, follow the light sand with a liquid deglosser.
On laminate, you need an adhesion primer. On MDF, use a primer that seals the raw edges. On wood, a standard undercoat is fine.
They're not all the same, and using the wrong one is a setup for failure.
If you're also planning to change the layout while the doors are off, this is a good time to think about improving the space before you repaint. Our guide to making the most of a compact kitchen has practical ideas that work even with standard cabinet sizes.
Once all that prep is done, you're ready to prime. That's the stage where everything starts to feel real.
Step-by-Step: How to Paint Kitchen Units Without Brush Marks
Brush marks happen when you overload the brush, press too hard, or work with paint that's too thick. Thin coats and the right tools fix all three. You'll get a smoother finish with less effort.
Image source: Bing (Web (fair-use with source credit))
- Prime first. Roll on a thin coat of primer and let it dry for two to four hours. Lightly sand with 220 grit. This is where a factory-smooth surface starts.
- Stir the paint thoroughly. Don't shake the tin, because shaking whips air bubbles into the paint. Those bubbles dry into pinprick holes.
- Use a high-density foam roller for the flat panels and a synthetic brush for edges, corners, and recessed areas. Roll the big areas. Brush the details. Keep a wet edge so lap marks don't show.
- Apply the first coat and let it dry. Sand lightly with 220 grit, then wipe off the dust. Apply the second coat. Add a third if the coverage still looks thin.
Water-based paint recoat time runs around two to four hours. Oil-based paint needs six to eight hours and better ventilation. Check the manufacturer's data sheet and follow that, because drying time shifts with humidity and temperature.
The roller matters more than people think. A foam roller leaves a stippled orange-peel texture that hides brush strokes. A fluffy roller leaves a lint-covered mess.
Foam is the safer pick for kitchen cabinets, and it's cheap to swap out between coats.
Mistakes That Lead to Peeling, Streaks, and Sticky Doors
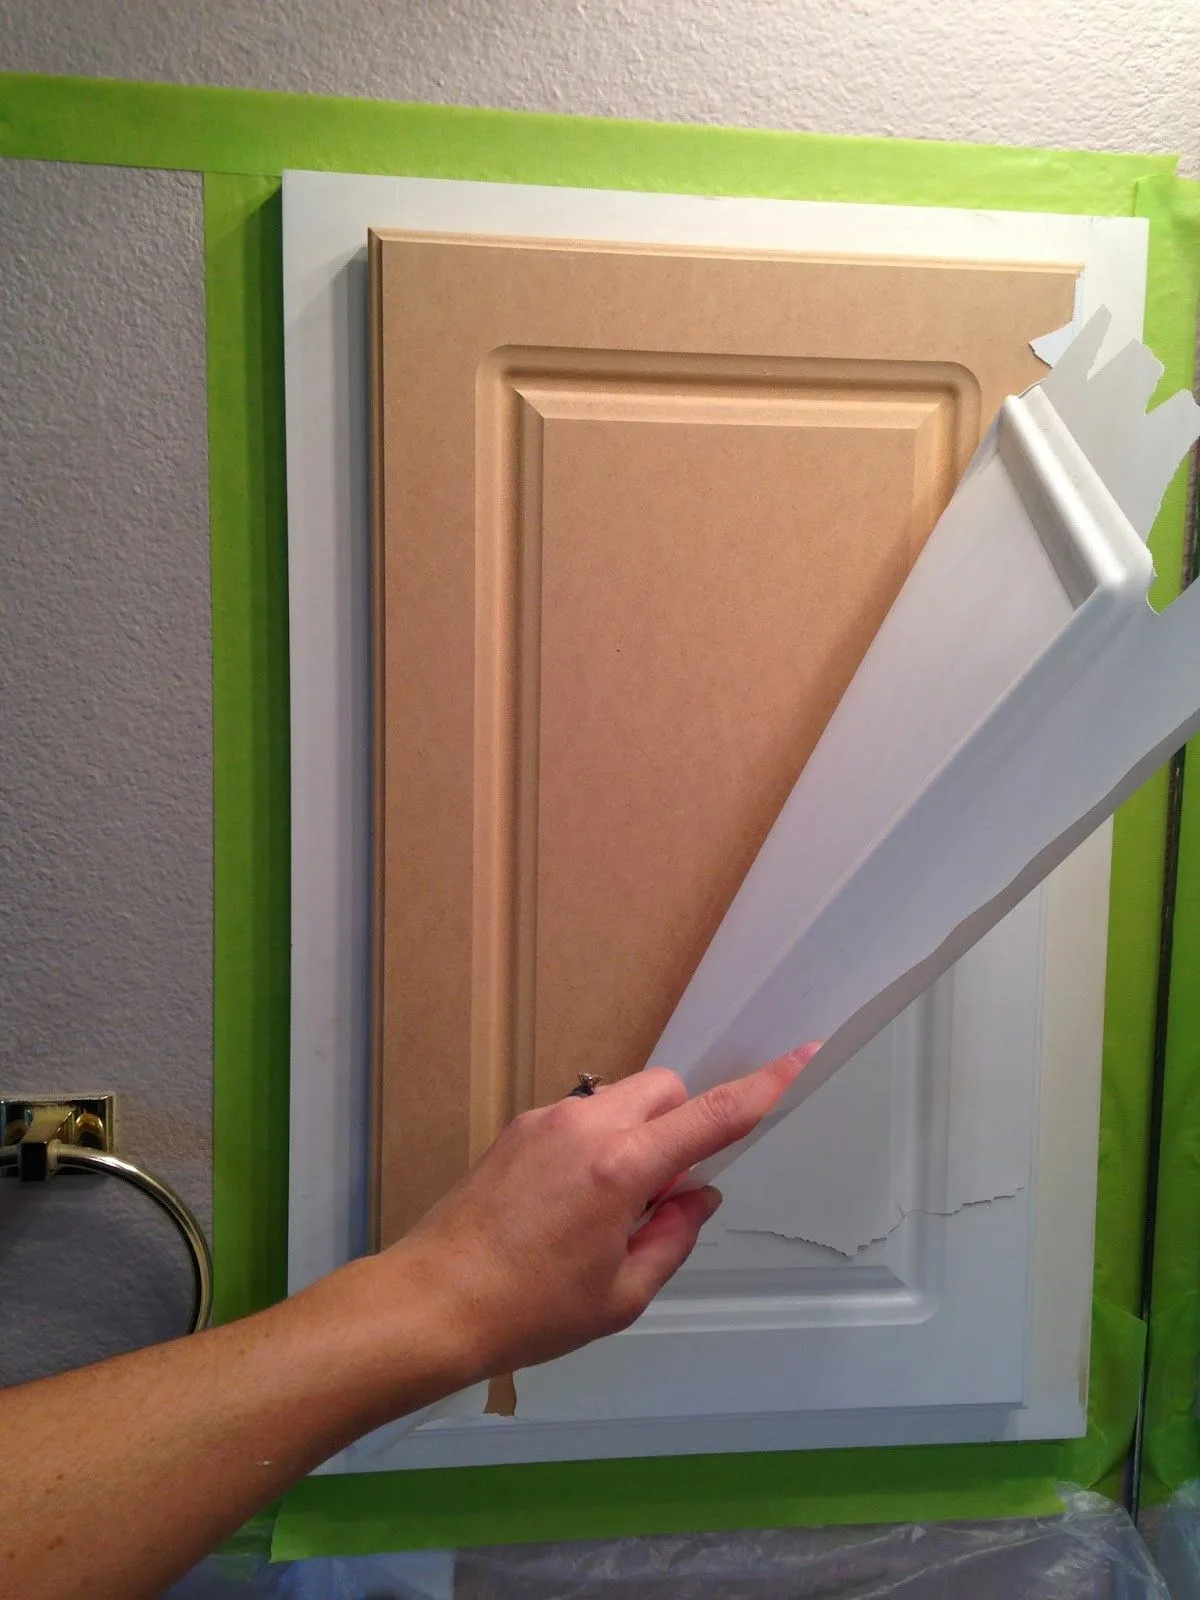
Image source: Web (Bing) / fity.club (Web image (fair-use with source credit))
Peeling paint is almost always an adhesion problem. Grease, a glossy surface, or a missing primer layer causes it. Streaking comes from poor technique, and sticky doors come from rushing the cure.
- Skipping the degreaser. Grease is invisible and paint refuses to bond to it. Clean first, always.
- Painting over glossy laminate without an adhesion primer. Standard primer lifts right off.
- Loading the brush with too much paint. Runs and drips appear before you can fix them.
- Sanding between coats with 120 grit. That's too coarse. Use 220 or 320.
- Hanging doors back too soon. The paint can look dry and still be soft underneath.
- Painting in humid weather. Moisture slows drying and clouds the finish.
If the paint peels off in sheets, strip it back to the bare surface. Clean, sand, and start over with an adhesion primer. If you see bubbles while painting, there's water or grease trapped underneath.
Sand back and redo the section.
Sticky doors usually mean the cure time wasn't long enough. Water-based cabinet paint needs a full seven to fourteen days to harden completely. Until then, the doors can fuse to the frames if you close them firmly.
Give the edges a light sand and wipe them down if they still catch.
How Long Does It Take and How Much Does It Cost?
Plan for a weekend of work and a week of waiting. The actual painting takes a day, but the drying and curing time does most of the heavy lifting.
| Task | Time you'll spend |
|---|---|
| Removing hardware and cleaning | 2 to 3 hours |
| Sanding, filling, and priming | 3 to 4 hours |
| Two to three coats of paint | 4 to 6 hours spread over two days |
| Full cure before hanging doors | 7 to 14 days |
A standard kitchen with twelve to fifteen doors needs about four days of elapsed time if you include primer and paint drying between coats. In our research, the people who rush the cure time are the ones repainting within a year.
| Item | Estimated cost |
|---|---|
| Degreaser and cleaning supplies | £10 |
| Sandpaper and tack cloth | £8 |
| Wood filler | £5 |
| Primer | £25 |
| Two tins of cabinet paint | £60 |
| Foam rollers and brushes | £15 |
| Masking tape and painter's tape | £10 |
| Total | £133 |
Compare that to replacing the whole kitchen, which often runs £1,500 to £5,000. If you'd rather hire someone, a professional kitchen spraying job in the UK typically costs £300 to £700 depending on size. Doing it yourself keeps the cost down, but it takes patience.
If you're thinking about a bigger overhaul at the same time, our guide to a full kitchen remodel covers the process from start to finish.
Are Your Kitchen Units Worth Painting or Better Replaced?
Use this simple test. If the boxes are solid and the doors close properly, paint them. If the carcases are swollen, the edges are blowing out, or the hinges have come loose twice, replace them.
| Option | Typical cost | Time to finish | Best for |
|---|---|---|---|
| Painting existing units | £50 to £250 | A few days | Solid units and structurally sound doors |
| Replacing doors and drawer fronts | £500 to £1,500 | One to two weeks | Good boxes, tired or damaged doors |
| Full replacement | £1,500 to £5,000+ | Two to four weeks | Damaged carcases or a new layout |
Thermofoil doors are the exception. Their plastic surface sheds paint even when you use the right primer. If your doors are thermofoil but the boxes are fine, replace just the doors.
Paint the frames and you're done.
One more thing to consider. If your kitchen layout doesn't work, painting won't fix that. Moving the wall ovens, changing the run, or adding a breakfast bar only happens during a bigger renovation.
A budget-friendly refresh can buy you time, but it can't change the room's bones.
If the units are solid and you're happy with the layout, painting is the smartest money move you'll make this year. If the kitchen is constantly fighting you, start planning a more serious remodel instead.
Maintenance Tips to Keep Your Freshly Painted Units Looking Good
Wait the full cure time before treating the kitchen normally. Hang the doors back, but leave them slightly open for a few days so the edges can air out. Once the paint hardens, cleaning is straightforward.
| Habit | What to do |
|---|---|
| Daily cleaning | Warm water and a soft cloth is enough |
| Grease build-up | Use a mild degreaser, rinse with clean water |
| Tough stains | Damp cloth with a little dish soap, not abrasive scrubbers |
| Chips and scuffs | Touch up with leftover paint and a small artist brush |
Avoid bleach sprays and harsh multipurpose cleaners. They eat into the paint surface and dull the sheen over time. Even the best cabinet paint is not as tough as a factory-baked finish, so treat it with a bit of respect.
Loose hinges happen because screw holes strip out from opening and closing. The fix is quick. Pull the screw out, fill the hole with wood filler, and let it harden.
Then screw the hinge back in and the bite is fresh again.
If a door feels sticky in the doorway, check the painted edges. A glob of paint or a high-spot on the frame is usually the culprit. Sand the contact point lightly with 320 grit.
No need to repaint, and the door closes freely again.
Following this routine keeps the finish looking sharp for years. If the style later feels tired, a repaint is still cheaper than a full renovation. It's the gift that keeps giving, as long as you clean the grease off before you put the brush down.
Maintenance Tips to Keep Your Freshly Painted Units Looking Good
Wait the full cure time before treating the kitchen normally. Keep doors slightly open for a few days after hanging so the edges can air out fully. Then cleaning becomes straightforward.
| Habit | What to do |
|---|---|
| Daily cleaning | Warm water and a soft cloth |
| Grease build-up | Mild degreaser, then rinse |
| Tough stains | Dish soap on a damp cloth, no abrasive scrubbers |
| Chips and scuffs | Touch up with leftover paint |
Skip bleach sprays and harsh multi-purpose cleaners. They dull the sheen over time. Those products eat into the paint surface faster than standard use.
A loose hinge means the screw holes have stripped out. Pull the screw, fill the hole with wood filler, and let it harden. Then reinstall the hinge for fresh bite.
If a painted edge feels sticky, check for a high-spot. Sand it lightly with 320 grit. No repaint needed, and the door closes freely again.
Quick Decision Guide: Paint, Repair, or Replace
Use this as a final check before you commit. The right call depends on the cabinet boxes and the doors themselves.
| Situation | Best move |
|---|---|
| Boxes solid, doors close properly | Paint |
| Boxes solid, doors twisted or peeling | Replace doors, paint frames |
| Swollen boxes, soft edges, or joint failure | Replace the units |
| Original tin thermofoil doors | Replace doors or hire a pro |
If the layout no longer works, more than paint is needed. A minor refresh only fixes colour, not function. Start planning a deeper remodelling project if the offset is right.
FAQs
Can I paint kitchen units without sanding?
Yes, but only if you clean the surfaces thoroughly and use a liquid deglosser. It creates a grippy surface for the primer. Old, glossier surfaces need real sanding.
Does laminate need a special primer?
Yes, use an adhesion primer. It bonds to the smooth glossy surface and prevents peeling.
How long before I can hang the doors back?
Water-based paint cures in 7 to 14 days.
Will the paint last in a working kitchen?
Yes. Quality water-based acrylic paint looks great for years.
Why is my paint peeling on the edges?
The edges get more wear. You may miss the edges during priming, or the paint didn't fully cure. Light sand and repaint just the edge.