How to Replace a Kitchen Faucet Washer: Easy DIY Steps
A steady drip from the kitchen spout wastes over 3,000 gallons a year and drives up the water bill. Learning how to change the washer in a kitchen faucet stops that leak in one afternoon with basic tools. Most homeowners assume every faucet uses the same flat rubber disc.
The reality is four distinct valve designs and each one seals differently.
Per EPA WaterSense data a single drip per second equals five gallons daily. That adds up fast on a municipal meter. The fix starts with identifying which valve sits inside your faucet body.
Let's break down the four types so you buy the right parts the first time.

Image source: Web (Bing) / ipipeline.net (Web image (fair-use with source credit))
Quick Answer
Changing a kitchen faucet washer means identifying your valve type first. Compression stems need a flat seat washer. Cartridge faucets use O-rings.
Ball valves need seats springs and a cam washer. Ceramic discs rarely leak from washers. Shut off water.
Remove the handle. Swap the worn seal. Reassemble with silicone grease.
Why Your Faucet Type Changes the Entire Repair
Walk into a hardware store and you'll see a wall of "universal" faucet repair kits. They promise to fix everything. They rarely do.
A compression stem washer is a fiber or rubber disc sized by stem diameter (00, 0, 1/4L, 3/8L). A Moen 1225 cartridge uses two nitrile O-rings. A Delta ball valve needs two spring-loaded rubber seats plus a cam packing washer.
Ceramic disc cartridges seal with polished ceramic plates, no rubber washer at all.
Buying the wrong kit wastes a trip and leaves the leak running. The handle motion tells the story. Two handles that rotate 90 degrees and stop?
Compression stem. Single lever that lifts and swivels? Cartridge or ball.
Single lever that only rotates? Ceramic disc. Count handles.
Watch the motion. That identification step saves more time than any tool in the box.
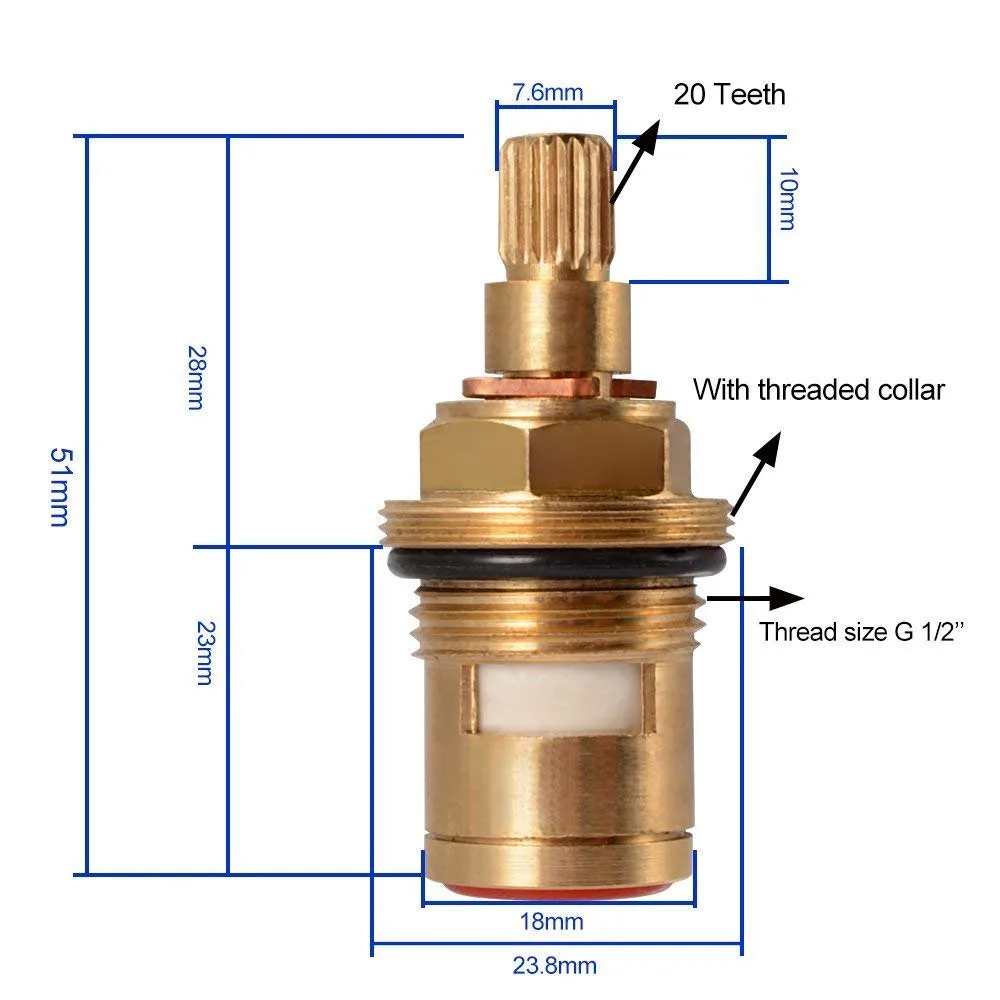
Manufacturer service manuals from Delta and Moen confirm these categories as of 2026. The diagram above shows each valve in cross-section with the sealing surface highlighted. Notice how the compression seat washer sits at the bottom of a threaded stem.
The cartridge O-rings groove around a plastic cylinder. The ball valve seats press into the faucet body under spring tension. The ceramic discs face each other inside a sealed cartridge.
Each design demands a different disassembly sequence and a different replacement part.
If you're planning a broader kitchen update while you have the faucet apart, it's worth reviewing how cabinet depth affects faucet clearance. Our guide on lower cabinet dimensions covers the standard measurements that keep everything aligned.
The Four Faucet Types and What "Washer" Actually Means in Each
Compression Stem (Two-Handle Traditional)
This is the classic design found in homes built before 1990. Hot and cold each have a threaded brass stem. Turning the handle drives the stem down.
A beveled seat washer at the tip presses against a brass seat in the faucet body. The washer is a flat disc with a 45-degree bevel on one face. That bevel must face the seat.
Install it upside down and water bypasses the seal immediately.
Stem washer sizes follow an industry code: 00 fits a 1/4-inch stem, 0 fits 3/8-inch, 1/4L and 3/8L are long-shank versions. Measure the stem diameter with a caliper or take the old washer to the store. The brass seat often pits from mineral deposits.
If your finger feels a ridge the seat needs replacement too. A seat wrench (tapered square drive) removes it without rounding the flats.
Cartridge — Moen 1225 Style (Single-Handle Common)
Moen dominates this category. The 1225 cartridge is a plastic body with a brass stem. Two O-rings seal the cartridge against the faucet body bore.
A retaining clip holds the cartridge in place. Pull the clip first. Then grip the stem with pliers and pull straight out.
The O-rings stay in grooves on the cartridge body. Roll them out with a pick. Lubricate new rings with silicone grease.
Slide the cartridge back in. Snap the clip home.
Do not confuse the 1225 with the 1222 Posi-Temp. That is a shower valve only. Kitchen faucets use the 1225.
Moen's official installation guide shows the clip orientation, ears point up. A bent clip leaks. A cartridge inserted 180 degrees off rotation leaks.
The stem flats must align with the handle adapter.
Ball Valve — Delta Style (Single-Handle Classic)
Delta popularized the rotating ball. A slotted stainless or plastic ball sits in the faucet body. Two rubber seats with springs press against the ball inlet holes.
A plastic cam with a rubber packing washer caps the ball. The handle lifts the ball to open flow. Rotating the ball aligns slots with the seats.
Rebuild kits include the ball, cam, packing, seats, and springs. Order matters. Drop springs into the body holes.
Press seats onto springs. Set ball on top with slots facing the seats. Place packing on ball.
Set cam over packing with tab aligned to body notch. Tighten the cap. Delta's RP4993 kit fits most models.
The Monitor series uses RP6128, springs are heavier.
Ceramic Disc (Modern Single-Handle)
Two ceramic plates, one fixed one rotating, seal by lapped flat faces. No rubber washer. No seat.
No spring. Leaks usually mean sediment scratched the ceramic or the cartridge cracked. The fix is a full cartridge swap.
Brands like Kohler, Grohe, and American Standard use proprietary cartridges. Find the model number on a tag under the spout or on the original box. Order the exact cartridge.
No universal option exists.
Before You Start: Shutoff Reality Check and the Tools That Matter
Turn the angle stops under the sink clockwise until they stop. Open the faucet. Verify zero flow on both hot and cold.
Old compression stops fail to seal about 20 percent of the time. If water still trickles you need the main house shutoff. Locate it now, not halfway through the repair.
Gather tools before you touch the faucet. A basin wrench reaches the supply nuts behind the sink. An adjustable wrench handles bonnet nuts.
A seat wrench removes compression seats. Allen keys (usually 3/32 or 1/8 inch) free handle set screws. A cartridge puller helps stubborn Moen 1225 bodies.
Needle-nose pliers extract retaining clips. A small flashlight peers into the faucet body. Silicone plumber's grease (not petroleum jelly) lubricates every rubber part.
Penetrating oil loosens mineral-crusted nuts. A bucket catches residual water. Towels protect the cabinet floor.
| Tool | Purpose | Typical Cost |
|---|---|---|
| Basin wrench | Supply line nuts | $12–$20 |
| Seat wrench | Compression seat removal | $8–$12 |
| Cartridge puller | Moen 1225 extraction | $10–$15 |
| Allen keys | Handle set screws | $5–$10 |
| Silicone grease | O-ring / washer lubrication | $4–$8 |
Plug the sink drain. A bonnet nut or clip falling down the drain adds an hour to the job. Lay a towel in the sink basin too.
It protects the finish from dropped tools.
If this repair is part of a larger remodel, you might be coordinating cabinet work too. Our piece on renovating kitchen cupboards covers how to sequence plumbing and cabinetry without rework.
Parts You'll Actually Need (And How to Spot Them at the Store)
Take a photo of the old parts with your phone. Zoom in at the store. Memory fails on washer thickness and O-ring cross-section.
Compression stem washers come in assortments labeled by stem size (00, 0, 1/4L, 3/8L). Buy the assortment if you're unsure. Cost is $8, $12.
Single washers run $0.50, $2 each.
For Delta ball valves ask for RP4993 (standard) or RP6128 (Monitor). The box lists compatible model numbers. Generic "universal" seats and springs often have wrong spring tension.
They leak in weeks. Spend the extra two dollars for the Delta kit.
Moen 1225 cartridges sell for $22, $28. An O-ring kit alone is $8. If the faucet body seats are pitted the cartridge swap is faster and more reliable.
The cartridge includes fresh O-rings. Check the model tag. Moen's website matches model to cartridge.
Ceramic disc cartridges are brand-specific. Kohler, Grohe, American Standard, Pfister, each uses proprietary geometry. No cross-brand fit.
Search the manufacturer site by model number. Shipping takes two days. Plan accordingly.
Silicone grease is non-negotiable. Petroleum jelly degrades nitrile rubber in six months. A small tube costs $4.
It lasts for years of repairs.
Compression Stem: Visual Walkthrough from Bonnet Nut to Seat Washer
Shut off water. Verify zero flow. Remove the handle.
Most have a decorative cap hiding a Phillips screw. Pop the cap with a flat blade. Unscrew.
Lift the handle. If it's stuck tap gently with a rubber mallet. Do not pry, the handle snaps.
Unscrew the dome or bonnet nut. An adjustable wrench fits the flats. Turn counterclockwise.
If it's frozen apply penetrating oil. Wait ten minutes. Try again.
Heat from a hair dryer helps. Do not use a torch. The faucet body cracks.
Pull the stem straight out. It threads into the faucet body. Note the orientation.
The seat washer sits at the bottom held by a brass screw. Remove the screw. The old washer falls out.
Check the brass seat inside the faucet body. Shine a light. Feel for pits or ridges with a fingertip.
Any ridge means seat replacement.
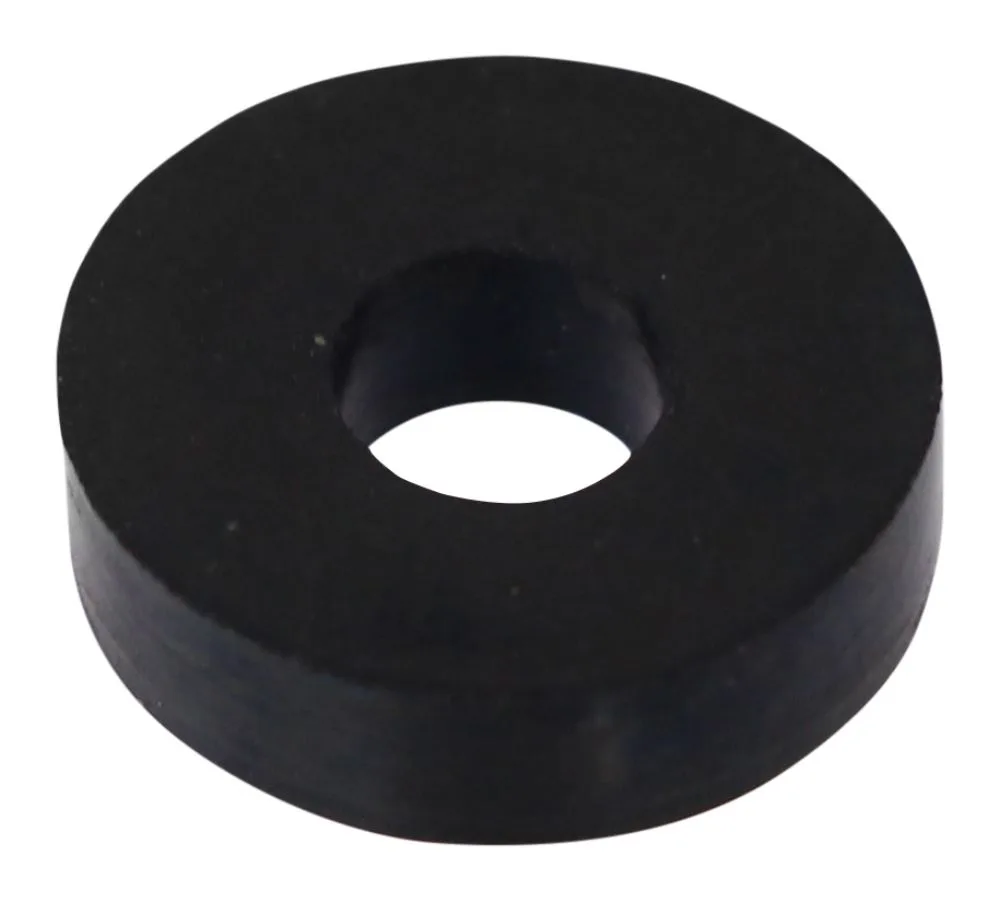
The photo above shows the correct bevel orientation. The angled face contacts the brass seat. The flat face sits against the stem shoulder.
Install the new washer bevel-down. Replace the brass screw. Do not overtighten, the washer distorts.
If the seat needs removal insert the seat wrench. Turn counterclockwise. The seat has left-hand threads on some brands.
If it won't budge stop. Forcing it cracks the body. A cracked body means full faucet replacement.
Reinstall the stem. Thread it in by hand. Snug with the wrench, about 1/8 turn past hand-tight.
Replace the bonnet nut. Same torque. Reattach the handle.
Turn water on slowly. Check for leaks at the stem and spout. Cycle the handle full range.
Watch five minutes. No seepage means the repair holds.
The International Plumbing Code requires lead-free brass (NSF/ANSI 372) for all drinking water components. Replacement stems and seats must carry that certification. Check the packaging.
Non-compliant parts risk lead leaching.
Cartridge (Moen 1225 Style): O-Ring Replacement Without Mangling the Clip
Shut off water. Verify zero flow. Remove the handle.
Most Moen handles use a 3/32-inch Allen set screw at the base. Loosen it. Pull the handle straight up.
If a dome cover sits under the handle unscrew it by hand. The retaining clip is now visible. It is a U-shaped stainless wire with ears that snap into slots on the cartridge body.
Grip the clip ears with needle-nose pliers. Pull straight out. Do not bend the ears.
A bent clip will not seat fully and the cartridge will leak. Set the clip aside where it cannot roll away. Grab the brass stem with adjustable pliers.
Wrap the jaws with a rag to avoid marring the stem. Pull straight up with steady pressure. The cartridge slides out of the brass bore.
Two O-rings sit in grooves near the top and bottom of the cartridge body.
Roll the old O-rings off with a pick. Clean the grooves with a nylon brush. Lubricate new O-rings generously with silicone grease.
Slide them into the grooves. They must sit flat with no twists. A twisted O-ring rolls during insertion and leaks within days.
Align the cartridge stem flats with the handle adapter. Push the cartridge straight down until it bottoms out. You will feel a distinct stop.
Reinstall the retaining clip. Push the ears into the slots until they click. The clip must sit flush.
If it protrudes the handle will not seat. Replace the dome cover. Reattach the handle.
Tighten the set screw. Turn water on slowly. Check for leaks at the handle base and spout.
Cycle the handle through full hot and cold. Watch five minutes. No seepage means the repair holds.
If the cartridge refuses to pull a cartridge puller threads onto the stem and provides leverage. Moen sells the 14272 puller for this purpose. It costs about $12.
Do not use a slide hammer on the faucet body. The casting cracks.
Delta Ball Valve: Cam, Packing, Seats & Springs in the Right Order
Shut off water. Verify zero flow. Remove the handle.
A 1/8-inch Allen screw hides under a decorative cap. Pop the cap. Loosen the screw.
Lift the handle. Unscrew the chrome cap by hand or with strap wrench. Do not use channel locks on the finish.
The cam assembly lifts off exposing the ball.
Lift the ball out. Note the slot orientation. Two rubber seats with springs sit in the faucet body holes.
Remove them with a pick. The springs stay in the holes. The seats pull out.
Inspect the ball surface. Scratches or mineral buildup mean ball replacement. The rebuild kit includes a new ball.
Drop the new springs into the body holes. Press the new seats onto the springs. The seat lip must sit flat on the spring coil.
Set the ball on top with its slots aligned to the seats. The ball has a small peg that fits a notch in the body. That peg sets the rotation limit.
Place the rubber packing washer over the ball stem. Set the plastic cam over the packing. The cam has a tab that fits a notch in the faucet body.
Align it.
Thread the cap on by hand. Tighten with a strap wrench or rag-covered adjustable wrench. Snug plus 1/8 turn.
Over-tightening cracks the plastic cam. Reinstall the handle. Tighten the set screw.
Snap the cap cover. Turn water on slowly. Check all connections.
Cycle the handle. The lever should lift smoothly and rotate fully. Any binding means the cam tab is misaligned.
Back off the cap and realign.
Delta's RP4993 kit fits most single-handle kitchen models. The RP6128 Monitor kit uses heavier springs for pressure-balancing bodies. Check the model tag before ordering.
Using standard springs in a Monitor body causes temperature fluctuations. Using Monitor springs in a standard body makes the handle stiff.
Ceramic Disc: Why You're Not Changing a Washer at All
Ceramic disc cartridges seal with two polished ceramic plates. One plate rotates with the handle. The other stays fixed.
Water flows when the plate holes align. No rubber washer. No seat.
No spring. The plates are lapped to a mirror finish. Sediment scratches the surface.
A scratched plate leaks. The only fix is a full cartridge swap.
Find the model number. It is usually on a tag under the spout or on the original box. Kohler tags list a K-number.
Grohe uses a four-digit code. American Standard uses a seven-digit SKU. Search the manufacturer website by that number.
Order the exact cartridge. Prices range from $30 to $80. Shipping takes two to five days.
No universal cartridge fits across brands.
Shut off water. Verify zero flow. Remove the handle.
Most use a 3/32 or 1/8-inch Allen screw. Unscrew the dome or bonnet nut. An adjustable wrench fits the flats.
Pull the cartridge straight up. Some have a retaining clip like Moen. Others friction-fit.
Note the orientation. The new cartridge must index the same way.
Insert the new cartridge. Align the tabs or flats. Press down until seated.
Replace the bonnet nut. Snug with wrench. Reattach the handle.
Turn water on slowly. Check for leaks. Cycle the handle through full range.
The action should feel smooth with no grit. Ceramic discs last 15 to 20 years in normal use. Hard water shortens life.
A whole-house softener extends it.
If the faucet body itself is pitted or corroded the new cartridge will not seal. That means full faucet replacement. See the repair versus replace section below.
Visual Mistakes That Cause Leaks: Upside-Down Seats, Rolled O-Rings, Misaligned Cams
The photo below shows a compression seat washer installed upside down. The bevel faces away from the brass seat. Water flows past the flat face and drips from the spout.
Flip it. Bevel always contacts the seat.
Rolled O-rings are the number one cartridge leak cause. The O-ring twists during insertion. It seats crooked.
Water bypasses the seal. Always lubricate with silicone grease. Push the cartridge straight in.
Do not rotate while pressing. If you feel resistance stop. Pull back.
Check the O-ring. Re-seat it.
Delta ball valve cam tabs must engage the body notch. A misaligned cam lets the ball rotate past the shutoff position. The handle never fully closes.
Water crosses from hot to cold. You get warm water from the cold side. Realign the cam tab.
It clicks into the notch.
Moen retaining clips must snap fully into the cartridge slots. A clip that sits proud by even a millimeter prevents the handle from seating. The handle wobbles.
The cartridge shifts. Leaks appear at the handle base. Press the clip ears until they click.
Supply line nuts overtightened with a basin wrench crush the ferrule. The line leaks at the connection. Hand tight plus one-half turn is the spec.
Use two wrenches, one on the nut one on the fitting, to avoid twisting the line. A twisted braided line restricts flow and fatigues the inner hose.
Petroleum jelly on rubber parts seems harmless. It is not. Nitrile rubber swells and cracks within six months.
Silicone grease is the only safe lubricant. A $4 tube lasts years. Keep it in your tool bag.
Repair vs Replace: When the Faucet Body Tells You to Stop
A faucet body over 15 years old with pitted seats corroded threads or cracked casting is not worth rebuilding. The parts cost adds up. A new name-brand kitchen faucet runs $80 to $250.
Installation takes about the same time as a complex rebuild. You get a modern cartridge a fresh finish and a warranty.
Signs the body is done: the brass seat cannot be removed without rounding. The stem threads are galled. The cartridge bore is scored.
The ball valve body has worn grooves where the ball seats. The spout base leaks from a cracked casting. Any of these means replace.
Rental properties change the math. A $15 rebuild kit buys time. A full replacement may need landlord approval.
Check the lease. Some jurisdictions require licensed plumbers for supply line replacement. A washer change on the existing valve usually falls under minor repair.
Hard water regions accelerate seat pitting. If you have replaced seats twice in three years the water chemistry is winning. A new faucet with ceramic disc cartridges resists mineral buildup better.
The upfront cost pays back in fewer callbacks.
Lead-free compliance matters. Faucets manufactured before 2014 may not meet NSF/ANSI 372. A repair on an old body keeps non-compliant brass in the water path.
A new faucet guarantees lead-free construction. That protects the household.
If you're already planning a kitchen update, replacing the faucet during the remodel avoids cutting into new countertops later. Our guide on kitchen remodel sequencing covers the right order for plumbing and surface work.
Pro Tricks the Parts Store Won't Tell You
Take the old cartridge or stem to the store in a zip bag. Match it physically. Model numbers wear off.
Photos blur. The part in hand never lies. Ask for the OEM kit by brand part number.
Delta RP4993. Moen 1225. Generic kits substitute cheaper springs and thinner washers.
They leak sooner.
Buy two seat washers for compression stems. The brass screw often strips the old washer during removal. A spare saves a second trip.
Silicone grease goes on every rubber surface. The tube costs four dollars. It prevents rolled O-rings and extends seal life years.
Clean the faucet body bore with a nylon brush before installing a new cartridge. Mineral scale scores the fresh O-rings. A thirty-second scrub prevents callbacks.
Use a phone flashlight to inspect the seat. Your fingertip feels pits your eyes miss.
If the angle stop weeps when you close it do not force it. The packing nut needs a quarter turn snug. Tighten it before you start the faucet repair.
A leaking stop ruins the test.
Quick-Reference Cheat Sheet by Faucet Type
| Valve Type | Handles | Seal Parts | Key Tool | Typical Time |
|---|---|---|---|---|
| Compression | 2 | Seat washer brass seat packing | Seat wrench | 25 min |
| Moen 1225 Cartridge | 1 | Two O-rings cartridge clip | Cartridge puller | 35 min |
| Delta Ball | 1 | Seats springs cam packing ball | Strap wrench | 45 min |
| Ceramic Disc | 1 | Full cartridge only | Adjustable wrench | 20 min |
Match your handle motion to the row. Buy the parts listed. Bring the tools shown.
Set aside the time noted. First attempts add fifty percent.
Frequently Asked Questions
How do I know which faucet valve I have?
Count the handles and watch the motion. Two handles that stop at 90 degrees means compression stem. One lever that lifts and swivels means cartridge or ball.
One lever that only rotates means ceramic disc.
Can I use petroleum jelly instead of plumber's grease?
No. Petroleum jelly degrades nitrile rubber in six months. Silicone plumber's grease is the only safe lubricant.
A small tube costs four dollars and lasts years.
Why does my faucet still drip after replacing the washer?
The brass seat is likely pitted. Feel inside the faucet body with your fingertip. Any ridge means the seat must be replaced.
A seat wrench removes it without cracking the body.
Do I need to shut off the main water valve?
Test the angle stops first. Close them fully then open the faucet. If flow stops completely the angle stops work.
If water still trickles you need the main shutoff.
How long do faucet washers last?
Compression seat washers last five to ten years. Cartridge O-rings last ten to fifteen years. Delta seats and springs last seven to twelve years.
Hard water cuts those numbers in half.
When should I replace the whole faucet instead of repairing?
If the body is over fifteen years old with pitted seats corroded threads or cracked casting. A new faucet costs eighty to two hundred fifty dollars and installs in the same time as a complex rebuild.