Fix a Leaky 2-Handle Kitchen Faucet: Step-by-Step
A leaky two-handle kitchen faucet wastes thousands of gallons each year and can rot the cabinet below. Learning how to fix a leaky kitchen faucet with two handles starts with knowing which valve lives inside because the repair changes completely between a compression stem, a cartridge, and a ceramic disc. Most homeowners grab a universal washer kit only to find it does not fit their modern faucet.
The real fix begins with a five-minute diagnosis that points you to the right parts the first time.
Per ASME A112.18.1 testing a single drip per second wastes over 3,000 gallons annually and adds measurable cost to your water bill. Hard water above 180 ppm accelerates seat erosion and cartridge seizure which makes early repair even more critical. Let's walk through the decision tree that pros use so you match the repair to your exact faucet.
Quick Answer
Fix a leaky two-handle kitchen faucet by first identifying the valve type, compression stem, cartridge, or ceramic disc. Shut off water at the angle stops or main supply. Remove the handle and trim to expose the valve.
Replace the rubber washer and seat on compression stems, swap the entire cartridge on cartridge models, or install a new ceramic disc cartridge on quarter-turn models. Test for leaks before reassembling the handle.
Why Your Two-Handle Faucet Leaks (and Why One Fix Doesn't Fit All)
Two-handle faucets leak for three distinct reasons and each reason demands a different repair path. A spout drip usually means a worn seat washer or a scored cartridge seal. Water pooling at the base signals failed spout O-rings or a cracked faucet body.
A handle that weeps indicates worn packing or damaged cartridge O-rings. The valve type determines which parts you need and how you install them. Compression stems use a rubber washer pressed against a brass seat.
Cartridges use a cylindrical valve body with rubber seals. Ceramic discs use two polished plates that rotate 90 degrees. Universal washer kits only work on compression stems and even then the seat size must match.
Manufacturer specifications indicate that mixing parts across brands causes immediate failure. Aggregate reviews report that misidentified valves are the top reason DIY repairs leak again within weeks.

The faucet body style also matters. Widespread models have separate hot and cold valves spaced eight inches apart. Centerset units mount on four-inch centers with a single deck plate.
Bridge faucets connect the handles with a fixed arched tube and often use proprietary parts. Knowing your mounting style helps when parts are discontinued and replacement becomes the only option. If you're planning a larger upgrade, understanding your cabinet depth helps when selecting a new faucet, standard lower cabinet dimensions affect clearance for widespread shanks.
Quick Diagnostic: Match Your Leak to the Right Repair Path
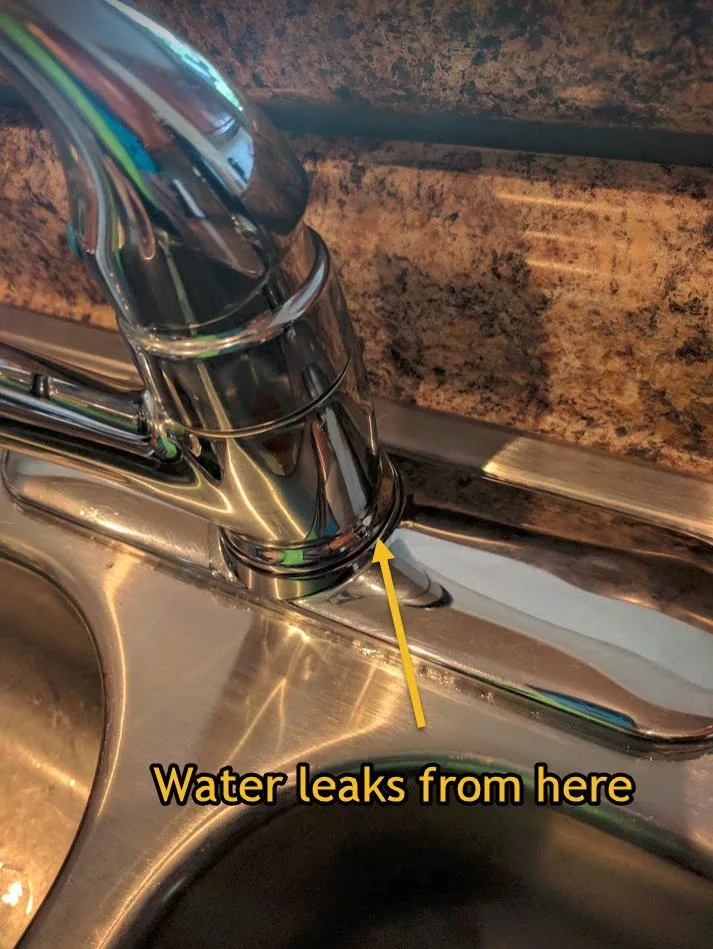
Start by watching where water escapes while the faucet runs and while it sits off. A steady drip from the spout tip with handles closed points to the valve seat or cartridge seals. Water seeping around the base of the spout means the spout O-rings have hardened or the faucet body has a hairline crack.
Moisture under the handle escutcheon indicates packing nut failure or cartridge body O-ring wear. Supply line drips at the angle stop connections are a separate issue entirely. Turn on each handle independently to isolate hot or cold side.
The side that drips is the side you repair. This simple test saves buying parts for both valves when only one fails.
If both sides drip you replace both valve assemblies. Check the angle stops before you start. Quarter-turn ball stops should close with a firm 90-degree rotation.
Multi-turn compression stops may need several full turns. If a stop will not shut off you must close the main house valve. Corroded stops that leak when operated need replacement before you touch the faucet.
This upstream check prevents a mid-repair flood. When planning a full kitchen refresh, budget-friendly renovation strategies often include updating old supply valves during faucet work.
| Leak Location | Likely Cause | Valve Types Affected |
|---|---|---|
| Spout tip drip | Worn seat washer, scored cartridge seal, scratched ceramic disc | Compression, Cartridge, Ceramic Disc |
| Base of spout | Failed spout O-rings, cracked faucet body | All types |
| Handle stem | Worn packing, damaged cartridge O-rings | Compression, Cartridge |
| Supply connections | Loose nuts, corroded angle stops, worn supply lines | Independent of faucet valve |
Inside the Faucet: Compression Stems, Cartridges, and Ceramic Discs Explained
Compression stems are the oldest design. A threaded stem rises and lowers a rubber washer onto a brass seat. Tightening the handle compresses the washer to stop flow.
The seat is often removable with a seat wrench. Stems have a packing nut that seals the stem where it exits the bonnet. Cartridges replaced stems in the 1970s.
A single cylinder contains all moving parts and seals. The handle rotates the cartridge to align inlet ports with the outlet. Rubber O-rings on the cartridge body seal against the faucet body.
Retention varies by brand, Moen uses a U-clip, Delta uses a threaded bonnet nut, Price Pfister uses a retaining nut. Ceramic disc cartridges arrived in the 1990s. Two ceramic plates with matching ports rotate past each other.
A quarter-turn (90 degrees) opens or closes flow. They resist wear but debris can scratch the plates causing permanent leaks. The plates are not serviceable, the whole cartridge replaces.
Manufacturer specifications confirm ceramic disc cartridges last 15 to 20 years in normal water conditions. Hard water reduces that to 8 to 12 years. Compression seats wear in 3 to 5 years in aggressive water.
Cartridge O-rings degrade in 7 to 10 years. NSF/ANSI 372 certification requires all replacement parts meet lead-free standards for drinking water contact. When designing a new kitchen, modern faucet selections often favor ceramic disc valves for longevity.
Identify Your Valve Type Before You Buy a Single Part
Remove the handle first. Most handles hide a setscrew under a decorative cap or behind the lever. Hex keys (typically 3/32 or 1/8 inch) release the handle.
Lift off the handle and any trim sleeve to expose the valve top. Compression stems show a hexagonal or square stem nut with a packing nut behind it. Cartridges show a smooth cylindrical body with a retaining clip, hex nut, or threaded bonnet.
Ceramic disc cartridges look similar to cartridges but the handle rotates only 90 degrees. Turn the handle gently, full rotation (multiple turns) means compression or cartridge. Quarter-turn stop means ceramic disc.
Check for a brand badge on the faucet body. Moen, Delta, Kohler, Pfister, American Standard, Grohe, and Hansgrohe each use proprietary cartridge geometries. Spline count matters on compression stems, 12, 16, or 20 point broach patterns are not interchangeable.
Take a photo of the valve top and the brand logo. Bring the old cartridge or stem to the plumbing supply house for exact matching. Big-box stores carry common cartridges but rare models require a specialist.
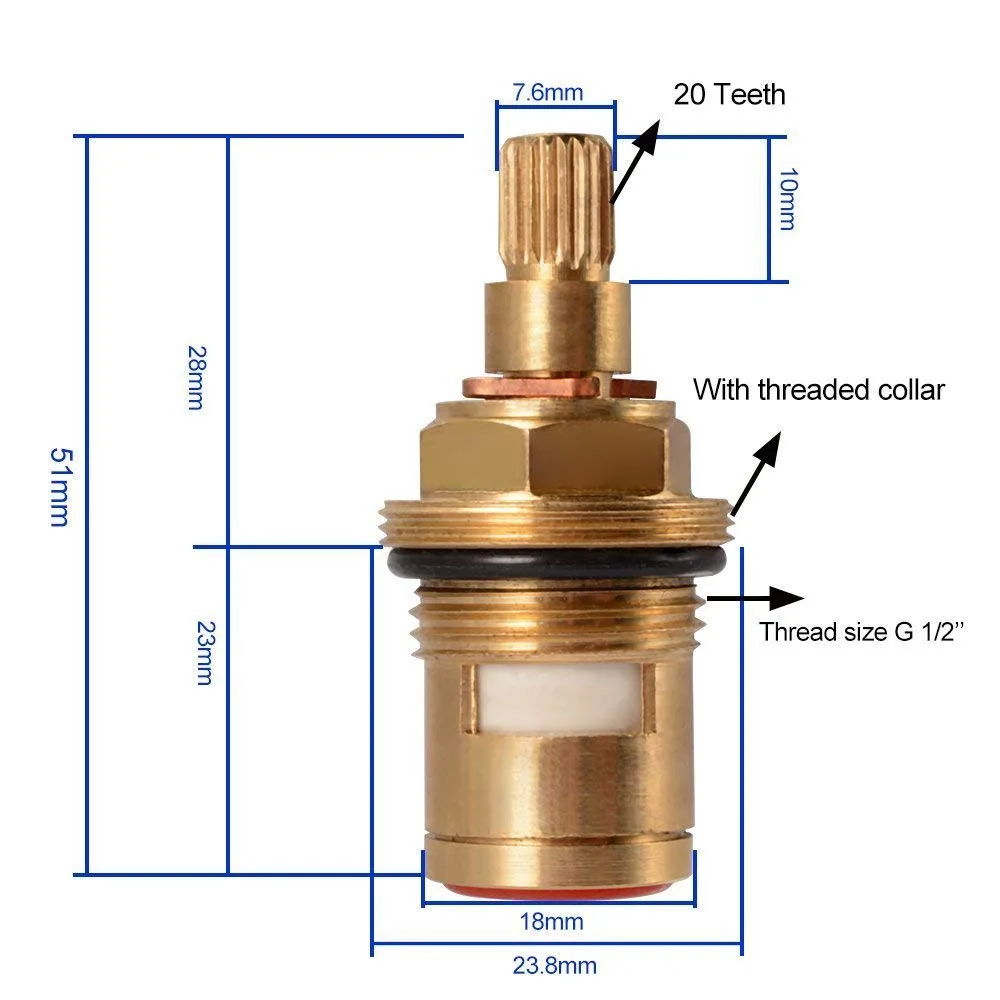
If the faucet has no visible brand, measure the cartridge length, diameter, and spline count. Note the retention method, clip, nut, or bonnet. Online databases from manufacturers match these dimensions to part numbers.
Price Pfister stems often use a 974-series number. Moen cartridges are 1225 (plastic) or 1222 (brass). Delta uses RP19804 for many two-handle models.
Kohler stamps a K-number on the cartridge body. When in doubt, order the OEM part. Aftermarket cartridges save money but often leak at the body seals within a year.
For a complete kitchen overhaul, cabinet renovation timing should coordinate with faucet replacement to avoid rework.
Decision Branch: Spout Drip → Seat & Washer or Cartridge Swap
If water drips from the spout with handles fully closed the problem lives in the valve seal. On compression stems the rubber washer has hardened or the brass seat has eroded. Remove the stem with an adjustable wrench on the stem nut.
Inspect the washer, replace it with the exact size (typically 00, 0, or 1/4 inch). Examine the seat with a flashlight. Grooves or pitting mean the seat must come out.
A seat wrench engages the internal splines. Turn counterclockwise. If the seat strips, a seat extractor bites the outer wall.
Install the new seat with pipe thread sealant on the threads. Reassemble with fresh packing on the stem. On cartridge models the entire cartridge replaces.
Pull the retaining clip with needle-nose pliers or unthread the bonnet nut. Note the cartridge orientation, hot and cold cartridges are often mirror images. Install the new cartridge in the same orientation.
Lubricate the O-rings with plumber's grease. On ceramic disc models the cartridge replaces as a unit. Align the keyway with the faucet body slot.
Torque the retaining nut to manufacturer spec, typically 12 to 15 foot-pounds. Overtightening cracks the ceramic plates.
Compression stem rebuild kits cost $5 to $12 and include washers, seats, and packing. OEM cartridges run $18 to $45. Ceramic disc cartridges cost $25 to $60.
Labor for a pro runs $150 to $350 for the first hour. A DIY repair takes 30 to 90 minutes including diagnosis. The decision tree branches again if the seat will not remove, at that point the faucet body may need replacement.
When remodeling, outdoor kitchen plumbing follows similar valve principles but with frost-proof requirements.
Decision Branch: Base Leak → Spout O-Rings or Faucet Body Crack
Water pooling around the spout base means the spout-to-body seal has failed. Pull the spout straight up after removing any set screw at the rear base. Two or three O-rings sit in grooves on the spout shank.
Hard water turns them brittle. Roll them off with a pick. Match the cross-section diameter and inside diameter exactly, generic packs often miss by a fraction of a millimeter.
Lubricate new O-rings with plumber's grease. Slide the spout down with a gentle twist. If water still seeps the faucet body may have a stress crack near the spout bore.
Inspect with a flashlight and magnifier. Hairline cracks in brass or zinc bodies are not repairable. Epoxy fails under pressure cycles.
At that point the entire faucet replaces. Widespread models let you swap just the center spout assembly if the valves are sound. Centerset and bridge units usually require full replacement.
Decision Branch: Handle Leak → Packing Nut, O-Rings, or Cartridge Seals
Moisture under the handle escutcheon traces to the stem or cartridge seal. On compression stems the packing nut compresses graphite or PTFE packing around the stem. Tighten it 1/8 turn first, often that stops the weep.
If not, unscrew the packing nut, remove the old packing rings, and install new string packing or a preformed packing washer. Do not overtighten or the handle binds. On cartridge models the cartridge body O-rings seal against the faucet body bore.
Remove the cartridge and roll off the old O-rings. Match the groove width and diameter. Ceramic disc cartridges use the same body O-rings.
Lubricate heavily with silicone grease. Reinstall the cartridge aligning the keyway. If the leak persists the cartridge bore in the faucet body may be scored, another full-replace signal.
Handle leaks on widespread faucets isolate to one valve. Centerset leaks can come from either valve since they share a deck plate.
Repair vs. Replace: The 15-Year / Cracked Body / NLA Parts Rule
Three hard thresholds push you toward replacement. Age over 15 years means internal passages are likely corroded and new seals won't seat cleanly. A cracked body, whether at the spout base, handle bore, or supply shank, cannot be reliably sealed.
Parts no longer available (NLA) from the manufacturer or major distributors like Ferguson or Winsupply make repair impossible. Bridge faucets and early widespread models often hit NLA status first. Cost comparison seals the decision.
A quality new two-handle faucet runs $150 to $350. Pro installation adds $200 to $400. DIY replacement takes 1 to 2 hours if supply lines cooperate.
If your repair parts plus specialty tools exceed $100 and the faucet is over 10 years old, replacement wins on reliability. When upgrading, coordinating cabinet hardware with the new faucet finish creates a cohesive look.
| Factor | Repair | Replace |
|---|---|---|
| Faucet age | Under 10 years | Over 15 years |
| Body condition | No cracks | Any crack |
| Parts availability | OEM in stock | NLA |
| Parts + tools cost | Under $75 | Over $100 |
| Skill level | Basic DIY | Any (pro install optional) |
Step-by-Step: Compression Stem Rebuild (Seat, Washer, Packing)
Shut off angle stops. Open handles to relieve pressure. Remove handle setscrew and lift handle.
Unscrew trim sleeve if present. Loosen packing nut with adjustable wrench. Unscrew stem nut (hex or square) and pull stem straight out.
Inspect stem threads, replace if corroded. Remove old rubber washer from stem bottom. Use a seat wrench to unthread the brass seat counterclockwise.
If the seat strips, drive a seat extractor into the outer wall and back it out. Coat new seat threads with pipe thread sealant. Thread new seat in by hand then snug with seat wrench, do not overtighten.
Install correct-size washer on stem (00, 0, or 1/4 inch). Wrap stem threads with PTFE tape. Reinstall stem.
Pack new graphite or PTFE string packing into packing nut cavity. Tighten packing nut until handle turns with slight resistance. Reassemble trim and handle.
Turn water on slowly. Check all joints.
Step-by-Step: Cartridge Replacement (Retaining Clip, Nut, or Bonnet)
Shut off water. Remove handle and trim. Identify retention method.
Moen: pull U-clip straight up with needle-nose pliers. Delta: unthread bonnet nut with adjustable wrench or cartridge wrench. Price Pfister: unthread retaining nut.
Kohler: unthread bonnet or remove clip per model. Grasp cartridge stem with pliers and pull straight out. Note orientation, hot and cold cartridges are often mirrored.
Take the old cartridge to match spline count, length, and port alignment. Lubricate new cartridge O-rings generously with plumber's grease. Insert new cartridge in exact same orientation.
Engage retention: seat U-clip fully, thread bonnet nut to 12-15 ft-lbs, or tighten retaining nut snug plus 1/4 turn. Reinstall trim and handle. Pressurize slowly.
Cycle each handle 20 times to seat seals. Check for drips at spout and base. Aerator may sputter initially, run water until clear.
Step-by-Step: Ceramic Disc Cartridge Swap (Alignment Keys, Torque Specs)
Shut off water. Remove handle and trim. Unthread retaining nut or bonnet nut with cartridge wrench.
Pull cartridge straight up. Note the alignment keys on the cartridge base, usually two tabs that fit slots in the faucet body. Hot and cold cartridges are mirror images; do not swap sides.
Lubricate new cartridge O-rings with silicone grease. Lower cartridge into body engaging keys fully. Thread retaining nut by hand then torque to 12-15 ft-lbs per manufacturer spec.
Overtightening cracks ceramic plates. Reinstall trim and handle. Pressurize slowly.
Cycle handles 20 times. Check for leaks at spout and base.
Tools That Save Hours: Seat Wrench, Cartridge Puller, Basin Wrench
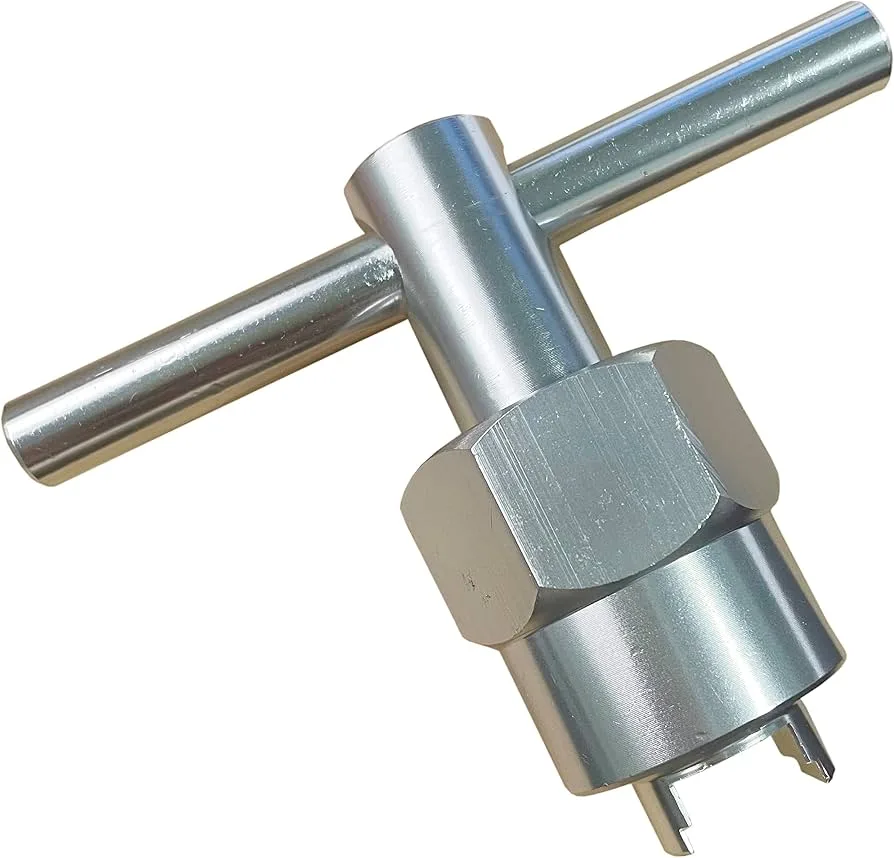
A seat wrench with tapered jaws engages removable brass seats without stripping. A cartridge puller with adjustable arms grips stuck cartridge bodies when mineral buildup locks them in place. A basin wrench with pivoting head reaches supply nuts behind the sink deck.
Add adjustable wrenches (8 and 10 inch), needle-nose pliers, hex keys (3/32 and 1/8 inch), flashlight, and plumber's grease. Penetrating oil helps seized packing nuts. White vinegar soak (30 minutes) dissolves mineral scale on stuck cartridges.
Having these ready prevents mid-repair hardware store runs.
Common Mistakes: Rounded Nuts, Wrong Splines, Overtightened Bonnet
Rounding the packing nut or bonnet nut with an oversized adjustable wrench is the top error. Use the correct size wrench or a cartridge wrench. Installing a washer with the wrong thickness prevents full compression or binds the stem.
Mixing hot and cold cartridges on ceramic disc models reverses handle operation and can damage alignment keys. Overtightening the bonnet nut on ceramic cartridges cracks the plates, torque spec exists for a reason. Reusing old O-rings or packing guarantees a callback leak.
Forgetting to lubricate O-rings causes them to roll or tear on installation. Skipping the slow pressurize step blows out seals before they seat.
Parts Cost & Time: $5 Kit vs. $45 Cartridge vs. $300 Pro Call
Compression rebuild kits run $5 to $12 for washers, seats, and packing. OEM cartridges cost $18 to $45 depending on brand. Ceramic disc cartridges range $25 to $60.
Specialty tools add $20 to $40 if you buy them. Total DIY parts and tools typically stay under $100. A pro service call starts at $150 to $350 for the first hour plus parts.
Most repairs take 30 to 90 minutes once diagnosed. Widespread faucets take longer due to separate valve access. Centerset units are faster.
The cost crossover favors DIY unless supply lines or angle stops also need replacement.
| Repair Type | Parts Cost | Tool Cost | Time | Pro Cost |
|---|---|---|---|---|
| Compression stem | $5-12 | $20-40 | 45-90 min | $150-350 |
| Cartridge swap | $18-45 | $20-40 | 30-60 min | $150-350 |
| Ceramic disc swap | $25-60 | $20-40 | 30-60 min | $150-350 |
When to Stop and Call a Plumber: Seized Stops, Cracked Brass, Code Work
Stop if angle stops will not close or leak when operated, you need a main shutoff and possibly stop replacement. Stop if the faucet body shows any crack, epoxy fails under pressure. Stop if supply lines are corroded into the faucet shanks, forcing them twists the body.
Stop if local code requires a licensed plumber for supply line work. Stop if the cartridge is seized and a puller won't budge it after heat and penetrating oil, the faucet body may need replacement. Stop if you encounter lead solder joints on pre-1980 plumbing, disturbance requires certified abatement.
These scenarios exceed DIY scope and risk water damage or code violations.
Maintenance That Prevents the Next Leak: Aerator, Supply Lines, Angle Stops
Clean the aerator annually, mineral buildup restricts flow and stresses cartridge seals. Unscrew, soak in vinegar, rinse, reinstall. Inspect flexible supply lines every two years; replace at first sign of corrosion or bulging.
Exercise angle stops quarterly: open and close fully to prevent seizure. Replace multi-turn stops with quarter-turn ball valves for reliability. Hard water areas benefit from a whole-house softener to extend all valve life.
Final Decision Guide: Match Your Faucet, Leak, and Skill Level to the Right Fix
Compression stem drip with basic tools → rebuild kit. Cartridge drip with identified brand → OEM cartridge swap. Ceramic disc quarter-turn leak → matching disc cartridge.
Base leak on widespread spout → spout O-rings. Base leak on centerset → full faucet replace. Handle leak → packing or body O-rings.
Seized stops, cracked body, or NLA parts → call a pro. Skill honest assessment prevents water damage.
Frequently Asked Questions
How do I know if my faucet is compression or cartridge?
Turn the handle: multiple full rotations mean compression or cartridge; a firm 90-degree stop means ceramic disc. Remove the handle to see the valve top.
Can I use a universal washer kit on any faucet?
No. Universal kits only fit compression stems with standard seats. Cartridge and ceramic disc models require brand-specific cartridges.
What if the seat won't come out?
Try a seat extractor. If the seat strips completely the faucet body usually needs replacement, the seat bore is damaged.
How tight should the bonnet nut be on a ceramic cartridge?
Torque to 12-15 foot-pounds per manufacturer spec. Overtightening cracks the ceramic plates.
Should I replace both hot and cold cartridges at once?
Yes, if one failed the other is near end of life. Labor is the same; parts cost doubles but prevents a callback.
When is a faucet too old to repair?
Over 15 years, cracked body, or parts no longer available. At that point replacement is more reliable and often cheaper long-term.