How to Replace a Kitchen Sink Drain Without a Plumber
That drip under the cabinet isn't just annoying, and it's not going to fix itself. Knowing how to change a kitchen sink drain is one of those DIY skills that pays for itself the first time you use it. The relentless drip usually means the flange's rubber gasket has given up, or the plumber's putty under the lip has dried out and cracked.
As of 2026, a standard stainless steel basket strainer kit costs between $15 and $75. A basin wrench, the one tool that makes this job possible, runs about $20. The whole swap takes most first-timers around 60 minutes.
Once you've done it once, you'll wonder why you ever hesitated.
Quick Answer
To change a kitchen sink drain, remove the old one from below. Clean the opening thoroughly. Roll a putty rope and press it around the flange lip.
Insert the new flange and tighten the locknut. Reconnect the P-trap and test for leaks.
You're Leaking or Rusting: Here's What You're Actually Dealing With
If your sink is leaking, it's usually one of three things. The rubber gasket under the flange could be crushed or missing. The plumber's putty (or silicone) around the top edge might be dried out.
Or a slip nut on the P-trap is loose.
In our research of plumbing forums and manufacturer documentation, a failed rubber gasket is the most common culprit in kitchen sinks. Kitchen drain assemblies in North America use a 1-1/2-inch tailpiece, and the visible flange measures about 3-1/2 inches across. When the gasket or putty fails, water finds the path of least resistance.
You end up with a slow drip on the cabinet floor.
If the leak appears only while running water, the flange seal is your prime suspect. If it's constant, look at the P-trap or slip nuts. If you see rust or green corrosion on the bottom of the flange, that's a clear sign the protective coating has worn off.
You can inspect this yourself in about two minutes. Grab a flashlight, lie under the sink, and wipe the pipe with a dry paper towel. Run the water and watch closely.
The exact location of the water tells you exactly what needs attention.
In many cases, you don't need a full replacement. A new rubber gasket and fresh putty can fix a leak for under $10. But if the flange is pitted, corroded, or cracked, a new drain assembly is the right move.
The Anatomy of a Kitchen Sink Drain: Know Your Parts Before You Touch Anything
Before you unscrew anything, take a minute to understand what's under there. A kitchen sink drain assembly is really five main parts stacked together.
- Flange (basket strainer): The stainless steel piece you see in the basin. It has a wide lip at the top and threads on the underside.
- Rubber gasket: A soft cone-shaped ring that seals between the flange and the bottom of the sink. It often has a paperboard backing you remove before installation.
- Locknut: The metal ring that threads up the flange from underneath, holding everything tight against the basin.
- Tailpiece: The vertical pipe that slides over the flange's threaded tail and connects down to the P-trap.
- P-trap: The curved pipe that holds water and keeps sewer gas from drifting up into your kitchen.
Here's what the rubber gasket looks like out of the box. Note the tapered edge.
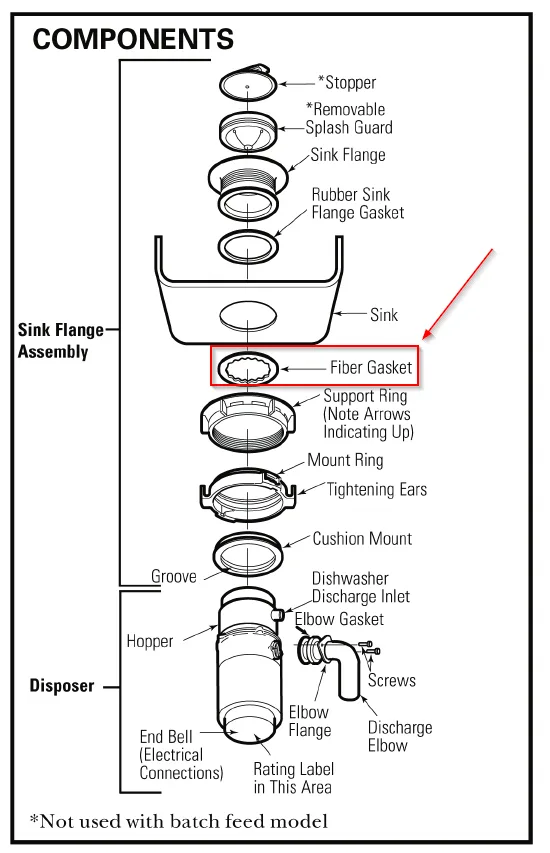
Orientation matters. The tapered side of the gasket faces up into the sink, while the wide flat side sits against the bottom. Get it backwards, and it won't seal no matter how tight you crank the locknut.
The whole assembly hangs from the sink basin, and the working space underneath is cramped. It's usually dictated by your lower cabinet depth, so if you're planning a new countertop or sink, it's worth thinking about access during the design phase. Proper sink prep goes hand in hand with the rest of a kitchen layout.
Manufacturer specs confirm that standard US kitchen drain kits follow the dimensions set by plumbing fixture standards. That means any off-the-shelf kit you buy should fit a standard sink hole. Per ASME's plumbing standards, the flange opening has been consistent for decades now.
You won't need custom parts for a typical drop-in sink.
Look for Visual Clues: How to Confirm Your Drain Needs Replacing
Sometimes you don't need to run water to know there's a problem. The drain itself leaves visual clues all over the assembly.
| Visual clue | Likely problem |
|---|---|
| Black spots or pitting on the flange | Corrosion eating through the metal |
| Crusty white or green deposit around the rim | Dried-out putty or old silicone |
| Water dripping from under the locknut | Failed or compressed rubber gasket |
| Flange wiggles when you push it side to side | Loose locknut or stripped threads |
If you see water pooling on top of the P-trap, the issue may not be the drain assembly at all. That's usually a loose slip nut or a cracked trap. Tighten those joints first.
You can often stop a leak without replacing anything.
Roughly one in four kitchen sink leaks come from a corroded flange bottom, not from the seal itself. Once rust has eaten through the stainless finish, the metal starts flaking into the cabinet. That's not a repair job.
That's a straight replacement.
Here's the best test. Dry everything with a towel. Run the hottest water you can for about thirty seconds.
Then look underneath and trace the water trail back to its source. If you still can't find it, wipe the pipes with a paper towel and check for moisture on the towel's surface.
If you're already planning a kitchen refresh on a budget, this repair can be part of the update. A new stainless flange looks far better than that stained old basket, and it's a cheap upgrade compared to a full countertop change.
Tools and Parts: What You Need to Buy vs. Already Own (and Where to Get Them)
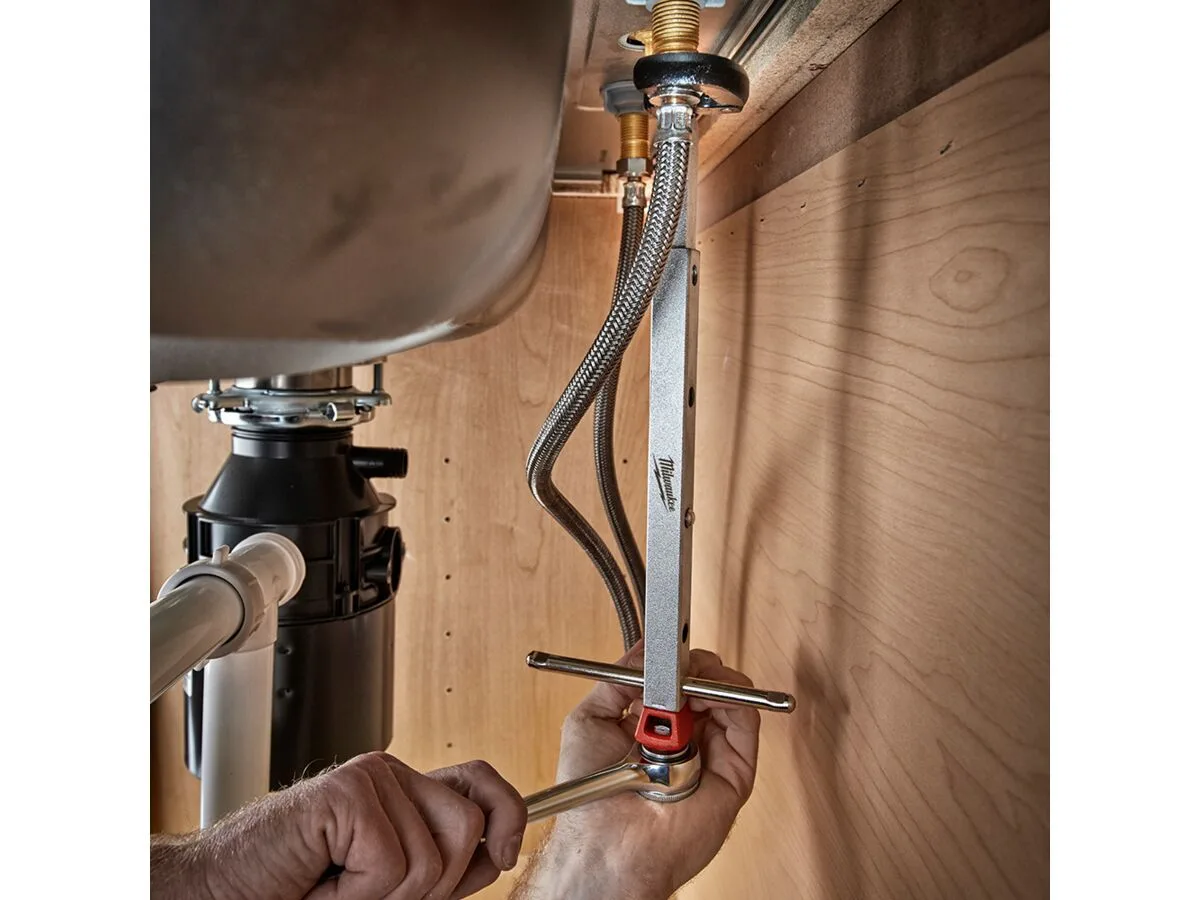
Most homeowners already have a pair of adjustable pliers and a flathead screwdriver. The one tool that's genuinely worth buying is an offset basin wrench. That's what reaches the locknut when your arm can't.
| Tool or material | Why you need it | Approx. cost (2026) |
|---|---|---|
| Basin wrench | Reaching the locknut behind the tailpiece | $15–$25 |
| Plumber's putty | Sealing the flange lip to the sink basin | $5 |
| Silicone caulk | Alternative to putty for stainless sinks | $7 |
| Adjustable pliers | Loosening P-trap slip nuts | $12 |
| Bucket | Catching water left inside the trap | $3 |
| Old towel | Protecting the cabinet floor | $0 |
You'll also need the drain kit itself. Basic models with chrome-plated plastic run around $15. Heavy stainless steel kits with a full brass tailpiece sit closer to $75.
For a kitchen you use every day, spending a bit more on the metal version is worth it. Plastic threads strip, and the chrome finish tends to flake.
A few other things help. A flat putty knife scrapes off old putty, and a small wire brush cleans the sink opening. If you have a garbage disposal, you might need a disposal drain adapter kit.
Those run about $10 and include the correct tailpiece to meet the disposal discharge.
You can find all of this at any big-box hardware store. Many manufacturers also sell drain kits directly, and their websites provide installation diagrams for the exact model you're buying. That's a helpful reference for the specific orientation of washers and gaskets.
Prep Work: The Water Is Off and the Cabinet Is Clear
Here's the part people skip, and it always comes back to bite them. Clear out the cabinet completely. That means the cleaning sprays, the soap dispenser, the old rags.
You need room to move and see.
Next, lay down an old towel and place a bucket under the P-trap. Even after you shut off the water supply, there's still a cup of standing water inside that curved pipe. It comes out the moment you loosen the slip nuts.
Shut off the water supply valves under the sink. Turn both the hot and cold handles clockwise until they stop. Then open the faucet for a few seconds to release pressure.
You don't need to drain the whole system, but this lets out the water sitting in the faucet spout.
If you have a garbage disposal, unplug it. There's always a slim chance of stray water hitting the electrical outlet, and you want nothing live under there. Also place a magnet over the drain opening if you have a stainless sink.
You don't want the old locknut falling down the hole as you drop it.
Take a photo of the P-trap with your phone before you remove anything. That photo becomes your reassembly map. It's a simple step, but it saves a lot of head-scratching when you're trying to line up the pipes later.
Finally, run a quick check on the surrounding pipes. Per the Uniform Plumbing Code, drain lines should slope at least a quarter-inch per foot. If your trap looks flat or reversed, address that before you put the new drain in.
You don't want to revisit this cabinet in a month for a separate issue.