
How to Arrange Kitchen Appliances for Maximum Efficiency
Most kitchens fail before the first cabinet gets ordered because nobody drew the plan view first. Learning how to arrange kitchen appliances starts with a scaled drawing that shows every door swing, landing zone, and traffic path in relation to fixed utilities. The work triangle still gets taught, but modern research backs zone-based planning: separate prep, cooking, and cleanup stations that reflect how people actually cook.
A good layout reduces steps, prevents collisions, and keeps hot pans off cold counters.
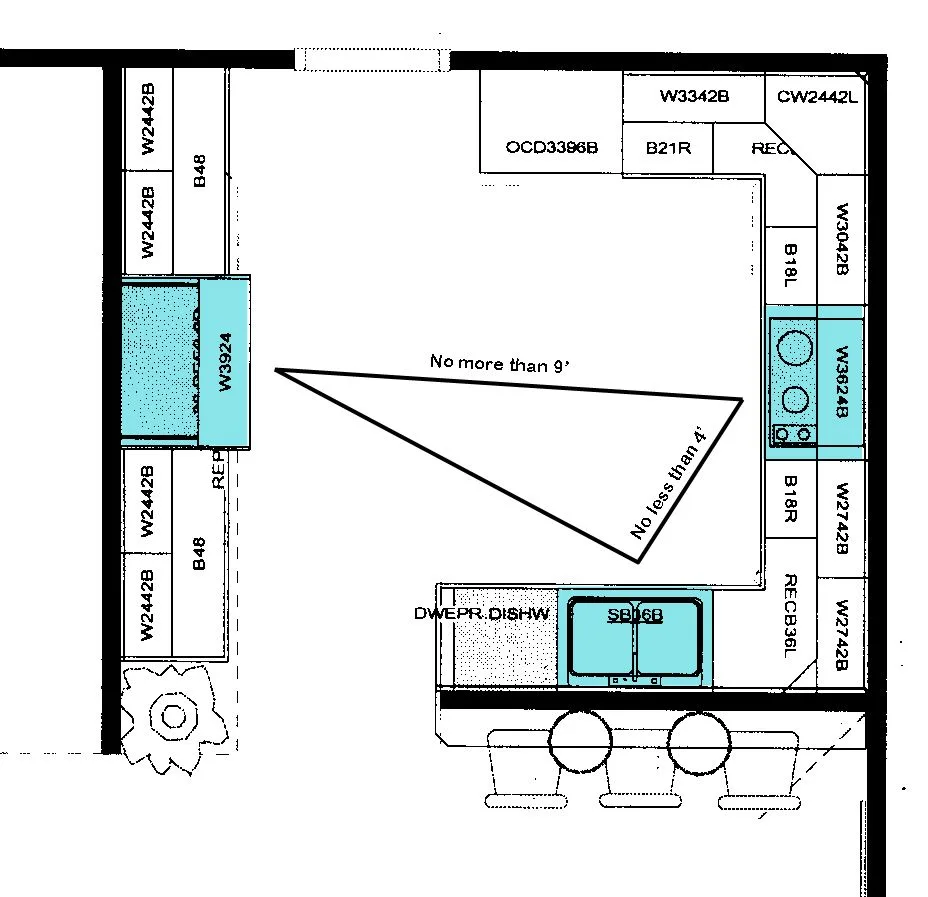
Per NKBA guidelines, the three primary work centers, refrigerator, sink, cooktop, should sit within a 13-to-26-foot total perimeter with each leg between four and nine feet. That range still holds as of 2026, but the real control comes from landing zones and clearance arcs you can only verify on paper. Let's start with what you cannot move.
Quick Answer
Arrange kitchen appliances by first mapping fixed utilities, windows, and doors on a scaled plan. Place the refrigerator, sink, and cooktop in a work triangle or zone layout with required landing zones. Verify door swings, drawer arcs, and aisle widths meet NKBA minimums.
Add ventilation, electrical, and gas connections per code. Test the layout with real cooking workflows before ordering cabinets.
Why Kitchen Layout Lives or Dies in the Plan View
A plan view is a top-down drawing of your kitchen footprint at a consistent scale, typically one-quarter inch equals one foot. It shows walls, windows, door openings, soffits, and every utility stub-out: gas line, 240-volt receptacle, water supply, drain, and vent duct route. Without this drawing, you cannot see how a refrigerator door blocks the main traffic path or how a dishwasher door hits the sink faucet.
The plan view also reveals the difference between code minimums and comfortable clearances. Code may allow a 36-inch aisle; NKBA recommends 42 inches for one cook and 48 inches for two. That six-to-twelve-inch gap decides whether two people can pass behind an open oven door.
Draw the plan first. Every appliance decision flows from it.
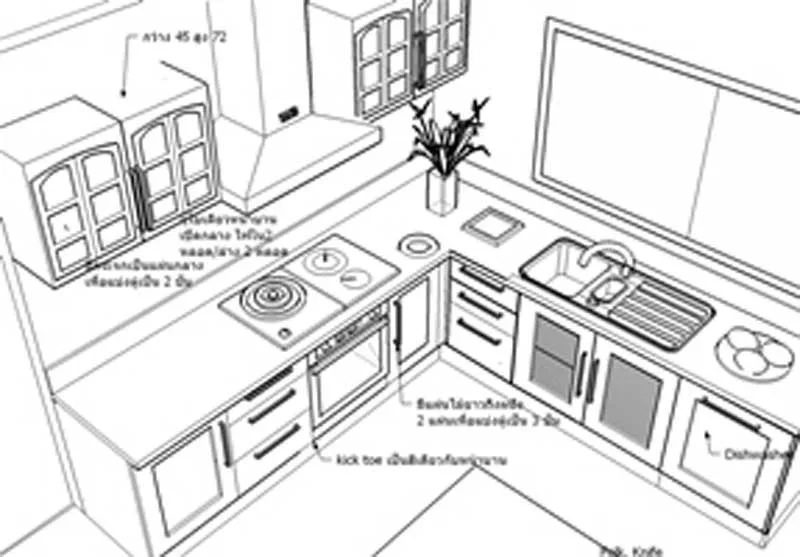
Start With What You Can't Move: Utilities, Windows, and Walls
Begin by measuring the room: overall length and width, window and door centers, ceiling height, and soffit depth. Mark every utility on the plan. Gas shutoff valves typically sit behind the range or in the basement below.
The 240-volt range receptacle often lives in a base cabinet or low on the back wall. Water supply lines and the dishwasher drain tailpiece connect under the sink. Vent ducting runs up through the ceiling or out a sidewall.
Windows dictate sink placement for many homeowners. A centered sink under a window needs at least 18 inches of counter each side for landing zone. If the window sits too low, the faucet hits the sill.
Doors swing into the kitchen, note their arc on the plan. A 36-inch door swinging into a galley corridor can eliminate the required aisle width. Structural walls that cannot move become hard constraints for island placement.
Check local amendments before finalizing utility locations. Some jurisdictions require make-up air systems for hoods exceeding 400 CFM. Others prohibit recirculating hoods with gas cooktops.
The International Residential Code and National Electrical Code set baselines, but your building department has final say. A quick call to the inspector saves expensive rework.
Place the Big Three First: Refrigerator, Sink, Cooktop
The refrigerator, sink, and cooktop anchor every kitchen layout. Place them in this order: refrigerator first, sink second, cooktop third. The refrigerator is the largest appliance and its hinge direction determines the landing zone.
Put the fridge at the end of a run so the open door doesn't block traffic. Allow 15 inches of counter on the handle side for grocery unloading.
The sink anchors the cleanup zone. Center it under a window if possible, but preserve the 18-to-24-inch landing zone on one side and 12-to-18 inches on the other. The dishwasher sits immediately adjacent, within 36 inches, on the same cabinet run.
This keeps the scrape-load-walk pattern tight. If you want a second prep sink, place it in the island or a dedicated baking zone.
The cooktop or range goes last because it needs the most clearance: 12 inches minimum on one side, 15 inches on the other per NKBA; 30 inches total between combustible surfaces. Gas ranges need a gas line. Electric and induction need a 240-volt circuit.
Ventilation ducting runs straight up or horizontally to an exterior wall. Keep the duct run short and straight, every elbow costs CFM.
| Appliance | Primary Landing Zone (NKBA) | Adjacent Appliance | Clearance Note |
|---|---|---|---|
| Refrigerator | 15" handle side | None required | Hinge side dictates zone |
| Sink | 18" one side, 24" other | Dishwasher within 36" | Prep sink adds second zone |
| Cooktop | 12"/15" each side | Oven below or separate | 30" to combustibles |
Build Landing Zones Around Every Appliance
Landing zones are the counters where you set things down, hot pans, grocery bags, wet produce, clean dishes. NKBA minimums exist for a reason: they prevent the "where do I put this" shuffle that burns fingers and drops jars. The cooktop needs 12 inches on one side and 15 on the other.
The sink needs 18 inches on one side, 24 on the other. The refrigerator needs 15 inches on the handle side. A wall oven needs 15 inches adjacent or above.
These zones cannot overlap. A single 36-inch counter between the sink and cooktop satisfies neither. You need dedicated space for each activity.
If the kitchen is tight, a portable butcher block on a rolling cart can serve as a temporary landing zone for the fridge or oven. Permanent zones must be built into the cabinet plan.
Consider the sequence: unload groceries → fridge → prep at sink → cook at range → plate → serve → cleanup at sink → dishwasher. Each handoff needs a flat surface. A 15-inch zone beside the fridge lets you set a heavy bag before lifting items into the crisper.
A 24-inch zone beside the sink holds a colander and a cutting board simultaneously. Skimping here creates daily friction.
Map Door Swings, Drawer Arcs, and Traffic Paths
Every appliance door, oven door, and drawer has an arc. Draw them on the plan. A French-door refrigerator swings two doors up to 110 degrees each.
A wall oven door drops down 90 degrees. A dishwasher door drops 90 degrees and extends 24 inches forward when open. A 36-inch range hood may have a 30-inch capture depth.
These arcs overlap in ways that surprise people in showrooms but show clearly on paper.
Traffic paths need minimum widths. NKBA calls for 42 inches for a single cook, 48 inches for multiple cooks. Absolute minimum is 36 inches past a peninsula end.
Measure from the counter face to the opposite counter, island, or wall, not from the cabinet box. An island seated at 42 inches from the perimeter leaves 36 inches of walkway once stools are tucked in. That works for one person; two people need 48 inches.
Test the plan with real scenarios. Open the fridge door, does it block the dishwasher? Open the oven, does the door hit the island seating?
Walk from sink to cooktop with a theoretical stockpot, does your elbow clear the fridge handle? If the plan fails any test, move appliances on paper. It costs nothing there.
Moving a gas line after drywall costs thousands.

Choose Your Layout Type: Galley, L, U, Island, or Peninsula
The footprint dictates the layout. A galley kitchen runs two parallel counters with a single aisle, efficient for one cook but tight for two. Minimum aisle width is 42 inches; 48 inches lets two people pass.
An L-shape opens the corner for a table or island. A U-shape wraps three walls and maximizes storage but needs at least 60 inches between opposing counters for comfort. An island adds a fourth work surface but requires 42 inches clearance on all sides.
A peninsula attaches to one wall and saves space but blocks access from one side.
Match the layout to the household. A galley works in a narrow city apartment. An L-shape with an island suits open-plan living.
A U-shape fits a dedicated cooking room. If the room is wider than 12 feet, an island centers the workflow. If it is narrower, a peninsula keeps the zone compact.
Draw each option to scale before deciding. The plan view reveals which layout actually delivers the required landing zones and clearances.
Special Zones: Baking, Beverage, Appliance Garage, Second Sink
A baking zone groups the stand mixer, flour storage, sheet pans, and a low counter at 30 to 32 inches for rolling dough. Place it near the wall oven or a dedicated bake station. A beverage zone holds the coffee maker, grinder, mugs, and a small sink or water line, keep it outside the main cooking triangle so guests don't cross the cook's path.
An appliance garage hides the blender, food processor, and toaster behind a tambour or lift-up door; make it at least 18 inches deep and 24 inches tall for tall machines.
A second sink in the island or a butler's pantry creates a true prep-and-cleanup split. It needs its own drain, vent, and water lines, plan those early. A pot-filler above the cooktop eliminates carrying heavy stockpots across the kitchen.
Each special zone adds utility but also adds plumbing, electrical, and cabinet cost. Prioritize the zones that match how you actually cook.
Ventilation That Actually Works: Hood Width, Height, and Duct Path
The hood must extend at least three inches beyond the cooktop on each side. A 36-inch cooktop needs a 42-inch hood minimum; 48 inches is better. Mount the bottom of the hood 24 to 30 inches above an electric cooktop and 30 to 36 inches above gas per manufacturer specs.
Higher mounting reduces capture; lower risks heat damage. Ducted exhaust is mandatory for gas and high-heat cooking. Recirculating hoods only filter grease and odor, they do not remove heat, moisture, or combustion byproducts.
Duct size drives performance. Six-inch round duct handles up to 400 CFM. Eight- to ten-inch round or equivalent rectangular is needed for 600 to 1200 CFM professional ranges.
Run duct straight up through the roof or out a sidewall. Every 90-degree elbow adds equivalent length and cuts airflow. Use smooth-wall metal duct, not flexible foil.
Seal all joints with foil tape rated for high temperature. If the hood exceeds 400 CFM, check local code for make-up air requirements.

| Cooktop Width | Minimum Hood Width | Mount Height (Electric) | Mount Height (Gas) |
|---|---|---|---|
| 30" | 36" | 24–30" | 30–36" |
| 36" | 42" | 24–30" | 30–36" |
| 48" | 54" | 24–30" | 30–36" |
Electrical and Gas: Dedicated Circuits, GFCI, and Shutoff Locations
Every major appliance needs its own circuit. The range or cooktop plus wall oven requires a 40- to 50-amp 240-volt circuit. The refrigerator gets a dedicated 20-amp 120-volt circuit.
The dishwasher and disposal each need a 20-amp circuit, often shared with a split receptacle. The microwave needs a 20-amp circuit if built-in; countertop models can share a countertop circuit. All countertop receptacles must be GFCI-protected per NEC 210.52.
Receptacles cannot sit face-up on horizontal countertops.
Gas appliances need a shutoff valve in the same room within six feet of the appliance. The connector must be a listed flexible corrugated stainless steel tube no longer than six feet. Hard pipe runs to the shutoff; the connector bridges the last few inches.
A sediment trap (drip leg) is required at the appliance inlet. Pressure test the line before connecting appliances. Electric and gas work must be permitted and inspected, never DIY unless you hold the license.
Universal Design Clearances That Future-Proof the Kitchen
Universal design makes the kitchen usable by everyone regardless of age or ability. A 30-by-48-inch clear floor space centers on each appliance. Counter height drops to 34 inches maximum for wheelchair access; 32 to 34 inches works for most seated users.
Knee space under the sink and cooktop requires 27 inches high, 30 inches wide, and 19 inches deep. Side reach range is 15 to 48 inches from the floor. Front controls on the cooktop and oven eliminate reaching over hot burners.
Drawer dishwashers and microwave drawers bring loading height to waist level. French-door refrigerators with bottom freezers put fresh food at eye level. Lever handles on faucets and cabinets replace knobs.
Touch-latch or push-to-open drawers remove the need for grip strength. These features add cost upfront but avoid a full remodel later. They also increase resale value in markets with aging populations.
Plan them now while walls are open.
Common Layout Mistakes You'll See in the Drawing (Not the Showroom)
A refrigerator placed at the end of a run with the hinge against the wall blocks the door from opening past 90 degrees, you lose half the shelves. A dishwasher next to a corner cabinet traps the door against the blind panel. An island seated 36 inches from the perimeter looks fine on paper until you add bar stools and lose the walkway.
A microwave over the range mounted at standard height puts the door at 66 inches, too high for short users and dangerous for kids pulling hot liquids.
The work triangle drawn with straight lines ignores door swings. A sink centered on a window often leaves zero landing zone on one side because the faucet base hits the sill. A cooktop pushed against a side wall eliminates the required 12-inch clearance.
A hood narrower than the cooktop leaves the front burners unvented. These errors show up in the plan view every time. Fix them before you order cabinets.
Quick-Reference Measurement Cheat Sheet
| Element | Minimum | Recommended | Code Reference |
|---|---|---|---|
| Aisle width (1 cook) | 36" | 42" | NKBA |
| Aisle width (2 cooks) | 42" | 48" | NKBA |
| Cooktop landing zone | 12"/15" | 15"/18" | NKBA |
| Sink landing zone | 18"/24" | 24"/30" | NKBA |
| Fridge landing zone | 15" hinge side | 18" hinge side | NKBA |
| Hood above electric | 24" | 24–30" | Mfr specs |
| Hood above gas | 30" | 30–36" | Mfr specs |
| Counter height | 34" accessible | 36" standard | ADA/IRC |
| Toe kick depth | 3" | 3–4" | NKBA |
| Duct size ≤400 CFM | 6" round | 6–7" round | IRC M1503 |
Print this table. Tape it to your drawing. Check every dimension before the cabinet order ships.
When to Call a Designer: Complex Footprints, Structural Moves, Code Triggers
Hire a certified kitchen designer (CKD) when the footprint has angles, curves, or multiple level changes. Structural wall removal requires an engineer's stamp and a permit, designers coordinate that. If the hood exceeds 600 CFM, make-up air calculations get complex.
Historic districts often restrict exterior vent terminations. Multi-cook households with overlapping zones benefit from professional workflow analysis. A designer's fee typically runs 4, 10% of project cost and pays for itself in avoided change orders.
Frequently Asked Questions
What is the minimum aisle width for a kitchen?
36 inches is the absolute minimum per code. NKBA recommends 42 inches for one cook and 48 inches for two.
Can I put a dishwasher next to a refrigerator?
Yes, but allow at least 2 inches of filler between them so the dishwasher door doesn't hit the fridge handle. The fridge hinge should face away from the dishwasher.
Do I need a vent hood for an electric cooktop?
Code does not always require it, but cooking produces grease, moisture, and heat. A ducted hood protects cabinets and air quality. Recirculating is better than nothing.
How far should the refrigerator be from the sink?
No fixed distance, but the work triangle leg should be 4 to 9 feet. More important: keep a 15-inch landing zone on the fridge handle side and 18, 24 inches beside the sink.
Can I use a microwave drawer instead of over-the-range?
Yes. Microwave drawers install under the counter or in an island, freeing the wall for a proper hood. They need a 24-inch wide cabinet and a 120-volt circuit.


