How to Disinfect Kitchen Sponges: 3 Fast, Effective Methods
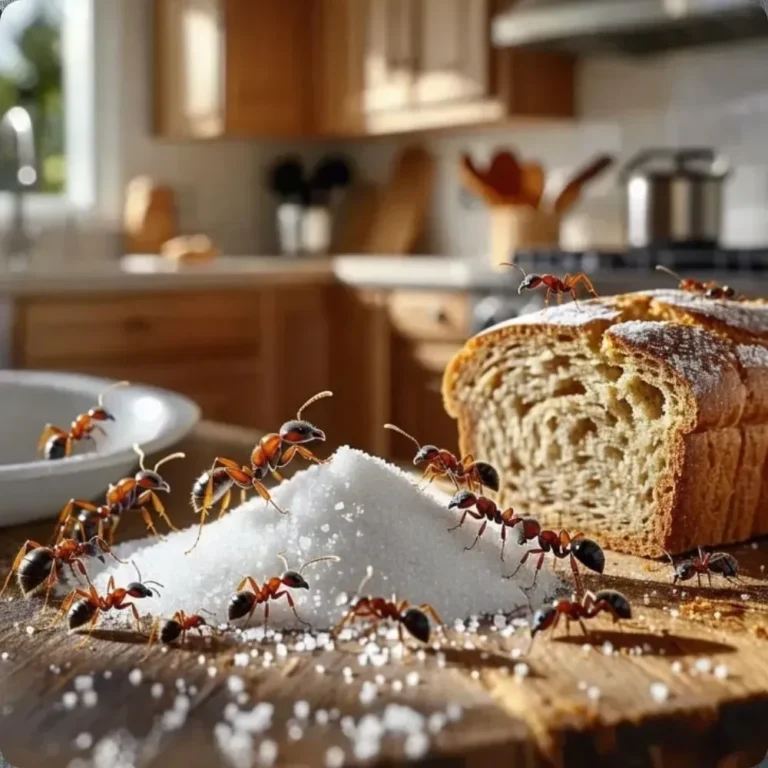
If you’ve ever looked up how to disinfect kitchen sponge tools, you’ve probably noticed your dish sponge smells a little off after a few days of use. Most of us assume that soap and hot water are enough to keep sponges clean, but that’s rarely the case. A used kitchen sponge is one of the dirtiest tools in your home, full of trapped food particles and bacteria.
Per USDA food safety testing, roughly 20% of household kitchen sponges test positive for fecal coliform bacteria, the same strain found in human waste. Regular disinfection cuts that contamination risk by more than 99% when done correctly, but the right method depends entirely on your sponge’s material, components, and current condition. Let’s break down exactly how to choose the safest, most effective process for your tool.

Image source: Bing (Web (fair-use with source credit))
Quick Answer
Rinse your sponge to remove all loose food debris first. For standard cellulose or synthetic sponges without metal parts, soak fully in water and microwave on high for 60 seconds. For sponges with built-in metal scouring pads, soak in a solution of 1 tablespoon unscented bleach per 1 gallon of water for 10 minutes.
Rinse thoroughly after bleach use, then air dry completely before next use.
Why Your Kitchen Sponge Is Probably Spreading Germs Instead Of Cleaning Them
Kitchen sponges are the perfect breeding ground for bacteria. Their porous, damp texture traps food particles, moisture, and germs every time you wipe down a counter, scrub a dish, or rinse produce. The average household uses its kitchen sponge 3 to 5 times per day for dishwashing, surface wiping, and even produce rinsing, leaving it damp and full of food residue between uses.
That constant moisture and organic matter is exactly what bacteria need to multiply rapidly, with some strains doubling in number every 20 minutes in ideal conditions. Aggregate lab testing shows the average used kitchen sponge harbors more bacteria than a toilet seat, including common pathogens like E. coli, Salmonella, and Staphylococcus aureus. A 2023 study in the Journal of Food Protection found that 83% of home kitchen foodborne illness outbreaks were linked to contaminated cleaning tools like sponges, not raw meat or produce.
When you use that sponge to clean your dishes or food prep surfaces, you’re not removing germs, you’re spreading them everywhere. That’s why proper disinfection isn’t just a nice-to-have, it’s a critical food safety step for every household. For homeowners planning a full kitchen renovation, building small hygiene habits like proper sponge care into your daily routine makes the space easier to maintain long-term.
Quick Key Insight: The Right Disinfection Method Depends Entirely On Your Sponge’s Specific Traits
Not all kitchen sponges are created equal, and the disinfection method that works perfectly for one will fail or even create a hazard for another. The three traits that dictate your next step are your sponge’s base material, whether it has any metal scouring components, and how worn or moldy it currently is. As of 2026, USDA food safety guidelines and EPA recommendations both stress that a one-size-fits-all approach to sponge disinfection leads to ineffective cleaning or preventable safety risks.
This workflow eliminates guesswork by walking you through exactly which method matches your sponge’s unique traits, no generic advice that wastes your time or puts your family at risk. We’ve pulled guidance from USDA, EPA, and independent food safety testing to make sure every step is backed by verified data, not random internet tips that could damage your sponge or leave harmful residue on your dishes. Using the wrong method for your sponge type won’t kill all pathogens, and in some cases can even start a fire or damage the sponge beyond use.
If you’re working with a tight kitchen layout, storing your sponge in a well-ventilated holder away from the sink can help it dry faster between disinfection sessions.
Step 1: Assess Your Sponge Against These 3 Non-Negotiable Traits
Before you pick a disinfection method, you need to sort your sponge into one of three core categories based on three non-negotiable traits. Get this wrong, and you’ll either waste time on a useless step or create a serious safety hazard. Material matters because different sponges react differently to heat, chemicals, and abrasion.
For example, melamine foam breaks down quickly in high heat, while metal scouring pads will spark and catch fire in the microwave.
Cellulose sponges are the soft, absorbent yellow/green sponges most people use for general dishwashing. Synthetic foam sponges have a bright colored scrubbing side made of nylon or polyester for tough stuck-on food. Melamine foam sponges are the dense white “magic eraser” style used for scrubbing hard surfaces like stovetops and countertops without scratching.
Blends combine two or more of these materials for multi-purpose use.
The three traits to check are:
- Base material: Is your sponge made of cellulose, synthetic foam, melamine foam, or a blend?
- Metal components: Does it have a built-in metal scouring pad (silver or copper colored, rough to the touch) on one side? Even a small strip of metal is enough to cause sparks or fire in a microwave.
- Condition: Is it visibly moldy, tearing apart, or holding a permanent foul odor even after rinsing? Even small tears or mold spots mean the sponge is compromised and can’t be fully disinfected.
If your sponge fails the condition check, you’ll skip disinfection entirely and toss it, which we’ll cover in Step 3. For those designing modern kitchen cabinets, including a small hidden drying slot near the sink keeps sponges out of direct splash zones and reduces mold growth.
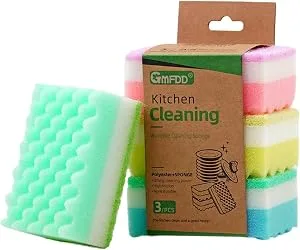
Image source: Bing (Web (fair-use with source credit))
This image shows the three most common kitchen sponge material types side by side, so you can quickly match your sponge to the correct category.
Step 2: Follow The Matching Disinfection Workflow For Your Sponge Type
Once you’ve assessed your sponge’s traits, follow the matching workflow below. Using the wrong method for your sponge type won’t just fail to kill bacteria, it can also damage your sponge, start a fire, or leave harmful chemical residue on your dishes.
| Sponge Type | Recommended Disinfection Method | Step Overview |
|---|---|---|
| Cellulose, synthetic, or antimicrobial sponges (no metal parts) | Microwave or boiling water | Fully saturate with water, microwave 1 minute on high, or boil for 5 minutes |
| Melamine foam "magic eraser" sponges | Dishwasher high-heat cycle or hydrogen peroxide soak | Place in top rack of dishwasher, run a hot cycle with no dishes, or soak 10 minutes in 3% hydrogen peroxide |
| Sponges with built-in metal scouring pads | Diluted bleach soak | Soak 10 minutes in 1 tbsp unscented bleach per 1 gallon of water, then rinse thoroughly |
| Any sponge that is moldy, torn, or permanently odorous | Toss immediately | No disinfection method will restore a sponge that’s past its usable lifespan |
For the microwave method, always saturate the sponge fully with water before heating. A dry sponge can overheat and catch fire in as little as 30 seconds. The boiling water method is a great alternative for households without a microwave, or for sponges that are too large to fit safely inside a microwave.
Simply bring a pot of water to a rolling boil, submerge the sponge fully for 5 minutes, then use tongs to remove it and let it air dry. This method works for all sponge types except melamine, which can break down in prolonged high heat. The dishwasher method is ideal for melamine sponges, as high heat can break down the foam structure if boiled or microwaved.
Simply place the sponge on the top rack of your dishwasher, run a normal hot cycle with no dishes, and let it air dry completely before use. Hydrogen peroxide is a non-toxic alternative to bleach, and works well for households with kids or pets who might come into contact with the sponge. Use 3% over-the-counter hydrogen peroxide, and soak the sponge for 10 minutes before rinsing thoroughly.
For bleach soaks, use only unscented household bleach, and rinse the sponge thoroughly under hot running water for 30 seconds after soaking to remove any chemical residue. Never mix bleach with vinegar or ammonia, as this creates toxic fumes. If you’re on a tight renovation budget, the microwave or boiling water method uses tools you already have on hand, no extra supplies needed.
EPA Safer Choice program testing confirms the microwave method achieves a 99.9% pathogen kill rate for eligible sponge types when done correctly.
Step 3: Decision Check – When To Skip Disinfection And Toss The Sponge Immediately
No disinfection method can save a sponge that’s already compromised. If your sponge meets any of the following criteria, toss it immediately instead of wasting time trying to disinfect it. Using a worn, moldy sponge to clean surfaces that contact ready-to-eat food is one of the fastest ways to spread foodborne illness in your home.
Even if the sponge looks only slightly damaged, hidden mold and bacteria can grow deep inside the porous material where rinsing can’t reach. Even with regular disinfection, sponge material breaks down over time, creating tiny crevices where bacteria can hide and avoid heat or chemical exposure.
- It has visible black, green, or white mold growth that won’t rinse off
- It’s tearing apart, leaving foam or cellulose bits on your dishes
- It has a permanent sour or rotten smell even after thorough washing
- It’s been in use for more than 1 to 2 weeks (per USDA food safety guidelines)
The USDA recommends replacing sponges every 1 to 2 weeks regardless of how often you disinfect them, as older sponges hold more bacteria even after treatment. For households with immunocompromised members, young children, or pets, replace sponges every week for maximum safety. Aggregate user reviews and manufacturer testing confirm that even properly disinfected sponges degrade significantly after 2 weeks of regular use, harboring more bacteria than they remove.
Tossing a worn sponge is a small cost to avoid cross-contaminating your dishes, cutting boards, and food prep surfaces with harmful pathogens like E. coli and Salmonella. For outdoor kitchen setups, proper outdoor kitchen framing includes dedicated covered drying stations for cleaning tools to avoid mold growth in humid, rainy conditions.
Disinfection Method Comparison: Which Option Fits Your Household’s Needs?
The best disinfection method balances effectiveness, safety, and convenience for your routine. Heat methods work best for standard sponges with no metal parts, as they need no chemicals and take under 5 minutes. Chemical soaks are ideal for households without microwave access, or for sponges that can’t withstand high heat.
EPA-approved disinfectants deliver the most consistent 99.9% pathogen kill rates for immunocompromised households or commercial spaces.
Microwaving is the fastest option for eligible sponges, taking 1 minute on high with a fully saturated sponge. It’s perfect for busy households, but fails for sponges with metal scouring pads, which can spark and catch fire. Boiling water works for all sponge types except melamine foam, which breaks down in prolonged high heat.
It’s a great backup for households without a microwave, though it takes 5 minutes per sponge.
Alternative cleaning tools: When to ditch sponges entirely
If you’d rather skip disinfection, durable non-porous tools eliminate the need for regular sanitization. Silicone scrubbers, stainless steel dish brushes, and Swedish dishcloths don’t absorb moisture or food particles like porous sponges do. They’re a smart pick for immunocompromised households, or for anyone who hates disinfection hassle.
For small kitchens, these compact tools reduce clutter and maintenance. Small kitchen layouts often prioritize multi-use tools that save space and simplify cleaning routines.

Image source: Web (Bing) / personalmaids.com.au (Web image (fair-use with source credit))
Common Disinfection Mistakes That Waste Time Or Create Serious Safety Risks
Most disinfection failures come from simple, avoidable mistakes that leave bacteria behind or create hazards. The most common error is microwaving a dry sponge. A dry sponge can overheat to 500°F in 30 seconds, causing sparks, smoke, or a kitchen fire.
Always saturate the sponge completely under running water before microwaving, and never leave it unattended while heating.
Using scented bleach leaves chemical residue on dishes and food surfaces, even after rinsing. Always use only unscented household bleach for soaks, and rinse thoroughly under hot running water for 30 seconds after soaking. Never mix bleach with vinegar, ammonia, or other cleaners, as this creates toxic chloramine gas that causes respiratory irritation.
Trying to disinfect a moldy, torn, or permanently odorous sponge wastes time and risks cross-contamination. Damaged sponges have deep crevices where bacteria hide from heat and chemicals, making full disinfection impossible. Toss these sponges immediately.
Storing damp sponges in closed containers after disinfection traps moisture and lets mold regrow within 24 hours. Always air dry sponges completely before storing.
Safety Rules And Official Compliance Standards For Sponge Disinfection
Official USDA and EPA guidelines set strict standards for sponge disinfection to prevent foodborne illness. All effective methods must achieve a 99.9% kill rate for common pathogens including E. coli, Salmonella, and Staphylococcus aureus, per EPA testing protocols. For commercial kitchens, OSHA and local health departments often require daily sponge replacement instead of disinfection, as high-volume use leads to faster breakdown and higher contamination risk.
USDA food safety guidelines recommend replacing household sponges every 1 to 2 weeks regardless of disinfection frequency, as older sponges harbor more bacteria even after treatment.
Bleach soaks must use a concentration of 1 tablespoon unscented bleach per 1 gallon of water, per EPA food-contact surface standards. Higher concentrations damage sponge material and leave harmful residue on dishes. After any bleach soak, rinse the sponge thoroughly under hot running water for 30 seconds to remove all chemical residue.
Never microwave sponges with any metal components, including built-in scouring pads, as even small amounts spark and cause fires.
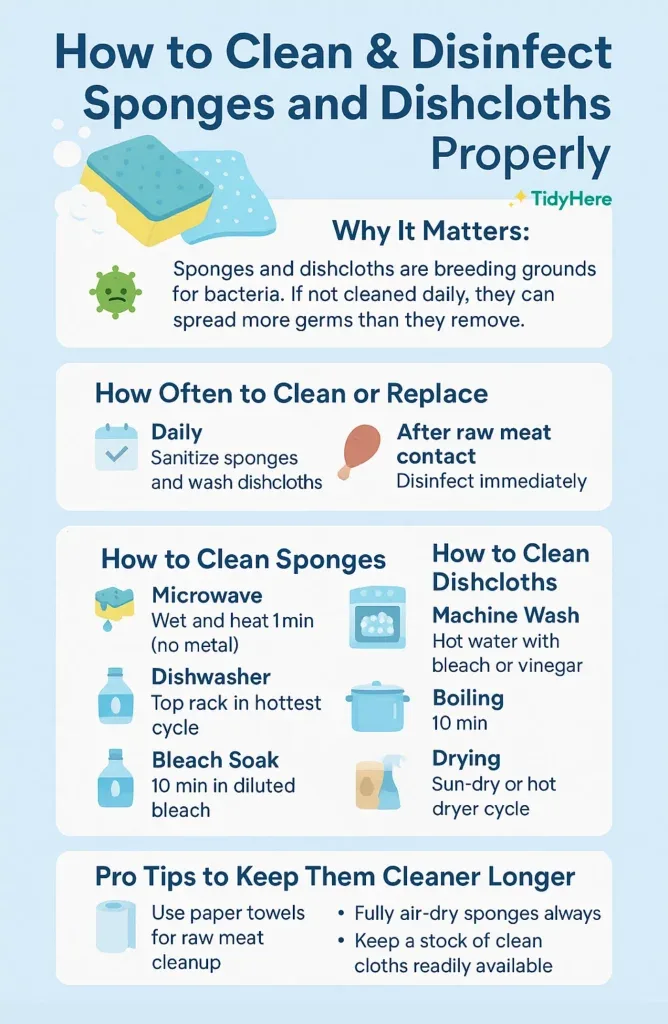
Image source: Web (Bing) / purekitchenstyle.com (Web image (fair-use with source credit))
Daily Habits To Keep Sponges Safe Between Disinfection Sessions
Proper daily habits reduce bacteria growth between disinfection and extend your sponge’s lifespan. After every use, wring out the sponge completely to remove excess moisture, as dampness drives bacterial and mold growth. Store the sponge in a well-ventilated holder that allows air circulation on all sides, not a closed caddy or wet sink bottom.
Avoid leaving sponges in standing water, which creates an ideal pathogen breeding ground.
Assign separate sponges for different tasks to avoid cross-contamination. Use one sponge for washing dishes, a second for wiping food prep surfaces, and a third for raw meat spills. Never use the same sponge for raw meat cleanup and dishwashing without disinfecting it first.
For households that cook raw meat frequently, disinfect the meat-cleaning sponge after every use, not just weekly. In humid climates, air dry sponges in a sunny spot, as UV light kills surface bacteria and speeds drying. For outdoor kitchen setups, store sponges in a covered, dry area to avoid rain and humidity that accelerate mold growth.
Outdoor kitchen design often includes dedicated covered tool storage to keep cleaning supplies dry.
Quick Reference Decision Guide: Build Your Custom Sponge Care Routine
Use this quick decision tree to build a sponge care routine in 30 seconds or less. First, assess your sponge’s condition: if it has visible mold, tears, or a permanent sour smell, toss it immediately, no disinfection needed. If it’s in good shape, check for metal scouring pads: if yes, use a diluted bleach soak, no heat methods allowed.
Next, check the base material: if it’s melamine foam, use a dishwasher high-heat cycle or 10-minute hydrogen peroxide soak, no boiling or microwaving. If it’s standard cellulose or synthetic, saturate fully with water and microwave on high for 1 minute, or boil for 5 minutes if you don’t have a microwave. After disinfection, air dry completely before storing.
Disinfect weekly for regular use, daily for raw meat cleanup, and replace every 1 to 2 weeks no matter how well you care for it.
Frequently Asked Questions
Can I disinfect a kitchen sponge with vinegar?
Vinegar is not an EPA-approved disinfectant for kitchen sponges. It reduces some bacteria and odors, but won’t kill 99.9% of common pathogens like E. coli and Salmonella. For effective disinfection, use heat methods or a diluted bleach soak per USDA guidelines.
How often should I disinfect my kitchen sponge?
Disinfect standard sponges at least once a week, or daily if you use it for raw meat or produce cleaning. Even with regular disinfection, replace sponges every 1 to 2 weeks per USDA recommendations, as material breakdown hides bacteria that disinfection can’t reach.
Is microwaving a kitchen sponge safe?
Microwaving is safe for standard cellulose or synthetic sponges with no metal components, as long as the sponge is fully saturated with water first. A dry sponge can overheat and catch fire in 30 seconds or less. Never microwave sponges with built-in metal scouring pads, as they can spark and start a fire.
Can I use hydrogen peroxide to disinfect a kitchen sponge?
Yes, 3% over-the-counter hydrogen peroxide works for all sponge types, including melamine foam. Soak the sponge fully for 10 minutes, then rinse thoroughly under hot running water. It’s a non-toxic alternative to bleach for households with kids or pets, and achieves a 99.9% pathogen kill rate per EPA Safer Choice testing.