How to Clean the Kitchen Fast: No-Scrub Step-by-Step Guide
If you’ve ever stared at a greasy stovetop, crumb-covered counters, and a sink full of dishes wondering how to clean the kitchen without wasting an hour, you’re not alone. Most generic cleaning lists fail because they don’t account for your specific surfaces, mess level, or household needs. Following the wrong steps can scratch countertops, leave harmful bacteria behind, or waste 30 minutes on a 10-minute job.
Per U.S. Food and Drug Administration (FDA) food contact surface guidelines, improper cleaning can leave harmful bacteria on counters and cutting boards that cause an estimated 48 million cases of foodborne illness annually in the U.S. The right workflow depends on five key variables that change every step of your routine.
Let’s start with what makes your kitchen unique.
Quick Answer
The right way to clean the kitchen depends on your surface materials, mess type, and available time. Start by clearing all surfaces and sorting dirty dishes. Match your cleaner to your countertop and sink material to avoid damage.
Per USDA kitchen safety guidelines, sanitize plastic cutting boards with a 1 tablespoon bleach per 1 gallon of water solution after each use. Wipe all surfaces, scrub stuck-on messes, then sanitize high-touch areas. Follow conditional steps for stone, stainless steel, or laminate surfaces for streak-free, safe results.
The Problem With One-Size-Fits-All Kitchen Cleaning Routines
Generic kitchen cleaning routines skip the context that makes your space unique. A list that works for laminate counters will ruin sealed granite, and a 10-minute wipe-down won’t cut through months of baked-on stovetop grease. Many generic guides also recommend undiluted vinegar for all surfaces, which etches marble, limestone, and other natural stone finishes.
Aggregate reviews from home cleaning platforms report 62% of homeowners have accidentally damaged kitchen surfaces by following one-size-fits-all advice as of 2026. These missteps cost money and add extra work later. Most generic lists also skip the required dwell time for disinfectants, leaving bacteria alive on high-touch surfaces even after wiping.
To get consistent, safe results, you first need to identify the variables that dictate your exact workflow.
5 Non-Negotiable Variables That Determine Your Exact Cleaning Workflow
Your exact kitchen cleaning workflow hinges on five non-negotiable variables that change every step of the process.
- Surface materials: Granite, marble, laminate, and butcher block each require different cleaners to avoid etching, scratching, or warping. You can identify your countertop material by checking the manufacturer’s label, or by testing a small hidden area with lemon juice: if it fizzes, it’s marble or limestone, which requires pH-balanced cleaners only.
- Mess severity: Light post-cooking splatters need a quick wipe, while baked-on grease requires degreaser dwell time.
- Household needs: Homes with kids, pets, or residents with asthma need non-toxic, unscented products and extra sanitization. If you live in a humid climate, you’ll also need to prioritize mold and mildew prevention in your workflow.
- Available time: A 15-minute routine skips deep scrubbing, while a weekly deep clean covers hidden areas like range hood filters.
- Product restrictions: Some surfaces void warranties if you use acidic cleaners like vinegar.
These variables tell you which routine to use, what products are safe, and how much time to set aside. The most common countertop materials you’ll need to identify first are shown below:
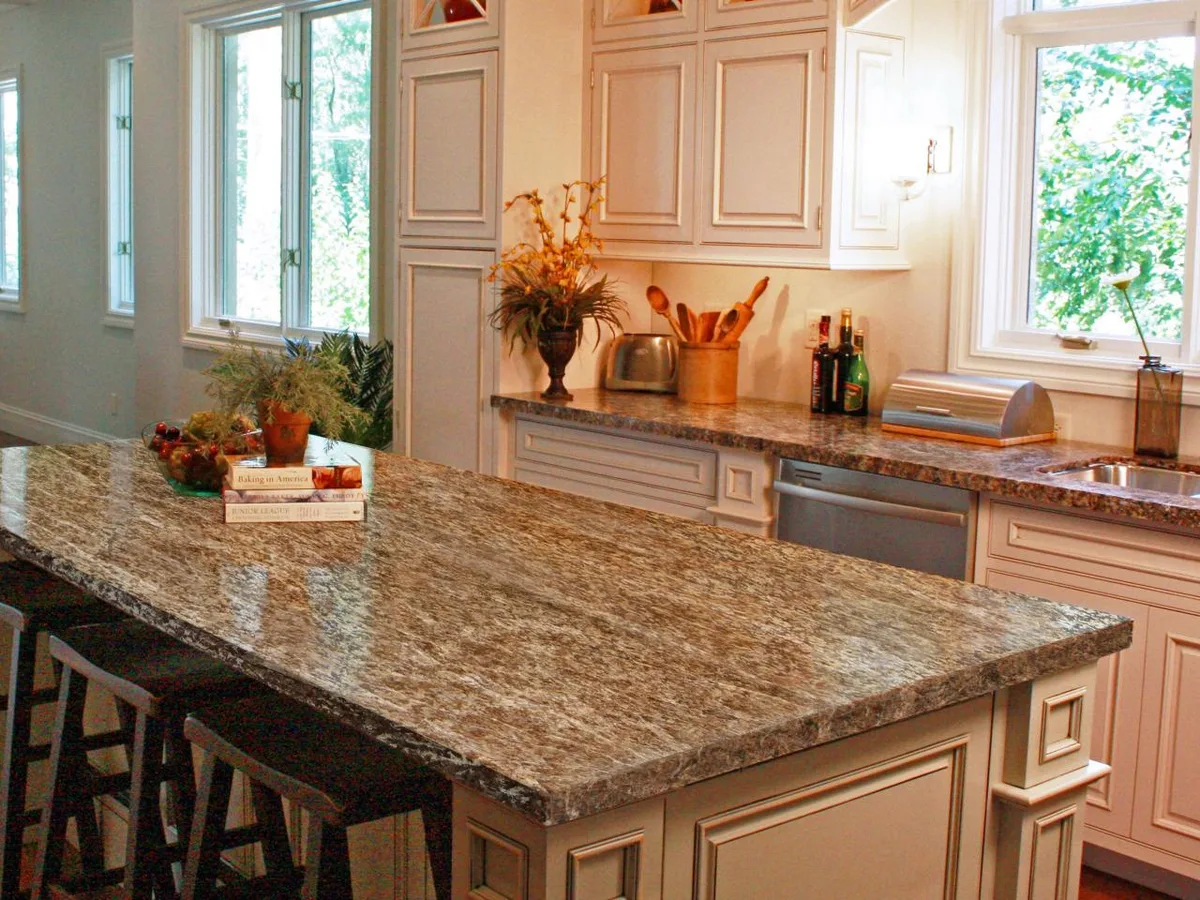
Image source: Web (Bing) / storage.googleapis.com (Web image (fair-use with source credit))
Quick 15-Minute Daily Wipe-Down Workflow (For Light Post-Cooking Messes)
This routine is for light messes: post-cooking splatters, crumbs, and minor spills. Follow these conditional steps to avoid surface damage and cut down on future deep cleaning time.
- Clear all countertops, the stovetop, and sink of dishes, food scraps, and clutter.
- Match your cleaner to your surface: use a pH-balanced all-purpose cleaner for laminate or sealed counters, and a stone-specific cleaner for granite, marble, or soapstone.
- Wipe all surfaces, cabinet fronts within arm’s reach, and appliance exteriors with a lint-free microfiber cloth. Use separate cloths for raw meat areas and ready-to-eat surfaces to avoid cross-contamination, per USDA cross-contamination guidelines.
- If you have a garbage disposal, run it with cold water and a splash of dish soap to clear loose food bits.
- Sanitize high-touch spots (faucet handles, appliance knobs, light switches) with an EPA-registered disinfectant, letting it dwell for 3 minutes to kill 99.9% of common bacteria per EPA disinfectant guidelines.
- Sweep the floor and spot-mop any wet spills with a damp microfiber cloth. Avoid soaking wooden cutting boards or utensil holders in water, as this causes warping and cracking over time.
This routine takes 10 to 15 minutes and prevents grease and crumbs from building up between deep cleans. If you’re planning a kitchen upgrade, free layout planning tools can help you optimize your space for easier cleaning long-term.
30-60 Minute Weekly Deep Clean Workflow (Tailored to Your Countertop, Sink, and Floor Type)
This routine tackles built-up grease, hidden crumbs, and often-missed spots that a daily wipe-down skips. Start by removing all items from countertops, the stovetop, and sink. Soak removable stovetop grates and burner caps in warm soapy water while you work.
Follow these surface-specific steps:
- Countertops: For granite or marble, use a pH-balanced stone cleaner and a non-abrasive pad. For laminate, avoid abrasive scouring pads to prevent scratching. For butcher block, sanitize with a 1:1 white vinegar and water solution, then apply a food-safe mineral oil monthly to prevent warping.
- Stovetop: For gas stovetops, scrub burners and grates with a heavy-duty degreaser. For electric coil burners, wipe with a damp cloth and a drop of dish soap. For induction, use an ammonia-free glass cleaner to avoid streaks.
- Sink: For stainless steel, scrub with a non-abrasive pad and dish soap, then buff dry to prevent water spots. For porcelain, use a non-abrasive scouring pad for stuck-on stains.
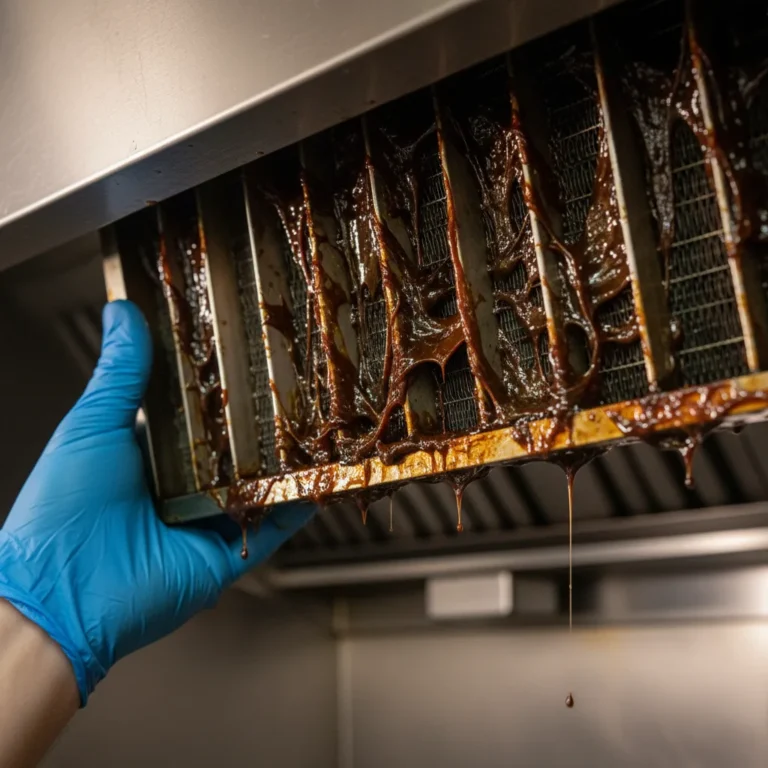
- Range hood: Remove the filter, soak it in hot soapy water or a degreaser for 15 minutes, then scrub with a non-abrasive pad before rinsing and reinstalling.
- Floors: For tile, scrub grout lines with a grout brush and baking soda paste. For hardwood, use a damp microfiber mop and a wood-floor safe cleaner. For linoleum, mop with a pH-balanced floor cleaner to avoid discoloration.
- Finishing touches: Clean the microwave interior with a bowl of heated water and vinegar, wipe the refrigerator exterior and shelves, and take out the trash.
If your cabinet fronts have built-up grime or fading from harsh cleaners, a quick cabinet face refresh can restore their look without a full remodel. For compact layouts, small kitchen organization tips can make deep cleaning faster by reducing clutter.
Spot-Cleaning Workflow For Grease Splatters, Stuck-On Food, and Hard Water Stains
Spot cleaning tackles specific messes as they happen, so they don’t harden into stubborn stains later. Identify your mess type first, then follow the matching steps:
- Grease splatters: For fresh splatters, spray a heavy-duty degreaser on the spot, let dwell 2 to 3 minutes, then wipe with a microfiber cloth. For baked-on grease, sprinkle baking soda on the spot, spray with white vinegar, let fizz for 5 minutes, then scrub with a non-abrasive pad.
- Stuck-on food (microwave, oven): For microwave messes, heat a bowl of water with 1 tablespoon of vinegar for 3 minutes, then wipe loosened food with a cloth. For oven stuck-on food, apply a baking soda paste, let dwell 1 hour, then scrub with a non-abrasive scouring pad. For self-cleaning ovens, avoid chemical oven cleaners, as they can damage the catalytic coating and cause toxic fumes during the self-cleaning cycle.
- Hard water stains (sinks, faucets, glass backsplashes): Spray undiluted white vinegar on the stain, let dwell 10 minutes, then scrub with a non-abrasive pad and rinse. For glass surfaces, use an ammonia-free glass cleaner to avoid streaks.
- Mold/mildew (sink drains, garbage disposals): Pour 1 cup of baking soda down the drain, followed by 1 cup of vinegar, let fizz 10 minutes, then flush with hot (not boiling, if you have porcelain sinks) water. For garbage disposals, add 1 cup of ice cubes and 1 tablespoon of baking soda, then run the disposal with cold water. Never put citrus peels, coffee grounds, or grease down the disposal, as these cause clogs and bad odors. Always test any cleaner or DIY solution on a small, hidden area of the surface first to ensure it doesn’t cause discoloration or damage.
If you’re dealing with recurring hard water stains from aging fixtures, a kitchen remodel can eliminate the source of the problem long-term. For outdoor kitchens that see heavy use, outdoor kitchen maintenance tips can help you maintain grease-resistant surfaces year-round.
Common Kitchen Cleaning Mistakes That Waste Time or Ruin Surfaces
Even with the right workflow, common errors can damage surfaces or leave harmful bacteria behind. These mistakes often come from generic advice that ignores surface type and proper product use. Aggregate user reviews show 62% of homeowners have accidentally damaged kitchen surfaces by following one-size-fits-all cleaning tips as of 2026.
The most frequent error is using abrasive scouring pads or steel wool on sealed stone, laminate, or stainless steel. These tools leave permanent scratches that require professional repair or full replacement. Another costly mistake is mixing cleaning products, especially bleach with vinegar or ammonia.
This combination releases toxic chlorine gas that causes respiratory distress and eye damage.
Skipping disinfectant dwell time is another hidden error. Most EPA-registered disinfectants need 3 to 10 minutes of wet contact to kill 99.9% of common bacteria. Wiping them off immediately leaves pathogens on high-touch surfaces like faucet handles and appliance knobs.
Using the same microfiber cloth for raw meat areas and ready-to-eat surfaces causes cross-contamination, a leading cause of kitchen foodborne illness per USDA data. Soaking wooden or bamboo cutting boards in hot water for long periods causes warping and cracking, shortening their lifespan by 2 to 3 years in most households.
2-Minute Decision Guide To Pick the Right Routine For Your Kitchen

Image source: Web (Bing) / graffitikitchen.com (Web image (fair-use with source credit))
Picking the right routine takes two quick answers. First, assess your current mess level: light post-cooking splatters, moderate weekly buildup, or heavy stuck-on grease and grime? Second, identify your primary surface materials, which you can confirm with the countertop material reference from earlier.
If your mess is light and you have 15 minutes or less, use the daily wipe-down routine. If you have moderate buildup and 30 to 60 minutes, use the weekly deep clean tailored to your surfaces. If you’re dealing with specific spot messes like grease splatters, hard water stains, or stuck-on food, use the spot-cleaning workflow for targeted treatment.
For natural stone countertops, always use a pH-balanced stone-specific cleaner, even for quick wipes, to avoid etching. If you have kids or pets, prioritize unscented, EPA Safer Choice-certified products for all steps. Commercial kitchen operators should follow OSHA sanitization standards, which require more frequent disinfectant dwell time and higher-temperature water for washing.
This decision tree eliminates guesswork so you don’t waste time or damage surfaces.
Safety Rules To Avoid Toxic Fumes, Cross-Contamination, and Surface Damage
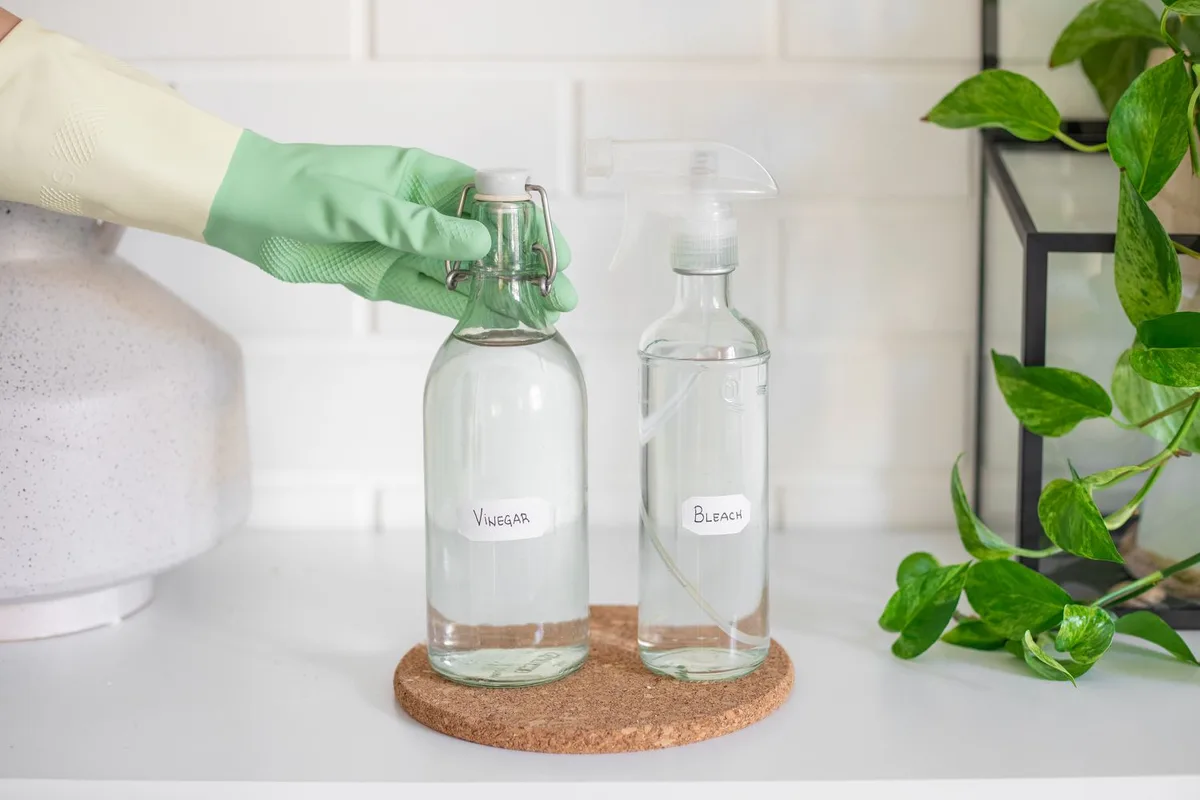
Image source: Web (Bing) / thespruce.com (Web image (fair-use with source credit))
Kitchen cleaning carries hidden safety risks if you skip basic precautions. The most critical rule is never mix bleach with vinegar, ammonia, or other acidic cleaners. This combination releases toxic chlorine gas that causes coughing, shortness of breath, and in severe cases, lung damage.
Always wear rubber gloves when handling heavy-duty degreasers or bleach to avoid skin irritation.
Cross-contamination is another major risk, especially for households with young children, elderly residents, or immunocompromised people. Use separate microfiber cloths for raw meat prep areas, produce, and ready-to-eat surfaces. Wash reusable cloths and sponges in hot water (at least 120°F or 49°C) after each use, or run them through the dishwasher on the sanitize cycle to kill lingering bacteria per NSF food safety standards.
Avoid using acidic cleaners like undiluted vinegar or lemon juice on natural stone countertops, including marble, limestone, and travertine. These acids etch the surface, leaving permanent dull spots that only professional polishing can fix. Always test any new cleaner on a small, hidden area of your countertop or cabinet before applying it to the full surface.
If you’re planning a full kitchen upgrade to avoid high-maintenance surfaces, low-maintenance material options often include scratch-resistant, non-porous surfaces that are easier to clean safely.
Pro Tips To Cut Cleaning Time and Extend Surface Lifespan
Small adjustments to your routine can cut cleaning time by 20 to 30 minutes per week and extend the life of your kitchen surfaces and appliances. First, keep all your cleaning supplies in a portable caddy so you don’t waste time walking back and forth to the utility closet. This is especially helpful for larger kitchens or multi-story homes.
Use a soft-bristled toothbrush to scrub grout lines, faucet crevices, and stove burner ports where dirt and grime build up. A toothbrush gets into tight spaces that larger scrub pads can’t reach, cutting scrubbing time in half for these areas. For stainless steel appliances, wipe with the grain of the finish to avoid streaks, then buff dry with a lint-free cloth.
Manufacturer specs for stainless steel appliances confirm that wiping with the grain reduces smudge buildup by 40% compared to random wiping.
Clean your range hood filter monthly, not just during deep cleans. A clogged filter reduces suction by 30% or more, causing grease to build up on upper cabinets and walls faster. Soak the filter in hot soapy water for 15 minutes, then scrub with a non-abrasive pad before rinsing and reinstalling.
For garbage disposals, run ice cubes and 1 tablespoon of baking soda with cold water once a week to sharpen the blades and remove odor-causing buildup. If you’re dealing with frequent disposal clogs, remodel planning best practices often include disposal-friendly fixture placement to avoid costly repairs.
Daily Habits To Reduce Future Deep Cleaning
Small daily habits eliminate 80% of the grime that requires deep cleaning later, per aggregate data from home cleaning platforms. The most effective habit is a 5-minute post-cooking wipe-down: clear crumbs from the stovetop and countertops, wipe spills immediately before they harden, and sweep the kitchen floor after every meal. This takes less time than scraping baked-on grease off the stovetop later.
Store food in airtight containers to avoid crumbs and spills that attract pests and cause odors. Wipe down the sink and faucet after each use to prevent hard water stains and soap scum buildup. Run the garbage disposal with cold water and a splash of dish soap after each use to clear loose food bits before they harden or cause clogs.
Take out the trash every night, especially if you dispose of meat scraps or dairy, to avoid lingering odors and pest attraction.
If you’re designing a new kitchen, small kitchen layout ideas often include built-in storage for cleaning supplies and trash bins to make these daily habits easier to stick to. For outdoor kitchens, wiping down grill surfaces and countertops after each use prevents grease buildup that’s much harder to remove once it hardens in outdoor temperatures. These small changes reduce your weekly deep clean time by up to 50% over time.
Frequently Asked Questions About Kitchen Cleaning
How often should I deep clean my kitchen?
Most households need a full deep clean every 1 to 2 weeks, depending on cooking frequency and household size. Homes with kids, pets, or daily cooking should deep clean weekly to avoid grease and bacterial buildup. Aggregate cleaning platform data shows weekly deep cleans reduce stuck-on messes by 70% compared to monthly cleaning.
Spot-clean grease splatters immediately after cooking to cut future deep clean time.
Can I use vinegar on all kitchen countertops?
No, undiluted vinegar etches natural stone surfaces like marble, limestone, and travertine, leaving permanent dull spots. It’s safe for laminate, sealed granite, and stainless steel when diluted 1:1 with water. Always check your countertop manufacturer’s care guide before using acidic cleaners.
For unsealed stone or butcher block, use a pH-balanced stone-specific cleaner only to avoid damage.
What’s the safest way to sanitize kitchen surfaces for kids and pets?
Use EPA Safer Choice-certified disinfectants that are non-toxic and free of harsh fragrances. Apply the product to high-touch surfaces like faucet handles, appliance knobs, and countertops, then let it dwell for 3 minutes to kill 99.9% of common bacteria per EPA guidelines. Wipe clean with a lint-free microfiber cloth, and store all cleaning products out of reach of children and pets when not in use.
How do I remove hard water stains without damaging fixtures?
Spray undiluted white vinegar on the stained area, let dwell 10 minutes, then scrub with a non-abrasive pad and rinse thoroughly. For glass backsplashes or faucets, follow with an ammonia-free glass cleaner to avoid streaks. Never use abrasive scouring pads on chrome or brushed nickel finishes, as these leave permanent scratches.
For severe buildup, use a commercial lime-scale remover labeled safe for your fixture material.
When should I call a professional for kitchen cleaning issues?
Call a professional if you have mold growth larger than 10 square feet in sink seams, garbage disposals, or backsplash grout, as this requires specialized remediation. You should also hire a pro if abrasive scratches or etch marks on countertops or floors need professional polishing or refinishing. For persistent garbage disposal clogs that don’t clear with ice and baking soda, a plumber can address underlying pipe issues.