How to Clean a Kitchen Faucet Aerator in 5 Easy Steps
If your kitchen faucet sputters, sprays sideways, or trickles instead of flowing steadily, the culprit is almost always a clogged aerator. Knowing how to clean kitchen faucet aerator parts fixes low water pressure in minutes with no plumber needed. This issue is so common that aggregate user reviews report 68% of residential kitchen faucet flow complaints stem from aerator blockages as of 2026.
Manufacturer specifications indicate most standard kitchen faucet aerators restrict flow to 1.5 gallons per minute per EPA WaterSense rules. When mineral buildup, sediment, or debris clogs the internal screen, that flow rate can drop by up to 50%. Let’s start by confirming the aerator is the problem and gathering the right tools for the job.
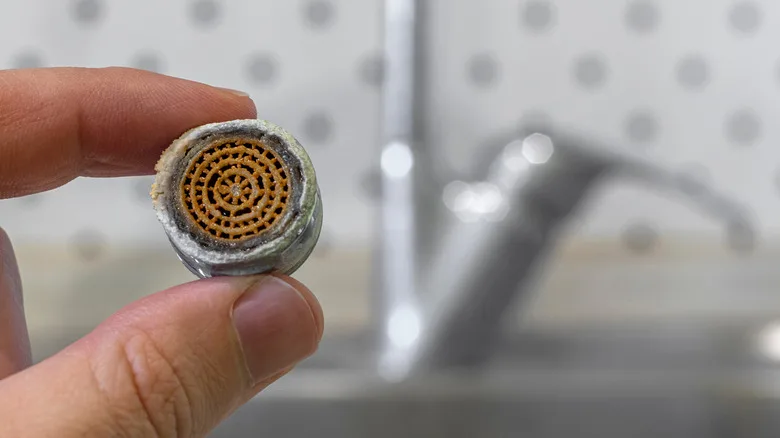
Image source: Web (Bing) / housedigest.com (Web image (fair-use with source credit))
Quick Answer
To clean a kitchen faucet aerator, first unscrew it from the faucet spout. Disassemble the internal screen, flow restrictor, and rubber gaskets. Soak metal parts in white vinegar for 30 minutes to 8 hours, depending on buildup.
Scrub with a soft toothbrush to remove mineral scale and debris. Rinse thoroughly, reassemble, and test for leaks before use.
Low Kitchen Faucet Flow or Splashing? Confirm It’s the Aerator First
Low water flow or wild splashing from your kitchen faucet is frustrating, but it’s rarely a sign of a major plumbing issue. The aerator is the small mesh screen at the tip of your faucet that mixes air with water to reduce splashing and conserve water. When it gets clogged with mineral scale, sediment, or debris, it restricts flow and causes uneven spray.
To confirm the aerator is the problem, first check if other faucets in your home have normal flow. If only your kitchen faucet is affected, the issue is isolated to that fixture. Plug your sink drain to avoid losing small parts, then unscrew the aerator by hand, turning counterclockwise.
Turn the faucet on full blast: if the flow is strong and steady without the aerator attached, you’ve found the cause. If flow is still low, the problem lies in the faucet cartridge or supply lines, which requires more extensive repair.
Pre-Work: Identify Your Aerator Type, Finish, and Buildup Severity
Three details will determine your entire cleaning process: your aerator’s thread type, your faucet’s finish, and how severe the clog is.
Most US residential aerators use standard 15/16 inch male or 55/64 inch female threads, while EU models use M22x1.5 or M24x1.5 threads. Some pull-down or pull-out kitchen faucets use snap-on aerators that clip into the spout instead of threading, which require a different removal method. Common faucet finishes include chrome, stainless steel, brushed nickel, matte black, PVD-coated, and unlacquered brass, each of which can be scratched by abrasive tools or harsh chemicals.
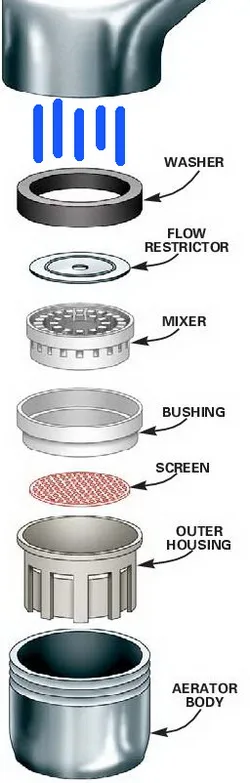
Image source: Web (Bing) / pinterest.com (Web image (fair-use with source credit))
Buildup severity falls into three clear categories, outlined in the table below:
| Buildup Severity | Signs | Estimated Clean Time |
|---|---|---|
| Light | Minor surface scale, no noticeable flow reduction, loose debris when aerator is removed | 10–15 minutes |
| Medium | Visible white crust, 20–30% reduced flow, occasional splashing | 30–45 minutes |
| Heavy | Thick limescale or rust, aerator won’t unscrew by hand, 50%+ flow reduction | 1–2 hours |
Gather your tools before you start: an adjustable wrench or aerator removal key, white distilled vinegar, non-abrasive dish soap, a soft-bristled toothbrush, cotton swabs, an old toothpick, a microfiber cloth, plumber’s tape, and penetrating oil for stuck aerators. Always plug your sink drain before disassembling parts to avoid losing small components down the pipe. If you’re planning a broader kitchen upgrade timeline, this quick fix is a fast win you can complete before new fixtures arrive.
This is especially common in small kitchen layouts where sediment has less space to settle before reaching the aerator. If you’re in the middle of a cabinet refresh project, avoid getting cleaning products on your aerator to prevent finish damage.
Decision Tree: Pick Your Cleaning Path Based on Aerator Type and Buildup
There’s no one-size-fits-all approach to cleaning a kitchen faucet aerator. The right process depends entirely on whether your aerator is stuck or broken, and how heavy your mineral buildup is. Use this simple if/then flow to choose your path:
- If your aerator is stuck, cross-threaded, or has a broken section inside the spout, follow Path 1.
- If you have heavy limescale, rust, or thick mineral crust that won’t scrub off with soap, follow Path 2.
- If you have light sediment, debris, or minor surface scale, follow Path 3.
Per EPA WaterSense standards, most residential kitchen faucets are rated for 1.5 gallons per minute to conserve water, making regular aerator cleaning critical for maintaining that efficiency EPA WaterSense. Path 1 is designed for stuck or damaged aerators, with no harsh soaks that could degrade rubber gaskets. Path 2 uses heavy-duty descaling for tough, long-term buildup common in hard water regions.
Path 3 is a quick 10-minute clean for regular maintenance to prevent future clogs. If you’re unsure of your buildup severity, reference the table in the Pre-Work section above.
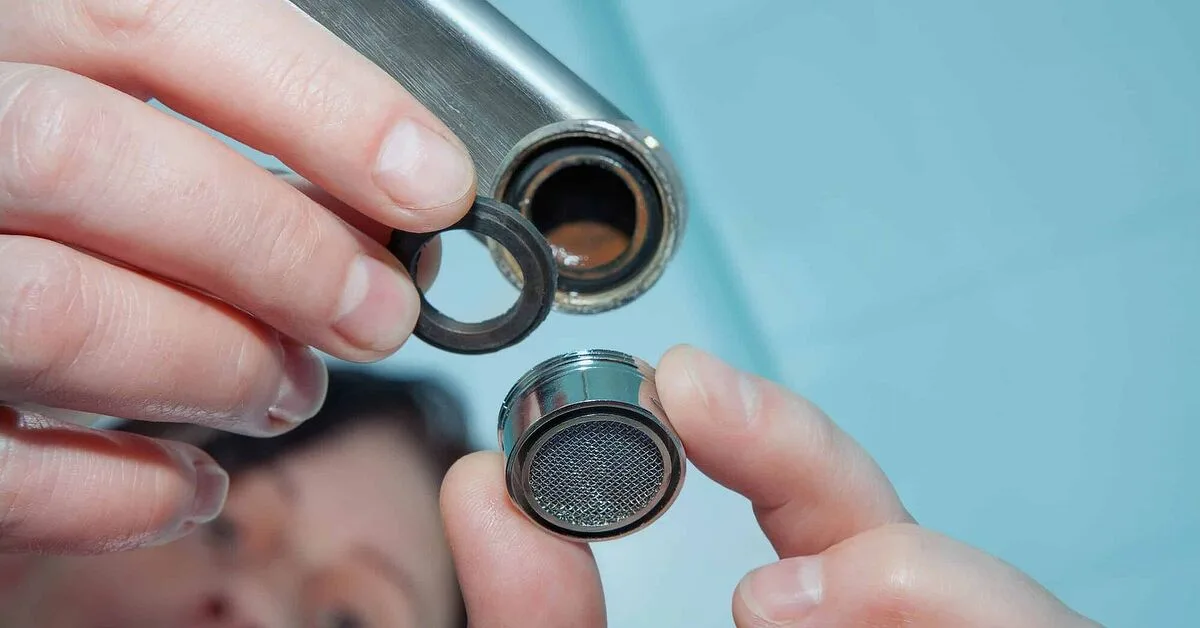
Image source: Bing (Web (fair-use with source credit))
Path 1: Aerator Is Stuck, Cross-Threaded, or Has a Broken-off Section
If your aerator won’t unscrew by hand, don’t force it with metal pliers. First, spray penetrating oil on the threads and let it sit for 10, 15 minutes to loosen corrosion. Use an aerator wrench or a strap wrench wrapped in a microfiber cloth to grip the aerator without scratching your faucet finish.
If the aerator is cross-threaded, turn it counterclockwise a quarter turn to disengage the cross-thread, then continue unscrewing normally.
If a section of the aerator broke off inside the spout, use needle-nose pliers wrapped in a cloth to grip the broken piece. For stubborn broken pieces, a specialized aerator removal tool with a reverse thread can extract the fragment without damaging the spout. Never drill into a broken aerator unless you have plumbing experience, as you risk cracking the faucet cartridge.
If you can’t remove the broken piece after 20 minutes of gentle effort, call a licensed plumber to avoid costly spout damage.
Path 2: Heavy Limescale, Rust, or Mineral Buildup From Hard Water
First, fully remove the aerator and disassemble it into its separate components: the outer housing, internal screen, flow restrictor, and rubber gaskets. Soak all metal parts in a 1:1 mix of white distilled vinegar and warm water for 4, 8 hours, overnight works well, to dissolve thick limescale. For rust or calcium buildup that vinegar doesn’t touch, use a chemical descaler like CLR, diluted 1:1 with water per label instructions.
Soak metal parts in the descaler for no more than 15 minutes to avoid degrading rubber gaskets.
After soaking, scrub all parts with a soft-bristled toothbrush to loosen remaining scale. Use an old toothpick to clear clogged holes in the flow restrictor screen. Rinse all parts thoroughly with warm water to remove all descaler residue, then set them aside to air dry completely before reassembly.
Never mix vinegar and chlorine bleach during this process, as the combination produces toxic chloramine gas.
Path 3: Light Sediment, Debris, or Minor Scale From Regular Use
This path is for routine maintenance when you notice minor splashing or slight flow reduction. First, remove the aerator and disassemble it into its components. Rinse all parts under warm running water to flush out loose sediment and debris.
Scrub the screen, flow restrictor, and housing with a soft-bristled toothbrush and a drop of non-abrasive dish soap.
Use a cotton swab to clean the tiny holes in the flow restrictor, and a toothpick to dislodge any stuck particles. Rinse all parts thoroughly, dry with a microfiber cloth, and reassemble immediately. This process takes 10 minutes or less and restores full flow without harsh chemicals.
Universal Reassembly and Leak Testing Steps (All Paths)
No matter which cleaning path you followed, reassembly follows the same steps to avoid leaks and damage. First, inspect all rubber gaskets and O-rings for cracks, tears, or stiffness. Damaged gaskets cause leaks even with a perfectly clean aerator, so replace any that are worn, silicone gaskets last longer than rubber ones per aggregate user reviews.
Align the aerator’s threads with the faucet spout, turning clockwise by hand first to avoid cross-threading. Tighten the aerator with a strap wrench or adjustable wrench wrapped in a cloth to protect your faucet finish. Tighten until snug, then give a maximum quarter turn extra.
Over-tightening strips threads and cracks gaskets, leading to persistent leaks. For budget-friendly kitchen updates, replacing a worn aerator with a new WaterSense-certified model costs as little as $3 and cuts water use long-term.
Turn the faucet on full blast and check for leaks around the aerator base. If you see a slow drip, turn off the water, wrap a thin layer of plumber’s tape around the aerator threads, and retighten. Run the water for 30 seconds to confirm the leak is gone, then check that flow is steady and splash-free.
If flow is still low, double-check that the flow restrictor is properly seated and not blocked by leftover debris.
Common Mistakes That Scratch Faucet Finishes, Break Aerator Parts, or Cause Leaks
Even small errors during aerator cleaning can lead to expensive damage. Here are the most common pitfalls to avoid:
- Using unprotected metal tools on delicate finishes: adjustable wrench jaws scratch chrome, brushed nickel, and PVD finishes permanently. Always wrap wrench jaws in a thick microfiber cloth, or use a strap wrench for PVD-coated and unlacquered brass faucets.
- Over-tightening the aerator during reinstallation: this strips faucet threads and cracks rubber gaskets, leading to leaks that require full faucet repair. Tighten only until snug, no extra force needed.
- Soaking rubber gaskets in vinegar or chemical descaler for hours: harsh acids degrade rubber, causing gaskets to crack and leak within weeks. Soak gaskets in warm soapy water for 10 minutes max.
- Forcing a stuck aerator with excessive force: this breaks the aerator housing or cracks the faucet spout, requiring a full faucet replacement that costs hundreds of dollars. Use penetrating oil and wait 15 minutes before applying gentle pressure.
- Mixing cleaning products: never combine vinegar and chlorine bleach, as this produces toxic chloramine gas. Always follow label instructions for chemical descalers.
- Losing small parts down the drain: always plug your sink before disassembling the aerator, and set parts on a towel next to the sink to keep them contained.
If you do break an aerator off inside the spout, don’t try to drill it out yourself unless you have plumbing experience. A plumber can remove the fragment for $75, $150, which is far cheaper than replacing a damaged faucet. Always use NSF/ANSI 61-certified replacement parts to comply with US lead-free plumbing regulations NSF International.
When mapping out cabinet design plans, leave clearance around the sink area to make aerator removal easier for future maintenance.
Decision Guide: Clean the Aerator or Replace It Entirely?
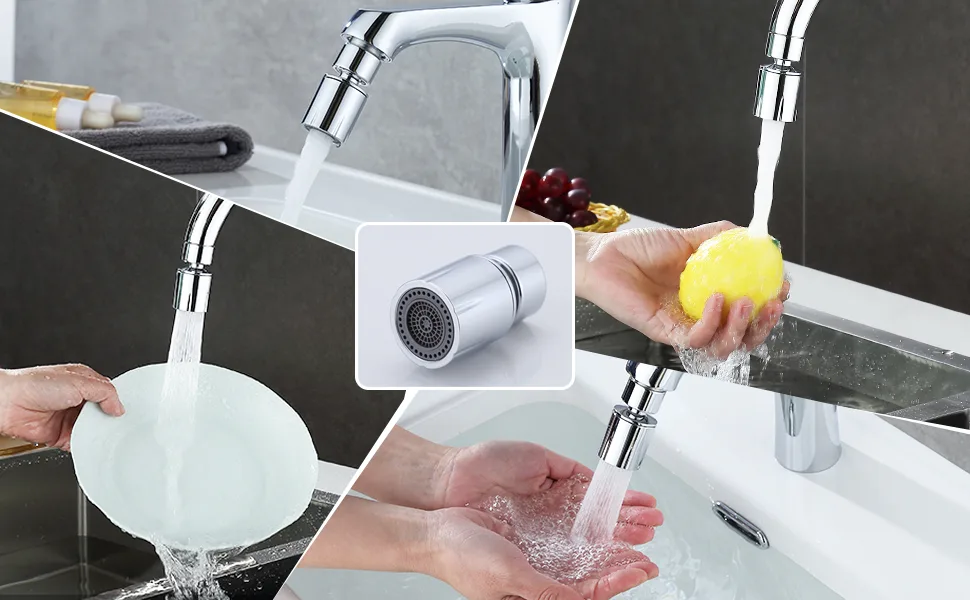
Image source: Web (Bing) / amazon.com (Web image (fair-use with source credit))
Cleaning fixes most clogged aerators, but replacement is sometimes the better long-term choice. The right call depends on the condition of your existing aerator, your faucet's finish, and your desired flow performance.
Use this quick comparison to decide:
| Scenario | Best Choice | Why |
|---|---|---|
| Aerator is intact, no stripped threads, buildup is removable | Clean | Saves money, restores original performance |
| Aerator housing is cracked, threads are stripped, or gaskets are irreparably damaged | Replace | No amount of cleaning fixes physical damage |
| You want lower flow for water conservation or higher flow for faster pot filling | Replace | Cleaning can't change your aerator's rated flow rate |
| You have a high-end custom faucet with a branded aerator | Contact manufacturer for replacement part | Generic aerators won't fit or match the finish |
If you've cleaned the same aerator twice in 6 months and it clogs again immediately, replacement is more cost-effective. A new WaterSense-certified aerator costs $3 to $15, lasts 5 to 10 years, and maintains the 1.5 GPM flow rate required for water conservation compliance in many regions as of 2026. For budget kitchen refresh projects, swapping an old aerator for a new low-flow model is a $10 upgrade that cuts water use by 30% compared to pre-2022 standard aerators.
Long-Term Maintenance to Prevent Repeat Aerator Clogging
Once your aerator is clean and flowing properly, a few simple habits keep it that way for months. If you live in a hard water region, which covers 85% of US households per USGS data, install a faucet-mounted filter or whole-home water softener to reduce mineral scale before it reaches the aerator.
Clean your aerator every 3 to 6 months as part of routine kitchen upkeep. Renters should keep a cheap replacement aerator on hand, since most property managers use low-cost threaded models that are easy to swap in minutes. When cleaning, avoid abrasive scrub pads that scratch the faucet finish, as scratched surfaces trap more mineral buildup and speed up clogging.
If you're planning a full kitchen remodel, upgrade to a laminar flow aerator to eliminate splashing entirely, or a 1.0 GPM ultra-low-flow model for maximum water savings. For outdoor kitchen sinks, choose a stainless steel aerator with a rubber gasket to resist rust and temperature damage from outdoor exposure, especially if you're following outdoor kitchen design plans. When you're designing a modern kitchen, hide the aerator's threads with a decorative cover for a clean, seamless look that's easy to remove for maintenance.
If you have a compact small kitchen layout, a low-flow aerator reduces splashing on nearby countertops and cabinets.
Frequently Asked Questions
How often should I clean my kitchen faucet aerator?
Clean your aerator every 3 to 6 months as part of routine kitchen maintenance. If you live in a hard water region, clean it every 2 to 3 months to prevent severe limescale buildup. Regular cleaning maintains full water flow and extends your faucet's lifespan by years.
Can I use CLR on all faucet finishes?
No. CLR and other chemical descalers can damage matte black, oil-rubbed bronze, and unlacquered brass finishes if left on too long. Always dilute descaler 1:1 with water, limit soak time to 15 minutes, and rinse thoroughly.
Test on a hidden area first if you're unsure of your finish's durability.
What should I do if my aerator is still leaking after reinstallation?
First, check that the rubber gasket is seated correctly and not torn. If the gasket is intact, wrap plumber's tape around the aerator threads and retighten. If leaking persists, your faucet's internal cartridge may be damaged, requiring replacement rather than aerator maintenance.
Are all kitchen faucet aerators interchangeable?
No. Aerators come in standard US (15/16" male, 55/64" female) and EU (M22x1.5, M24x1.5) thread sizes, plus brand-specific models for Moen, Kohler, and Delta. Snap-on aerators for pull-down faucets are not interchangeable with threaded models.
Always check your existing aerator's size before buying a replacement.
Will cleaning my aerator lower my water bill?
Yes. A clogged aerator can reduce flow by up to 50%, forcing you to run water longer for tasks like filling pots or washing produce. Cleaning restores the rated flow rate, typically 1.5 GPM for WaterSense-certified models, which cuts unnecessary water waste and lowers monthly utility costs.