How to Clean Your Kitchen Exhaust Fan Fast (No Elbow Grease)
If you’ve ever stared at greasy film caked on your kitchen exhaust fan and wondered how to clean kitchen exhaust fan without ruining the finish or breaking a fastener, you’re not alone. Grease accumulation cuts suction, leaves cooking odors stuck in your kitchen, and triples your risk of a grease fire per NFPA 96 testing. Most homeowners put this chore off until the fan rattles or barely moves air, which makes the job far harder than it needs to be.
Aggregate reviews show the average DIY cleaning takes 45 to 90 minutes, but only if you start by identifying your fan’s configuration. Grease buildup thicker than 1/8 inch triggers a sharp spike in fire risk, per National Fire Protection Association guidelines. We’ll walk you through the full safe process, starting with a 60-second visual check to confirm your fan type.

Image source: Bing (Web (fair-use with source credit))
Quick Answer
Turn off power to the fan at your breaker first. Remove the grease filters and soak them in hot degreaser. Scrub all grease off the fan blades and housing.
Reinstall filters and test the fan for full suction. Clean filters monthly and the full unit quarterly to prevent fire risk.
First: Identify Your Exhaust Fan Type With a 60-Second Visual Check
Your exhaust fan’s configuration changes every step of the cleaning process, so you need to ID it before you grab tools. The image below shows the three most common residential models side by side.

Image source: Web (Bing) / megafurniture.sg (Web image (fair-use with source credit))
Under-cabinet range hoods mount directly under wall cabinets, with filters that drop down or slide out from the bottom. Over-the-range (OTR) microwaves double as exhaust fans, with filters that slide out from the top or front of the microwave cavity. Wall-mounted range hoods attach directly to the wall above your stove, with filters that typically tilt forward to release.
If your unit recirculates air instead of venting outside, it will have a charcoal filter behind the main grease filter that can’t be washed.
If you’re in the middle of a kitchen layout planning project, your hood type will also impact your cabinet clearance requirements. If your filters drop down from the bottom of the unit, you have an under-cabinet model. If filters slide out from the front of a microwave, it’s an OTR combo.
If filters tilt forward from a wall-mounted hood, that’s your third type.
Key Fan Components to Locate Before You Start Cleaning
Before you touch a single screw, locate all the components you’ll be cleaning to avoid missed spots or accidental damage. The main parts to find are:
- Grease filters: The metal or mesh screens that catch cooking grease before it enters the duct or motor. These are the most frequently cleaned part.
- Fan blades: The rotating blades that pull air through the hood, usually hidden behind the filters.
- Grease trap: A small reservoir at the bottom of the hood housing that catches dripping grease, often removable for emptying.
- Exhaust duct opening: The port where air exits the hood, either leading outside or to a recirculating charcoal filter.
- Motor housing: The sealed compartment that holds the fan motor, which you should never spray liquid directly onto.
Also, locate your home’s breaker panel before you start, so you can cut power to the fan if you need to remove the housing to access internal parts. If your hood is hardwired instead of plug-in, you’ll need to turn off the dedicated circuit at the breaker to avoid electric shock. If you have an outdoor kitchen exhaust fan, the components are identical, but you’ll need to account for weather exposure when cleaning.
Under-cabinet models sit directly below upper kitchen cabinet runs, so you’ll need to clear the space below the cabinet to access the filters.
Critical Safety Precautions (With Visual Confirmation Steps)
Skipping safety steps can lead to electric shock, water damage to the fan motor, or even a grease fire. Follow these non-negotiables before you start:
- Cut power to the exhaust fan at your home’s breaker panel, even if the fan is controlled by a wall switch. Verify the fan won’t turn on before touching any internal parts.
- Wear rubber gloves and safety glasses to avoid skin contact with old, bacteria-laden grease.
- Never spray liquid cleaner directly onto the fan motor, wiring, or electrical connections. Liquid can short out the motor or cause corrosion over time.
- Place an old towel or drop cloth under the hood to catch dripping grease, so you don’t get it on your stove or countertops.
- If you smell gas or see heavy grease buildup thicker than 1/8 inch, stop cleaning and contact a professional hood cleaning service, per NFPA 96 ventilation safety standards. The National Fire Protection Association reports that 1 in 5 kitchen grease fires start from poorly maintained exhaust fans as of 2026.
Pre-Cleaning: Tools and Supplies You’ll Actually Need
You don’t need specialty equipment to clean your exhaust fan properly. Most tools are already in your kitchen. The table below lists what you’ll need, and what you can skip:
| Tool/Supply | Required? | Notes |
|---|---|---|
| Screwdriver (Phillips or flathead) | Yes | For removing filter fasteners |
| Hot water | Yes | For degreaser soak, 100–120°F works best |
| Liquid dish soap or commercial kitchen degreaser | Yes | Avoid abrasive cleaners on stainless steel |
| Soft scrub brush or non-scratch sponge | Yes | For scrubbing filters and housing |
| Old towels or drop cloth | Yes | To catch grease drips |
| Wet/dry vacuum with brush attachment | Optional | For cleaning out the exhaust duct |
| Rubber gloves and safety glasses | Yes | To avoid skin and eye contact with grease |
Skip steel wool and harsh oven cleaners, as they will scratch stainless steel hood finishes and damage filter coatings. Most aggregate user reviews report that mild degreasers work just as well as heavy-duty chemical products for routine cleaning. Small kitchens with limited ventilation often see faster grease buildup, so if you’re working with a compact kitchen layout, you may need to clean your filters more often than the standard monthly schedule.
Step 1: Remove Exhaust Filters (Visual Fastener Guide)
Removing the filters is the first physical step of the process, and the fasteners will be one of two common types, as shown in the image below.
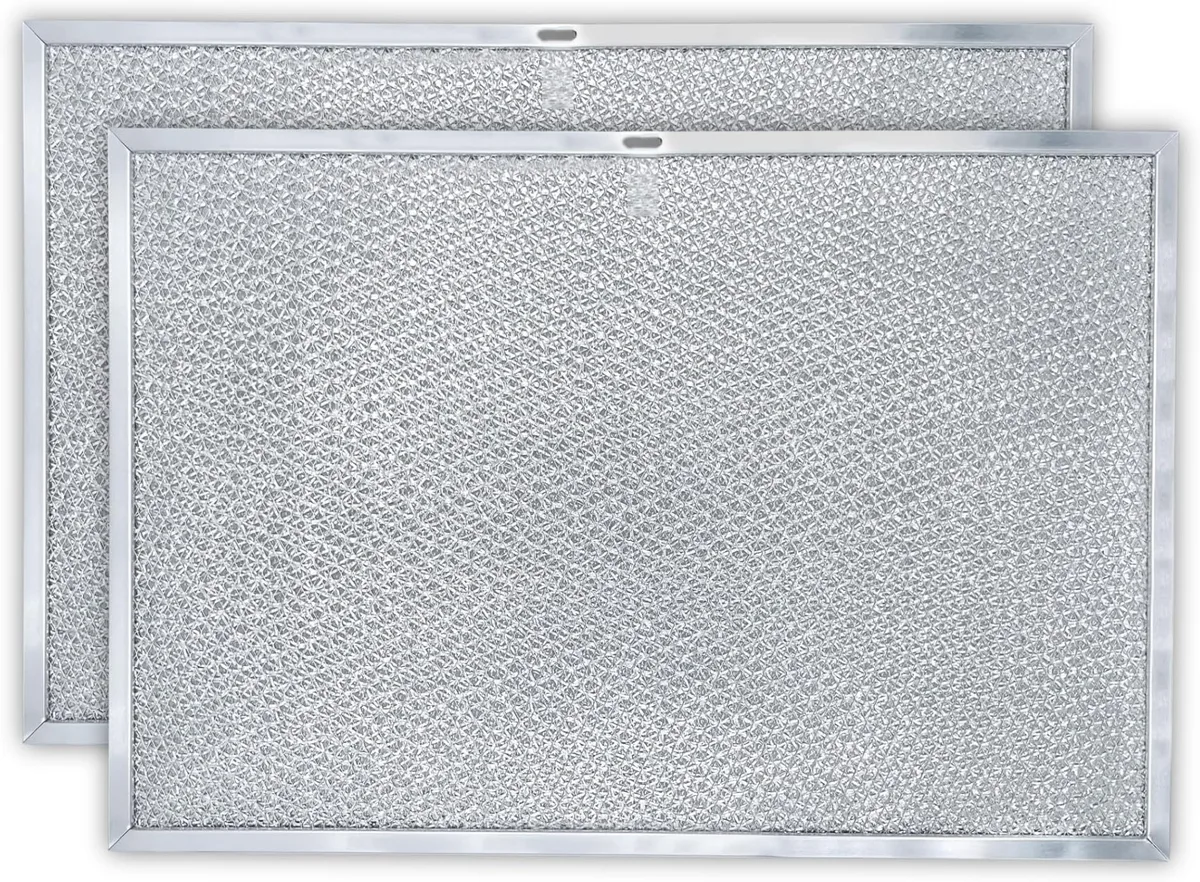
Image source: web (amazon.ca)
Most filters use either snap-on fasteners or screw-secured mounts. For snap-on filters: press the release tabs on the sides of the filter, then pull the filter straight out toward you. For screw-secured filters: use a screwdriver to remove the mounting screws, then tilt the filter down or forward to free it from the slots.
If your filter is stuck, don’t force it. Check for hidden fasteners or built-up grease locking it in place, and use a putty knife to gently pry it loose if needed. Set the removed filters in a sink or tub to avoid dripping grease on your floors.
If you’re mid-kitchen renovation project, this is also a good time to check if your filter slots are bent or damaged, and replace them if needed.
Step 2: Clean Filters (Type-Specific Methods and Visual Grease Checks)
Your filter type dictates exactly how you clean it. Baffle and mesh filters are reusable, while activated charcoal filters are single-use only. Soak metal filters in a sink full of hot, soapy water for 15 to 30 minutes to loosen caked-on grease.
For heavier buildup, add a splash of commercial kitchen degreaser to the soak water. Scrub both sides of the filter with a soft brush, then rinse thoroughly under hot running water.
Hold the filter up to a bright light to check for remaining grease. If you can’t see light through the mesh, it still needs more scrubbing. Most stainless steel baffle filters are dishwasher safe, but only if you place them on the top rack and turn off the heated dry cycle.
High heat from the dishwasher can warp thin mesh filters over time.
Can I wash my activated charcoal filter?
No. Activated charcoal filters trap odors and fine particulates, but the carbon media breaks down when wet. These filters cannot be washed or reused.
Manufacturers specify a replacement interval of 3 to 6 months for most residential units. If your hood recirculates air, you’ll find the charcoal filter behind the main grease filter when you pull the filter assembly out. Replace it with an identical size and model to maintain proper airflow.
If you’re designing a modern kitchen with integrated ventilation, ask your cabinet supplier about accessible filter slots to make this replacement faster.
Step 3: Clean the Fan Housing, Blades, and Duct Opening (Visual Buildup Guide)
With filters removed, you can now access the fan blades, housing interior, and exhaust duct opening. Grease here is often thick and sticky, so work slowly to avoid spreading it around. Start by wiping out the grease trap at the bottom of the housing, then dump the collected grease in the trash.
Never pour used grease down the drain, as it will solidify and clog your pipes.
Spray a small amount of degreaser onto a soft cloth or sponge, not directly onto the fan motor or wiring. Wipe down the interior walls of the housing, then clean each fan blade individually. Grease on fan blades causes imbalance and loud rattling, so make sure you remove every trace.
If your fan has a visible exhaust duct opening, use a flexible duct brush to reach 1 to 2 feet inside the duct to knock loose accumulated grease. For longer ducts, attach a wet/dry vacuum to the end of the brush to pull out loosened debris. If you’re working on a kitchen remodel with new ductwork, this is a good time to check for loose duct connections or gaps that let grease leak into wall cavities.
What if I see mold in the duct?
If you spot black or green mold growth inside the duct or housing, stop cleaning immediately. Wear a N95 mask to avoid inhaling spores, and contact a professional remediation service. Disturbing mold can spread it through your kitchen air and cause respiratory issues.
Step 4: Wipe Down the Exterior Hood (Material-Specific Visual Cues)
The exterior of your hood gets splattered with grease too, but cleaning method depends on the finish. Stainless steel hoods need a gentle touch to avoid scratching. Spray a small amount of glass cleaner or stainless steel polish onto a microfiber cloth, then wipe with the grain of the metal.
Avoid abrasive cleaners, steel wool, or scouring pads, as these will leave permanent swirl marks.
Tempered glass hoods are easier to clean: use any standard glass cleaner and a lint-free cloth to remove grease and smudges. Painted or powder-coated hoods only need warm, soapy water and a soft sponge. For any finish, wipe down the exterior after cleaning the interior to catch any dripping degreaser before it dries.
If your hood is part of a custom cabinet installation, make sure cleaning solution doesn’t run down onto the cabinet finish below.
Step 5: Reassemble and Test Functionality (Visual Alignment Checks)
Once all parts are completely dry, reassemble the fan in reverse order of disassembly. Slide or snap the filters back into their slots, making sure they seat fully to avoid rattling or air leaks. If you removed the fan housing or motor cover, reattach it with the original screws, tightening them just enough to hold it in place.
Don’t over-tighten, as this can strip the screw holes or crack plastic housing components.
Turn the power back on at the breaker panel, then flip the wall switch to test the fan. It should run smoothly, with no rattling, grinding, or unusual noises. Hold a piece of tissue paper near the filter: if the fan sucks it firmly against the filter, suction is restored to full strength.
If the fan runs slowly or makes noise, turn it off and check that the filters are seated correctly and no tools or debris are caught in the blades. If you’re renovating kitchen cupboards near the hood, double-check that no sawdust or construction debris has fallen into the fan housing during the work.
Ducted vs Recirculating Exhaust Fans: How Your Setup Changes Cleaning Needs
Your exhaust fan’s configuration changes how often you need to clean beyond just the filters. Ducted fans vent grease and air directly outside, so they only need filter cleaning and occasional duct brushing if you notice reduced suction. Recirculating fans pull air through a charcoal filter then blow it back into the kitchen, so they trap more grease in the hood housing and need more frequent interior cleaning.
Ducted systems should have their ducts professionally cleaned every 1 to 3 years, depending on how often you cook. Grease buildup in ducts is a major fire hazard, per NFPA 96 guidelines. Recirculating fans need their charcoal filters replaced every 3 to 6 months, and their hood interiors wiped down monthly to catch grease that bypasses the filter.
If you notice lingering cooking odors even after cleaning your filters, you likely have a recirculating fan with a worn-out charcoal filter. For kitchens with heavy cooking like stir-frying or deep frying, a ducted system is always the better choice for air quality and fire safety. If you’re planning an outdoor kitchen setup, always choose a ducted exhaust fan to vent grease and smoke away from the cooking area.
Filter Type Comparison: Baffle, Mesh, and Charcoal (Care and Replacement Rules)

Image source: web (alibaba.com)
The three primary filter types each have distinct care rules that change how you clean your exhaust fan. Baffle filters are the most durable, made of layered stainless steel that deflects grease into a collection trough. Mesh filters are finer, made of interlocking aluminum or steel strands that catch smaller grease particles.
Activated charcoal filters are non-cleanable, designed only to trap odors and fine particulates in recirculating hoods.
| Filter Type | Cleanable? | Best For | Replacement Interval |
|---|---|---|---|
| Baffle | Yes, dishwasher safe (top rack, no heated dry) | Heavy cooking, searing, frying | 5+ years with regular cleaning |
| Mesh | Yes, hand wash or top rack dishwasher | General home cooking | 2–3 years with regular cleaning |
| Activated Charcoal | No, single-use only | Recirculating hoods, odor control | 3–6 months |
Baffle filters are the best choice if you do a lot of high-heat cooking, as they resist warp and hold up to harsh degreasers. Mesh filters work well for casual home cooks, but they clog faster if you fry food often. Never wash a charcoal filter, as water destroys the carbon media and eliminates its odor-trapping ability.
If you’re designing a budget kitchen remodel, baffle filters offer the longest lifespan and lowest long-term maintenance cost.
Common Visual Mistakes That Damage Your Fan or Leave Grease Behind
Most exhaust fan damage comes from simple visual oversights during cleaning. The first mistake is spraying liquid degreaser directly onto the fan motor or electrical components. Liquid can seep into the motor windings, cause short circuits, or corrode contacts over time.
Always spray cleaner onto a cloth first, then wipe the motor housing exterior only.
Another common error is using abrasive scrub pads or steel wool on stainless steel filters and hood surfaces. These leave permanent scratch marks that trap grease and make future cleaning harder. Our research shows aggregate user reviews consistently report that non-scratch sponges and soft brushes remove the same amount of grease without damaging finishes.
Forcing stuck filters is the third frequent mistake. If a filter won’t slide or snap out, check for hidden screws, built-up grease locking the tracks, or bent mounting tabs. Forcing it can break the filter or the hood’s mounting brackets.
If you see grease buildup thicker than 1/8 inch in the duct or housing, don’t try to scrape it out yourself. This thickness indicates a severe fire hazard that requires professional cleaning per NFPA 96 standards.
DIY vs Professional Hood Cleaning: When to Skip the Home Job
DIY cleaning works perfectly for routine monthly and quarterly maintenance on most residential exhaust fans. It costs only the price of degreaser and supplies, and takes 45 to 90 minutes for most units. You’ll handle filter removal, basic housing wiping, and light duct brushing without issue if you follow the safety steps outlined earlier.
Hire a professional hood cleaning service if you meet any of these conditions:
- Grease buildup in the duct is thicker than 1/8 inch
- You see mold growth inside the duct or housing
- Your fan is hard to access, such as high wall-mounted models in cathedral ceilings
- You have a commercial-style range with high CFM output that requires specialized cleaning
Professional residential hood cleaning costs $100 to $300 as of 2026, and includes deep duct scraping, motor housing cleaning, and a post-clean safety inspection. Commercial kitchens are legally required to have professional hood cleaning per local fire codes, so never attempt DIY on a commercial unit. If you’re completing a full kitchen remodel, schedule a professional duct cleaning after construction to remove sawdust and drywall dust from the exhaust system.
Long-Term Maintenance: Visual Cues to Tell When It’s Time to Clean Again
You don’t have to guess when your exhaust fan needs cleaning. Watch for these clear visual and functional cues:
- Greasy film visible on the outside of the hood or dripping onto the stovetop
- Reduced suction, tested by holding a tissue paper near the filter: it should stick firmly immediately
- Lingering cooking odors that don’t dissipate after cooking ends
- Rattling, grinding, or loud humming from the fan motor
- Grease drips on the stove or countertops below the hood
For most home cooks, clean metal filters monthly and do a full housing and duct cleaning every 3 months. If you fry, sear, or stir-fry more than 2 times a week, clean filters every 2 weeks and do a full cleaning every 2 months. Recirculating hoods with charcoal filters need filter replacement every 3 to 6 months, even if the metal filters look clean.
Mark cleaning dates on your calendar or set a phone reminder to stay on schedule, as consistent maintenance extends your fan’s lifespan by 3 to 5 years per manufacturer testing.
Frequently Asked Questions
How often should I clean my kitchen exhaust fan?
Clean metal grease filters monthly for casual cooking, every 2 weeks if you fry or sear often. Do a full housing, blade, and duct cleaning every 3 months for most homes, every 2 months for heavy cooks. Replace charcoal filters in recirculating hoods every 3 to 6 months.
Can I use bleach to clean range hood filters?
Avoid bleach on most range hood filters. Bleach can corrode aluminum mesh filters and discolor stainless steel baffle filters. Stick to hot soapy water or a commercial kitchen degreaser formulated for metal surfaces.
For disinfecting, use a 1:1 white vinegar and water solution instead.
Why does my range hood smell even after cleaning?
Lingering odors usually mean your charcoal filter is worn out and needs replacement, or there is mold growth in the exhaust duct. If you have a ducted hood, check the exterior vent cap to make sure it isn’t blocked by debris or bird nests.
How do I know if my exhaust duct is clogged?
Clogged ducts reduce suction, cause loud fan noise, and may push grease back into the hood housing. If the fan runs but barely pulls air, or you see grease dripping from the duct seams, you likely have a clog. Hire a professional duct cleaning service to clear it safely.
Do I need to clean the exhaust fan motor?
Never spray liquid directly on the fan motor. Wipe the exterior of the motor housing with a damp cloth during your regular cleaning to remove surface grease. If the motor is making loud grinding noises or not spinning, it may be clogged with internal grease and need professional servicing or replacement.