Build Base Kitchen Cabinets: A Step-by-Step Guide
You've drawn out the kitchen layout, picked a countertop, and priced out factory cabinets. Then you saw the total and thought: I could build those myself. Learning how to build base cabinets for kitchen projects is a serious time commitment, but the cost savings are substantial.
If you can cut a straight line and follow a level, you have the baseline skills to pull it off.
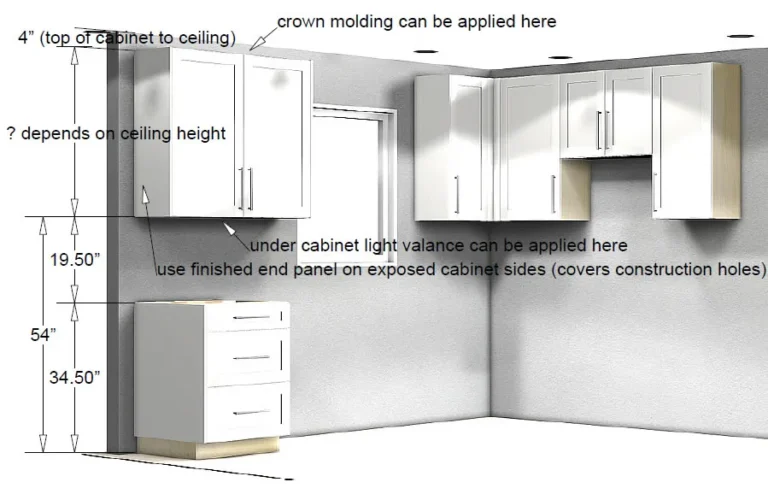
Let's anchor that with a number. As of 2026, the standard base cabinet box is 34.5 inches tall and 24 inches deep, sized so a 1.5-inch countertop lands you at a 36-inch finished height. The best DIY builders treat that spec as a law, not a suggestion.
Getting your box dimensions right before you cut is the difference between a smooth install and a very frustrating weekend.
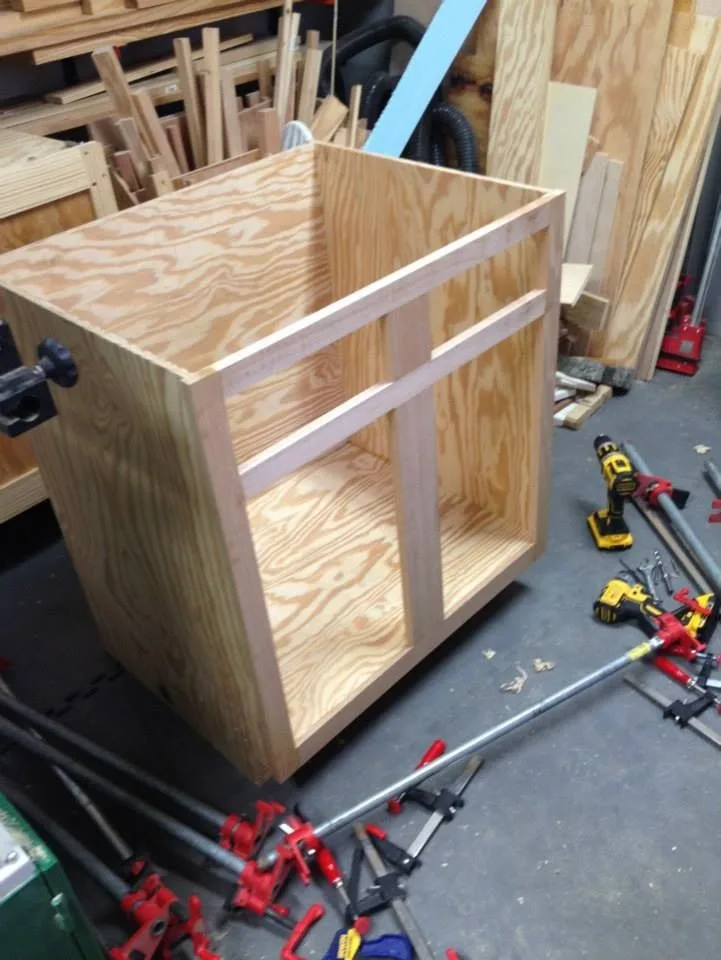
Image source: Web (Bing) / pinterest.com (Web image (fair-use with source credit))
The Core Problem: Why DIY Base Cabinets Fail Before They Start
Building a base cabinet sounds simple. Four sides, a bottom, a back, and a door. The reality is that the assembly order and material choices decide everything.
Our research into DIY cabinet builds shows the same three failures over and over: racked boxes, unlevel floors that throw everything off, and panels that warp or sag six months later.
The biggest culprit is racking. That's when the cabinet box twists out of square during assembly, so doors never align and drawers bind. It happens when you skip the back panel or glue up without clamping square.
The second killer is ignoring floor slope. Old homes rarely have level floors, and shimming a 36-inch wide box with a twisted frame is a losing battle.
The third issue is material denial. Solid wood side panels sound great until seasonal humidity shrinks them and the doors stop closing. The National Kitchen & Bath Association's planning guidelines recommend stable sheet goods like plywood for carcass construction, and they're right.
The good news? Every one of these problems is preventable. You just need to pick a construction method that fits your tools and follow a build order that locks everything square.
Before you cut anything, sketch the rough cabinet layout on paper. It saves you from buying an extra sheet of plywood.
Quick Answer: The Two Ways to Build (and How to Choose)
There are two main ways to build a base cabinet: face-frame and frameless. Your choice affects every subsequent step, from joinery to hinges to door style.
| Factor | Face-Frame Construction | Frameless Construction |
|---|---|---|
| Appearance | Traditional, with visible stiles and rails | Sleek, full-overlay doors cover the box |
| Strength | Rigid frame adds stiffness | Relies on thick panels and proper joinery |
| Hardware | Standard hinges, doors sit on the frame | European concealed hinges, precise adjustments |
| Difficulty | Slightly easier for beginners | Requires more precision in cutting |
| Best for | Classic, transitional kitchens | Modern, minimalist slab-door designs |
Here's the decision tree. If you want a classic Shaker or inset look, and you're comfortable with a pocket-hole jig, build a face-frame cabinet. It's more forgiving of slight misalignment.
If you're after a clean, modern kitchen with full-overlay doors, go frameless. You'll cut the box panels to exact dimensions and rely on concealed hinges for adjustability. You also need a track saw or table saw with a good fence, because accurate cuts are non-negotiable.
One honest note: frameless cabinets look professional, but they expose errors. A tiny squareness mistake on the box becomes a door gap you can't hide. Face-frame construction gives you a little extra forgiveness at the front of the cabinet.
If you're also weighing the overall room design, our guide on small kitchen layouts walks through how cabinet runs and appliance placement interact. It helps to zoom out before you commit to a building method.
The Build Sequence: Step-by-Step Workflow
Once you've chosen a construction style, the build order is the same. Follow these steps and you'll avoid the common pitfalls.
- Measure the room and check floor level. Run a long straightedge across the floor in every direction. Record the highest and lowest spots so you know where shims will go later.
- Map cabinet widths and layout. Decide where the sink, stove, and dishwasher sit. Plan filler strips for gaps against walls or appliances.
- Create a cut list. Use a 4×8 sheet of plywood and map your panels carefully. Side panels, top and bottom rails, toe kick strips, and back panels all need their own rectangle.
- Cut the carcass pieces. Your sides should be full height (usually 34.5 inches), and the bottom panel sits between the sides.
- Cut and install the toe kick. The standard is a 4-inch high, 3-inch deep recessed base. Build it as a separate box frame or attach it at the bottom of the sides.
- Assemble with joinery. Pocket holes are the beginner's friend. Dado-and-rabbet joints are stronger but need more tooling. Glue every joint and clamp tight.
- Attach the back panel. The back locks the box square. It's not optional. Use a 1/2-inch plywood back and tack it to every part of the carcass.
- Build and fit the face frame (if you're going that route). Stile and rail widths are typically 1.5 to 2 inches. Glue and nail it to the front of the box.
- Cut drawer boxes and mount slides. Under-mount slides hold more weight but need a 5/8-inch gap on each side. Side-mount slides are simpler and cheaper.
- Hang doors and adjust. Install hinges, close the doors, and tweak the alignment before you finish the cabinet.

Image source: Web (Bing) / storage.googleapis.com (Web image (fair-use with source credit))
A note on workflow: build one cabinet completely before you batch-cut the others. That proves your math and your technique on a small scale. Once the first box is square and flat, you can confidently cut the rest of the pantry.
Materials, Hardware, and Joinery: Pick the Honest Option
Your material selection is where you'll save money or create problems. Let's be direct about what works.
| Material | Pros | Cons | Best Use |
|---|---|---|---|
| Baltic birch plywood | Stable, strong, edges look clean | Expensive | Sides, bottoms, drawer boxes |
| Cabinet-grade hardwood plywood | Good exterior veneer, high quality | Not as flat as baltic birch | Overall carcass |
| MDF | Cheap, smooth, paints beautifully | Heavy, prone to swelling near moisture | Painted doors, interior shelving |
| Melamine | Inexpensive, easy to wipe | Chips on edges, hard to repair | Utility cabinets, pantry interiors |
Most professional builders use 3/4-inch plywood for side panels and the bottom. The back panel is a 1/2-inch sheet. For a sink base, choose moisture-resistant plywood and seal every exposed edge.
Joinery comes down to your comfort level with tools. Pocket-hole joinery is the fastest, most forgiving route. You drill angled holes into one panel and use screws to pull the joint tight.
A basic jig costs around $40 and works fine on 3/4-inch plywood.
Dado-and-rabbet joints are mechanically stronger. You cut grooves into the side panels and slide the bottom into place. You need a table saw with a dado stack or a router with a straight bit.
It's more work, but the joint won't rack under heavy loads.
Hardware eats a surprisingly large chunk of your budget. Soft-close hinges and drawer slides cost $8 to $15 per piece. If you're building a 10-cabinet kitchen, that adds up fast.
We recommend buying quality under-mount slides for drawers that carry heavy pots and pans, and standard self-closing hinges for doors. That split lets you stick to a strict budget without sacrificing durability.
The Toe Kick, Leveling, and Floor Irregularities You Need Into Account
Every kitchen floor has some slope. New construction slabs are usually flat, but older homes settle, and 1/4-inch over a 10-foot run is common. Ignoring that before you build means shimming later.
The toe kick is the recessed base under your cabinets. Standard dimensions are 4 inches high and 3 inches deep relative to the cabinet face. It gives your toes a place to rest when you stand at the counter, and it hides floor unevenness if you build it carefully.
Build the toe kick as a separate square frame using the same plywood. Cut it to match the cabinet footprint, then attach it to the bottom of the cabinet box. Leave the front face open so you can slip shims underneath after installation.
For floor leveling, you have two options. Traditional shimming is the simplest: place the cabinet on the toe kick, check with a level, and drive composite shims under the low side. You can use a flat pry bar to lift the cabinet while you wedge the shims.
Once everything is level, trim the shims with a flush-cut saw.
The second option is leveling legs. These are threaded plastic legs that screw into the bottom of the cabinet and adjust independently. They're common in frameless European cabinets.
This approach saves you from shim gymnastics but adds cost per cabinet.
Whichever method you choose, anchor the cabinets to wall studs after leveling. Screw through the back panel or a mounting rail into the studs. Do not rely on shims alone.
The connection keeps the cabinet from tipping forward, especially with heavy countertops.
You also want to verify the standard depth of lower cabinets before you commit to a toe kick plan. It's 24 inches from the back of the wall to the front edge, and your toe kick should sit under that footprint, not protrude.