Stop the Drip: How to Replace a Kitchen Faucet Washer
A dripping kitchen faucet wastes over 3,000 gallons a year and adds $20 to $60 to your water bill. Learning how to change a washer in a kitchen faucet stops that leak in one afternoon with basic hand tools. The repair applies only to compression-style stems, two-handle faucets where a rubber washer presses against a brass seat.
Cartridge, ball, and ceramic-disc models use different seals and are not covered here.
Per EPA WaterSense data a steady drip of one drop per second equals 3,000 gallons annually. ASME A112.18.1 standards require replacement washers to meet NSF/ANSI 61 lead-free limits. Most homeowners finish the job in 30 minutes once parts are in hand.
Let's start by confirming your faucet type.
Quick Answer
Turn off the angle stops under the sink. Remove the handle and bonnet nut. Pull the stem straight out.
Inspect the valve seat for pitting. Match the old washer for diameter, thickness, and bevel direction. Install the new washer bevel toward the seat.
Reassemble stem, bonnet, and handle. Open stops slowly and check for leaks.
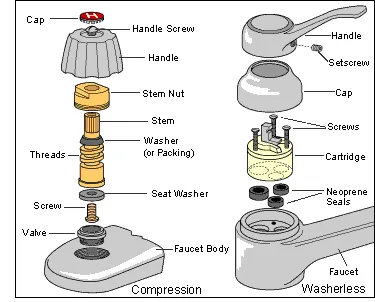
Image source: Web (Bing) / hometips.com (Web image (fair-use with source credit))
Know Your Faucet First: Only Compression Stems Use Washers
Compression faucets have two separate handles, one hot, one cold. Each handle connects to a brass stem that moves up and down. A rubber washer at the stem base presses against a brass seat to stop flow.
When the washer hardens or the seat grooves, water seeps through. Single-handle faucets use cartridges, balls, or ceramic discs instead. Those designs do not have replaceable seat washers.
Look under the sink. Two supply lines feeding two handles usually means compression stems. One supply line or a single handle means a different mechanism.
Manufacturer diagrams from Delta, Moen, and Kohler confirm stem type by model number. If you see a hex or Allen set screw on the handle side, it's likely a cartridge. Compression handles typically have a decorative cap hiding a Phillips screw.
Quick identification checklist:
- Two handles (hot and cold separate)
- Handles turn multiple rotations to open fully
- Handle caps pop off to reveal screws
- Brass stem visible after bonnet removal
- Flat rubber washer at stem bottom
Tools & Parts Layout: What to Have on the Counter Before You Start
Gather everything before you touch a shutoff valve. A mid-job hardware store run turns a 30-minute fix into a half-day project. The table below lists every tool and part you need.
Most items cost under $5 at a plumbing supply house. Big-box stores carry universal kits but often miss oddball stems like Price Pfister or Sayco.
| Item | Purpose | Typical Cost | Notes |
|---|---|---|---|
| Basin wrench | Reaches bonnet nut behind sink | $12–$22 | 11-inch telescopic handles tight spaces |
| Adjustable wrench | Holds supply lines steady | $8–$15 | Smooth jaws prevent marring chrome |
| Seat wrench | Removes replaceable seats | $8–$15 | T-handle style fits hex and square drives |
| Penetrating oil | Frees seized bonnet nuts | $5–$10 | PB Blaster or Liquid Wrench |
| Silicone plumber's grease | Lubricates O-rings and threads | $3–$6 | NSF 61 certified only |
| Stem washer assortment | Matches OD, ID, bevel | $2–$5 | Take old washer to compare |
| O-ring kit | Seals stem and spout base | $3–$7 | Buy EPDM for hot water service |
| Flashlight | Inspects seat surface | — | Headlamp frees both hands |
| Rags and bucket | Catches residual water | — | Plug drain first |
Pro tip: Photograph the faucet brand logo and any model numbers before disassembly. That photo saves a return trip when the universal kit doesn't fit. Plumbing supply counters can cross-reference your photo to the exact stem.
Shutoff Check: Verify Angle Stops Hold — No Main Shutdown Needed
Angle stops under the sink should isolate the faucet. Turn each handle clockwise until snug. Open the faucet handles to relieve pressure and confirm flow stops completely.
If either stop weeps or won't turn, you have two options. Option one: tighten the packing nut on the stop body a quarter turn with an adjustable wrench. Option two: close the main house valve.
Most homes built after 1990 have quarter-turn ball stops that seal reliably. Older gate-valve stops often seize or leak when operated. Test both hot and cold.
A single faulty stop means main shutdown. Place a bucket under the supply connections before disconnecting anything. Residual water in the lines will spill.
Plug the drain with a rag or basket strainer. A dropped bonnet nut or screw disappears instantly into the tailpiece.
If stops fail:
- Tighten packing nut ¼ turn max
- Still weeps → close main valve
- No main access → call a plumber
- Never force a frozen gate valve
Handle Off, Stem Out: Visual Cues for Each Fastener Type
Handles attach three ways. Pop the decorative cap with a flat blade. Underneath sits a Phillips screw, remove it and lift the handle.
Some lever handles hide a 1/8-inch Allen set screw on the side. Loosen it and pull the handle straight up. Cross handles sometimes thread directly onto the stem.
Unscrew counter-clockwise by hand or with a strap wrench. Once the handle is off, you see the bonnet nut. It's the large hex nut sitting on the faucet body.
A basin wrench slides up from below and grips the flats. Turn counter-clockwise. If the nut won't budge, soak it with penetrating oil for 15 minutes.
Tap the wrench handle lightly with a hammer to break corrosion. Do not use a pipe wrench on the bonnet, the jaws crush soft brass. The stem pulls straight up once the bonnet clears.
Note the stem orientation. Hot and cold stems often mirror each other. The key or flat on the stem body must align with the faucet body slot on reinstall.
Handle removal quick guide:
| Handle Style | Fastener | Tool |
|---|---|---|
| Cap + lever | Phillips screw | #2 Phillips |
| Lever side | 1/8" Allen set screw | Allen key |
| Cross handle | Threaded on stem | Hand or strap wrench |
| Wrist blade | Cap + screw | Flat blade + Phillips |
The Seat Moment: Flashlight Inspection, Dress or Replace Decision
The valve seat lives inside the faucet body. Shine a flashlight straight down the stem bore. Run a fingertip across the seat surface.
Feel for ridges, grooves, or pitting. A smooth, shiny seat takes a new washer and seals. A grooved seat leaks no matter how good the washer is.
Two seat types exist. Replaceable seats have a hex or square recess for a seat wrench. Non-replaceable seats are integral to the brass body.
Those must be dressed with a seat dressing tool. Dressing shaves a thin layer of brass to create a fresh sealing surface. You can dress a seat two or three times before it's too thin.
After that, the faucet body needs replacement. If the seat is replaceable, engage the seat wrench fully. Turn counter-clockwise.
Steady pressure prevents rounding the recess. Clean the threads before installing the new seat. A dab of pipe dope on the seat threads prevents future seizure.
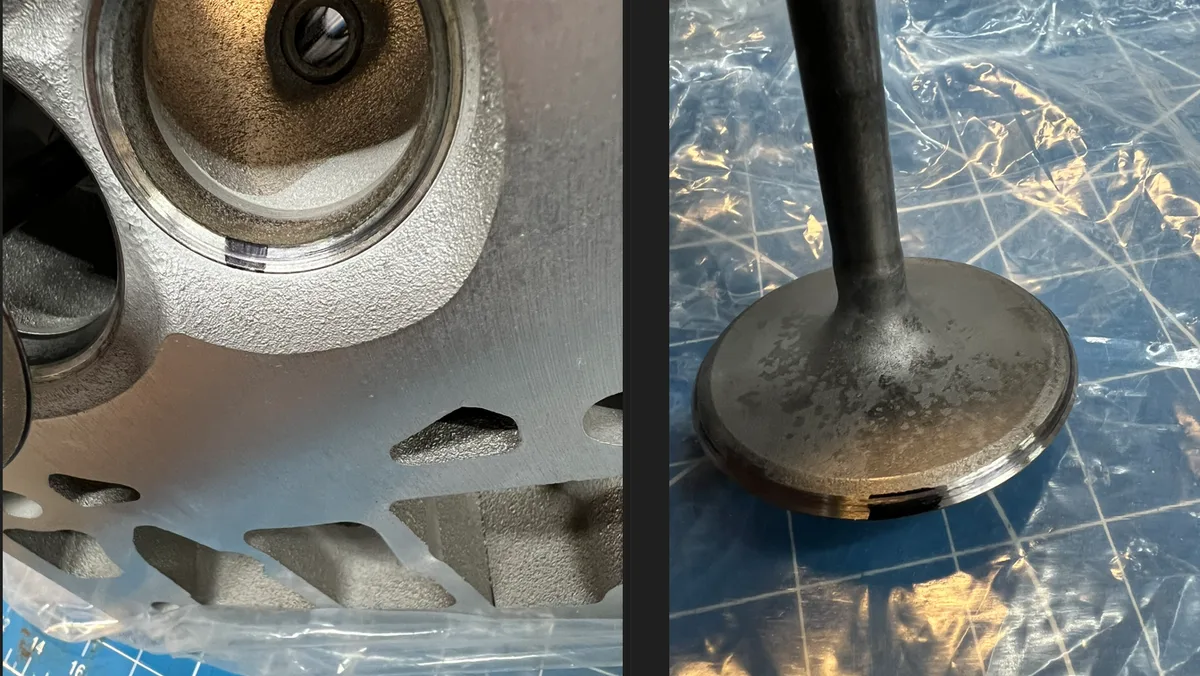
Image source: Bing (Web (fair-use with source credit))
Seat decision flowchart:
- Smooth and shiny → keep, install new washer
- Light grooves → dress with seat tool
- Deep pits or cracks → replace seat (if removable)
- Non-removable and badly pitted → replace faucet body
Washer Match-Up: OD, ID, Bevel Direction — Take the Old One With You
The old washer is your only reliable spec sheet. Outer diameter, inner diameter, thickness, and bevel angle must match. Universal kits at big-box stores cover common sizes: 1/2-inch OD by 3/8-inch ID, 9/16-inch OD, 5/8-inch OD.
Metric stems from Canadian or European imports run 12 mm or 14 mm OD. Brand-specific stems differ. Delta stems use 0.437-inch diameter.
Moen stems use 0.500-inch. Price Pfister stems use 0.400-inch. A washer 0.010-inch too small leaks.
One 0.010-inch too large prevents the stem from seating. Thickness matters too. A thicker washer raises the stem and binds the handle.
A thinner washer leaves a gap at the seat. Bevel direction is the most common error. The bevel faces the brass seat.
That means the concave side points down on most stems. Flat washers go on flat seats. Fiber washers go on angled seats.
Check the old washer orientation before you toss it. If the old washer disintegrated, look at the seat. An angled seat takes a beveled washer.
A flat seat takes a flat washer.
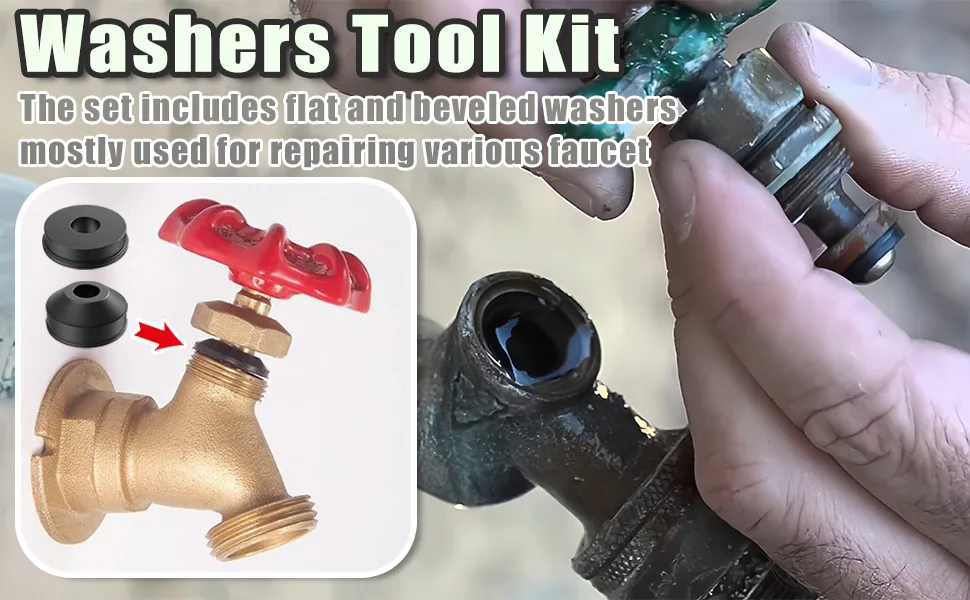
Image source: Web (Bing) / amazon.ca (Web image (fair-use with source credit))
Washer spec cheat sheet:
| Stem Brand | Stem OD | Common Washer OD | Washer ID | Bevel |
|---|---|---|---|---|
| Delta | 0.437" | 1/2" | 3/8" | 45° |
| Moen | 0.500" | 9/16" | 7/16" | 45° |
| Price Pfister | 0.400" | 7/16" | 5/16" | 45° |
| Sayco | 0.437" | 1/2" | 3/8" | 45° |
| Generic | — | 1/2", 9/16", 5/8" | 3/8", 7/16" | 45° or flat |
Pro tip: Slip the new washer onto the stem screw before you thread the retainer. It keeps the washer from falling into the sink basin. Tighten the retainer screw snug, not cranked.
Over-torquing splits the washer or strips the soft brass screw head.
Reassembly Sequence: Stem Alignment, Bonnet Torque, Handle Indexing
Reassembly is the reverse of disassembly but with three critical checkpoints. First, align the stem key or flat with the faucet body slot. Drop the stem straight in.
Do not twist it into place. Twisting shears the new washer against the seat edge. Second, thread the bonnet nut by hand until it seats.
Then use the basin wrench. Firm hand pressure plus an eighth turn is the target. That equals roughly 25 to 30 inch-pounds.
Brass yields before steel. A cracked bonnet costs more than the whole rebuild kit. Third, index the handle.
Hot stems usually turn counter-clockwise to open. Cold stems turn clockwise. Some brands mirror this.
Test handle rotation before you tighten the set screw. The handle should point to the 6 o'clock position at full open. If it points to 3 or 9, pull the handle and rotate the stem spline one notch.
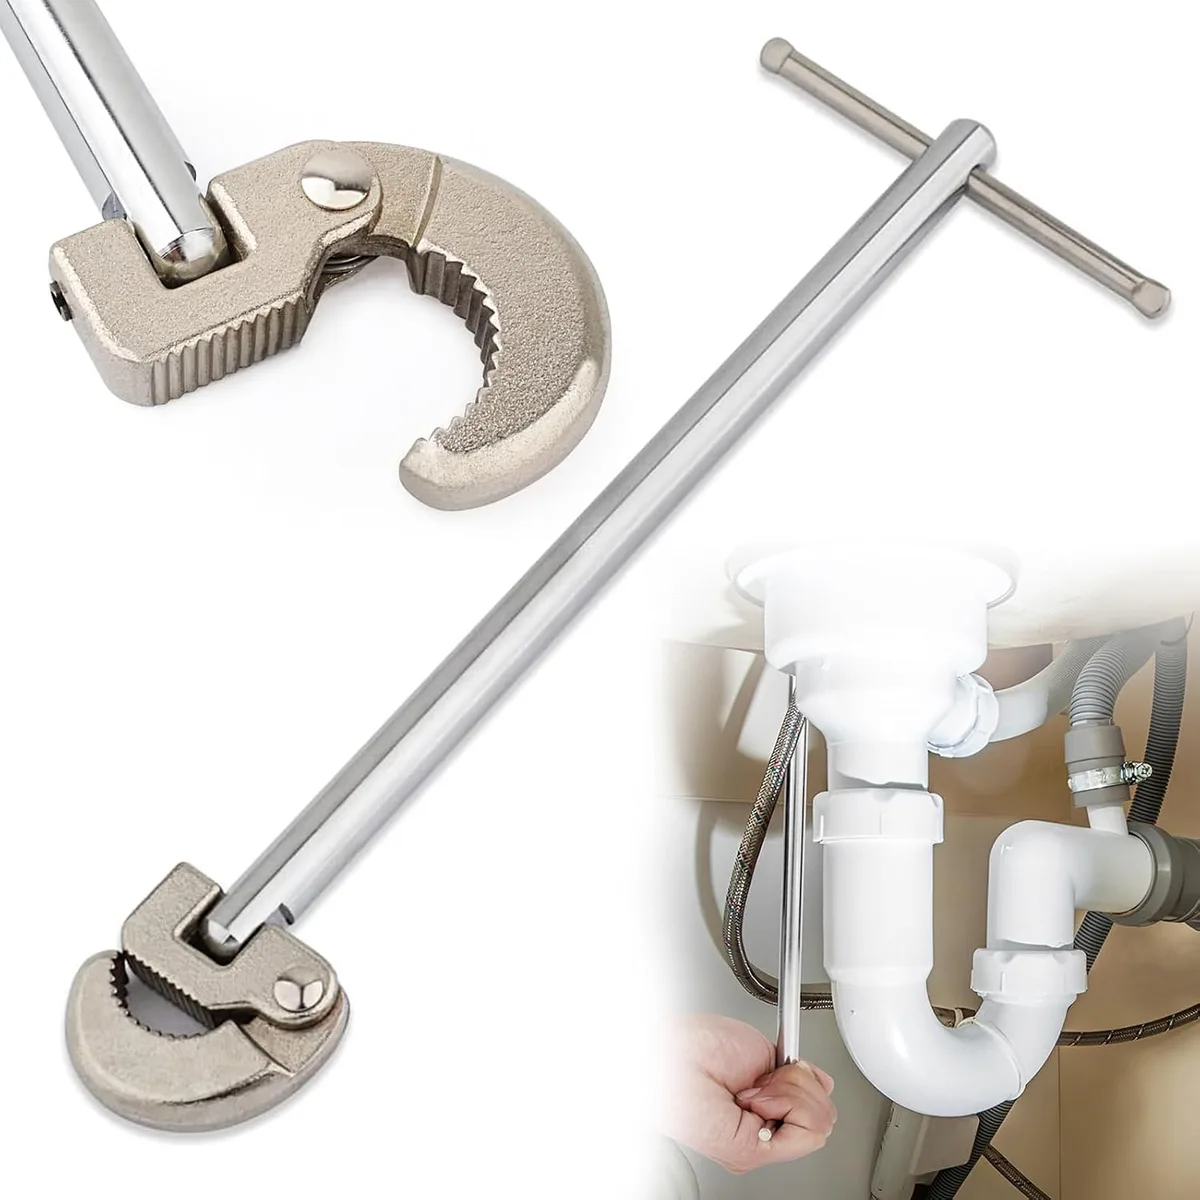
Image source: Web (Bing) / amazon.co.uk (Web image (fair-use with source credit))
Torque checklist:
- Stem key engaged in body slot ✓
- Bonnet hand-tight then ⅛ turn with basin wrench ✓
- No gap between bonnet and faucet body ✓
- Handle points 6 o'clock at full open ✓
- Set screw or handle cap secured ✓
If the bonnet nut spins freely but won't tighten, the threads are stripped. That faucet body is done. If the stem wobbles side to side, the bonnet is under-torqued or the stem is bent.
Replace the stem.
Test & Tweak: Slow Open, Watch Bonnet & Spout Base for Weep
Open the angle stops slowly. Quarter-turn each, then pause. Watch the bonnet nut for a bead of water.
Watch the spout base where it meets the deck. A weep at the bonnet means the bonnet is under-torqued or the stem O-ring is missing. A weep at the spout base means the spout O-ring is bad or the spout nut is loose.
Tighten the bonnet another sixteenth turn if needed. Do not exceed a quarter turn past hand-tight. If the bonnet still weeps, remove the stem and check the O-ring.
It sits in a groove near the top of the stem. Replace it with a fresh EPDM ring from your kit. Lubricate it with silicone grease.
Reinstall and retest. Run both hot and cold full blast for 30 seconds. Check for drips at the spout tip.
A drip there means the washer still isn't seating. Reopen the bonnet, verify washer orientation, and reassemble.
Leak location diagnosis:
| Leak Point | Likely Cause | Fix |
|---|---|---|
| Bonnet nut | Under-torqued or missing stem O-ring | Tighten ⅛ turn or replace O-ring |
| Spout base | Bad spout O-ring or loose spout nut | Replace O-ring or tighten spout nut |
| Spout tip | Washer upside down, wrong size, or seat pitted | Recheck washer, dress or replace seat |
| Handle | Packing nut loose or packing worn | Tighten packing nut or add packing |
Common Visual Mistakes: Upside-Down Bevel, Cross-Threaded Bonnet, Missed O-Ring
The bevel mistake happens fast. The washer looks symmetric. It isn't.
Concave side faces the seat. Convex side faces the retainer. Flip it and water blasts past the edge.
Cross-threaded bonnets happen when you rush. The first two threads must engage cleanly. Turn the bonnet counter-clockwise until you feel a click, that's the threads aligning.
Then turn clockwise. If resistance spikes in the first half turn, back out and start again. Forcing it cuts new threads in the soft brass.
The stripped bonnet won't seal. The missed O-ring is silent until you pressurize. The stem O-ring sits in a groove near the top.
The spout O-ring sits at the base of the spout shank. Both need silicone grease. Dry O-rings roll or tear on installation.
A torn O-ring leaks immediately. A rolled O-ring leaks in a week. Photograph the stem before disassembly.
The photo shows O-ring position and washer orientation. It's the cheapest insurance in the job.
Mistake prevention table:
| Mistake | Visual Clue | Prevention |
|---|---|---|
| Upside-down bevel | Immediate spout drip | Photo old washer; bevel toward seat |
| Cross-threaded bonnet | Bonnet spins loose, won't tighten | Counter-clockwise click first |
| Missed stem O-ring | Leak at handle when pressurized | Check groove, grease, verify in photo |
| Missed spout O-ring | Leak at deck when running | Pull spout, verify ring in groove |
| Over-tightened retainer | Split washer, screw head stripped | Snug only, ¼ turn past contact |
When to Stop & Swap: Cracked Bonnet, Stripped Seat, Galvanized Supply Lines
Some repairs aren't worth the chase. A cracked bonnet nut leaks forever. Brass doesn't weld.
Epoxy fails under pressure and heat. Replace the faucet. A stripped seat recess in a replaceable seat means the seat wrench can't grip.
You can try an easy-out extractor but the risk of damaging the faucet body threads is high. If the seat is non-replaceable and dressing doesn't clean it up after two passes, the seat is too thin. The faucet body is scrap.
Galvanized supply lines are a different beast. They corrode from the inside. Disturbing them often splits the pipe or cracks the angle stop.
If you see galvanized pipes feeding the faucet, budget for supply line replacement. Push-fit connectors (SharkBite or similar) work on copper, PEX, and CPVC. They don't seal reliably on corroded galvanized.
That's a repipe job. Call a licensed plumber. Asbestos warning: pre-1980 packing material in some stems may contain asbestos.
Wet-wipe any fibrous packing. Don't sand or scrape dry. Bag the waste.
Wash hands thoroughly.
Stop-and-swap decision matrix:
| Condition | Repair Possible? | Action |
|---|---|---|
| Cracked bonnet | No | Replace faucet |
| Stripped seat recess | Marginal | Try easy-out; replace faucet if fails |
| Non-replaceable seat worn thin | No | Replace faucet |
| Galvanized supply lines | No (DIY) | Call plumber for repipe |
| Asbestos packing suspected | Yes (with care) | Wet-wipe, bag, replace with modern packing |
Quick Reference: Stem Brand ID Chart & Washer Size Cheat Sheet
Use this table at the hardware store. Match your stem brand to the right washer before you leave the aisle. Measurements are in inches unless noted.
OD is outer diameter. ID is inner diameter. Bevel is the angle cut on the sealing face.
Most hardware stores stock universal assortments covering the first three rows. Plumbing supply houses carry the brand-specific rows. Take a photo of this chart on your phone.
| Brand | Stem OD | Washer OD | Washer ID | Bevel | Notes |
|---|---|---|---|---|---|
| Delta (pre-1995) | 0.437 | 1/2 | 3/8 | 45° | RP1740 kit fits most |
| Moen (brass stem) | 0.500 | 9/16 | 7/16 | 45° | 1225 cartridge uses no washer |
| Price Pfister | 0.400 | 7/16 | 5/16 | 45° | Verve / Windsor stems |
| Sayco | 0.437 | 1/2 | 3/8 | 45° | Often rebadged Delta |
| Crane / Dial-Eze | 0.437 | 1/2 | 3/8 | 45° | Seat often non-removable |
| Generic US | — | 1/2, 9/16, 5/8 | 3/8, 7/16 | 45° | Universal kit |
| Metric (CAN/EU) | 12 mm, 14 mm | 12 mm, 14 mm | 8 mm, 10 mm | 45° | Check thread pitch |
Seat wrench drive sizes:
- Hex: 5/16, 3/8, 7/16 inch
- Square: 1/4, 5/16, 3/8 inch
- T-handle wrench accepts all
O-ring quick sizes:
- Stem packing: 3/8 ID x 1/16 wall (most)
- Spout base: 13/16 ID x 3/32 wall (common)
- Buy EPDM for hot side. Buna-N fails above 180°F.
Frequently Asked Questions
How do I know if my faucet uses a washer or a cartridge?
Two handles that turn multiple rotations usually mean compression stems with washers. Single handles or handles that turn 90 degrees use cartridges, balls, or ceramic discs.
Can I use a flat washer on a beveled seat?
No. A flat washer on an angled seat leaves a gap at the edge. Water will leak immediately.
Match the washer profile to the seat profile.
Why does my faucet still drip after replacing the washer?
Most common causes: washer installed upside down, wrong washer thickness, pitted seat not dressed, or missing stem O-ring. Recheck each in order.
Do I need to replace the seat every time?
Only if the seat is pitted, grooved, or cracked. A smooth shiny seat reuses indefinitely. Dressable seats survive two to three dressings before replacement.
What if the bonnet nut won't come off?
Soak with penetrating oil for 15 minutes. Tap the wrench handle lightly with a hammer. Heat from a hair dryer helps expand the nut.
Never use a pipe wrench on brass.
Is this repair legal for renters?
Check your lease. Most allow minor maintenance. Document the leak and repair with photos.
Keep receipts for parts. Some jurisdictions require licensed plumbers for supply line work.