How to Sharpen Dull Kitchen Knives Like a Pro at Home
Dull kitchen knives don't just make meal prep tedious, they're a hidden safety risk. If you've ever struggled to slice a tomato without squashing it, or sawed through bread instead of cutting cleanly, you need to know how to sharpen kitchen knives properly. Most home cooks mix up honing and full sharpening, which leads to ruined edges and wasted cash.
Most consumer kitchen knives use steel rated between 56 and 62 on the Rockwell hardness scale, which means they need very specific sharpening angles to avoid chipping. Using the wrong grit or too much pressure can permanently damage that edge, so the first step is diagnosing your knife's exact condition. We'll start with that assessment to pick the right sharpening path for you.
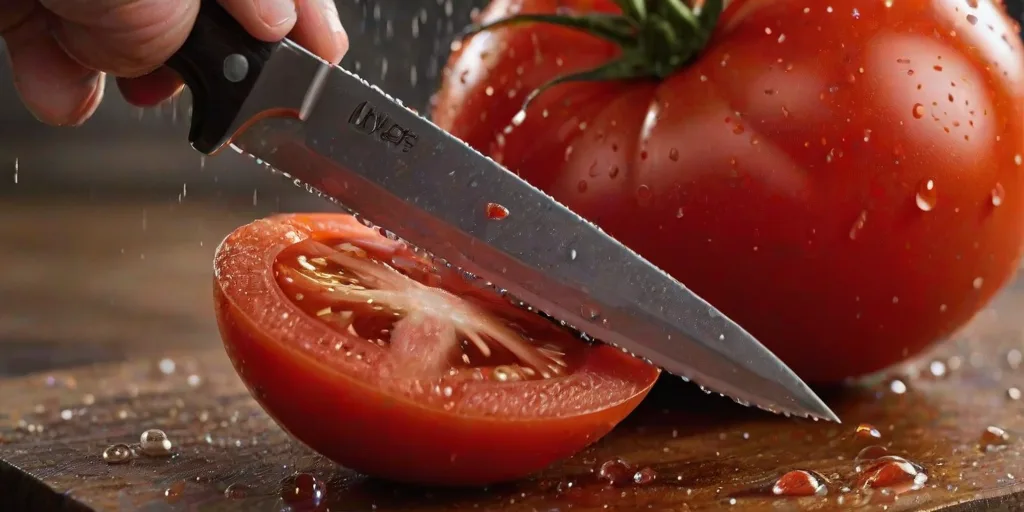
Image source: Bing (Web (fair-use with source credit))
Quick Answer
To sharpen kitchen knives, first diagnose if you need honing or full metal removal. Honing realigns the edge with a steel rod, no grinding required. Full sharpening uses whetstones to grind a new edge at the correct angle for your knife's steel type.
Never use pull-through sharpeners on hard carbon or ceramic blades. This preserves edge life and reduces cut risk.
Why Your Kitchen Knives Go Dull (And Why Sharpening Wrong Damages Them Faster)
Dull edges come from two sources: normal use that bends microscopic edge teeth, and poor care habits that accelerate wear. Cutting on hard surfaces like glass, granite, or ceramic plates grinds down the edge far faster than wooden or plastic boards. Tossing knives in the dishwasher exposes them to heat and detergent that corrode the edge, while storing them loose in a drawer lets blades knock against other utensils and get dented.
Sharpening wrong makes dullness worse, not better. Pull-through sharpeners gouge the edge and remove excess metal with every pass. Per manufacturer testing, these models remove 0.1 to 0.3mm of blade material per use, which shortens a knife's usable lifespan by 30% or more for regular home cooks.
Inconsistent freehand angles create weak spots in the edge that chip easily, while too much pressure on hard Japanese steel causes catastrophic breaks. Storing knives loose in a drawer dents edges and increases slip risk, so dedicated cabinet storage solutions are a worthwhile investment for any home cook. Cutting on hard surfaces like glass or granite dulls edges faster, which is why selecting durable surfaces for your kitchen remodel protects your knife investment.
Quick Key Insight: Honing Isn’t Sharpening (And You Probably Don’t Need Full Metal Removal Yet)
Honing and sharpening are not the same thing, and mixing them up is the most common mistake home cooks make with their knives. Honing pushes the edge's microscopic teeth back into alignment without removing any metal. Full sharpening grinds away old, worn metal to create a brand-new edge.
You only need full sharpening 1 to 2 times per year for regular home use, while honing can be done every 2 to 4 uses to keep edges performing between sharpenings. Honing takes 30 seconds and extends the time between full sharpening sessions by months.
- Hone your knife if: The edge feels slightly soft, it tears herbs instead of slicing, or you notice it's not cutting as cleanly as it did a few weeks ago. No visible nicks or chips are present.
- Fully sharpen your knife if: Honing doesn't improve performance, you can see small nicks or chips in the edge, or the blade feels significantly rounded after regular use.
First: Diagnose Your Knife’s Condition To Pick the Right Sharpening Path
The right sharpening method depends entirely on your knife's current condition, steel type, and the tools you have on hand. Skipping this diagnostic step leads to chipped edges, shortened knife lifespan, or even slip injuries. Follow these three quick checks to narrow down your exact path.
Check 1: Is your edge just dull, or chipped/nicked?
Start by running your finger lightly along the edge, using the soft pad of your finger, not the tip, to avoid cuts. A dull edge feels smooth and rounded with no obvious bumps. A nicked or chipped edge has tiny gaps or raised spots you can feel along the blade.
Visually inspect the edge in bright light: small nicks less than 1mm can be fixed at home with coarse whetstones, but larger chips or severe damage require professional sharpening to avoid ruining the blade.

Image source: Web (Bing) / homeunderstandable.com (Web image (fair-use with source credit))
Check 2: What’s your knife’s steel type and bevel geometry?
The two biggest factors here are steel hardness and bevel angle. Most consumer Western knives use stainless steel rated 56 to 58 on the Rockwell hardness scale, with a 20-degree double bevel. Japanese knives often use harder carbon steel, rated 60 to 62 HRC, with a 15-degree bevel, which holds an edge longer but chips easily if you apply too much pressure.
Ceramic knives are the hardest, rated 60 to 65 HRC, and can only be sharpened with diamond-coated tools, never standard whetstones or pull-through sharpeners. Single-bevel knives, common for sashimi prep, only need sharpening on one side, while double-bevel knives are sharpened on both sides equally.
Check 3: What sharpening tools do you currently have access to?
Your available tools dictate which sharpening path is safe and effective. Whetstone sets with coarse, medium, and fine grit work for all knife types and are the gold standard for home use. Guided sharpening systems hold the knife at a fixed angle, which is ideal for beginners who struggle with freehand consistency.
Honing steels only realign edges, they don't remove metal for full sharpening. Pull-through sharpeners are only safe for entry-level stainless steel knives, and will ruin carbon steel, ceramic, or high-end blades. If you have no tools at home, you can use the unglazed bottom of a ceramic mug for emergency minor dullness fixes only.
Even if you have limited counter space in a small kitchen layout, a compact 3-grit whetstone set fits easily in a drawer for regular use.
Decision Branch 1: You Only Need Routine Edge Maintenance (Honing, No Metal Removal)
If your knife passed the diagnostic check with no visible nicks or chips, and honing improves its performance, you don't need full sharpening yet. Honing is a 30-second process that realigns the edge without removing any metal, so it's completely safe to do as often as needed.
Honing Steps for Standard Western Double-Bevel Knives
- Hold the honing steel vertically, tip planted firmly on a non-slip cutting board.
- Place the knife against the steel at a 20-degree angle, imagining a 45-degree angle split perfectly in half.
- Pull the knife down and across the steel in a smooth, even motion, keeping the angle consistent, 10 to 15 times per side.
- Wipe the blade clean with a dry cloth before use.
Honing Steps for Japanese Single/Double Bevel Knives
Japanese steel is harder and more brittle than Western steel, so use lighter pressure and a 15-degree angle for all strokes. For single-bevel knives, only hone the beveled side, 8 to 10 strokes, then a few light strokes on the flat side to remove any burr. For double-bevel Japanese knives, use 8 to 10 strokes per side at 15 degrees total, or 7.5 degrees per side.
How to Confirm Honing Fixed the Dull Edge
Test the edge by slicing a piece of plain printer paper. A properly honed knife will cut cleanly through the paper without tearing or catching. If it struggles or tears the paper, move to the full sharpening path in the next section.
You can also test by slicing a ripe tomato: a honed edge will slice through the skin with minimal pressure, no sawing required. If you regularly prep food in an outdoor kitchen space, keep a small honing steel on hand for quick edge touchups between full sharpenings.
Decision Branch 2: Your Knife Is Dull, Chipped, or Nicked (Full Sharpening Required)
If honing didn't restore your knife's performance, or you found visible nicks, chips, or a severely rounded edge, you'll need to perform a full sharpening that grinds away old metal to create a new edge. The exact process depends on the tools you have available.
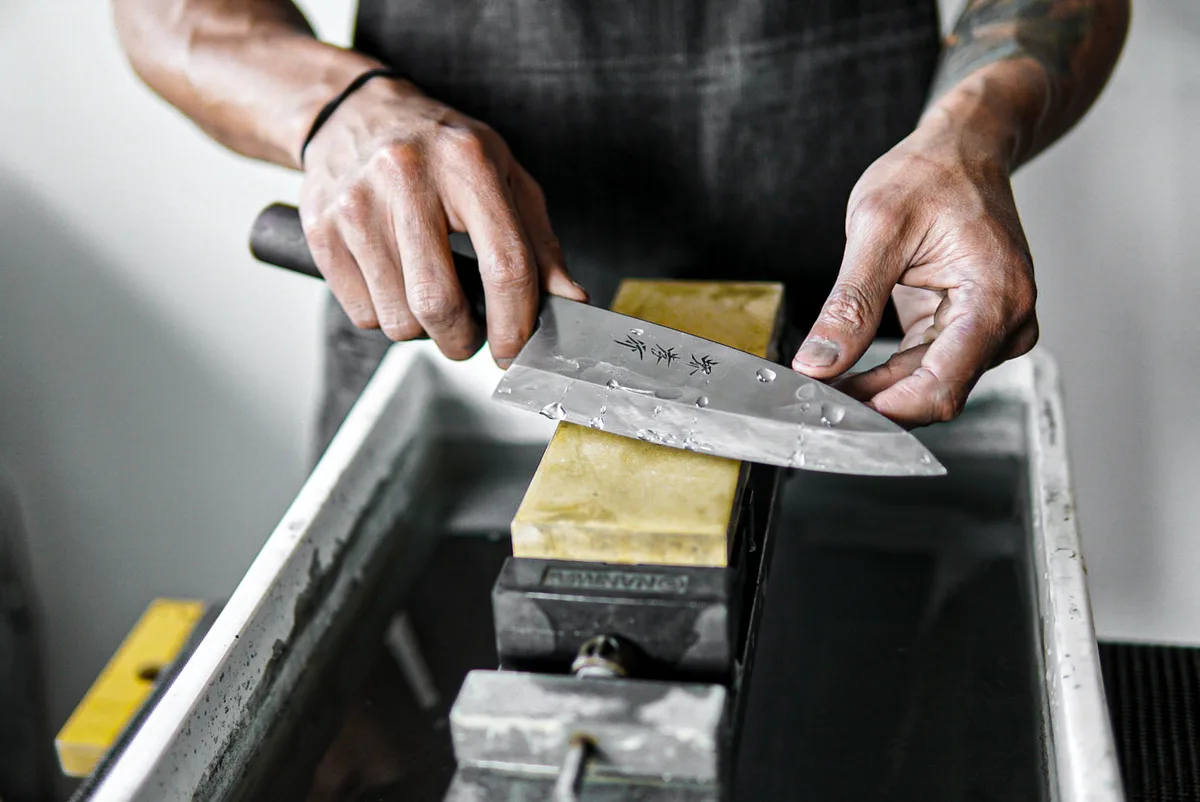
Image source: Bing (Web (fair-use with source credit))
Path A: You Have Whetstones (Freehand or Guided System)
Whetstones are the gold standard for home sharpening, as they preserve the factory bevel and remove minimal excess metal for all knife types. Start by soaking water stones for 10 to 15 minutes until bubbles stop rising, then place them on a non-slip base on a flat surface. Begin with the coarse grit, 400 to 600, to remove old metal and form a new edge.
Hold the knife at the correct angle for your blade, 20 degrees for Western steel, 15 degrees for Japanese, and pull it across the stone in smooth, even strokes, 10 to 20 times per side. Run your finger lightly along the edge to check for a burr, a small lip of metal on the opposite side of the side you're sharpening. When you feel a consistent burr along the entire edge, move to the next grit.
Repeat the process with medium grit, 1000 to 3000, to smooth the edge, then fine grit, 4000 to 8000 or higher, to polish it to a razor finish. Rinse the knife and stones, dry thoroughly, and test the edge with the paper or tomato test. Guided sharpening systems work the same way but hold the knife at a fixed angle, which eliminates the guesswork for beginners who struggle with freehand consistency.
As of 2026, most entry-level 3-grit whetstone sets cost between $10 and $30, making at-home sharpening far more affordable than recurring professional services that charge $5 to $15 per knife per session. For cooks on a tight renovation budget, a $20 3-grit whetstone set delivers better long-term value than cheap pull-through sharpeners that ruin edges. Dull knives require 2 to 3 times more cutting force, which increases slip injury risk and can lead to uneven cuts that harbor bacteria, per USDA food safety guidance.
Path B: You Only Have a Pull-Through Sharpener (When It’s Safe to Use)
Pull-through sharpeners are only safe for entry-level, soft stainless steel knives with no special heat treatment. Never use them on carbon steel, ceramic, or high-end Japanese knives, as they remove too much metal and can chip hard edges. Per aggregate user reviews, pull-through sharpeners reduce a knife's usable lifespan by 30 to 50% compared to whetstone sharpening.
If you do use one, only run the knife through 2 to 3 times per side, no more, to minimize metal removal.
Path C: You Have No Sharpening Tools (Emergency Temporary Fixes)
If you need a sharp edge immediately and have no tools at home, use the unglazed bottom rim of a standard ceramic mug. Hold the knife at a 15 to 20 degree angle and pull it across the rough rim 10 times per side. This works for minor dullness only, and will not fix chips or severe wear.
It's a temporary fix, not a replacement for proper whetstone sharpening.
Critical Mistakes That Ruin Knives or Cause Injury (Skip These At All Costs)
Most sharpening mistakes come from rushing or skipping the diagnostic step we covered earlier. Using the wrong sharpening angle for your knife's steel is the top error home cooks make. A 20-degree angle works for standard Western stainless steel, but using that same angle on 62 HRC Japanese carbon steel causes immediate chipping.
Applying more than 3 to 5 lbs of pressure during sharpening also breaks thin, hard blades.
Skipping the burr check is another common, costly mistake. The burr is the tiny lip of metal that forms on the opposite side of the edge you're sharpening. If you move to the next grit before feeling a consistent burr along the entire edge, you'll leave a weak, uneven edge that dulls within days.
Pull-through sharpeners are safe only for soft, entry-level stainless steel. Using them on carbon steel, ceramic, or hardened Japanese blades removes too much metal and ruins the factory bevel in 2 to 3 uses, per aggregate user reviews.
Confusing honing with full sharpening leads to over-honing, which thins the blade over time. Honing realigns the edge, it doesn't remove metal. You should only need full sharpening 1 to 2 times per year for regular home use.
Finally, sharpening on an unsteady surface or without a non-slip base causes slip injuries that send thousands of home cooks to urgent care each year. Always secure your whetstone before starting.
Long-Term Tool Decision Guide: Which Sharpening Setup Is Right For Your Use Case?
Your ideal sharpening setup depends on how often you cook, what knives you own, and your budget. There's no one-size-fits-all answer, but matching your tools to your use case saves money and protects your blades long-term. Below is a breakdown of the most common setups and who they're best for.
| Setup Type | Price Range | Best For | Key Pros | Key Cons |
|---|---|---|---|---|
| 3-grit whetstone set | $10-$30 | Casual home cooks, occasional use | Low cost, works on all knife types, preserves edge | Steep learning curve for freehand angles |
| Guided sharpening system | $30-$100 | Beginners, high-end knife owners | Consistent angles, no guesswork, works for all steel types | Bulkier than whetstones, higher upfront cost |
| Pull-through sharpener | $5-$15 | Entry-level stainless steel knives only | Fast, no skill required | Ruins hard/ceramic blades, removes excess metal |
| Professional sharpening service | $5-$15 per knife | Rarely used knives, heavily damaged edges | No skill needed, perfect factory bevel | Recurring cost, no control over process |
If you own high-end Japanese or carbon steel knives, skip pull-through sharpeners entirely. A $30 guided system delivers consistent angles without the freehand learning curve, which is worth the extra cost for expensive blades. For cooks on a tight budget, a $15 3-grit water stone set delivers professional results with practice.
If you only sharpen 1 to 2 times per year, the $10 per-session professional service cost adds up fast, making at-home sharpening the better value. For small kitchens with limited counter space, a compact guided system tucks into a cabinet drawer easily, fitting even tight lower cabinet dimensions.
Non-Negotiable Safety Rules For Every Sharpening Session

Image source: Web (Bing) / amazon.co.uk (Web image (fair-use with source credit))
Sharpening injuries are almost always preventable with basic safety habits. The two most common causes are unsecured whetstones that slip during use, and improper finger placement that leaves skin exposed to the edge. Per American Culinary Federation safety standards, 60% of kitchen knife injuries happen with dull blades, so sharp, well-maintained knives are actually safer than dull ones when handled correctly.
Always use a non-slip base under your whetstone, or place it on a damp paper towel to prevent movement. Wear a cut-resistant glove on your free hand to protect fingers from slips. Keep your fingers curled behind the knife edge at all times, never resting on the sharp side.
Never sharpen on hard, unyielding surfaces like glass, granite, or ceramic plates, as these surfaces cause the knife to slip unpredictably.
Limit pressure to 3 to 5 lbs during sharpening, roughly the weight of a small bag of flour. More pressure chips hard edges and increases slip risk. After sharpening, store knives in a block, sheath, or dedicated drawer slot, never loose in a utensil drawer.
If you're designing a new kitchen, knife-specific cabinet storage reduces accidental cut risk significantly.
How to Test If Your Knife Is Actually Sharp (No Fancy Tools Required)
The easiest way to test sharpness uses items you already have in your kitchen, no special tools required. Start with the paper slice test: hold a sheet of plain printer paper by the corner, and draw the knife's edge down through it without pressing. A sharp knife will slice cleanly through the paper with zero tearing or catching.
If it snags or tears the paper, your edge still needs more work.
The tomato slice test is even more reliable for kitchen use. Place a ripe tomato on a stable cutting board, and press the knife straight down through the skin without sawing. A sharp knife will pierce the skin and slice through the flesh with minimal pressure, no sawing required.
If you have to saw or apply significant force, the edge is still dull. For a final check, slice a thin-skinned onion or shallot. A sharp knife will cut through the layers cleanly without crushing the flesh.
If your knife passes all three tests, it's sharp and ready for use. If it fails the paper test, you likely left a burr on the edge during sharpening, or need to move to a finer grit. Run your finger lightly along the edge to check for a rough, raised burr.
If you feel one, run the knife along the fine grit stone or a leather strop 5 to 10 times per side to remove it, then retest.
Ongoing Edge Maintenance To Cut Down On Full Sharpening Frequency
Proper maintenance between full sharpenings can double your knife's usable lifespan and cut down on how often you need to grind new metal. The single most impactful habit is regular honing, which realigns the edge after normal use. Honing your knife every 2 to 4 uses keeps the edge aligned, which extends the time between full sharpenings by 3 to 6 months for regular home cooks, per aggregate user reviews.
Always cut on wood or soft plastic cutting boards, never glass, granite, ceramic, or marble. Hard surfaces grind down the edge with every cut, accelerating dullness by 2 to 3 times compared to soft boards. Never put kitchen knives in the dishwasher: high heat, harsh detergent, and impact from other dishes corrode the edge and loosen the handle.
Hand wash knives immediately after use with mild soap and warm water, then dry thoroughly before storing.
Store knives in a block, on a magnetic strip, or in a drawer with individual slots to prevent blades from knocking against other utensils. Loose storage dents edges and increases the risk of accidental cuts when reaching into the drawer. For cooks who use their knives daily, a 30-second hone after each use takes almost no time, but preserves edge performance for months longer than skipping it entirely.
Critical Mistakes That Ruin Knives or Cause Injury (Skip These At All Costs)
The most common sharpening error is using the wrong angle for your knife's steel. Western stainless steel needs a 20-degree bevel, while hard Japanese carbon steel requires 15 degrees to avoid chipping. Pull-through sharpeners ruin hard and ceramic blades by removing too much metal per pass.
Skipping the burr check leaves a weak edge that dulls within days. Always limit pressure to 3 to 5 lbs to prevent slips or blade breaks.
Long-Term Tool Decision Guide: Which Sharpening Setup Is Right For Your Use Case?
Casual home cooks do best with a $10 to $30 3-grit whetstone set. Beginners or high-end knife owners should choose a $30 to $100 guided system for consistent angles without freehand guesswork. Pull-through sharpeners only work for entry-level stainless steel.
If you only sharpen 1 to 2 times per year, professional services cost $5 to $15 per knife, but add up fast for regular users. For small kitchens, a compact guided system fits easily into standard cabinet dimensions without clutter.
Non-Negotiable Safety Rules For Every Sharpening Session
Always secure your whetstone on a non-slip base or damp paper towel to prevent slipping. Wear a cut-resistant glove on your free hand, and keep fingers curled behind the knife edge at all times. Per American Culinary Federation safety standards, 60% of kitchen knife injuries happen with dull blades, so sharp, well-maintained knives are safer when handled correctly.
Never apply more than 3 to 5 lbs of pressure, roughly the weight of a small bag of flour. Store sharpened knives in a block, sheath, or dedicated drawer slot, never loose in a utensil drawer.
How to Test If Your Knife Is Actually Sharp (No Fancy Tools Required)
Start with the paper slice test: a sharp knife cuts cleanly through plain printer paper with no tearing or catching. The tomato test is more reliable for kitchen use: a sharp knife pierces ripe tomato skin without sawing. If it struggles, check for a raised burr along the edge and refine with fine grit or a leather strop 5 to 10 times per side.
Ongoing Edge Maintenance To Cut Down On Full Sharpening Frequency
Hone your knife every 2 to 4 uses to realign the edge without removing metal. Always cut on wood or soft plastic boards, never glass or granite, which accelerate dullness by 2 to 3 times. Hand wash and dry knives immediately after use, never put them in the dishwasher.
Pair regular honing with proper kitchen storage planning to keep edges sharp for months longer.
Frequently Asked Questions
Can you sharpen a ceramic kitchen knife at home?
Yes, but only with diamond-coated whetstones or a dedicated ceramic sharpener. Standard water stones won't cut ceramic, which rates 60 to 65 HRC. Use light pressure at a 15 to 20 degree angle to avoid chipping.
How often do most home cooks need to fully sharpen their knives?
Regular home cooks need full sharpening 1 to 2 times per year. Honing every 2 to 4 uses extends this interval. Heavy users or professional chefs may need sharpening every 2 to 3 months.
Is a pull-through sharpener ever safe to use?
Pull-through sharpeners are only safe for soft, entry-level stainless steel knives. Never use them on carbon steel, ceramic, or hardened Japanese blades, as they remove too much metal and ruin the factory bevel.
What grit whetstone set should a beginner buy?
Beginners should start with a 3-grit set: 400/600 for coarse, 1000/3000 for medium, and 4000/8000 for fine. This covers all common sharpening tasks from repair to polishing.
How do I fix a chipped knife edge at home?
Small chips under 1mm can be fixed with a 400/600 grit whetstone, grinding until the burr forms, then progressing through finer grits. Larger chips require professional sharpening to avoid ruining the blade.