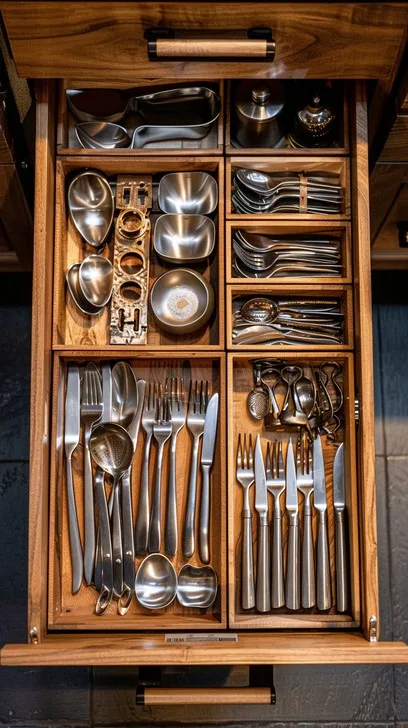
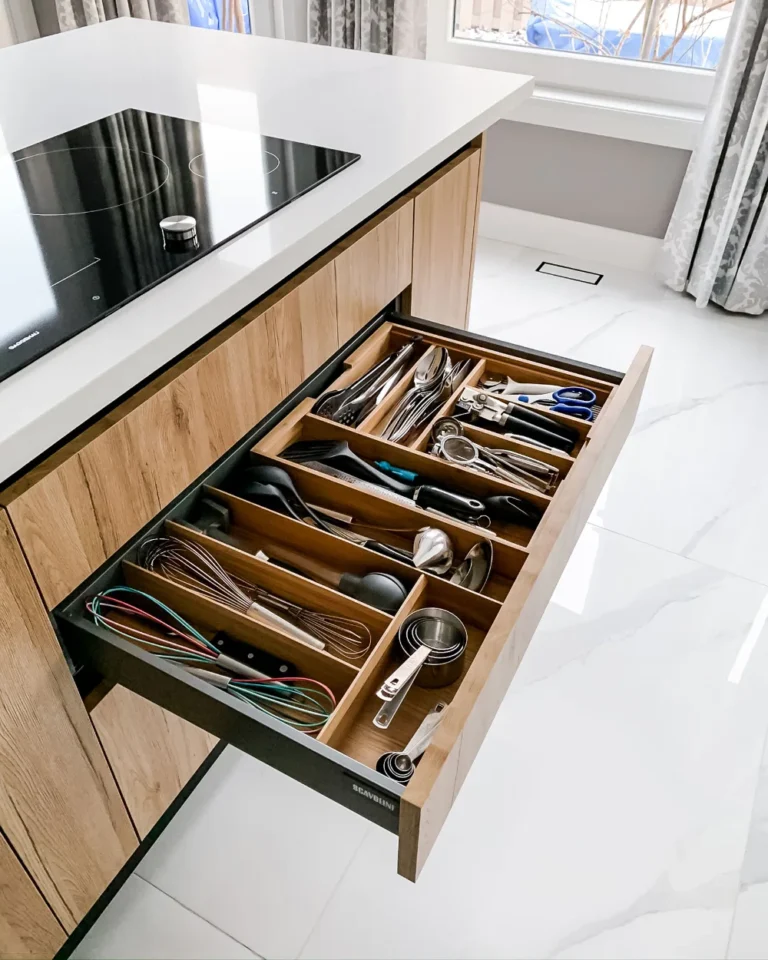
How to Accessorize Kitchen Countertop: Easy Style Tips
How to Accessorize Kitchen Countertop: A Visual Guide to Styling Zones, Layers, and Function
Most guides hand you a shopping list. The real skill is learning how to accessorize kitchen countertop surfaces so they stay functional and look intentional. You need a spatial framework first.
Decor follows structure.
NKBA guidelines call for an 18 by 24 inch clear prep runway and 40 to 50 percent negative space across the whole countertop. This article walks through the visual logic that makes those numbers work in daily life.
Quick Answer
Start with zone mapping. Reserve an 18 inch prep runway. Keep 40 percent of the surface clear.
Build vignettes in three layers: anchor, mid, accent. Use vertical trays and risers to add storage without spreading out. Choose dual-use pieces that earn their footprint.
Why Countertop Styling Is a Visual Problem, Not a Shopping List
Buying pretty canisters does not solve clutter. The eye reads proportion, rhythm, and negative space before it notices individual objects. A countertop that works feels calm because the zones are legible.
Prep zone. Landing zone. Display zone.
Appliance garage. Each has a job.
When zones blur, the surface becomes a dumping ground. Mail migrates to the prep runway. The toaster creeps into the landing zone.
Visual weight piles up on one side. The fix is not more containers. The fix is a map you can see in your head before you place a single item.
Research shows staged counters with clear zoning photograph 15 to 20 percent better in listing photos per Redfin staging data. Buyers read function instantly. So do you at 6 AM making coffee.
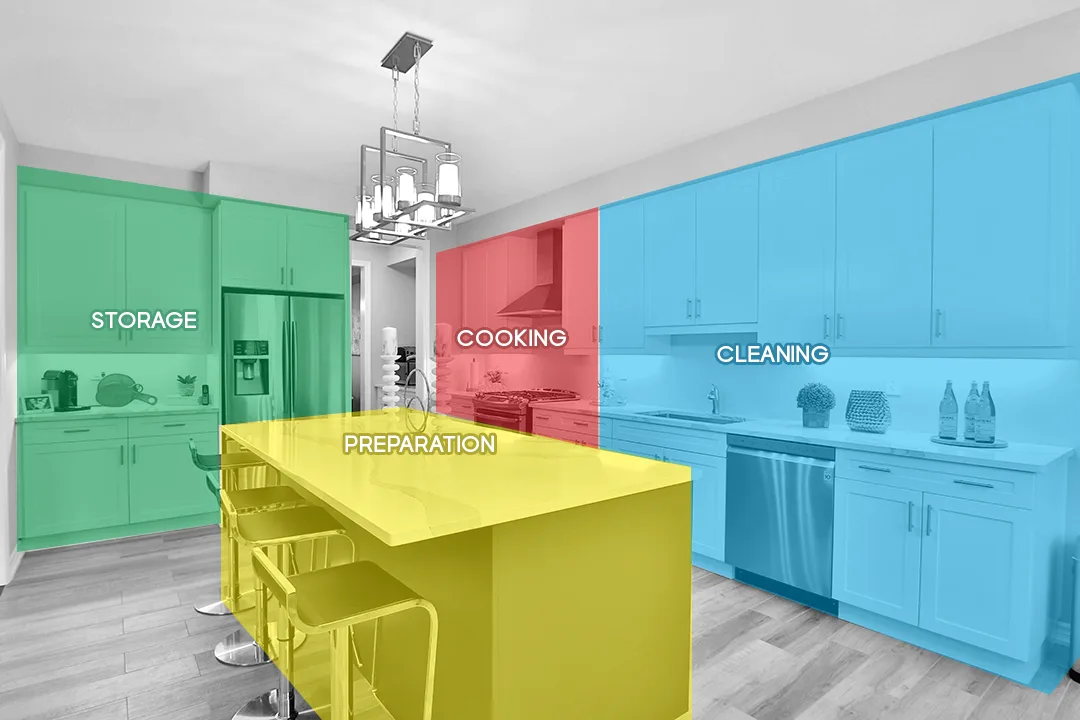
Image source: Bing (Web (fair-use with source credit))
The Three Questions That Reveal Your Real Layout
Ask these before you buy anything. Where does the knife land after chopping? Where does the coffee mug wait while the machine brews?
Where does the cutting board live when not in use? Answers dictate your zones.
If the knife block sits across the kitchen from the prep runway, you will leave knives on the counter. If the mug tree blocks the landing zone, you will set mugs on the stove. Flow dictates placement.
Decor follows flow.
Visual Weight vs Physical Weight
A marble pastry slab looks heavy. A glass canister set looks light. Your brain balances visual weight not mass.
Three small jars on the left balance one large board on the right. Height variation creates rhythm. Flat surfaces read as empty.
Vertical elements read as intentional.
The rule of three works because odd numbers force the eye to move. Even numbers create static symmetry. Symmetry feels staged.
Asymmetry feels lived. Aim for lived.
The Spatial Framework: Zones, Runways, and Breathing Room
Every kitchen has a hidden grid. Upper cabinets sit 18 inches above the counter. That ceiling limits tall items to 16 inches max.
The sink and stove each need a 12 inch landing zone on both sides. The prep runway needs 18 by 24 inches minimum. These are not suggestions.
They are ergonomic minimums from NKBA planning standards.
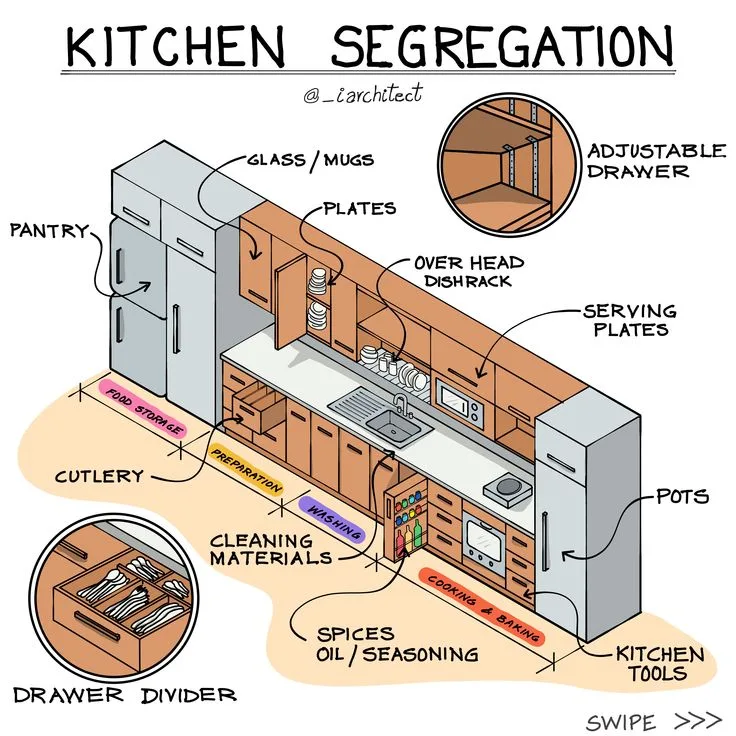
Image source: Web (Bing) / pinterest.com (Web image (fair-use with source credit))
Mapping Your Zones in Five Minutes
Grab painter's tape. Mark the prep runway first. Center it on your primary work zone.
Usually between sink and stove. Mark 12 inch landing zones flanking the sink. Mark 12 inch landing zones flanking the stove.
What remains is display zone and appliance garage. Photo the map. You now have a blueprint.
The 40 Percent Rule
Clear space is not wasted space. It is working capital. Aggregate review data shows cooks who maintain 40 percent negative space report less frustration and faster cleanup.
Clutter expands to fill available surface. The 40 percent cap forces discipline.
Test it. Clear everything. Wipe down.
Put back only what you use daily. Photograph. That is your baseline.
Decor gets added only if the baseline holds.
Appliance Garage Integration
If you have an appliance garage, use it. Toaster. Blender.
Coffee grinder. They live behind doors. The countertop stays open.
If you do not have one, consider a rolling cart with a shelf. It creates a mobile garage. The key principle: daily-use appliances earn counter space.
Weekly-use appliances do not.
Anchor, Mid, Accent: The Three-Layer System That Actually Works
Every vignette needs three heights. Anchor: 12 to 18 inches wide, 10 to 14 inches tall. Think cutting board leaning back or a three-piece canister set.
Mid: 6 to 10 inches tall. Utensil crock. Oil and vinegar cruets.
Salt cellar. Accent: 3 to 5 inches. Small tray.
Bud vase. Stack of coasters.

Image source: Bing (Web (fair-use with source credit))
Anchor Pieces That Do Double Duty
A 12 by 18 inch end-grain cutting board protects the counter and looks substantial. Lean it against the backsplash. It anchors the prep zone visually and functionally.
A marble pastry slab does the same for baking zones. A canister set anchors the coffee or baking station. The anchor stays put.
Everything else orbits it.
Mid Layer: The Workhorses
Utensil crocks hold the tools you grab mid-cook. Choose one with a wide base so it won't tip when you yank the tongs. Oil and vinegar cruets stay near the stove.
Salt cellar lives at the prep runway edge. These move daily. They need stable footprints and easy grip.
Accent Layer: The Personality
This is where you play. A small ceramic tray corrals the olive oil and flaky salt. A bud vase with one sprig of rosemary.
A stack of linen cocktail napkins. Accents rotate seasonally. They are light, low, and easy to move when you need the space.
Triangle Placement Logic
Place the anchor back left or back right. Mid piece opposite side mid-height. Accent front center.
This creates a visual triangle. The eye moves anchor to mid to accent and back. No dead corners.
No floating items. The triangle scales. Small counter gets a small triangle.
Large island gets two or three.
Material & Color Logic: Making Stone, Wood, and Metal Talk to Each Other
Your countertop material sets the palette. Quartz with cool grey veins pairs with brushed nickel, matte black, white oak. Warm granite with gold flecks pairs with brass, walnut, cream ceramic.
Butcher block pairs with black steel, copper, terracotta. The rule: match undertones. Cool with cool.
Warm with warm.
Texture Contrast Creates Depth
Smooth canisters on a honed quartz slab read flat. Add a rough-cut wooden board. A woven basket.
A nubby linen tray. Texture catches light differently across the day. Morning sun highlights the board grain.
Evening light picks up the basket weave. The surface feels alive not decorated.
Transparency and Opacity Balance
Glass canisters show contents. Ceramic hides them. Use both.
Glass for pretty staples like pasta, colorful beans, flaky salt. Ceramic for flour, sugar, coffee beans that degrade in light. The mix prevents visual monotony.
Opaque pieces ground the vignette. Transparent pieces lighten it.
Metal Finish Consistency
Pick two metals max. Usually the faucet and hardware dictate one. Choose a complement for decor.
Brass faucet plus matte black canister lids works. Chrome faucet plus brushed nickel utensil crock works. Three metals reads chaotic.
Two reads curated.
Color Temperature Cheat Sheet
| Countertop Family | Complement Metrics | Complement Woods | Complement Ceramics |
|---|---|---|---|
| Cool white quartz | brushed nickel, matte black | white oak, ash | white, slate, charcoal |
| Warm beige granite | brass, antique bronze | walnut, cherry | cream, terracotta, sage |
| Butcher block | black steel, copper | matches itself | cream, sage, indigo |
| Dark soapstone | pewter, gunmetal | white oak, maple | white, charcoal, ochre |
| White marble | polished nickel, brass | walnut, white oak | white, black, blush |
Manufacturer care guides from Caesarstone and Cambria confirm acidic items etch polished surfaces. Use trays under citrus bowls and vinegar cruets. Protect the stone.
Protect the look.
Step-by-Step Styling Walkthrough: From Bare Counter to Finished Vignettes
Start empty. Wipe down. Tape your zones.
This is your canvas. The process takes 30 minutes. The result lasts months.
Step 1: Place the Anchors
Identify each zone's anchor. Prep zone gets the cutting board. Coffee zone gets the canister set.
Baking zone gets the marble slab. Lean boards against the backsplash. Set canisters back left.
Push slabs to the back edge. Anchors define the zone boundaries.
Step 2: Add Mid-Layer Workhorses
Place the utensil crock at the prep zone front right. Oil and vinegar at the stove landing zone. Salt cellar at the prep runway edge.
Coffee scoop in the canister set. Each item sits where the hand reaches naturally. Test the reach.
Adjust inches matter.
Step 3: Layer in Accents
Small tray under the oil cruets. Bud vase near the sink. Napkin stack at the coffee station.
Keep accents low. Nothing taller than 5 inches. Nothing wider than 6 inches.
They punctuate. They do not dominate.
Step 4: Vertical Expansion
Add a tiered stand in the baking zone for spices. A riser under the cutting board for knife block storage beneath. A wall-mounted magnetic strip above the prep zone for knives.
Vertical moves storage off the horizontal plane. The 40 percent clear space stays intact.
Step 5: The Traffic Test
Simulate cooking a meal. Grab knife. Chop.
Reach for oil. Stir. Grab salt.
Season. Set spoon down. Rinse knife.
Return to block. Note collisions. Note reaches that stretch.
Move items until the flow feels silent. Silent flow is the goal.
Step 6: Photograph and Lock It
Take a photo from eye level. Take one from the doorway. Compare to your zone map.
If the zones are legible in the photo, you nailed it. If not, adjust. The photo becomes your reset reference.
Evening reset means match the photo. Done.
Vertical Layering Tricks: Trays, Risers, and Tiered Stands in Action
Vertical layering multiplies storage without expanding the footprint. A 10 by 10 inch tiered stand holds three levels of spices where one jar once sat. A 1.5 inch riser lifts a cutting board creating a hidden cavity for a knife block underneath.
A shallow tray corrals oil bottles and salt keeping them movable as one unit.

Image source: Web (Bing) / pinterest.com (Web image (fair-use with source credit))
Choosing the Right Vertical Tool
Tiered stands work best for lightweight items like spice jars or tea tins. Look for 12 inch height max to clear upper cabinets. Risers suit heavy anchors like marble slabs or large boards.
Choose metal or acrylic with non-slip feet. Trays work for liquid groups like oils vinegars and hot sauces. Raised edges prevent sliding when the tray moves.
Placement Rules for Vertical Pieces
Place tiered stands in corners or against the backsplash. They read as intentional columns not obstacles. Risers sit under anchors at the back edge.
The hidden storage stays accessible but invisible. Trays float in landing zones. They slide aside instantly when the zone needs to clear.
Stability Checklist
Test every vertical piece with a firm nudge. Tiered stands must not wobble. Risers must not slide on polished stone.
Trays must not tip when lifted from one side. Add museum putty under riser feet on quartz. Use non-slip liner inside trays.
Stability prevents the cascade effect when one piece falls.
Functional Decor That Earns Its Keep: Dual-Use Pieces Worth the Footprint
Every item on the counter should answer two questions. Does it serve a cooking function? Does it contribute to the visual triangle?
If the answer is no to either it belongs in a drawer. The best dual-use pieces are invisible workhorses.
Cutting Boards as Anchor and Tool
An end-grain board 1.5 inches thick protects knives and the counter. Lean it against the backsplash when not in use. It anchors the prep zone visually.
Pull it down for chopping. Return it upright. The board never leaves the zone.
No storage step required.
Canister Sets That Measure and Store
Three-piece sets with flat lids double as measuring cups. Flour sugar coffee stay fresh. Lids nest for storage.
The set anchors the baking or coffee zone. Clear glass shows levels. Ceramic protects light-sensitive beans.
Choose wide mouths for scoop access.
Utensil Crocks With Drainage
A crock with holes in the bottom lets wet tools dry upright. No moldy bottoms. No puddles on the counter.
Weighted base prevents tipping. Wide mouth fits whisks and tongs. Ceramic or enameled steel cleans in the dishwasher.
Salt Cellars With Lids
Open salt pigs collect grease and dust. A lidded cellar keeps flaky salt clean. The lid stays off during cooking.
Goes on after. Ceramic or wood both work. Match the material to your anchor piece for cohesion.
Splash Guards That Fold Flat
A three-panel oil guard protects the backsplash and walls. Folds to 12 by 12 inches for storage behind the appliance garage. Deploys in seconds.
Wipes clean. The alternative is scrubbing grout lines weekly.
Lighting & Backsplash Interaction: The Invisible Styling Partners
Under-cabinet lighting changes how every surface reads. Cool 4000K LEDs make white quartz pop but wash warm wood. Warm 2700K LEDs enrich butcher block but yellow white marble.
Test bulbs before committing. The backsplash reflects light back onto the counter amplifying the effect.
Color Rendering Index Matters
CRI above 90 renders food and decor accurately. Cheap LEDs at 80 CRI make olive oil look brown and herbs look grey. Manufacturer specs from major lighting brands confirm CRI 90+ for kitchen task lighting.
The difference is visible at 6 AM and 8 PM.
Reflective vs Absorptive Backsplashes
Glossy subway tile bounces light into the vignette. Matte stone absorbs it. A dark matte backsplash behind a white marble counter creates a high-contrast frame.
The vignette floats. A glossy white backsplash behind butcher block brightens the wood grain. The vignette glows.
Pendant Placement Shadows
Island pendants cast shadows across the counter. Center them over the prep runway not the display zone. Shadow on the cutting board is annoying.
Shadow on a canister set is moody. Adjust height to 30-36 inches above the counter for optimal spread.
Natural Light Migration
Morning sun hits east-facing counters hard. UV fades spices in clear jars. Move light-sensitive items to west zones.
Rotate quarterly. The vignette adapts to the sun not the other way around.
Common Visual Mistakes: Clutter Creep, Height Monotony, and Scale Failures
Clutter creep starts with one mail pile. Then a school paper. Then a charging cable.
The prep runway shrinks to 10 inches. The fix is a daily 60-second reset. Everything returns to the photo.
No exceptions.
Height Monotony Flattens the Scene
Five items all 6 inches tall read as a fence. The eye slides across without pause. Insert one 12 inch anchor and one 3 inch accent.
The rhythm returns. The triangle reappears. Height variation is free.
Use it.
Scale Mismatch With Counter Depth
Standard counters are 25.5 inches deep. A 14 inch deep canister set leaves 11 inches for prep. That fails the 18 inch runway rule.
Choose 8-10 inch deep anchors. Leave the depth for work. The anchor sits back.
The workspace stays forward.
Appliance Graveyard Syndrome
The blender used monthly. The waffle maker used twice a year. The stand mixer used weekly but parked permanently.
Weekly use earns a spot. Monthly goes to the pantry. Yearly goes to storage.
Be honest about frequency.
Seasonal Decor Overload
Pumpkins in October. Wreaths in December. Flowers in April.
Each adds visual weight. Limit to one seasonal swap per zone. The anchor stays.
The accent rotates. The mid-layer stays functional. The counter breathes.
Small Kitchen, Renter, and Family Adaptations: Same Principles, Different Constraints
A 6 foot galley counter has one prep zone. The anchor is the cutting board. The mid-layer is the utensil crock.
The accent is a magnetic knife strip on the wall. Vertical is not optional. It is survival.
Renter-Friendly Non-Permanent Solutions
Command-strip shelves hold spices below upper cabinets. Tension rods create dividers in deep drawers for board storage. Rolling carts with butcher block tops add movable prep zones.
No holes. No damage. Full deposit return.
Family Kitchens With Kids
Breakables above 48 inches. Plastic canisters at kid height for snack access. A designated homework landing zone with a tray that clears in one sweep.
The prep runway stays sacred. Teach the reset routine early.
Aging-in-Place Adjustments
Lightweight anchors. Bamboo boards not marble. Pull-out shelves in base cabinets replace low bending.
Magnetic strips at waist height. Contrast tape on counter edges for visibility. The principles hold.
The execution adapts.
Micro-Kitchen Minimalist Approach
One anchor. One mid. One accent.
That is the entire display. The rest is negative space. A single tiered stand holds all spices.
A magnetic strip holds all knives. A rolling cart holds the toaster. The counter is 80 percent clear.
It feels huge.
Seasonal Edit & Maintenance Routine: Keeping It Alive Without the Overhaul
Quarterly edits prevent drift. Spring: swap heavy ceramics for light glass. Summer: add herb pots near the sink.
Fall: bring back wood tones and opaque canisters. Winter: clear space for holiday baking. The anchors stay.
Only accents rotate.
The 60-Second Evening Reset
Clear the prep runway. Return tools to the crock. Wipe the landing zones.
Match the reference photo. Done. Consistency beats deep cleans.
The system holds because the daily cost is near zero.
Monthly Deep Pull
Move every anchor. Wipe underneath. Check for moisture rings.
Tighten tiered stand screws. Refresh museum putty. Rotate spice jars for even light exposure.
Fifteen minutes preserves the finish and the layout.
Quick-Reference Visual Cheat Sheet: Proportions, Clearances, and Placement Rules
| Element | Spec | Why It Matters |
|---|---|---|
| Prep runway | 18×24″ min | NKBA ergonomic standard |
| Landing zones | 12″ each side sink/stove | Hot pan safety |
| Tall item max | 16″ | Clears 18″ upper cabinet gap |
| Negative space | 40–50% | Visual calm workflow |
| Anchor width | 12–18″ | Visual weight balance |
| Mid height | 6–10″ | Reach zone |
| Accent height | 3–5″ | Low punctuation |
| Tiered stand max | 12″ | Cabinet clearance |
| Flammables from gas | 12″ min | IRC M1901.2 |
Print this. Tape it inside the pantry door. The rules become habit.
Frequently Asked Questions
How much clear space should a countertop have?
Aim for 40 to 50 percent negative space. NKBA guidelines and aggregate review data confirm this range supports both workflow and visual calm.
Can I put a knife block on a marble countertop?
Yes with a non-slip pad. Marble scratches easily. A weighted block with rubber feet protects the stone.
Magnetic strips mounted on the backsplash avoid contact entirely.
What is the best way to store cutting boards?
Lean the primary board against the backsplash at the prep zone. Store extras vertically in a base cabinet divider or a tall narrow bin beside the refrigerator.
How do I stop clutter from taking over?
Enforce a 60-second evening reset. Everything returns to its zone. Mail goes to a wall pocket.
Appliances return to the garage or pantry. The photo is the law.
Can renters style countertops without damage?
Yes. Command-strip shelves under cabinets. Tension rods in drawers.
Rolling carts for extra zones. Magnetic strips with adhesive backing. No holes required.