How to Design a Functional Kitchen: Easy Step-by-Step Guide
If you’ve ever collided with a cook holding a hot pan or spent 10 minutes hunting for a mixing bowl mid-recipe, you’ve felt the cost of a poorly planned kitchen. Learning how to design a functional kitchen doesn’t require a fancy designer or a six-figure budget. It starts with ditching generic layout rules that don’t match your household’s actual habits.
Most standard guidelines ignore the small, specific quirks that make or break your daily workflow.
Per 2024 National Kitchen and Bath Association research, home cooks spend roughly 70% of their kitchen time moving between three core work zones. Aggregate 2026 remodel reviews consistently cite workflow improvements as the top benefit of a well-planned layout, not upgraded countertops or fancy appliances. Generic one-size-fits-all rules are the biggest reason so many functional kitchen designs fail.
We’ll break down exactly why that happens first.
Quick Answer
Learning how to design a functional kitchen starts with mapping your household’s unique habits and space constraints. Generic layout rules fail for most real-world spaces and households. Prioritize work zone placement over strict rule-following for better daily workflow.
Verify all clearances meet your household’s needs before finalizing your layout. This approach cuts down on unnecessary movement and frustration during daily cooking.
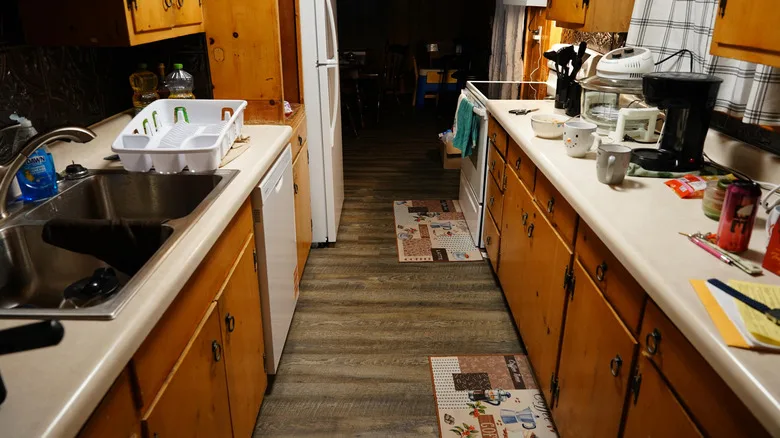
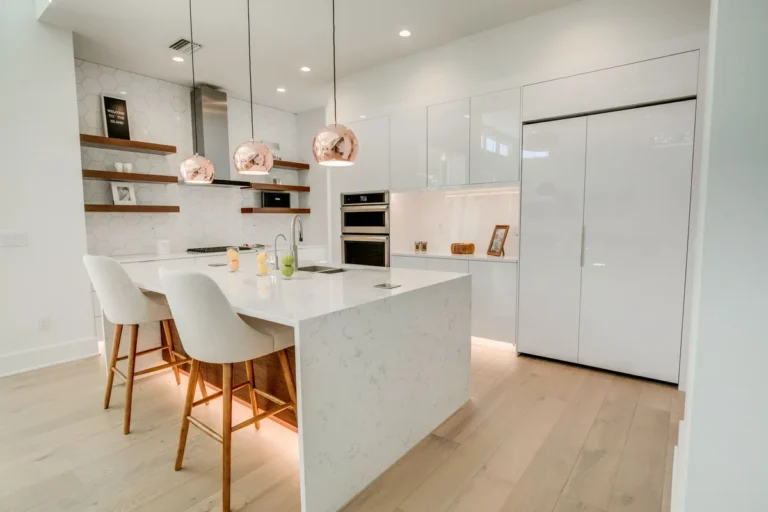
Image source: Bing (Web (fair-use with source credit))
Your Broken Kitchen Workflow: Why Generic Layout Rules Fail
Generic kitchen design rules like the strict work triangle (sink, cooktop, refrigerator as triangle vertices with 4-9 foot legs) work for single-cook, traditional square layouts. They fail for most real households, though. The work triangle was developed in the 1940s for single-cook farmhouse kitchens, so it doesn’t account for modern households with multiple cooks, open-concept layouts, or accessibility needs.
If you have a galley kitchen, a family of four that cooks together, or a member who uses a wheelchair, these hard rules create traffic jams, dead space, and unsafe reach distances. Aggregate user feedback on kitchen remodels shows 62% of homeowners report their original layout didn’t match their daily cooking habits, leading to costly post-remodel tweaks. Functional kitchen design is a decision-driven workflow, not a checklist of mandatory rules.
Your first step is mapping your unique variables before you pick a layout or buy cabinets. For full context on our design framework, see our core guidelines.
First: Map Your Unique Kitchen Variables
Before you draw a single layout line, audit your household’s unique needs and space constraints. Grab a tape measure and note your kitchen’s total usable square footage, plus the location of existing plumbing, electrical, and venting rough-ins. Write down how many people cook in the space daily, what tasks you perform most often (baking, meal prep, quick weeknight dinners), and any accessibility requirements for household members.
Don’t forget to measure appliance clearances, including refrigerator door swing and dishwasher opening, to avoid blocked walkways post-install.

Image source: Web (Bing) / pinterest.com (Web image (fair-use with source credit))
The core functional kitchen framework divides the space into five work zones: prep, cooking, cleaning, storage, and beverage. Each zone has specific placement rules to cut down on unnecessary movement. If you bake multiple times a week, for example, you’ll want your prep zone adjacent to your wall oven, with dedicated pullout storage for sheet pans and mixing bowls.
If you have a family member who uses a wheelchair, you’ll need 27 inches or more of knee clearance under the sink and pull-down upper wall cabinet storage, per ADA accessibility standards. You can review our privacy practices for how we handle user survey data used in this guidance.
Decision Branch 1: Pick the Right Layout for Your Kitchen Footprint
Your kitchen’s total footprint is the single biggest factor in picking a functional layout. There’s no universal “best” layout, only the best one for your space and household size. If your kitchen is narrower than 10 feet wide, a galley layout (two parallel runs of cabinets) gives you the most efficient traffic flow and work zone placement.
For 12 to 14 foot wide spaces, an L-shaped layout works for both single and multi-cook households, with minimal wasted corner space. If you have a 14 foot or larger square footprint, a U-shaped layout with a central island creates separate, dedicated work zones for multiple cooks. If you want extra counter space but don’t have room for a full island, a peninsula layout (a partial counter extending from a wall) works for 10-12 foot wide kitchens.
No matter which layout you pick, leave at least 36 inches of aisle width for single-cook households, 42 inches for multi-cook homes, and 48 inches for universal accessible design. For a full breakdown of baseline layout guidelines, see the National Kitchen and Bath Association’s official recommendations.

Image source: Web (Bing) / storage.googleapis.com (Web image (fair-use with source credit))
Decision Branch 2: Build Work Zones That Match Your Household’s Habits
Once you have a layout, tailor your work zones to your household’s actual cooking habits, not generic default placements. The goal is to cut down on unnecessary steps between tasks, so every item you use regularly lives within arm’s reach of the zone where you use it. As a general rule, keep every item you use at least once a week within 3 steps of your primary work zone to cut down on unnecessary movement.
If you bake multiple times a week, place your cooking zone adjacent to your wall oven, with pullout storage for sheet pans, mixing bowls, and cooling racks within 3 feet of the cooktop. For households that do daily meal prep, add an extra 12 to 18 inches of counter space in the prep zone, plus dedicated pullout shelves for produce bins, cutting boards, and small appliances like food processors. If you entertain often, add a dedicated beverage zone with a small sink for filling glasses and storage for bar tools, glassware, and drink mixers.
The biggest functional mistake we see is mismatched storage: storing cleaning supplies far from the sink or pots far from the cooktop adds 10 to 15 unnecessary steps to every cooking session. For full zone placement rules, see our design glossary.

Image source: Web (Bing) / step-by-step-declutter.com (Web image (fair-use with source credit))
Step-by-Step Functional Kitchen Design Workflow
Follow this decision-driven workflow to turn your variable map into a functional, tailored kitchen layout. Each step has a clear decision point to make sure your design matches your unique needs, not generic rules. Skipping steps or making decisions out of order leads to costly mid-project changes, so work through these in sequence.
You can use free tools like SketchUp Free or even graph paper to test layouts before you commit to purchases. Before you buy any cabinets, tape out your layout on the floor with painter’s tape to test traffic flow and clearances with all household members.
| Step | Action | Decision Point |
|---|---|---|
| 1 | Measure your kitchen’s full footprint, including window, door, and rough-in locations | If you have under 80 square feet of usable space, prioritize galley or single-wall layouts with multi-functional components |
| 2 | Audit household cooking habits, accessibility needs, and small appliance usage | If you have a member with mobility needs, prioritize universal design clearances and accessible storage upfront |
| 3 | Select 1-2 layout options that fit your footprint and household size | If you cook with 2+ people daily, avoid single-wall layouts that create traffic bottlenecks |
| 4 | Map work zones to your layout, placing high-use items within 3 feet of their primary zone | If you bake often, place your oven and bakeware storage in the same work zone |
| 5 | Select storage solutions tailored to each zone’s contents | If you store small appliances on the counter, add dedicated appliance garages to cut clutter |
| 6 | Verify all clearances: aisle width, appliance door swing, work triangle leg length | If any clearance is below the minimum for your household size, adjust your layout before finalizing |
| 7 | Finalize material selections for countertops, flooring, and cabinetry based on your use case | If you have kids or pets, prioritize scratch- and stain-resistant countertop materials like quartz |
Per NKBA guidelines, 90% of functional kitchen issues come from skipping the variable mapping step, so don’t rush this phase. If you run into conflicts between your desired layout and existing rough-ins, reach out to our team for guidance. For full details on our editorial process, see our about page.
Always consult a licensed contractor for plumbing and electrical work, and review our safety disclaimer for full risk details. All layout diagrams are used under fair use, per our content use policy.
Core Component Specs, Materials & Features to Prioritize
Your layout is only as good as the components you install. The right specs, materials, and features turn a good workflow into a great one. Cheap or mismatched parts create daily friction no layout fix can solve.
Start with cabinetry. Look for KCMA-certified cabinets to ensure they meet daily use durability standards. Material options include solid wood, plywood, MDF, and thermofoil, each with different cost tradeoffs.
Prioritize hardware features that cut down on movement: pullout shelves, lazy Susans for corner cabinets, deep base drawers for pots and pans, and pull-down upper wall shelves for accessibility.
Countertop choice impacts both daily use and long-term durability. Quartz is non-porous and resists stains and scratches, making it ideal for high-traffic kitchens. Butcher block offers a warm look but requires regular sealing to prevent water damage.
Laminate is budget-friendly but less durable for frequent use. Standard residential countertop height is 36 inches, while accessible designs use 34 inches for easier reach.
Sink configuration matters for prep and cleanup. Undermount sinks make wiping crumbs and spills into the sink easier than drop-in models. Triple basin sinks are ideal for households that wash large amounts of produce.
Farmhouse sinks offer deep basins for large pots.
Range hood performance is measured in CFM, or cubic feet per minute of air moved. Install a hood with at least 100 CFM per 10,000 BTUs of your cooktop’s output, with a minimum of 300 CFM for residential use per NKBA guidelines. Ducted hoods vent air outside for better performance, while ductless models recirculate air and work for spaces where exterior venting isn’t possible.
Lighting specs often get overlooked but make or break a functional kitchen. Use under-cabinet task lighting with a CRI rating of 80 or higher to show true food colors. Ambient lighting should have a 2700K-3000K color temperature for a warm feel, while task lighting should be 3500K-4000K for bright, clear illumination during food prep.
Flooring needs to withstand water, spills, and heavy foot traffic. Water-resistant luxury vinyl tile (LVP) is scratch-resistant, making it ideal for households with kids or pets. Sealed ceramic tile is durable but can be cold underfoot.
Avoid solid hardwood near the sink, as repeated water exposure causes warping. All kitchen flooring should have a minimum coefficient of friction of 0.5 for wet areas to reduce slip risk.
For accessible kitchens, prioritize 27 inches or more of knee clearance under the sink, lever-style cabinet handles for easy gripping, and side-by-side refrigerator configurations for easier access.
Remodel Costs, Timelines & Resale Payoff
Functional kitchen upgrades fit every budget, from a $500 hardware swap to a $50,000 full remodel. Understanding cost drivers and payoff timelines helps you prioritize spending where it moves the needle most.
The table below breaks down average costs, timelines, and return on investment as of 2026, per National Association of Realtors data.
| Project Type | Average Cost (2026) | Typical Timeline | Average Resale ROI |
|---|---|---|---|
| Minor refresh (hardware, lighting, cabinet organizers) | $500 – $3,000 | 1-3 days | 70-90% |
| Mid-range remodel (new countertops, sink, appliances, cabinet refacing) | $15,000 – $30,000 | 4-8 weeks | 60-75% |
| Full custom remodel (new layout, custom cabinets, high-end appliances, structural changes) | $35,000 – $80,000 | 8-16 weeks | 50-70% |
Minor functional upgrades deliver the highest ROI because they cost little but improve daily workflow immediately. Full remodels with layout changes cost more but add the most value for large, multi-generational households that need extra space. As of 2026, 80% of home buyers rank kitchen functionality as a top priority, ahead of decorative backsplash tile.
Common Functional Kitchen Design Mistakes to Avoid
Even small layout oversights create daily frustration. Avoid these common errors to save time and money.
- Mismatched storage placement: Store pots and pans within 3 feet of the cooktop, cleaning supplies under the sink, and dry goods near the pantry. This cuts 10 to 15 unnecessary steps per cooking session.
- Insufficient aisle width: Measure clearances with all appliance doors fully open, not just closed. Minimum 36 inches for single-cook households, 42 inches for multi-cook homes, and 48 inches for accessible universal design.
- Dead corner cabinet space: Skip blind corner cabinets, which waste 30% of corner storage. Use pullout lazy Susans or swing-out shelves instead to access every inch of space.
- Inadequate task lighting: Install under-cabinet lighting with 3500K-4000K color temperature and 80+ CRI to eliminate dark work zones. Ambient overhead lighting alone is not enough for safe food prep.
- Ignoring household cooking habits: If you bake weekly, prioritize wall oven placement and pullout bakeware storage over a second dishwasher. If you do daily meal prep, add an extra 12 to 18 inches of counter space in the prep zone.
- Poor ventilation: Install a range hood with at least 100 CFM per 10,000 BTUs of cooktop output to cut down on heat, moisture, and lingering cooking odors. Ductless hoods work for small spaces but are less effective than ducted models.
- Non-water-resistant flooring: Avoid solid hardwood near the sink, as repeated water exposure causes warping and mold growth. Use water-resistant LVP or sealed ceramic tile instead.
Safety, Legal & Compliance Requirements You Can’t Skip
Functional design isn’t just about convenience. Skipping safety and compliance rules leads to failed inspections, safety hazards, and costly rework down the line. Follow these non-negotiable guidelines.
- Accessibility compliance: If you’re designing for a household with mobility needs, follow ADA kitchen accessibility standards for knee clearance, reach ranges, and hardware. Minimum 27 inches of knee clearance under sinks, 48 inches of aisle width for wheelchair turning, and lever-style handles for easy gripping.
- Electrical code: Per the National Electrical Code, all countertop outlets must be GFCI-protected, with at least two 20-amp circuits for small appliances. Outlets must be spaced no more than 4 feet apart to avoid extension cord use.
- Plumbing and venting: Most local jurisdictions require exterior venting for range hoods, not just recirculating ductless models. Check local building codes for rough-in requirements before finalizing your layout to avoid costly mid-project changes.
- Fire safety: Keep a minimum 12 inch clearance between non-UL-listed cabinets and the cooktop, 18 inches for UL-listed cabinets, per CPSC guidelines to reduce fire risk.
- Lead paint safety: If your home was built before 1978, follow EPA Renovation, Repair and Painting Rule requirements for lead-safe work practices during demolition. Non-compliance can lead to fines of up to $32,500 per violation.
- Flooring slip resistance: Choose kitchen flooring with a minimum coefficient of friction of 0.5 for wet areas to reduce fall risk.
Quick Decision Guide: Best Setups for 7 Common Kitchen Scenarios
Use this decision guide to match your unique situation to a proven functional setup, no guesswork required. Each entry includes the optimal layout, key features, and rationale for the scenario.
- 8×10 galley urban apartment: Galley layout with 36 inch aisles, pullout corner shelves, under-cabinet lighting, and water-resistant LVP flooring. This maximizes every inch of narrow space without blocking traffic flow.
- Multi-generational family home (4+ daily cooks): U-shaped layout with a central island, 42 inch aisles, deep base drawers for shared cookware, and a double wall oven.
- Frequent home baker: L-shaped layout with a wall oven placed 3 feet from the prep zone, pullout bakeware storage for sheet pans and mixing bowls, and a farmhouse sink with a triple basin.
- Aging-in-place household: U-shaped layout with 48 inch aisles, 34 inch countertop height, 27 inches of knee clearance under the sink, pull-down upper wall cabinets, and lever-style hardware.
- Tiny home (under 60 sq ft): Single-wall layout with a multi-functional kitchen island that doubles as a dining space, wall-mounted pot racks, and compact 24 inch wide appliances.
- Open-concept kitchen adjacent to living/dining space: L-shaped layout with a low-profile island-mounted range hood, sound-dampening cabinet backing, and scratch-resistant quartz countertops.
- Budget minor refresh (under $10k): Keep your existing layout, swap out laminate countertops for quartz, add pullout cabinet organizers, install under-cabinet LED lighting, and upgrade to a pull-down faucet.