How to Clear a Clogged Kitchen Sink: 5 Easy No-Plumber Fixes
If you’ve ever stared at a kitchen sink full of standing water, wondering how to clear a clogged kitchen sink without calling a pricey plumber, you’re not alone. Clogged kitchen drains are one of the most common household headaches, often caused by built-up grease, food scraps, or soap scum. Most clogs are fixable with basic tools you already own, no special skills required.
Per ASTM International plastic pipe testing standards, PVC drain pipes can warp at temperatures as low as 140°F (60°C), so using the wrong unclogging method can cause expensive damage. We’ve broken down the exact, safe steps to clear your clog based on your specific sink setup, pipe type, and clog severity. First, run through a quick diagnostic to rule out red flags that require a pro.
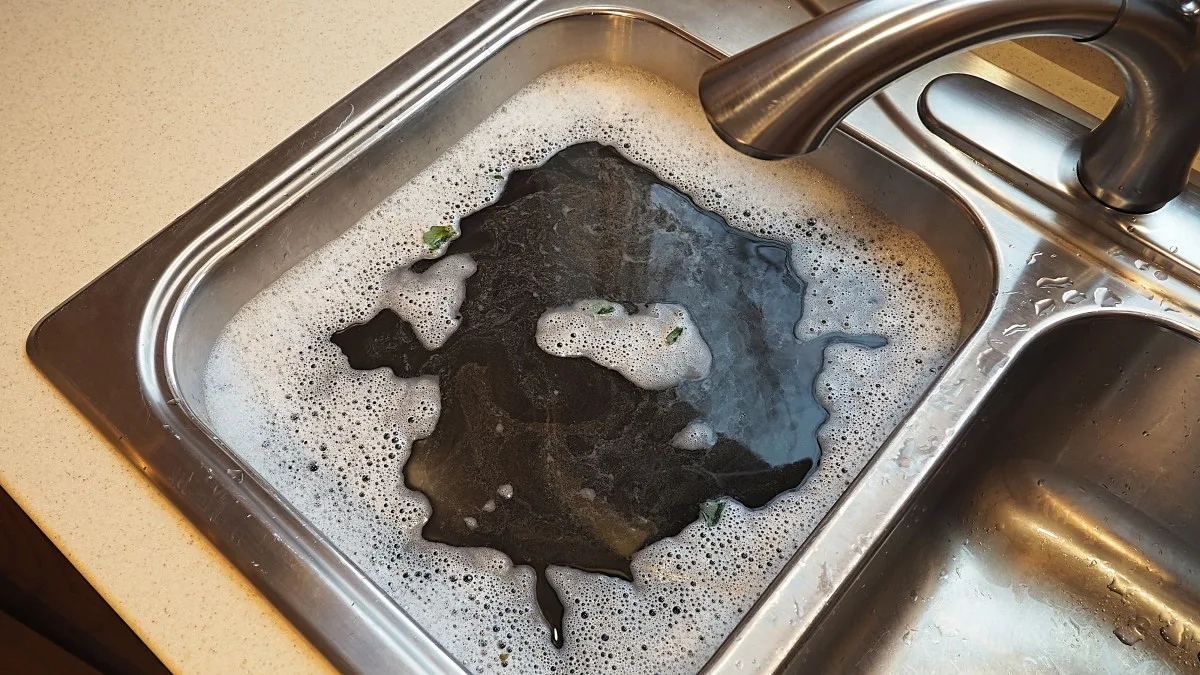
Image source: Web (Bing) / kaptenmods.com (Web image (fair-use with source credit))
First: 3 Red Flags That Mean You Should Skip DIY and Call a Plumber Immediately
Some clog symptoms mean you should skip DIY entirely and call a licensed plumber right away. Trying to force a fix for these issues can lead to thousands of dollars in water damage or violate local plumbing codes. The 3 biggest red flags are:
- Foul sewage odor coming from any drain in your home, which points to a main sewer line blockage rather than an isolated sink clog
- Multiple drains (toilets, tubs, other sinks) backing up at the same time, a sign of a blockage deep in your home’s drain stack
- Visible cracks, corrosion, or active leaks in exposed drain pipes under your sink, which require professional repair to prevent flooding
If you notice any of these, stop all unclogging attempts and contact a plumber as of 2026 to avoid worsening the issue. Renters should also notify their property manager immediately, as invasive pipe work may violate lease terms per HUD rental maintenance guidelines. If you’re planning a full kitchen remodel down the line, proper drain line placement during the initial design can prevent recurring clogs long-term.
Quick Diagnostic: Figure Out Your Clog Type, Pipe Material, and Disposal Setup
Before you grab any tools, run through these 4 checks to match your clog to the right fix. The diagram below labels all common kitchen sink drain components to help you identify your setup at a glance.

Image source: Bing (Web (fair-use with source credit))
| Diagnostic Check | How to Test | What It Means |
|---|---|---|
| Garbage disposal function | Flip the disposal switch: listen for hum, running, or no sound | Hum = jammed disposal; no sound = no power; runs but water still slow = clog past the disposal unit |
| Drain pipe material | Inspect exposed pipe under your sink | White/cream thin pipes = PVC or ABS; thick dark gray = cast iron; silver = rare stainless steel |
| Clog severity | Fill the sink 1 inch with water, then remove the stopper | Slow drain = partial clog; no water movement = full clog with standing water |
| Septic system presence | Check property records or look for a septic tank lid in your yard | Yes = avoid all harsh chemical drain cleaners, per EPA septic system maintenance rules |
If you rent, review your lease for restrictions on chemical drain use or invasive pipe work before proceeding. Many property managers prohibit these methods to avoid damage to the unit. If you’re working with a small kitchen layout, tight under-sink space can make P-trap removal trickier, so checking space constraints during your kitchen layout planning ahead of time can help.
If You Have a Garbage Disposal: Exact Steps for Jammed or Slow-Draining Sinks
Garbage disposals add unique steps to unclogging, as standard plunging can damage the unit or push clogs deeper. First, cut power to the disposal at the wall switch or circuit breaker to avoid electrical shock. Never reach into the disposal opening, even if it appears off.
If the disposal hums but won’t turn, it’s jammed. Locate the small reset button on the bottom of the disposal unit, press it firmly, then try running the disposal again with cold water. If it still hums, insert the included 1/4-inch hex key (or a standard allen wrench) into the port at the bottom of the unit, turn it clockwise and counterclockwise to free the jam.
Once it moves freely, press the reset button again, run cold water, and test the disposal.
If the disposal runs normally but water still drains slowly, the clog is in the P-trap or drain line past the disposal. Skip chemical drain cleaners here: aggregate user reviews report that lye-based cleaners corrode disposal blades and seals, leading to costly replacements. Instead, move to the P-trap removal steps covered later in this guide.
If you’re renovating an older home with cast iron pipes, knowing your pipe material before starting any plumbing work is critical, as covered in our guide to renovating kitchen cupboards with existing plumbing.
If You Don’t Have a Disposal, Partial Clog (Water Drains Slowly): Step-by-Step Fixes
For partial clogs without a garbage disposal, plunging is the safest, most effective first step, and it clears most minor clogs in 5 to 15 minutes per aggregate DIY repair data. First, remove the drain stopper and clear any loose food scraps from the drain opening. Seal the overflow drain with a tight-fitting wet rag to create proper suction pressure.

Image source: Web (Bing) / gofulldiy.com (Web image (fair-use with source credit))
Fill the sink with 1 to 2 inches of water to cover the rubber cup of your flange plunger, which is designed specifically for kitchen sink drains to create an airtight seal. Place the plunger over the drain opening, push down firmly 10 to 15 times, then pull up quickly to dislodge the clog. Repeat this cycle 3 to 4 times, then remove the plunger and test the drain.
If water still drains slowly, skip the boiling water trick if you have PVC pipes: per manufacturer specifications, PVC drain pipes warp at 140°F (60°C), which causes leaks and expensive repairs. Instead, try a homemade mix of 1 cup baking soda followed by 1 cup white vinegar, let it sit for 15 minutes, then flush with hot tap water. For renters on a tight budget, these natural methods are often the only allowed option, and they avoid the $150 to $300 average emergency plumber call-out fee for sink clogs, which is a big help if you’re renovating a kitchen on a tight budget.
If You Don’t Have a Disposal, Full Clog With Standing Water: What to Do First
Full clogs with standing water require a different first step than partial clogs, as plunging can cause water to overflow onto your floor if done incorrectly. First, remove as much standing water as possible using a small cup or wet/dry vac set to the liquid setting. Do not try to plunge until you’ve removed at least half the standing water, as excess water will splash out during the plunging motion.
If you have a wet/dry vac, place the hose directly into the drain opening, seal the gap with a rag, and turn the vac on to pull the water out quickly. Once the water level is low enough, use the same flange plunging method as for partial clogs, sealing the overflow drain with a wet rag first. If plunging doesn’t clear the clog after 3 attempts, move to the P-trap removal steps covered in the next section, as the blockage is likely stuck in the curved trap under your sink.
For homes with cast iron drain pipes, avoid aggressive snaking, as older cast iron can crack or puncture if force is applied incorrectly. If you’ve recently installed new lower kitchen cabinets, make sure the P-trap isn’t kinked or misaligned, as improper installation is a common cause of new clogs. Check standard lower cabinet depth specs to ensure your drain lines have enough clearance.
What to Try Next If the First Method Doesn’t Work
If plunging or disposal fixes didn’t clear the clog, the blockage is almost always stuck in the P-trap, the U-shaped pipe under your sink that catches debris. Place a small bucket under the P-trap, then use an adjustable wrench to loosen the slip nuts on both ends of the trap. Slide the trap off slowly, empty its contents into the bucket, and scrub out any built-up grease or food waste with an old toothbrush.
Image source: Bing (Web (fair-use with source credit))
Reattach the P-trap by hand-tightening the slip nuts first, then giving them a quarter turn with the wrench. Turn on the faucet to check for leaks before testing the drain. If water still drains slowly, feed a 25-foot manual drain auger (1/4-inch head) into the drain opening, crank the handle to break up the clog, then pull out the debris.
For clogs with standing water, a wet/dry vac set to liquid mode can pull the blockage out directly: seal the drain opening with a flange plunger, turn the vac on, and let it run for 30 to 60 seconds. If none of these steps work, the clog is deep in your home’s drain stack, and you’ll need to call a licensed plumber to avoid pipe damage.
Common Unclogging Mistakes That Damage Pipes, Break Disposals, or Make Clogs Worse
Most clog repair failures come from avoidable mistakes that turn a 10-minute fix into a $500+ repair bill. The most common errors include:
- Pouring boiling water down PVC or ABS drain pipes: manufacturer specifications confirm these plastics warp at 140°F (60°C), causing leaks and pipe failure
- Snaking a garbage disposal directly: aggressive auger feeding can break disposal blades or push the clog deeper into the drain line
- Using chemical drain cleaners in homes with septic systems: lye and sulfuric acid-based cleaners kill the beneficial bacteria septic tanks rely on to break down waste, leading to system failure
- Plunging without sealing the overflow drain: unsealed overflow vents break suction, reducing plunger effectiveness and causing water to splash onto your floor
- Ignoring recurring clogs: if a clog returns within 2 to 4 weeks, it’s almost always a sign of a deeper issue like misaligned pipes or grease buildup in the main drain line, not a one-time blockage
Renters should also avoid cutting into or soldering pipes, as most leases prohibit invasive plumbing work that could damage the unit. If you’re planning a full kitchen renovation, addressing underlying drain line issues during the remodel prevents recurring clogs for years. A well-planned full kitchen overhaul covers proper drain line placement to avoid this issue long-term.
Safety Rules to Avoid Burns, Septic Damage, or Warped PVC Pipes
Unclogging a kitchen sink carries low but real risks if you skip basic safety steps. Follow these rules to avoid injury, pipe damage, or costly septic repairs.
Always wear rubber gloves and safety goggles when working with drain cleaners, sharp tools, or dirty P-trap debris. This protects your skin and eyes from chemical burns and bacterial exposure, per OSHA workplace safety guidelines for plumbing work.
Disconnect power to your garbage disposal before touching any part of the unit: unplug it from the wall outlet or turn off the circuit breaker to avoid electrical shock.
Never use chemical drain cleaners if you have a septic system: the EPA prohibits lye and sulfuric acid-based cleaners for septic homes, as they kill the bacteria that break down waste. Stick to enzymatic cleaners or natural methods like baking soda and vinegar instead.
Check your pipe material before using hot water: only cast iron and ABS pipes can handle boiling water, while PVC pipes warp above 140°F (60°C). Use hot tap water (120°F / 49°C max) for PVC systems to avoid damage.
| Pipe Type | Safe Hot Water Temp | Unsafe Methods |
|---|---|---|
| PVC / ABS | 120°F (49°C) max | Boiling water, harsh chemical drain cleaners |
| Cast Iron | 212°F (100°C) boiling water allowed | Aggressive snaking (can crack corroded pipes) |
| Septic System | Any | Lye-based or sulfuric acid chemical drain cleaners |
Renters should also check their lease for prohibited unclogging methods before starting, as some property managers ban chemical cleaners or P-trap removal to avoid unit damage.
2-Minute Decision Guide: Pick the Right Unclogging Method for Your Sink
Use this quick flow to pick the right fix for your setup in 2 minutes or less, no guesswork required.
- Do you have a garbage disposal? , Yes, and it hums but won’t turn: Press the reset button on the bottom of the unit, then use a 1/4-inch hex key to free the jam. If it still doesn’t run, call a plumber.
, Yes, and it runs but water drains slowly: Remove and clean the P-trap first, then use a manual drain auger if needed.
, No: Move to step 2.
- Do you have standing water in the sink? , Yes: Remove half the standing water with a cup or wet/dry vac, then use a flange plunger with the overflow drain sealed.
, No: Use a flange plunger directly, then try a baking soda and vinegar mix if plunging fails.
- Do you have a septic system? , Yes: Skip all harsh chemical drain cleaners, stick to natural methods, plunging, or P-trap removal.
, No: You can use lye-based chemical drain cleaners as a last resort, only after trying all mechanical methods first.
- Did the first method work? , Yes: Flush the drain with hot tap water for 2 minutes to clear remaining debris.
, No: Move to the next method in the list above, or call a plumber if all steps fail.
Frequently Asked Questions
Can I use Drano on a kitchen sink with a garbage disposal?
No. Aggregate user reviews show lye-based drain cleaners like Drano corrode garbage disposal blades and seals, leading to costly unit replacement. Stick to plunging, P-trap removal, or enzymatic cleaners safe for disposals.
How long does it take to clear a kitchen sink clog?
Most minor partial clogs clear in 5 to 15 minutes with plunging. Full clogs requiring P-trap removal take 20 to 30 minutes. If you need to wait for enzymatic cleaners, add 30 minutes to overnight for the product to break down the clog.
Will baking soda and vinegar really unclog a sink?
Yes, for minor partial clogs. The fizzing reaction breaks up light grease and food debris, but it won’t clear tough solid blockages. It’s a safe first step for renters and homes with septic systems, as it causes no pipe or septic damage.
Can a clogged kitchen sink damage my cabinets?
Yes. Standing water from a full clog seeps into particleboard cabinet bottoms, causing swelling, mold, and rot within 24 to 48 hours. Remove standing water immediately and dry the cabinet interior with a towel to avoid costly cabinet replacement.
Is it normal for a kitchen sink to clog repeatedly?
No. Recurring clogs within 2 to 4 weeks point to underlying issues like grease buildup in the drain line, misaligned P-trap, or older cast iron pipes with corrosion. Address the root cause instead of repeatedly clearing the same blockage to avoid long-term pipe damage.