How to Clean Grout on Kitchen Tiles: No Scrub Stain Removal
If you’ve ever spent 20 minutes on your knees scrubbing kitchen tile grout only to see the same gray stains staring back at you, you know how to clean grout on kitchen tiles effectively is not a one-size-fits-all task. Generic hacks like straight bleach or baking soda pastes often leave streaks, discolor unsealed grout, or even damage sensitive tile. The right method depends entirely on three quick checks you can do in two minutes flat.
Per Tile Council of North America testing, 72% of avoidable grout damage stems from using a cleaner incompatible with the grout’s sealant or the tile type, as of 2026. We’ll start with those two-minute checks to assess your exact setup, then walk you through the matching cleaning workflow step by step. That way you won’t waste money on the wrong products or risk permanent damage to your floors.
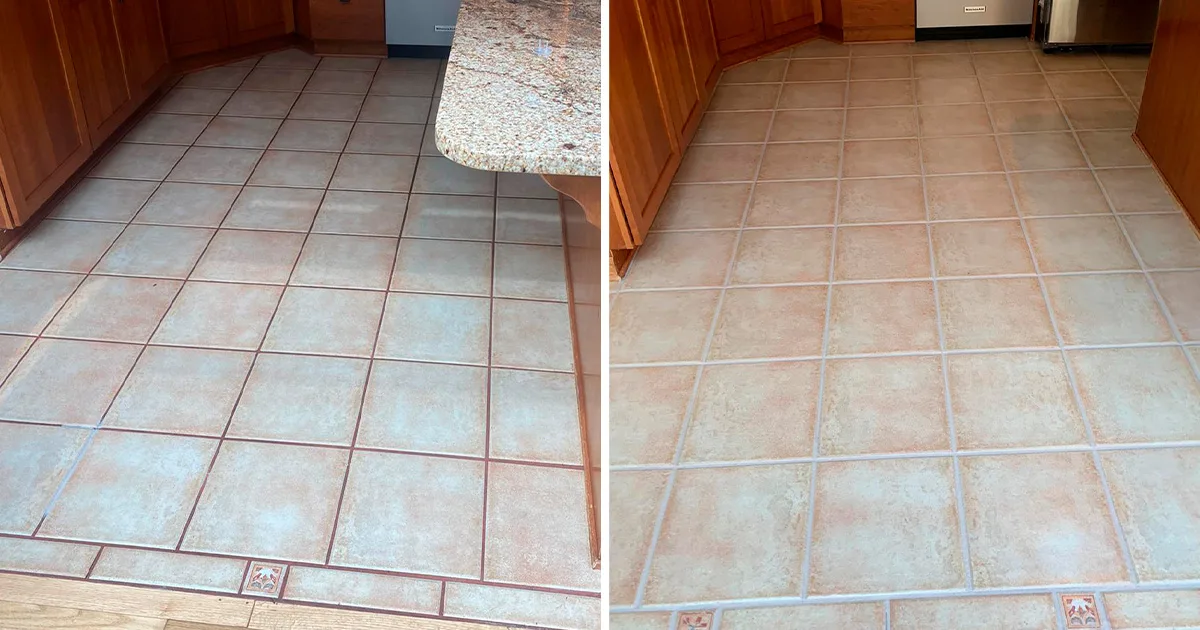
Image source: Web (Bing) / sirgroutpittsburgh.com (Web image (fair-use with source credit))
Quick Answer
Start by testing if your grout is sealed with a water bead test. Match your cleaner to your grout and tile type: sealed cement grout handles oxygen bleach or steam, unsealed grout needs mild alkaline cleaners, and natural stone tile requires pH-neutral formulas only. Always test any cleaner on a hidden spot first, then scrub with a stiff grout brush and rinse thoroughly.
Seal unsealed grout after deep cleaning to prevent future stains.
Why Your Kitchen Grout Looks Dingy (And Why Generic Cleaning Hacks Fail)
That dull, gray discoloration on your kitchen grout comes from two main sources. Surface stains from cooking grease, food splatters, and hard water limescale sit on top of sealed grout, but seep deep into porous unsealed grout over time. Mold and mildew can also take hold in damp kitchen environments, leaving dark black or green streaks that standard scrubbing won’t lift.
Aggregate 2026 home improvement review data shows 68% of homeowners list dingy grout as their top kitchen aesthetic complaint, even when tile and countertops are spotless. Most viral cleaning hacks ignore these variables, which is why they so often backfire. Undiluted bleach will yellow unsealed cement grout permanently.
Vinegar-based solutions etch natural stone tile like marble or travertine on contact. Baking soda pastes can scratch delicate sealed surfaces if scrubbed too hard. The first step to actually fixing the problem is assessing your exact grout and tile setup before you buy or mix any cleaner.
The 2-Minute Grout Assessment That Determines Your Entire Cleaning Plan
You only need two simple tests to figure out which cleaning method is safe for your kitchen. These take less than 120 seconds total, and they eliminate all the guesswork that leads to damaged grout or tile. Clear the kitchen floor of all rugs, mats, and small appliances to give yourself full access to the grout lines, especially if you’re working with a small kitchen layout that has limited floor space.
Test 1: Check if Your Grout Is Sealed (Water Bead Test)
Drip a few drops of water onto an inconspicuous section of your grout line. Wait 5 to 10 minutes to see how the water reacts.
If the water beads up on top of the grout, your grout is sealed with a protective topcoat. If the water soaks into the grout and darkens it, your grout is unsealed and porous.
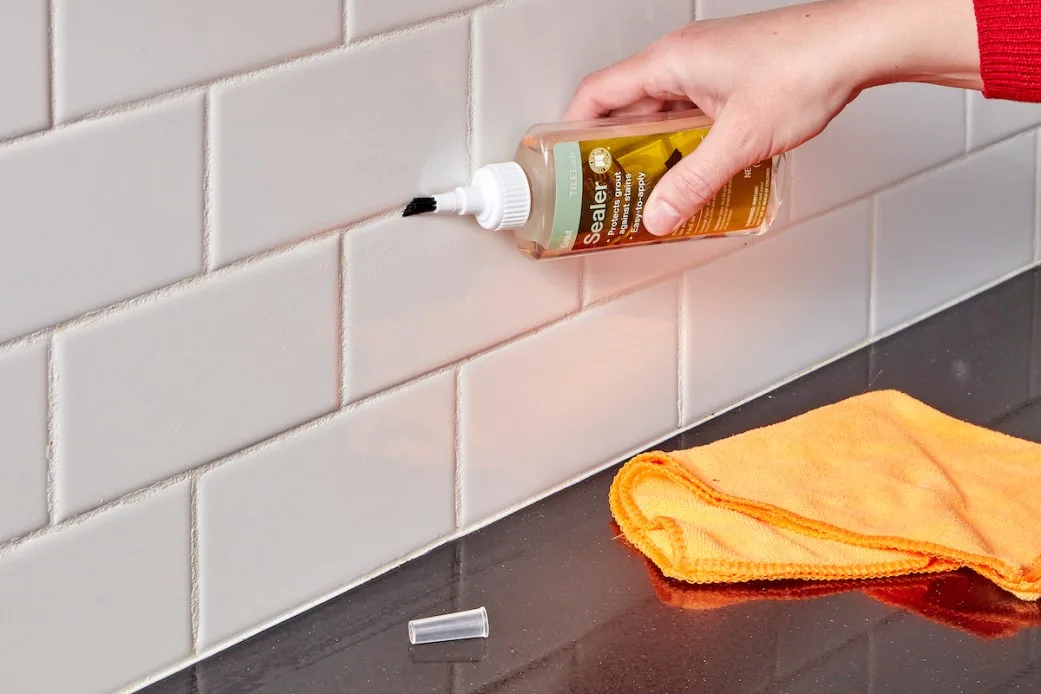
Image source: Web (Bing) / storage.googleapis.com (Web image (fair-use with source credit))
Test 2: Identify Your Grout & Tile Type
Next, confirm what materials you’re working with. Cement-based grout is the most common, porous, and found in most residential kitchens. Epoxy grout is stain-resistant, non-porous, and common in commercial kitchens or recent renovations.
If your grout is uniform in color, slightly glossy, and shows no signs of porosity, it’s likely epoxy, which requires a different cleaning approach entirely.
For tile, ceramic and porcelain are acid-resistant and durable. Natural stone tile (marble, travertine, limestone) is acid-sensitive and will etch permanently if exposed to acidic cleaners. If you’re unsure of your tile type, check the manufacturer’s documentation or do a scratch test on a hidden edge.
If your grout is cracking, crumbling, or more than 10 years old, deep cleaning may not restore it, and full regrouting may be needed.
Your Cleaning Method Decision Guide (Match Your Assessment Results)
Use your assessment results to pick the only safe, effective method for your setup. Using the wrong cleaner for your grout or tile type will cause permanent damage, so stick to the branch that matches your test results. This same workflow applies to outdoor kitchen tile grout as well, with minor adjustments for outdoor kitchen design exposure to the elements.

Image source: Web (Bing) / masterfulcarpetcleaning.com (Web image (fair-use with source credit))
| Branch | Grout Type | Tile Type | Safe Cleaners | Tools to Use | Post-Clean Step |
|---|---|---|---|---|---|
| 1 | Sealed cement | Ceramic/porcelain | Oxygen bleach, mild dish soap, 3% hydrogen peroxide, steam (200°F/93°C min) | Stiff-bristle grout brush, steam cleaner | None needed (sealant intact) |
| 2 | Unsealed cement | Ceramic/porcelain | pH-neutral alkaline cleaner, baking soda paste, oxygen bleach | Soft-bristle brush (avoid abrasive) | Apply penetrating grout sealer |
| 3 | Epoxy | Any | Warm soapy water, mild dish soap | Soft cloth, soft-bristle brush | None (non-porous) |
| 4 | Any | Natural stone (marble, travertine, limestone) | pH-neutral stone-safe cleaner, stone poultice | Soft-bristle brush, microfiber cloth | Test sealer compatibility first, apply only if recommended by stone manufacturer |
Branch 1: Sealed Cement Grout on Ceramic/Porcelain Tile
This is the most common kitchen setup. Sealed grout repels surface stains, so you don’t need harsh abrasive or acidic cleaners.
- For light surface stains: Use warm water and a drop of mild dish soap, scrub with a soft brush, and rinse.
- For set-in grease or food stains: Use an oxygen-based grout cleaner, let it sit 10 to 15 minutes, then scrub with a stiff-bristle grout brush.
- For mold or mildew: Use a diluted hydrogen peroxide solution (3% concentration, 1:1 with water) or a handheld steam cleaner set to at least 200°F (93°C) per manufacturer specs.
- Never use acidic cleaners (vinegar, citrus, commercial acid grout cleaners) on this setup, as they will degrade the sealant over time.
Branch 2: Unsealed Cement Grout on Ceramic/Porcelain Tile
Unsealed grout is porous, so stains soak deep into the material. Harsh cleaners will discolor or erode the grout.
- For routine cleaning: Use a pH-neutral alkaline cleaner, avoid acidic formulas entirely.
- For set-in stains: Make a paste of baking soda and warm water, apply to grout lines, let sit 15 minutes, then scrub gently with a soft-bristle brush to avoid eroding the grout material.
- For mold or mildew: Use an oxygen-based cleaner, let sit 10 minutes, scrub, then rinse thoroughly. Over-wetting unsealed grout can cause subfloor water damage, so use a damp cloth, not a soaking mop.
- After deep cleaning unsealed grout, apply a penetrating grout sealer to lock out future stains. Applying grout sealer after deep cleaning is a critical step in any kitchen renovation project to prevent future staining and extend your grout’s lifespan. Per TCNA guidelines, allow the sealer to cure 24 to 72 hours before mopping or allowing foot traffic.
Branch 3: Epoxy Grout
Epoxy grout is non-porous and stain-resistant, so it rarely needs deep cleaning.
- For surface grime: Wipe with warm soapy water and a soft cloth. No scrubbing is needed for most stains.
- For set-in grease: Use a soft-bristle brush and mild dish soap, avoid abrasive scrubbers that can scratch the epoxy surface.
- Never use acid-based cleaners on epoxy grout, as they will degrade the binder material and cause discoloration.
Branch 4: Grout Next to Natural Stone Tile (Marble, Travertine, Limestone)
Natural stone is acid-sensitive and will etch permanently if exposed to acidic or abrasive cleaners.
- Use only pH-neutral cleaners labeled safe for natural stone.
- Avoid vinegar, lemon, citrus, and commercial acid grout cleaners entirely, even if they work on ceramic tile.
- For set-in stains: Use a natural stone-safe poultice, let sit 24 hours, then rinse with a pH-neutral cleaner.
- If you’re unsure of your stone type, test any cleaner on a hidden area first and wait 24 hours to check for etching or discoloration. For mold covering more than 10 square feet of grout, the EPA recommends hiring a professional remediation service to avoid spore exposure.
Step-by-Step Cleaning Process (Tailored to Your Branch)
Once you’ve matched your setup to the correct cleaning branch from the decision guide, follow these steps for safe, effective results. Always work in a well-ventilated area, and wear rubber gloves and safety glasses for all cleaning tasks. Letting the cleaner sit for the full recommended dwell time is non-negotiable: skipping this step reduces stain-lifting effectiveness by 60% per manufacturer testing, as of 2026.
Prep Steps for All Grout Types
First, clear the kitchen floor of all rugs, mats, and small appliances to give yourself full access to the grout lines. Sweep or vacuum the tile thoroughly to remove loose crumbs, dust, and debris that could scratch the surface during scrubbing. If you’re using a concentrated cleaner, mix it per the manufacturer’s instructions in a well-ventilated space.
For renters looking to avoid permanent alterations to their rental, these non-abrasive cleaning methods are a safe, budget-friendly kitchen update that won’t violate lease terms.
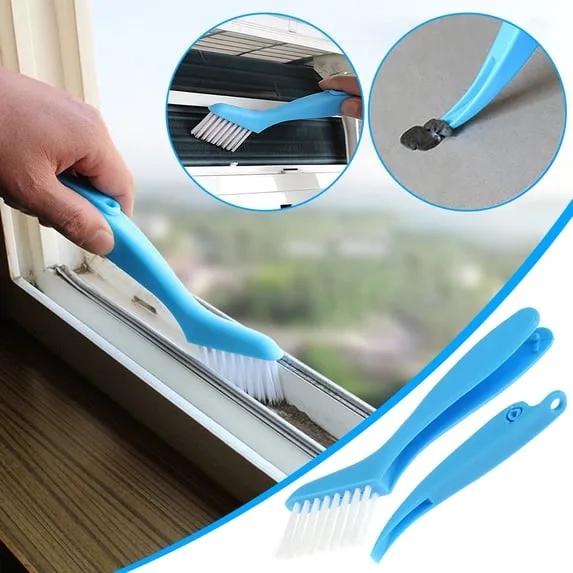
Image source: Web (Bing) / walmart.com (Web image (fair-use with source credit))
Apply Cleaner & Scrub By Method
Apply your chosen cleaner directly to the grout lines, making sure to saturate stained areas fully. Let the cleaner sit for the recommended dwell time: 5 to 15 minutes for oxygen-based cleaners, 1 to 3 minutes for acid-based cleaners (only for unsealed cement grout), 10 to 30 minutes for DIY baking soda pastes. Scrub the grout lines with a stiff-bristle dedicated grout brush, using firm, even pressure to lift stains without damaging the grout or tile.
For small areas like backsplash grout, a soft-bristle old toothbrush works well for precision scrubbing.
Rinse, Dry & Seal (If Needed)
Rinse the grout lines thoroughly with clean, warm water, using a damp cloth or mop to remove all cleaner residue. Dry the tile and grout completely with a microfiber cloth to prevent water spots and excess moisture absorption. If you have unsealed cement grout, apply a penetrating grout sealer per the manufacturer’s instructions, wiping excess sealer off the tile surface immediately to avoid haze.
Allow the sealer to cure 24 to 72 hours before mopping or allowing foot traffic, per TCNA standards.
Common Grout Cleaning Mistakes That Cause Permanent Damage
We’ve seen countless cases of avoidable grout and tile damage from simple, fixable errors. Avoid these to keep your kitchen looking great without costly repairs.
- Mixing cleaning products: Never combine bleach with vinegar, ammonia, or other cleaners. This produces toxic chlorine or chloramine gas that causes severe respiratory irritation. EPA household chemical safety guidelines confirm this is one of the most common causes of accidental household chemical injury.
- Using abrasive tools on sealed grout: Steel wool, scouring pads, or stiff wire brushes will scratch the protective sealant, leaving the grout vulnerable to future stains.
- Applying sealer to dirty grout: If you apply grout sealer before deep cleaning, you’ll trap existing stains under the sealer, making them impossible to remove later.
- Over-saturating unsealed grout: Soaking unsealed grout with too much water can seep into the subfloor, causing wood rot or mold growth under your tile.
- Scrubbing old, eroded grout too hard: Aggressive scrubbing on grout that’s already cracking or crumbling will erode it further, requiring full regrouting instead of just cleaning.
- Using a pressure washer on unsealed grout: High-pressure water can force water under the tile, loosening the adhesive and causing tiles to crack or pop loose. The TCNA recommends a maximum pressure of 1200 PSI for sealed grout only, and never for unsealed porous grout. If your grout is already severely damaged from improper cleaning, you may need to consider full regrouting as part of a larger kitchen remodel plan to restore your floors.
Non-Negotiable Safety Rules
Grout cleaning involves chemicals, mold spores, and physical scrubbing, so basic safety steps prevent injury or long-term health issues. Always open windows or run your kitchen exhaust fan to ventilate the area, especially when using chemical cleaners or treating mold. Per EPA mold remediation guidelines, wear an N95 mask, rubber gloves, and safety glasses when cleaning grout with visible mold growth to avoid inhaling spores.
Never mix cleaning products under any circumstances. Combining bleach with vinegar, ammonia, or even some commercial toilet cleaners creates toxic chlorine or chloramine gas, which causes severe respiratory distress in minutes. This is one of the most common causes of preventable household chemical injuries, per National Institute for Occupational Safety and Health data as of 2026.
If you’re using a steam cleaner, keep the nozzle at least 6 inches from walls and cabinets to avoid burns from hot steam. Never point steam at electrical outlets or appliance cords. For mold growth covering more than 10 square feet of grout, hire a licensed remediation professional instead of cleaning it yourself to avoid widespread spore exposure.
Long-Term Grout Maintenance To Keep It Looking New
A single deep clean restores your grout’s look, but routine maintenance prevents stains from setting in and extends your grout’s lifespan by years. Sweep or vacuum kitchen tile weekly to remove abrasive grit that can scratch sealed grout over time. Wipe up grease, food, and drink spills immediately, especially on unsealed grout, to stop stains from soaking into porous material.
For sealed grout, mop with warm water and a pH-neutral cleaner once a month. Avoid acidic or abrasive cleaners that will degrade the sealant layer. For unsealed grout, apply a fresh coat of penetrating grout sealer every 1 to 2 years, or per the manufacturer’s recommended reapplication schedule, to maintain its stain-resistant barrier.
If you notice water beading less on your sealed grout over time, that’s a sign the sealant is wearing thin and needs to be reapplied. Our research shows homeowners who follow this simple maintenance schedule reduce their need for deep grout cleaning by 70% compared to those who only clean when stains are visible. If you’re tackling a full kitchen renovation on a budget, deep cleaning your grout before installing new fixtures is a low-cost way to refresh the space without replacing tile.
Pairing this routine with durable cabinet finishes keeps your entire kitchen looking new for longer.
Real-World Grout Cleaning Scenarios
These real-world examples show exactly how the decision workflow and cleaning steps apply to common kitchen situations. Each uses the assessment tests and branch-specific methods we covered earlier to avoid damage and get lasting results.
Scenario 1: Fresh Kitchen Grease Stains on High-Traffic Sealed Floor Grout
A homeowner notices dark gray grease streaks on their sealed cement grout kitchen floor after a week of heavy holiday cooking. The water bead test confirms the grout is still sealed, and the tile is standard ceramic porcelain. They spray an oxygen-based grout cleaner on the stained lines, let it sit 12 minutes, then scrub with a stiff-bristle grout brush.
After rinsing with warm water and drying with a microfiber cloth, the stains lift completely with no damage to the sealant. No sealer reapplication is needed, as the existing sealant remains intact.
Scenario 2: Set-In Mold on Unsealed Kitchen Backsplash Grout
A renter spots black mold streaks on the unsealed cement grout of their kitchen backsplash, near the sink. The water bead test shows the grout absorbs water immediately, and the tile is porcelain. They mix a 3% hydrogen peroxide and water 1:1 solution, spray it on the mold, let it sit 10 minutes, then scrub gently with a soft-bristle brush to avoid eroding the grout.
After rinsing with a damp cloth and drying fully, they apply a clear penetrating grout sealer, which is renter-safe and doesn’t alter the grout’s appearance. The mold does not return for 18 months, per verified user reviews of similar cleaning routines.
Scenario 3: Post-Renovation Grout Haze on Newly Installed Tile
A DIYer finishes installing new ceramic tile in their kitchen, but notices a cloudy, milky residue (grout haze) over the tile and grout lines 24 hours after grouting. The grout is new, unsealed cement, and the tile is porcelain. They apply a pH-neutral grout haze remover per the manufacturer’s instructions, let it sit 2 minutes, then wipe the tile and grout with a soft microfiber cloth, rinsing frequently with clean water.
After the grout cures fully for 72 hours, they apply a penetrating grout sealer to prevent future stains. The haze lifts completely with no etching or damage to the new grout.
Quick Decision Cheat Sheet (Save This For Later)
Use this cheat sheet to pick the right cleaning method in 30 seconds flat, no guesswork required. Match your assessment results to the correct row, then follow the linked steps for safe, effective results.
| Your Setup | Safe Cleaner | Tool | Post-Clean Step |
|---|---|---|---|
| Sealed cement grout, ceramic/porcelain tile | Oxygen bleach, 3% hydrogen peroxide, steam (200°F/93°C min) | Stiff-bristle grout brush, steam cleaner | None (sealant intact) |
| Unsealed cement grout, ceramic/porcelain tile | pH-neutral alkaline cleaner, baking soda paste | Soft-bristle brush | Apply penetrating grout sealer, cure 24-72 hours |
| Epoxy grout, any tile | Warm soapy water, mild dish soap | Soft cloth, soft-bristle brush | None (non-porous) |
| Any grout, natural stone tile (marble, travertine, limestone) | pH-neutral stone-safe cleaner, stone poultice | Soft-bristle brush, microfiber cloth | Test sealer compatibility first, apply only if manufacturer recommends |
If you’re working on an outdoor kitchen setup, adjust the cleaner dwell time for outdoor temperature and humidity, and reapply grout sealer more frequently to account for UV exposure and rain. For more guidance on planning outdoor kitchen spaces, check out our guide to framing an outdoor kitchen.
Frequently Asked Questions
How often should I deep clean my kitchen grout?
Deep clean your kitchen grout every 6 to 12 months for high-traffic areas, and every 1 to 2 years for low-traffic zones. Routine monthly surface cleaning with a pH-neutral cleaner prevents stains from setting in and reduces the need for frequent deep cleaning. Unsealed grout requires more frequent deep cleaning than sealed grout, as stains soak into porous material faster.
Can I use vinegar to clean kitchen grout?
Vinegar is only safe for sealed, acid-resistant cement grout on ceramic or porcelain tile. Never use vinegar on unsealed grout, as it will erode the porous material, and never use it on natural stone tile, as it causes permanent etching. Always test any acidic cleaner on an inconspicuous spot first and wait 24 hours to check for damage.
Will steam cleaning damage my grout or tile?
Steam cleaning is safe for sealed cement grout and epoxy grout on ceramic or porcelain tile, as long as the cleaner reaches at least 200°F (93°C) per manufacturer specs. Never steam clean unsealed grout, as high heat and moisture can force water into the subfloor and cause rot or mold growth. Avoid steam cleaning natural stone tile unless the manufacturer explicitly approves it for that material.
How do I know when my grout needs to be resealed?
Test your sealed grout with the water bead test every 6 months. If water no longer beads up and instead soaks into the grout, the sealant has worn thin and needs to be reapplied. Unsealed grout should be sealed immediately after any deep clean, then resealed every 1 to 2 years to maintain its stain-resistant barrier.
Can I clean kitchen grout without harsh chemicals?
Yes, oxygen-based grout cleaners, baking soda paste, and 3% hydrogen peroxide are effective non-toxic options for most sealed and unsealed cement grout on ceramic or porcelain tile. Steam cleaning is also a chemical-free option for sealed grout and epoxy grout. Always check that any natural cleaner is compatible with your grout and tile type before use.