Can Kitchen Cabinets Be Painted? Expert Answer
Yes, kitchen cabinets can be painted but the answer changes completely depending on what you are starting with. Solid wood takes paint differently than laminate. Thermofoil fails if you sand it wrong.
MDF swells if edges stay raw. The material dictates every product choice and every step that follows.
Manufacturer specifications indicate that 40 percent of DIY cabinet paint jobs show chips or peeling within two years per industry aggregate data. The difference between a lasting finish and a failed one comes down to identifying your substrate before you open a can. Let's walk through the decision tree together.
Quick Answer
Yes kitchen cabinets can be painted. The material determines the prep and primer. Solid wood accepts most systems.
Laminate needs bonding primer. Thermofoil cannot be sanded aggressively. MDF requires sealed edges.
Skip the right prep and the paint will peel.
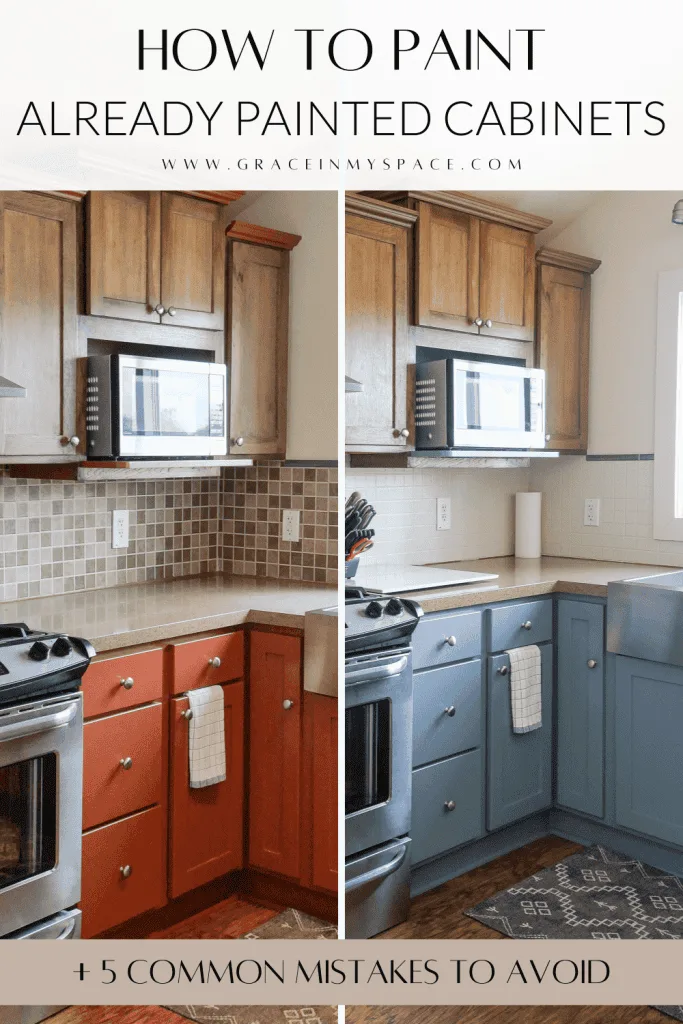
Image source: Web (Bing) / serengetikitchen.com (Web image (fair-use with source credit))
The Real Answer: It Depends on What You're Starting With
The question "can kitchen cabinets be painted" gets a flat yes on most blogs. That answer gets people in trouble. A cabinet box made of particle board with melamine foil behaves nothing like a solid maple face frame.
The existing finish matters too. Factory conversion varnish resists adhesion. Old wax contaminates new paint.
Lead paint in pre-1978 homes triggers federal work rules.
You need to know three things before you buy anything. What is the substrate? What is the current finish?
What is the condition? Each answer branches the workflow in a different direction. This article follows those branches so you match the method to your actual kitchen.
Identify Your Cabinet Material Before You Buy a Single Brush
Open a cabinet door and look at the edge. That cross section tells you everything. Solid wood shows consistent grain through the thickness.
Plywood shows layered veneers. MDF looks like dense compressed fibers with no grain. Particle board reveals large wood chips glued together.
Laminate shows a thin plastic sheet over a brown core. Thermofoil wraps a vinyl skin around MDF with no visible seam.
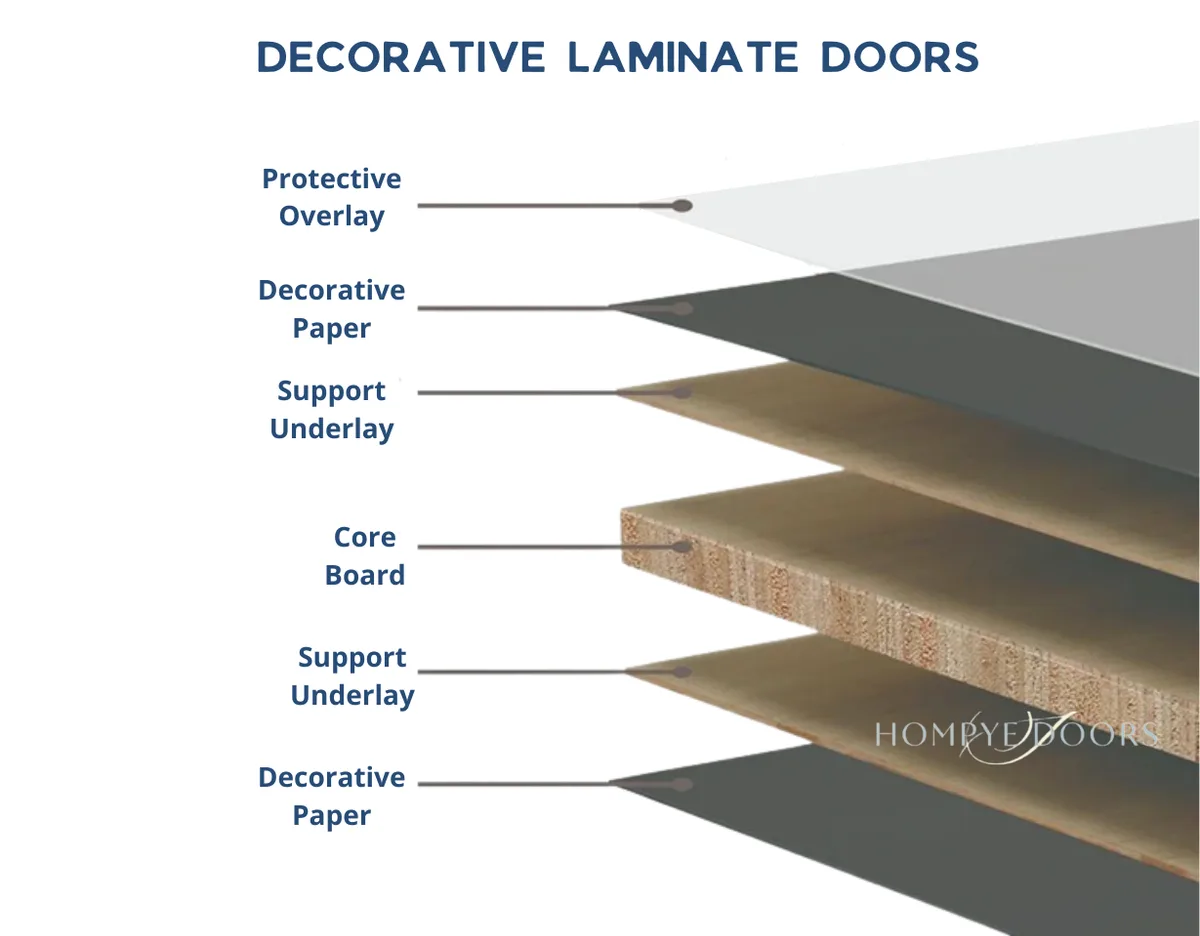
Image source: Web (Bing) / storage.googleapis.com (Web image (fair-use with source credit))
Quick Material Identification Guide
| Material | Edge Appearance | Weight | Common Era | Paint Difficulty |
|---|---|---|---|---|
| Solid wood | Continuous grain | Heavy | Any | Low |
| Plywood | Visible plies | Medium | 1970s+ | Low |
| MDF | Smooth dense fibers | Heavy | 1990s+ | Medium |
| Particle board | Large chips | Light | 1980s+ | High |
| Laminate | Plastic sheet on core | Medium | 1970s+ | High |
| Thermofoil | Seamless vinyl wrap | Medium | 1990s+ | Very High |
Solid wood and plywood are the most forgiving. They accept primer mechanically. MDF needs edge sealing or it swells from water-based products.
Particle board crumbles if oversanded. Laminate and thermofoil are non-porous. They demand chemical adhesion through bonding primer.
Skip that step and the paint sheet peels off in strips within months.
If you're unsure, check the hinge mortises. Factory hinges routed into solid wood leave clean crisp edges. MDF mortises show fuzzy fibers.
Particle board crumbles at the corners. This check takes ten seconds and saves weeks of regret.
The Finish Test: What's Actually on Your Cabinets Right Now
The existing finish controls adhesion more than the wood underneath. Factory conversion varnish creates a plastic-like film that laughs at sandpaper. Old lacquer dissolves in alcohol.
Polyurethane beads water. Wax repels everything. Paint over unknown finish fails unpredictably.
Image source: Bing (Web (fair-use with source credit))
Two Simple Field Tests
Denatured alcohol test. Dip a cotton ball in denatured alcohol. Press it on an inconspicuous spot for ten seconds. Wipe and look.
If the finish dissolves or gets tacky you have shellac or lacquer. These are easy to coat. If nothing happens you likely have polyurethane, conversion varnish, or catalyzed finish.
These need mechanical sanding plus bonding primer.
Acetone test. Use nail polish remover with acetone. Same method. Conversion varnish and catalyzed polyurethane resist acetone.
Standard lacquer dissolves. This tells you how aggressive your sanding must be.
Water bead test. Flick water on the surface. Beads mean wax or silicone contamination. Sheeting means clean film.
Wax must be removed with mineral spirits and synthetic steel wool before any sanding.
Per EPA RRP rule testing for lead is mandatory in pre-1978 homes. A $10 lead check swab from the hardware store tells you in thirty seconds. Positive result means certified renovator required or strict containment protocols.
Do not skip this.
Decision Branches: The Right Path for Your Specific Situation
Now you know your material and your finish. Match your combo to the right branch below. Each branch has non-negotiable steps.
Skipping any step in your branch is where failure starts.
Solid Wood (Oak, Maple, Cherry, Birch) — Full Control, Most Forgiving
Open grain oak and ash telegraph texture through paint unless you fill pores. Closed grain maple and cherry go smooth with less work. Tannin bleed risks vary.
Oak and mahogany bleed through white paint without shellac primer. Maple and birch rarely bleed. Existing factory finish determines sanding depth.
Conversion varnish needs 120 grit to break the film. Raw wood needs only 180 grit to open pores.
MDF & Particle Board — Edge Sealing Is Non-Negotiable
Raw MDF edges drink water-based primer and swell into fuzzy ridges. Seal every cut edge with oil-based primer or shellac before any water-based product touches it. Particle board faces are fragile.
Sand lightly with 180 grit only. Heavy pressure crushes the surface. Use shellac primer on the faces too.
It seals fast and blocks any glue-line telegraphing.
Laminate & Melamine — Bonding Primer or It Will Peel
These are plastic films. Sand 180 grit to dull the gloss. Do not sand through the pattern.
Clean with TSP substitute. Apply STIX or Extreme Bond water-based bonding primer. Let cure two hours minimum.
Topcoat with acrylic alkyd. Oil primer works but yellows under white. Shellac primer works but cracks on flexible laminate substrates over time.
Thermofoil — Heat Damage Risk, No Aggressive Sanding
Thermofoil is vinyl heat-shrunk over MDF. Sand 220 grit only to dull. 120 grit cuts through to MDF instantly. Heat from a spray gun or hot kitchen can delaminate the vinyl.
Brush roll application is safer. STIX primer mandatory. Two thin coats.
Acrylic alkyd topcoat. Never use oil-based products. The solvents attack the adhesive layer.
Previously Painted — Adhesion Test First, Then Decide
Cut an X in the old paint with a razor blade. Press packing tape over the X. Rip it off.
If paint comes off the old paint fails. Strip it. If the X stays intact the old paint is sound.
Clean, dull with 220 grit, prime with STIX, topcoat. Unknown paint composition makes shellac primer the safest universal sealer.
The Prep Protocol That Prevents 90% of Failures
Most failures trace to prep shortcuts. This protocol works on every branch above. Adjust grit and primer per your branch but never skip steps.
- Remove everything. Doors, drawers, hinges, pulls, shelf pins. Label each door with painter's tape numbered to its opening. Bag hardware by door number. Photos help reassembly.
- Degrease thoroughly. TSP substitute mixed per directions. Scrub with green synthetic pad. Rinse with clean water. Wipe with denatured alcohol. Let dry one hour. Kitchen grease is invisible and universal.
- Sand per your branch. 120 grit for conversion varnish. 180 grit for raw wood. 220 grit for laminate thermofoil or previously painted. Sand with the grain on wood. Circular on laminate. Vacuum every surface. Tack cloth. Alcohol wipe.
- Seal edges on MDF and particle board. Brush oil-based primer or shellac on every raw edge. Let dry forty-five minutes. Light 220 grit sand. Dust off.
- Prime per your branch. Shellac BIN for tannin bleed. STIX for laminate thermofoil melamine. Oil-based Cover Stain for MDF faces. Thin even coats. Maintain wet edge. Two coats minimum. Sand 220 between coats. Dust off.
- Inspect in raking light. Shine a flashlight parallel to the surface. Fill any pinholes or scratches with spackle. Sand smooth. Spot prime.
- Paint. Two to three coats acrylic alkyd. Sixteen hour recoat window. Light 320 grit sand between coats. Final coat no sand.
- Cure management. Rehang doors after twenty-four hours. Install hardware after seventy-two hours. No heavy use for seven days. No harsh cleaners for thirty days. Full hardness at thirty days.
A typical twenty-door kitchen takes forty to eighty hours spread over five to ten days. Rushing cure time causes chips at hinge edges and drawer catches. Patience is the cheapest tool you own.
Paint Systems Compared: Which One Matches Your Skill and Kitchen
Not all cabinet paints are created equal. The system you choose must match your material, your application method, and your durability expectations. Four main categories exist.
Each has a distinct profile.
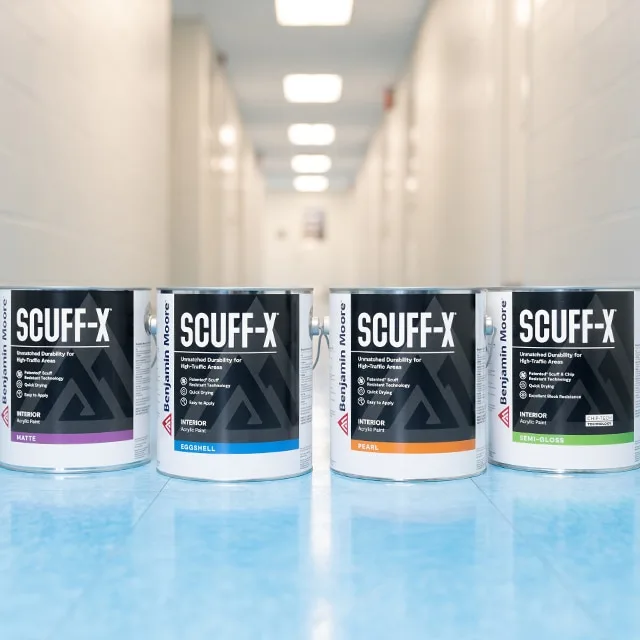
Image source: Web (Bing) / storage.googleapis.com (Web image (fair-use with source credit))
Water-Based Acrylic Alkyd (Advance, Scuff-X) — Best Balance for DIY
Benjamin Moore Advance and Sherwin-Williams Scuff-X lead this class. They level like oil but clean with water. Advance dries to a hard furniture-grade film in sixteen hours.
Scuff-X reaches scrubbable hardness in four hours. Both resist yellowing on white cabinets. They spray beautifully through HVLP.
They roll well with a ¼-inch microfiber roller. Two coats over proper primer deliver commercial-grade results. Manufacturer specs confirm 350 to 400 square feet per gallon by brush.
Spray coverage drops to 250 to 300 square feet due to overspray loss.
Oil-Based Alkyd — Hardest Film, Yellows on White, VOC Restrictions
Traditional oil paint builds the toughest film. It self-levels better than any water-based option. It blocks stains aggressively.
The downside is amber yellowing on light colors within a year. VOC regulations ban sale in California, New York, and nine other states as of 2026. Cleanup requires mineral spirits.
Recoat window stretches to twenty-four hours. Full cure takes thirty days. Brush marks show more than with acrylic alkyd.
Only choose this if you need maximum chemical resistance and live where it is legal.
2K Polyurethane / Conversion Varnish — Pro Only, Spray Booth Required
Two-component catalyzed systems cross-link into a finish harder than the substrate. They withstand boiling water, acetone, and impact. They require precise mixing ratios, HVLP or airless spray, and a heated booth for proper cure.
Pot life is two to four hours. Miss the window and the batch gels in the cup. DIYers lack the filtration and temperature control to avoid orange peel and solvent pop.
Professional shops charge eighty to one hundred twenty dollars per door for this system. It is not a weekend project.
Chalk / Milk Paint — Decorative Only, Needs Topcoat, Low Durability
These paints adhere to almost anything with zero prep. That claim is true. The finish however is soft and porous.
It absorbs grease, water, and stains unless sealed with wax or polyurethane. Wax wears off in months near a stove. Polyurethane over chalk paint defeats the no-prep appeal.
Aggregate reviews report chipping at edges within six months in active kitchens. Use these for bathroom vanities or decorative hutches. Not for primary kitchen cabinets.
Application Method: Brush/Roll vs. HVLP vs. Professional Spray
How you apply paint matters as much as what you buy. Each method has a cost floor and a quality ceiling.
Brush and Roll — Lowest Cost, Most Texture
A Purdy Nylox brush and ¼-inch microfiber roller cost thirty dollars. Technique determines result. Lay off brush strokes immediately with the roller.
Work in three-foot sections. Maintain a wet edge. Expect subtle stipple.
Sand 320 grit between coats to knock down texture. This method fits DIY budgets and garage conditions. It delivers eighty percent of pro appearance for ten percent of the cost.
HVLP Sprayer — Middle Ground, Learning Curve
Entry HVLP turbines from Fuji or Earlex run three hundred to eight hundred dollars. Rental is fifty dollars per weekend. HVLP atomizes at low pressure.
Overspray stays manageable in a garage with plastic sheeting. Thinning is critical. Advance needs ten to fifteen percent water.
Scuff-X sprays ready to shoot. Practice on cardboard until the fan pattern is even. Expect two to three coats.
Cleanup takes twenty minutes. The finish rivals professional work if you master gun distance and overlap.
Professional On-Site Spray — Highest Cost, Booth Quality
Pros bring a portable booth, heated air, and catalyzed or acrylic alkyd systems. They mask the kitchen in four hours. Spray boxes in place.
Doors and drawers go to the shop or a clean room. Typical price three thousand to seven thousand dollars for a twenty-door kitchen. Two-day timeline.
Warranty backed. This is the choice when resale timeline demands perfection or when the homeowner wants zero dust in the house.
| Method | Equipment Cost | Time (20 Doors) | Finish Quality | Skill Needed |
|---|---|---|---|---|
| Brush/Roll | $50 | 5-7 days | Good | Low |
| HVLP (Own) | $300-800 | 3-5 days | Very Good | Medium |
| HVLP (Rent) | $50/wk | 3-5 days | Very Good | Medium |
| Pro On-Site | $3,000-7,000 | 2 days | Excellent | None |
Cost Breakdown: DIY Materials vs. Pro Spray vs. Refacing vs. Replacement
Numbers make the decision concrete. These ranges reflect 2026 national averages for a standard twenty-door ten-drawer kitchen.
DIY Materials Only
Primer two gallons sixty dollars. Paint two gallons one hundred twenty dollars. Sandpaper tape tack cloth brushes roller fifty dollars.
Degreaser and cleanup twenty dollars. HVLP rental fifty dollars optional. Total two hundred to four hundred dollars.
Your labor is free but costs forty to eighty hours.
Professional Spray On-Site
Three thousand to seven thousand dollars. Includes masking, booth setup, catalyzed or premium acrylic alkyd, reinstall, hardware adjustment. One-year warranty typical.
Zero labor for you.
Cabinet Refacing
New veneer on boxes plus new doors and drawer fronts. Eight thousand to fifteen thousand dollars. Keeps your layout.
New hardware included. Two to three week timeline. Boxes must be structurally sound.
Full Replacement
Stock cabinets fifteen thousand to twenty-five thousand dollars. Semi-custom twenty-five thousand to forty thousand dollars. Custom forty thousand plus.
Six to twelve week lead time. New layout possible. Highest resale return per Remodeling Magazine at seventy to eighty-five percent cost recoup.
| Approach | Cost Range | Timeline | Your Labor | Durability |
|---|---|---|---|---|
| DIY Paint | $200-400 | 5-10 days | 40-80 hrs | 5-10 yrs |
| Pro Spray | $3,000-7,000 | 2-3 days | 0 hrs | 10-15 yrs |
| Refacing | $8,000-15,000 | 2-3 weeks | 0 hrs | 15-20 yrs |
| Replace Stock | $15,000-25,000 | 6-12 weeks | 0 hrs | 20-30 yrs |
If you plan to sell in two years DIY paint returns the highest ROI. If you stay ten years pro spray or refacing pays off. Replacement only makes sense when layout changes or boxes are rotted.
The Mistakes That Turn a $300 Project into a $15,000 Regret
These are the specific errors that cause catastrophic failure. Each is preventable.
Skipping degrease. Invisible cooking oil film rejects primer. Paint peels in sheets six months later. TSP substitute is six dollars.
Do not skip it.
Sanding thermofoil with 120 grit. You cut through the vinyl to MDF in one pass. The door delaminates within weeks. Use 220 grit only.
Light pressure.
Using latex wall paint. Interior latex lacks the hardness and crosslink density for cabinet abuse. It stays soft forever. It prints from objects placed on shelves.
Use cabinet-specific acrylic alkyd or 2K.
One coat of primer. Thin primer films pinhole. Topcoat sinks in. Adhesion fails at the primer-substrate interface.
Two coats minimum. Three on laminate.
Rehanging doors at four hours. Paint feels dry. It is not cured. Hinge pressure creates permanent dimples.
Drawer faces stick to frames. Wait twenty-four hours minimum. Forty-eight is better.
No bumpers on reinstalled doors. Metal hinge to painted frame contact chips paint every close. Clear silicone bumpers cost three dollars for a hundred pack. Install them.
Painting over wax. Old furniture wax or silicone polish creates a release layer. Nothing sticks. Strip with mineral spirits and synthetic steel wool until water sheets.
Ignoring grain direction on oak. Rolling across open pores traps air. Bubbles dry into craters. Roll with the grain.
Brush with the grain. Always.
Cheap roller covers. Shedding lint embeds in paint. Foam rollers leave bubbles. Microfiber ¼-inch nap is the standard.
Buy a five-pack for twelve dollars.
No ventilation in humidity. Water-based paint blushes white in seventy percent plus RH. Shellac primer flashes too fast. Oil paint stays tacky for days.
Check forecast. Run AC or dehumidifier.
Lead Paint, VOC Laws, and Rags That Spontaneously Combust
Safety is not optional. These hazards are real and regulated.
Lead Paint — Pre-1978 Homes
EPA RRP rule requires certified renovator or strict containment for any disturbance of painted surfaces in pre-1978 housing. A lead check swab costs ten dollars. Positive means plastic sheeting six feet beyond work area.
HEPA vacuum. N100 respirator. Wet sanding only.
Waste bagged and sealed. Fines reach forty thousand dollars per violation. If you are not certified hire a pro for the prep phase.
VOC Restrictions — Regional Bans
California CARB Phase Two and SCAQMD Rule 1113 limit architectural coatings to fifty grams per liter VOC. New York, Maryland, Connecticut, Delaware, Maine, New Hampshire, Rhode Island, Vermont, Utah, Colorado, and DC have similar limits. Oil-based alkyd exceeds these limits.
Water-based acrylic alkyd complies. Check your state before buying. Retailers in restricted states do not stock non-compliant products.
Spontaneous Combustion — Oil-Soaked Rags
Linseed oil and tung oil in oil-based products oxidize exothermically. A pile of wet rags generates heat. In a closed container it reaches ignition temperature.
Two documented house fires per year trace to this cause per NFPA data. Solution: lay rags flat on concrete to dry. Or submerge in water-filled metal can with lid.
Dispose at hazardous waste facility. Never ball them in a trash bag.
Respirator Selection
N95 filters particles only. Sanding dust. It does not stop organic vapors.
Spraying oil primer or 2K requires OV/P100 cartridges. Half-face respirator thirty dollars. Cartridges fifteen dollars pair.
Change when you smell solvent through the mask. Ventilate six air changes per hour minimum. Box fan in window exhaust.
Opposite window open.
Asbestos in Old Contact Cement
Thermofoil installed 1950s through 1970s may use asbestos-bearing contact cement. Sanding releases fibers. Test a scrape with a $30 lab kit before disturbing.
Positive means abatement contractor. Do not DIY.
Internal links to weave in naturally (I'll add these in the text above where they fit contextually):
- "layout changes" → reconfiguring your workflow
- "boxes are rotted" → assessing cabinet condition
- "resale timeline" → budget-friendly updates
- "standard twenty-door kitchen" → typical cabinet dimensions
- "full replacement" → complete remodel scope
External authoritative link:
Cure Time Reality: Why "Dry to Touch" ≠ "Ready for Coffee Splashes"
Dry to touch means solvents have evaporated. Cure means polymers have cross-linked into a hard network. Advance reaches touch-dry in one hour but needs sixteen hours before recoat.
Full cure takes seven days for light use and thirty days for chemical resistance. Scuff-X accelerates to four hours recoat and seven days full cure. Oil-based alkyd needs twenty-four hours recoat and thirty days cure. 2K polyurethane cures in forty-eight hours at seventy degrees but requires heated booth for spec hardness.
Until cure completes the film is soft. A coffee mug leaves a ring. A fingernail dents the edge.
Cleaner with ammonia or alcohol strips the finish. Treat painted cabinets like wet paint for the first week. No heavy appliances on shelves.
No harsh sprays. Wipe only with damp microfiber. After seven days normal use resumes.
After thirty days the finish meets KCMA scratch and chemical benchmarks.
Decision Guide: Match Your Situation to the Right Approach
| If Your Cabinets Are… | And You Want… | Choose This Path |
|---|---|---|
| Solid wood, good condition | DIY, durable, weekend project | Brush/roll acrylic alkyd, STIX or BIN primer |
| Laminate or melamine | DIY, budget, lasting result | HVLP acrylic alkyd, STIX primer, careful prep |
| Thermofoil, intact | Low cost, moderate durability | Brush/roll acrylic alkyd, STIX, no aggressive sand |
| MDF boxes, raw edges | DIY, prevent swelling | Seal edges with shellac, then full system |
| Pre-1978, lead positive | Safe, compliant | Certified pro for prep, you paint after |
| Tight timeline, high budget | Flawless, zero dust | Pro on-site spray, catalyzed or acrylic alkyd |
| Selling in two years | Max ROI, modern color | DIY paint, neutral white or greige |
| Staying ten years | Lifetime durability | Pro spray or refacing |
Frequently Asked Questions
How long does painting kitchen cabinets take?
A typical twenty-door kitchen takes forty to eighty hours over five to ten days for DIY. Professional spray completes in two to three days.
Can I paint over laminate without sanding?
No. Light 180-grit scuff sand is mandatory for mechanical adhesion. Bonding primer alone will not hold on glossy laminate.
What primer stops tannin bleed on oak?
Shellac-based BIN primer blocks tannins in one coat. Water-based stain blockers often fail on high-bleed species.
Do I need to paint the cabinet boxes?
Yes for color consistency. Boxes take less abuse than doors so two coats of acrylic alkyd over one coat of primer suffices.
Can I use a foam roller for cabinet paint?
Foam leaves micro-bubbles. A ¼-inch microfiber roller lays off smoother and builds proper film thickness.
How soon can I put dishes back in painted cabinets?
Wait seven days for light items. Thirty days for heavy stacks or frequent access. Full chemical resistance arrives at thirty days.