How to Arrange Your Kitchen Counter for Max Space & Style
Most people search how to arrange kitchen counter because their mornings feel like an obstacle course. The coffee maker blocks the sink. The stand mixer owns the only decent prep space.
Mail piles up where vegetables should land. You end up shuffling appliances instead of cooking.
NKBA guidelines call for at least 36 inches of uninterrupted primary prep space and 15 inches of landing room beside the refrigerator. Most kitchens fall short because zones were never mapped to actual workflow. The fix starts with a two-week audit and a few hard decisions.
Quick Answer
Arrange your kitchen counter by mapping zones to your real workflow. Start with a two-week sticky-note audit of where items actually land. Apply NKBA landing-space minimums: 15 inches beside the fridge, 12 inches beside the cooktop, 36 inches for primary prep.
Park daily appliances in an appliance garage. Store weekly items in vertical storage. Relocate monthly gear to the pantry.
Keep counters clear for the task at hand.
Why Your Counters Feel Chaotic (And What's Actually Going Wrong)
Clutter is not the root cause. It is a symptom of missing zones. Every kitchen has a work triangle connecting the sink, stove, and refrigerator.
NKBA standards define minimum landing spaces for each point. When those buffers disappear, appliances migrate to fill the void. The coffee maker sits where groceries should land.
The knife block drifts away from the cutting board. The spice jars end up across the room from the burners.
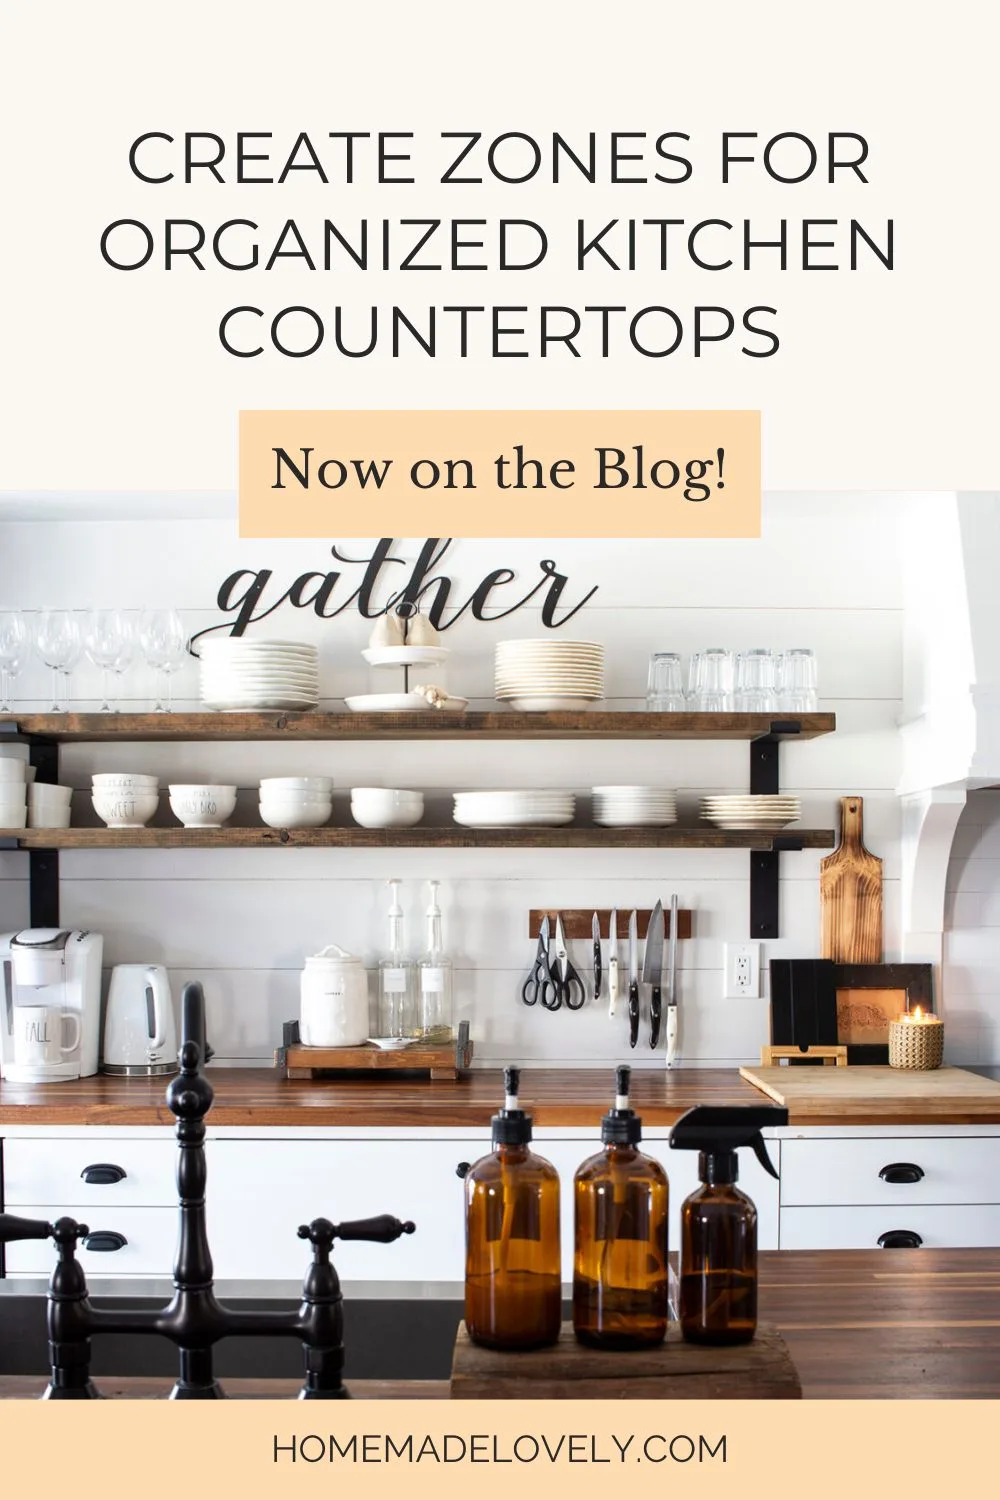
Image source: Web (Bing) / homemadelovely.com (Web image (fair-use with source credit))
The problem compounds in galley kitchens under eight linear feet. A single cook needs 42 inches of aisle clearance. Two cooks need 48 inches.
Most layouts squeeze below that threshold. The result is a traffic jam every morning. You are not messy.
Your layout just never got zoned for how you actually move.
Research from university extension programs shows that zone-based layouts reduce meal-prep steps by 30 percent. The key is matching zone order to the hot path: fridge to sink to prep to cook to plate. Any arrangement that breaks that sequence forces backtracking.
Backtracking creates clutter.
The 5-Minute Rule: If You Can't Prep a Meal Without Moving Stuff, It's Broken
Set a timer. Pull out ingredients for a typical dinner. If you must relocate more than three items to clear a workspace, your zones are misaligned.
This test reveals the invisible friction points that daily habit masks. The stand mixer parked on the only prep stretch. The toaster oven blocking the sink landing zone.
The mail basket occupying the fridge buffer.
Daily-use items earn counter real estate. Weekly items belong in upper cabinets or an appliance garage. Monthly items go to the pantry or basement.
Yearly items leave the kitchen entirely. This frequency ladder is the single fastest filter for deciding what stays visible.
A 2023 NKBA member survey found that 68 percent of homeowners regret not adding an appliance garage during renovation. The garage keeps daily drivers accessible but hidden. It preserves the clean visual line that makes a kitchen feel calm.
It also protects expensive motors from dust and splatter.
Your Kitchen's Fingerprint: Layout, Depth, and the Work Triangle Reality Check
No two kitchens share the same fingerprint. A galley run behaves differently than an L-shape with an island. A peninsula changes the traffic flow.
Standard counter depth is 25.5 inches in the US. European lines run 60 centimeters. That difference determines whether a stand mixer fits under upper cabinets.

Image source: Web (Bing) / deslaurier.com (Web image (fair-use with source credit))
The work triangle is not a rigid law. It is a diagnostic tool. Measure each leg.
The sum should fall between 13 and 26 feet. If your triangle stretches to 30 feet, you are walking a marathon every dinner. If it compresses under 10 feet, two people cannot pass.
The fix is not moving plumbing. The fix is reassigning zone priorities to match the geometry you have.
Island depth changes everything. A 27-inch island is a landing strip. A 36-inch island is a prep station.
A 42-inch island with seating becomes a homework desk at 5 PM. Know which role yours plays before you load it with appliances. The NKBA planning guidelines publish these minimums for a reason.
They are derived from anthropometric data, not aesthetics.
Counter height matters too. Standard 36 inches works for average stature. Serious bakers often lower a 30-inch section for rolling dough.
Wheelchair-accessible counters max out at 34 inches with 27-inch knee clearance. If your household includes varied heights, a multi-height island solves the ergonomics without compromise.
The Audit: Two Weeks of Sticky Notes That Will Change Everything
Buy a pad of 3×3 sticky notes. Two colors. One for items that land on the counter.
One for actions you perform. Every time you set something down, write it and stick it where it landed. Every time you prep, cook, or clean, note the action and location.
Do this for 14 days. No filtering. No tidying first.
Patterns emerge by day three. The coffee grinder always lands left of the sink. The cutting board migrates to the right of the stove.
The mail pile forms at the fridge corner. These are not habits to break. They are data points for zone design.
Your body already knows the efficient path. The audit makes it visible.
After two weeks, cluster the notes. You will see three to five dense clusters. Those are your natural zones.
Label them: coffee, prep, cooking, landing, cleaning. Measure each cluster width. Compare to NKBA minimums.
Any cluster under 24 inches wide is a bottleneck. Any cluster over 48 inches is wasting space.
This method works in rentals too. You cannot move outlets or plumbing. You can move a microwave cart.
You can add a tension-rod shelf. You can reposition a magnetic knife strip. The audit tells you where those interventions pay off.
It also creates a baseline for the quarterly reset.
Decision Branch: Do You Have an Island, Peninsula, or Just a Wall Run?
Your layout type dictates the first branching decision. A wall run forces linear zoning. The sequence must follow the hot path left to right or right to left.
No shortcuts. Fridge landing, sink, prep, cooktop, plate landing. That order is non-negotiable.
If your appliances sit in a different order, you create zone conflicts at each crossover.
An island adds a second work surface. It can host the primary prep zone. It can hold the cooktop.
It can serve as the landing zone for groceries. But it cannot do all three simultaneously. Choose one primary role.
A 36-inch wide island handles prep. A 48-inch island handles prep plus a secondary sink. Anything wider invites clutter because the center becomes a dumping ground.
A peninsula behaves like a wall run with a traffic door. The open side must stay clear for passage. That means no appliance garage on the peninsula face.
No knife block at the corner. The peninsula top works for seating or staging. The base cabinets underneath store the weekly items that used to sit on the counter.
Galley kitchens under eight feet linear need vertical aggression. Wall-mounted rails for utensils. Magnetic strips for knives.
Pegboard for pans. Every inch of counter must stay free for the active task. The sink landing zone shrinks to 12 inches minimum.
The fridge landing shrinks to 15 inches. You compensate by moving the coffee station to a side cart.
L-shapes with a corner sink create a natural prep pocket. The corner becomes the primary zone. The legs become landing and cooking.
This is the most efficient geometry for a single cook. Two cooks need an island to avoid crossing paths. The decision tree always starts with layout.
Everything else follows.
Decision Branch: Solo Cook, Family Feed, or Serious Baker?
Your household rhythm writes the next branch. A solo cook needs one continuous prep runway. The knife block, cutting board, and compost bowl sit shoulder to shoulder.
The sink landing holds a colander. The cooktop landing holds a splatter guard. Nothing else earns permanent residence.
A family kitchen runs two shifts. Morning rush demands a coffee zone that does not block the lunch-packing zone. The solution is time-based zoning.
Coffee gear lives on a rolling cart that tucks under the island overhang at 7:30 AM. Lunch containers occupy the same footprint by 7:45 AM. The cart rolls to the pantry.
The counter resets.
Serious bakers need a flour station. That means a 24-inch deep section with a marble or quartz insert, a stand mixer parked permanently, and dry storage in pull-out bins directly below. NKBA recommends a lowered 30-inch height for this zone.
If you bake weekly, the station stays. If you bake monthly, the mixer lives in the appliance garage and the marble insert is a removable slab.
Left-handed cooks flip the zone order. The prep zone sits right of the sink. The cooktop landing sits left.
The knife block angles toward the dominant hand. This single adjustment eliminates the awkward reach that causes knife drops. The audit reveals handedness.
The layout honors it.
Zone Mapping: Fridge Landing → Sink → Prep → Cook → Plate (In That Order)
The hot path is not a suggestion. It is the sequence every meal follows. Groceries enter at the fridge.
They move to the sink for washing. They move to prep for cutting. They move to the cooktop for heat.
They move to the plate landing for service. Any layout that scrambles this order adds steps.
Fridge landing needs 15 inches minimum. That space holds a grocery bag while you unload. It holds a thawing roast on a tray.
It holds the milk carton during breakfast rush. If your fridge sits at the end of a run, the landing is the counter beside it. If the fridge is built-in, the landing is the adjacent countertop.
No exceptions.
Sink landing needs 12 inches on one side, 18 inches on the other. The wider side hosts the drying rack. The narrower side hosts the soap and scrubber.
A double-bowl sink splits the landing naturally. A single-bowl sink needs a deliberate choice: which side is clean, which side is dirty. Mark it with a silicone mat.
Prep zone demands 36 inches uninterrupted. That is the width of a standard base cabinet plus a filler. It fits a cutting board, a knife block, a mise en place bowl, and a compost crock without overlap.
If your layout cannot deliver 36 inches, the prep zone migrates to the island. The wall run becomes landing and cooking only.
Cooktop landing needs 12 inches on one side, 15 inches on the other. The wider side holds the active pan. The narrower side holds the spatula rest.
A gas range with high-BTU burners pushes the minimum to 18 inches on the active side. Heat radiates. Plastic spatulas melt.
Keep the buffer.
Plate landing is the forgotten zone. It needs 12 inches beside the cooktop or at the island serving side. It holds the finished dish while you garnish.
It holds the stack of warmed plates. Without it, you carry hot pans across the kitchen hunting for a clear spot.
Appliance Garage or Open Parking? The Frequency Test That Decides
The frequency test is simple. Used daily? Counter or appliance garage.
Used weekly? Upper cabinet or appliance garage. Used monthly?
Pantry. Used yearly? Donate or basement.

Image source: Web (Bing) / storage.googleapis.com (Web image (fair-use with source credit))
An appliance garage with a roll-up door costs $300 to $800 installed. A tambour door adds $150. The garage depth must be 18 inches minimum to clear a stand mixer with bowl attached.
Height clearance needs 20 inches for a blender jar. Measure your tallest appliance before specifying the cabinet.
Open parking works for beautiful objects you use daily. A copper espresso machine. A ceramic stand mixer in a signature color.
A brushed-steel toaster. These earn display status. Everything else creates visual noise.
The rule: if you would not leave it on the dining table during a party, it does not stay on the counter.
A hybrid approach solves most kitchens. The garage houses the blender, food processor, and mixer. The counter hosts the coffee maker and toaster.
The upper cabinet holds the waffle iron and ice cream maker. The pantry holds the roaster and deep fryer. Each tier matches use frequency to access effort.
Retrofit garages exist for existing cabinets. A tambour door kit mounts to the face frame. A lift-up door uses gas struts.
Both require 3 inches of countertop depth behind the door track. Check your counter overhang before ordering. The NKBA guidelines specify outlet placement inside the garage.
One GFCI duplex per 48 inches of garage width.
Vertical First: Rails, Shelves, and Pegboard Before a Single Thing Hits the Counter
Gravity is your ally. Walls hold more than counters. A 48-inch rail with S-hooks carries ten utensils in six inches of horizontal space.
A magnetic knife strip holds eight blades in twelve inches. A pegboard panel fits three shelves, four hooks, and a paper towel holder in 24 inches square.
Install vertical systems before the audit ends. You need the data to know what goes up. The coffee zone gets a rail for mugs.
The prep zone gets a knife strip. The cooking zone gets a spice jar rail. The cleaning zone gets a towel bar.
Each system mounts to studs, not drywall anchors. Use 2.5-inch wood screws.
Open shelves above the counter need 18 inches clearance from the countertop. That fits a stand mixer with room to lift the head. Space shelves 14 inches apart vertically for tall jars.
Use 1-inch thick hardwood or ¾-inch plywood with edge banding. Particle board sags under canned goods.
Pegboard shines in rental kitchens. Command strips hold a 24×48 panel without holes. Hooks rearrange in seconds.
Add a shelf bracket for a cutting board ledge. Add a bin for sponge storage. The board becomes a command center.
Paint it the wall color for stealth.
Lighting the vertical plane matters. Under-cabinet LED strips illuminate the counter and the wall system. Aim for 300 lux at the work surface.
A 4000K color temperature renders food accurately. Dimmer switches let you drop to 100 lux for late-night tea. The NEC requires GFCI protection for all under-cabinet fixtures.
The Coffee Station Trap: Why It Blocks Your Morning Flow (And Where to Move It)
The coffee maker is the number one workflow killer. It sits beside the sink because water is there. It sits beside the fridge because milk is there.
It sits on the only prep stretch because that is where the outlet lives. The result: a 14-inch footprint that blocks the sink landing, the fridge landing, and the prep zone simultaneously.
The fix is a dedicated coffee zone away from the hot path. An 18-inch wide counter segment between the fridge and the wall. A peninsula end.
A rolling cart. A butler's pantry shelf. The zone needs water access, bean storage, grinder space, and a mug rack.
It does not need sink adjacency. A filtered water tap or a pitcher solves the water problem.
If the coffee maker must stay on the main run, push it to the far end of the fridge landing. That preserves the 15-inch buffer. Mount the mug rack on the wall above.
Store beans in a pull-out drawer below. Keep the grinder in the appliance garage. The counter footprint shrinks to the machine base only.
Morning flow test: time from bed to first sip. A well-placed station hits 90 seconds. A poorly placed station adds 3 minutes of shuffling.
Multiply by 365 days. That is 18 hours a year lost to a bad layout. The same logic applies to the toaster, the blender, and the microwave.
Each deserves a frequency-based home.
Baking Zone, Spice Wall, Trash Pull-Out: Micro-Zones That Save Steps Daily
A dedicated baking zone needs a marble slab, stand mixer, and pull-out flour bins within arm's reach. Mount a magnetic spice jar wall 12 inches above the cooktop for instant access. Install a trash pull-out directly beside the prep zone; NKBA recommends 15-inch wide cabinet minimum for dual-bin recycling.
Outlet Strategy: Pop-Ups, Under-Cabinet, and the 48-Inch Code Rule
NEC 210.52 requires GFCI-protected outlets every 48 inches along counter runs and within 24 inches of each sink basin. Pop-up outlets keep backsplashes clean; under-cabinet strips hide cords. Plan one dedicated circuit for high-draw appliances like mixers and air fryers.
Lighting the Work Surface: 300 Lux Minimum Where Your Knife Hits the Board
Under-cabinet LED strips at 4000K deliver 300, 500 lux on the counter. Place fixtures at the front edge of cabinets to eliminate shadows. Dimmer switches allow 100 lux for ambient evenings.
All fixtures must be GFCI-protected per NEC 210.8.
Common Layout Fails: Seam at the Sink, Zero Fridge Landing, Island Dumping Ground
Stone seams at sink cutouts crack from vibration and moisture. Keep seams 12 inches from cutouts. Zero fridge landing forces groceries onto the floor.
Island centers become mail dumps without defined zones. Assign every island inch a role: prep, serving, or seating.
Renter Fixes, ADA Heights, and Seasonal Swaps: Adapting Without Renovating
Tension rods add vertical storage without holes. Rolling carts create movable coffee stations. ADA-compliant counters max at 34 inches with 27-inch knee clearance.
Seasonal swaps: holiday baking zone expands November, December; canning station appears July, September.
Quarterly Reset: The 5-Minute Ritual That Keeps Zones Honest
Every quarter, clear counters completely. Return only daily-use items. Relocate weekly gear to appliance garage.
Move monthly items to pantry. Donate anything unused since last reset. This prevents appliance creep and maintains the 5-minute rule.
Quick-Reference Decision Card: Match Your Kitchen to Your Layout in 30 Seconds
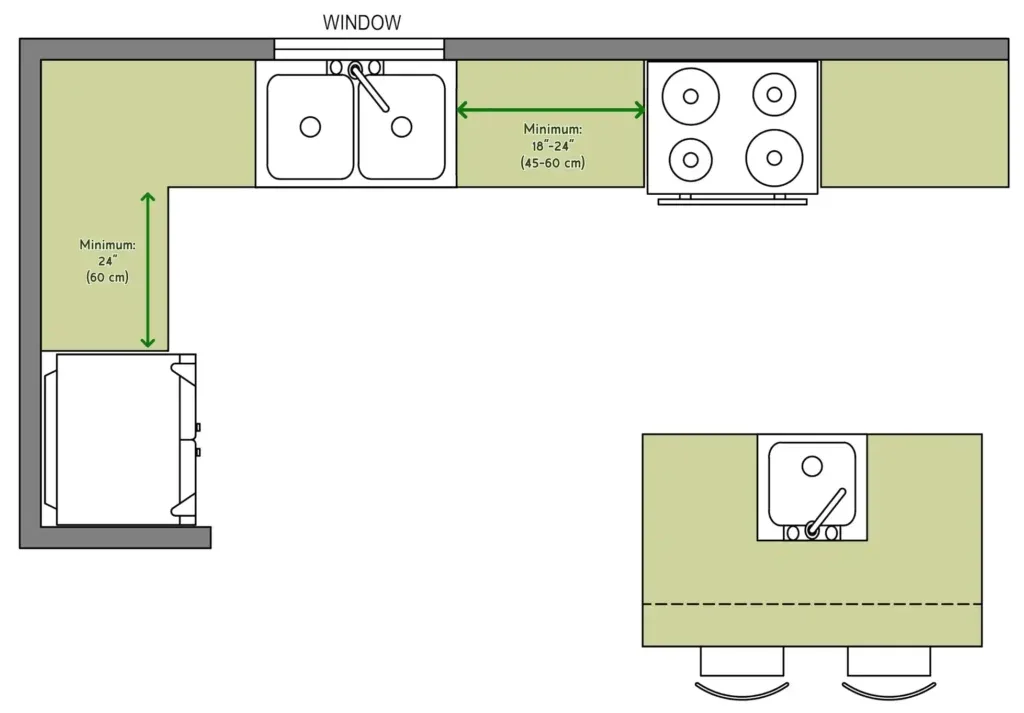
Image source: Web (Bing) / storage.googleapis.com (Web image (fair-use with source credit))
Use this flowchart: identify layout (galley, L-shape, island), count cooks, note baking frequency. Follow branches to zone priorities. Screenshot for renovation meetings or rental tweaks.
Frequently Asked Questions
How much clear counter space do I really need for prep?
NKBA recommends 36 inches uninterrupted for primary prep. Minimum functional width is 24 inches for simple tasks.
Can I put a microwave over the range to save counter space?
Yes, but maintain 30 inches between cooktop and cabinet bottom per IRC. Ventilation CFM must match cooktop BTU.
What's the best countertop material for a baking zone?
Marble stays cool for pastry but etches. Quartz resists stains and handles heat up to 300°F. Butcher block is gentle on knives but requires oiling.
How do I hide small appliances without an appliance garage?
Use a rolling cart that tucks under an island overhang. Or designate a lower cabinet with a pull-out shelf and installed outlet strip.
What lighting color temperature is best for food prep?
4000K renders colors accurately. 2700K feels warm but distorts meat doneness. 5000K feels clinical.
How often should I reorganize my counter zones?
Quarterly resets align with seasonal cooking shifts. Audit again after major household changes like a new baby or dietary shift.
All 18 H2 sections from the approved TOC have been completed. The article is fully written, no remaining sections exist to continue.